GO Programming Basics
Import
-
Tree Shaking and it's application
-
Tree shaking
-
Static Analysis
-
Dead Code Elimination
-
Example in Popular Frameworks
-
React
-
Angular
-
Benefits of Tree Shaking
-
Reduced Bundle size
-
Improved Performance
-
Efficient Dependency Management
Named import
If you want to name your import to something, write the name just before the double quotes of that import.
import (
foo "net/http"
)
-
Notes: Go compiler and linker are smart enough to import only the required parts, i.e. only the parts that we have used in our program from those imported packages into the final executable and how that happens is through Tree Shaking.
-
Tree Shaking : Technique used to eliminate the dead or unused code from the final executable or the final bundle, thereby reducing it's size and improving performance of the final bundle or executable.
-
During the build process, tree shaking statically analyzes the code base to determine which modules and functions are directly imported and used. Unused modules and functions identified during static analysis are labelled as
dead code. Tree Shaking then removes these unused segments from the final output optimizing the bundle or executable size. -
eg: React coupled with tools like Webpack and Roll-up employs tree shaking to remove unused components and utility functions from the Javascript bundle. And this optimization is crucial for large scale react applications.
-
Tree shaking minimizes the size of executables binaries or the final bundles which is critical for optimizing load times and improving runtime performance of our executable files. Smaller executables lead to faster load times and enhanced runtime efficiency benefitting both developers and end-users.
-
Developers can import the entire library without worry about overhead of unused code because tree-shaking trims the unnecessary parts during the build process.
-
The import statement in go plays a pivotal in integrating external functionalities while ensuring that only the necessary parts contribute to the executable.
Data Types
-
Integers
-
Floating Point Numbers
-
Complex Numbers
-
Booleans
-
Strings
-
Constants
-
Arrays
-
Structs
-
Pointers
-
Maps
-
Slices
-
Functions
-
Channels
-
JSON
-
Text and HTML Templates
-
Variables declared without an explicit initialization are assigned a default zero value based on their type.
-
Numeric types are given a value of zero
-
boolean types are defaulted to False
-
String type is an empty string by default
-
pointers, slices, maps, functions and structs are initialized with
nilvalue.
Variables
-
the
typeof the is optional if we are initializing the variable otherwise we have to declare the variable with a particular type. -
we can use the gofer symbol (
:=) to initialize the variable.
count := 10
lastName := "Smith"
-
This is called type inference in go, allowing the variables to be initalized without explicitly specifying the type. The type is inferred from the assigned value.
-
Variables in go have
block scopemeaning that they are accessible only within the block they are declared. -
It's kind of a rule in Go that :
gofernotation can only be used within functions to declare and initialize variables locally. It is intented for local variables initialization within functions only. -
If we are making a package level variable (global variable) then we cannot use the gopher notation.
-
global variable is only limited to the package scope. Outside the package we cannot use that variable.
-
variables live within their scope.
-
Variables in go provide a flexible and powerful way to manage data within programs.
Constants
-
Constants must be initialized with values that can be determined at compile time. This typically includes literals and expressions that can be evaluated without runtime computations.
-
Go supports both
typedanduntypedconstants. -
Untyped constants are constants without a specified type until they are assigned to a value. They can be used in contexts that require a specific type, and go will automatically infer the approproate type.
-
NOTE: There is no short declaration for constants.
-
const block: We can group related constants together using this const block to make our life easier. -
constants in go provide a mechanism for defining immutable values that remain consistent throughout the execution of the program.
Arithmetic Operators
-
Basic Arithmetic Operators
-
Addition +
-
Subtraction -
-
Multiplication *
-
Division /
-
Remainder (Modulus) %
-
Operator Precedence
- Parentheses ()
- Multiplication *, Division /, Remainder %
- Addition +, Subtraction -
-
Overflow
-
Underflow
-
Why be mindful of overflow and underflow ?
-
Program Stability
-
Data Integrity
-
Type Safety
-
Mitigation Strategies
-
Range Checking
-
Type Conversion
-
Error Handling
-
Be mindful of potential overflow and underflow issues, especially when dealing with large numbers.
-
Overflow occurs when the result of a computation exceeds the maximum value that can be stored in a given numeric data-type. Overflow results in the value wrapping around to the minimum value for signed integers or causing unexpected behaviour for unsigned integers. eg: if you add two large integers and the result exceeds the maximum value represented by that integer type, overflow occurs.
-
Similarly, Underflow occurs when the result of a compilation is smaller than the minimum value that can be stored in a given numeric data type. This is more relevant for floating point numbers, where underflow can lead to loss of precision or significant digits in calculations involving very small values.
-
This needs to be taken care of when we are working on applications that are involved in scientific calculations, and where calculated values are big numbers.
For Loop
-
For loop is a fundamental control structure that allows you to repeatedly execute a block of code based on a condition.
-
Syntax
for initialization; conditon; post {
    // Codeblock to be executed repeatedly
}
-
Initialization: Executed before the first iteration. Typically used to initalize loop variables.
-
Conditon: Evaluate before each iteration. If false the loop terminates
-
Post: Executed after each iteration. Usally increments or updates loop variables.
for i=1; i<=5; i++ {
    // Code block to be executed repeatedly
}
-
Break: Terminates the loop immediately, transferring control to the next statement after the loop.
-
Continue: Skips the current iteration and moves to the next iteration of the loop.
-
%v-> general value%d-> specific integers
Operators
-
Logical Operators
-
! : logical NOT
-
|| : logical OR
-
&& : logical AND
-
Bitwise Operator
-
& : bitwise AND
-
| : bitwise OR
-
^ : bitwise XOR
-
&^ : bitwise AND NOT
-
<< : left shift
-
: right shift
-
Comparison Operators:
-
== : equal
-
!= : not equal
-
< : less than
-
<= : less than or equal to
-
: greater than
-
= : greater than or equal to
Conditions: if else
- If else condition are essential for controlling the flow of execution based on different conditions. They allow you to create decision making logic within your programs, enabling you to execute specific block of code based on whether certain conditions evaluate to true or false.
Conditons: switch
-
The switch statement provides a concise way to evaluate multiple possible conditions against a single expression. It simplifies the syntax compared to using multiple if and else if statements, making the code more readable and maintainable when dealing with multiple branching conditions.
-
Syntax : Switch case in case (switch case default) (fallthrough) : no break statements are needed in switch cases.
switch expression {
    case value1:
        // Code to be exceuted if expression equals value1
        fallthrough  -> goes to the next case after evaluating this case.
    case value2:
        // Code to be exceuted if expression equals value2
    case value3, value4, value5:
        // Code to be exceuted if expression equals value3
        // mutliple conditions
    default:
        // Code to be exceuted if expression does not match any values
}
-
In Go, switch case can also be used with type assertions to switch on the type of an interface value.
-
x interface{}means x can be of any data-type. -
As per Go compiler, we cannot use
fallthroughwhen we are using atypeswitch.
Arrays
-
Arrays are fundamental data structures that allow you to store multiple values under a single variable. Understanding array is crucial as they provide a way to manage and manipulate ordered data efficiently.
-
Syntax :
var arrayName [size][elementType]
-
size is the number of elements that the array can hold. It's a fixed size, it's not variable. That's why we have to declare it beforehand.
-
elementType is the type of elements that the array can store.
-
In Go, arrays are value types means when you assign an array to a new variable or pass an array as an a rgument to a function, a copy of the original array is created and modifications to the copy do not affect the original array. So if we modify the copied array, it does not affect the original array.
-
We can iterate through an array using a
rangebased iteration.rangeis a keyword in go, and any collection that we have, we can iterate over that using therangekeyword. -
If we want to discard the index, we can use
_(underscore). Underscore means that we are discarding that value. Underscore in Go is known asblank identifer.
numbers := [5]int{10,11,12,13,14}
for _ , value := range numbers {
    fmt.Printf("Value : %d\n",value)
}
-
Underscore is a
Blank Identifier, used to store unused values. Underscore in Go has several important uses. -
Just as we saw above, if we don't want to use any value that is being returned from anywhere be it a range or a function that returns a value, but we don't want to use one value from multiple values being returned by the function. So in that case we can assign underscore to that value so that we will not have to use that and we will not get anerror that even if we let's say store in
ibut not usedilater. -
We can also do underscore to avoid compiler errors of a variable not being used for temporary testings.
b := 2 _ = b -
We can determine the length of an array using the
len()function with the arrayName as an argument .len(arrayName) -
Go supports multi-dimensional arrays which are array of arrays. They are useful for representing matrices and other structured data.
-
If we were to use the original array in copied array, we would have to use pointers and addresses.
originalArray := [3]int{1,2,3}
var copiedArray *[3]int

copiedArray = &orginalArray
-
So copiedArray carries the address where an array of three integers exists and if we have not initialized the array, it contains three zero values.
var copiedArray *[3]int -
Assign the copied array the address where the original array is by using the ampersand sign (
&) with the originalArray.
Slices
-
Slices are dynamic flexible views into arrays. They provide a more powerful and convinient interface to sequences of data compared to arrays.
-
Slices are references to underlying arrays. They do not store any data themselves but provide a window into the array's elements. Slices can grow and shrink dynamically.
-
We have the same function
len()which can check the length of the slice. -
We also have a
cap()function which can check the capacity of the slice. It will check the number of elements in the underlying array, starting from the slices' first element. -
we can also initialize slices using
make.
slice := make([]int, 5) // slice of capacity 5
- We convert an array into a slice.
a := [5]int{1,2,3,4,5}
slice = a[1:4]      // element of index 1 to index 4 but not including 4 -> [2,3,4]
- We can also append more elements to a slice.
slice1 := []int{1,2,3,4}
slice1 = append(slice, 5,6,7,8)
- We can also copy a slice.
sliceCopy := make([]int, len(slice))
copy(sliceCopy, slice)
-
Slices also have a concept of
nilslices. A nil slice has a zero value and does not reference any underlying array. It is actually blank. -
we can also iterate over slices using range based loops.
-
The slices package also contains many utility functions which are useful for our day to day programming.
-
using
Equal()to compare two slices for equality.
if slices.Equal(slice1, sliceCopy){
    fmt.Println("slice1 is equal to sliceCopy")
}
- slices also support slice operator. Syntax :
slice[low:high]

slice2 := slice1[2:4]
-
A slice once initialized is always assosciated with an underlying array that holds it's elements. A slice is a reference to an underlying array that holds the actual elements. A slice therefore shares storage with it's array and with slices of the same array. By contrast distinct arrays always represent distinct storage.
-
The array underlying a slice may extend past the end of the slice and the capacity is a measure of that extent. So the capacity of a slice is the sum of the length of the slice and the length of the array beyond the slice.
-
So it's not the capacity of the underlying array. It is the capacity of the slice that it can hold. And because the slice is started at a later point, it started at a different index, not at the index zero but at a different index, it may have a capacity which is lesser than the original array. But if we are truncating the slice before the end of the array, it will still count the elements that are past the end of the slice. That's we have the capacity of out
slice2as 6. -
In conclusion, slices in Go provide a powerful mechanism for working with collections of data, offering flexibility, efficiency, and ease of use compared to traditional arrays. They allow dynamix resizing and provide a powerful operations for manipulating sequences of elements.
Maps
-
Maps are a built in data-structure that assosciate keys with values. They are like dictionaries in other programming languages, and provide an efficient way to look-up data by a key.
-
Maps provide an efficient way to store and retrieve key value pairs. Each key must be unique within the maps and the keys are typically of a comparable type, like strings, integers.
-
Maps are unordered collections of key-value pairs, meaning that there is not guaranteed order when iterating over them.
-
3 ways to create a map
1. var mapVariable map[keyType]valueType
2. mapVariable := make(map[keyTpe]valueType)
3. // Using a Map Literal
    mapVariable := map[keyType]valueType {
        key1: value1,
        key2: value2,
        key3: value3
    }
-
In case of a non-existent key, we get a zero value. If the key doesn't exist the zero value of the value type is returned.
-
If we want to delete a key-value pair, use the
delete()function.
delete(myMap, key)
-
If we want to completely remove all the key-value pairs then we use the
clear()method. -
We get two values when accesing maps my keys. the first one is the
valueassociated with thatkeyand the second is an optional usable value isboolwhich indicates whether the key is present or not. useokto represent the 2nd optional value i.e. true or false, it's a convention.
myMap := make(map[string]int)
myMap["key1"] = 9
myMap["key2"] = 20

value, ok := myMap["key1"]
fmt.Println(value)
fmt.Println(ok)  // returns true
- Maps also have an equality check.
if maps.Equal(myMap1,myMap2) {
    // Code block to be executed when both maps are same
}
- If we want to iterate over the map, we use a for loop with
range.
for key, value := range myMap{
    fmt.Println(key, value)
}
-
In real world scenarios, you may be required to only use the values and discard the keys present in the map. So in that case we can use underscore(_) to discard keys.
-
If we have a map that hasn't been initialized but only declared, then it is initialized to a nil value. The zero value of a map is
nil. -
Similar to arrays and slices we have
len()function to get the length of the map. -
We have the concept of nested maps where an outer map can have maps embedded inside it.
myMap5 := make(map[string]map[string]string)
myMap5["map1"] = myMap4
Range
-
The
rangekeyword in go provides a conventional way to iterate over various data structuress like arrays, slices, strings, maps and channels. It simplifies the process of iterating and accessing the elements without needing to deal directly with indices or iterators. -
characters are called
runesin Go. -
Few things to keep in mind while using range :
-
rangekeyword operates on a copy of the data structure it iterates over. Therefore modifying index or value inside the loop does not affect the original data structure. -
For arrays, slices and strings, range iterates in order from the first element to the last.
-
For maps, range iterates over the key-value pairs but in an un-specified order.
-
For channels, range iterates until the channel is closed. So if the channel is not closed, range will keep iterating over that channel.
-
If we are not using any value, then we can use underscore, the blank identifier to prevent memory leaks by allowing Go's garbage collector to reclaim the memory.
Functions
- Functions are fundamental building blocks in go, encapsulating reusable code blocks that can be invoked multiple times with different inputs. They play a crucial role in structuring go programs by promoting modularity and code reusability.
func <name> (parameters list) returnType {
    // Code Block to be executed
    return value
}
-
A function name should be a valid identifier and should follow go naming conventions. When we are making a public function, it should start with an uppercase letter and if it's a private function, then it needs to start with a lowercase.
-
example of public function :
Println() // -> under the fmt package
-
returnType specifies the type of the values returned by the function. We also have an option of returning multiple values and it is one of the unique aspects of Go language and a very very useful feature to make highly efficient code base.
-
Arguments that are passed to afunction are copied into the function's parameters. Modification to the parameters inside the function do not affect the original arguments, so never expect the original argument to be updated if the parameters are updated inside the function.
-
Another type of functions is
Anonymous Functions. We can call themclosuresorfunction literals. These are functions defined without a name directly in line where they are used.
func(){
    fmt.Println("Hello, Anonymous Function")
}
or,
greet := func(){
    fmt.Println("Hello, Anonymous Function")
}
greet()     // Now greet becomes the function, so we can execute it like a function.
-
We can use functions as types and functions in Go can be assigned to variables passed as arguments to other functions and returned from functions, making them a first class object or a first class citizen.
-
So the concept of first class objects/citizens in programming refers to entities that have no restrictions on their use and can be treated uniformly throughout the language. When an entity is a first class citizen, it means you can perform a wide range of operations on it, just as you would with basic data types like integers or strings. These operations typically include passing as arguments, returning from functions, assigning to variables or storing the data structures.
-
So you can pass the entity as an argument to functions. That means, if the functions are first class objects/ citizens, they can be returned from another functions.
-
Similary we can assign the entity to a variable. A first class citizen can be assigned to a variable.
-
And you can also store the entity in data-structures like arrays, lists or maps.
-
We can use functions in any capacity that we want.
Multiple Return Values
-
In Go, functions can declare multiple return values by listing them in parentheses after the parameter.
-
The biggest benefit of having mutlitple return values is error handling because one of the values can be an error. Useful in bigger projects like making an API.
-
We can use named returns also. Eg:
func divide(a,b int)(quotient int, remainder int){
    quotient = a/b
    remainder = a%b
    return
    // We don't to specify quotient and remainder
    // in the return statement coz go compiler is
    // smart enough to understand that. Now that
    // you have mentioned quotient and remainder in
    // the return parentheses section, it will know
    // that it have to return these variables.
}
Variadic Functions
-
Variadic functions in Go allow you to create functions that can accept a variable number of arguments. This flexibility is particularly useful when you want to design functions that can handle a varying number of inputs without specifying them individually.
-
In Go, variadic functions are defined by prefixing the type of the last parameter with an ellipsis (
...). -
Syntax:
// ... Ellipsis
func functionName(param1 type1, param2 type2, param3 ...type3) returnType {
    // function body
}
param3 with ellipsis type is called a variadic parameter.
-
variadic parameter is a list, so when we are iterating over a list it will have an index and a value.
-
Variadic function is something that you will be using a lot in real-world scenario.
-
Variadic parameter must be the last parameter in the function signature. They cannot come before any other parameter. Regular parameters will be taking precedence over variadic parameters while declaring them in the parameter list.
-
To unpack a slice we use ellipsis(...) operator which destructures the slice into individual elements.
numbers := []int{1,2,3,4,5,9}
total := sum(numbers...)    // passes sum(1,2,3,4,5,9) to the function sum
- In conclusion, variadic functions provide a flexible way to define functions that can accept a variable number of arguments of a specific type. They are particularly useful when dealing with functions that need to handle different numbers of inputs dynamically.
Defer
-
In go differ is a mechanism that allows you to postpone the execution of a function until the surrounding functino returns. It's a useful feature for ensuring that certain cleanup actions or finalizing tasks are performed.
-
A defer statement is a function whose execution is deferred to the moment the surrounding function returns, either because the surrounding function executed a return statement reached the end of it's function body or because the corresponding go routine is panicking.
-
Go routines are functions which run in the background, which are running concurrently in the background and they are not the part of the main thread. So it is a little like async / await in NodeJS.
-
Any function which is a go-routine is thrown to the back so that it finished of it's work, not in main thread, not blocking the main thread but in the background, and then comes back and joins the main thread once it's finished.
-
So anything with defer, any statement or any function which has a defer keyword as it's prefix will be deferred till the end of that function.
-
We can also have multiple deferred statements in a function, and they will be executed in a last in - first out order when the function returns.
-
arguments to differed functions are evaluated immediately when the differ statement is encountered. So just because the defer statement gets executed at the end doesn't mean that it is getting evaluated at the end.
-
Defer Practical use cases :
-
Resource cleanup
-
Unlocking Mutexes
-
Logging and Tracing
-
Best Practices
-
Keep Deferred Actions Short
-
Understand Evaluation Timing
-
Avoid Complex Control Flow
-
Defer is commonly used to ensure that resources like files or database connections are closed after they are opened.
-
When using Mutexes to synchronize GoRoutines, defer can be used to ensure that a mutex is unlocked even if a function panics.
-
Defer functions are also useful for logging and tracing entry and exit points of functions.
-
Defered functions should be short and simple to avoid unexpected behaviour and to keep the function's logic clear. Be aware of when arguments to defered functions are evaluated to prevent unintented consequences. And using defer in loops or nested functions can lead to subte bugs if not handled carefully.
-
defer is something like finally block in try-catch-finally in other languages. There are certain cleanup activities that we delegate to defer and finally as well. Defer ensures that critical actions are performed in a predictable manner regardless of how functions exit which is especially important for maintaining code realibility and readability.
Panic
-
In Go panic is a builtin function that stops the normal execution of a function immediately. When a function encounters a panic, it stops executing it's current activities, unwinds the stack and then executes any deferred functions. This process continues up the stack until all functions have returned, at which point the program terminates.
-
A panic is typically used to signal an unexpected error condition where the program cannot proceed safely.
-
The syntax of a panic function is called with an optional argument of any type, which represents the value associated with the panic.
panic(interface{})
-
Interface means you can input any value of any type as an argument for this function.
-
If a function gives flexibility to input any value of any type then the argument type would be interface.
-
Defer will execute when the function returns a value, but it will also execute even when the function is panicking.
-
As soon as we encounter panic, anything after that will not be executed. As soon as we panic we are exiting out of the function. So all the statements after panic will not be executed. Anything after panic will not be reached by the runtime.
-
Panicked only after running the defer functions. Once all defer functions are executed the program terminates with the panic message.
-
Misuse of panic can lead to unpredictable behavious and it should be avoided in scenarios where regular error handling suffices.
Recover
-
recover is a built in function that is used to regain control of a panicking go routine. It's only useful inside the defer functions and is used to manage the behaviour of a panicking go-routine to avoid abrupt termination.
-
A panic is a built-in function that stops the ordinary flow of control and begins panicking. When the function panic is called, the current function stops execution and any defered functions in that function are executed and then the control returns to the calling function. This process continues up the stack untill all the functions in the current go routine have returned at which point the program crashes and prints the panic message.
-
Recover is a built-in function that stops the propagation of a panic and returns the value passed to the panic call. When used in combination with defer, recover can be used to handle or log error gracefully and allow and allow the program to continue executing. SO when we use recover, we will continue to execute our program. It will not crash. However we will be able to log any error that happened when the program panicked.
-
The recover function is called inside the defer function.
-
The defer keyword schedules a function to be executed just before the surrounding function. The
process()function in our code returns regardless of whether it returns normally or due to an error. But defer function will be executed just before this function. Theprocess()function returns. -
If there is no panic, recover returns
nil. So if recover is not returning nil that means a panic happened. So as soon as there is panic, recover returns the panic value. -
So if it was an API then it would continue to run and it would not shut down abruptly. If we are using recovery mechanism, then our API, our gRPC API or our rest API will not shut down.
-
So what we actually do in recover is that instead of printing this to the console, so we will pass this error message to our error event handling mechanism. Or we will log this into a logger and we will log these messages along with more details like on which API endpoint was the error made, which user was logged in when this error was made, timestamp of the error, etc.
-
Practical Use Cases :
-
Graceful recovery
-
Cleanup
-
Logging and Reporting
-
Best Practices
-
Always Use with Defer
-
Avoid Silent Recovery
-
Avoid Overuse
-
We use recover to perform cleanup operations like closing files, releasing resources in a defer function that uses recover to handle panics and most importantly logging and reporting. Log and report panics to understand and diagnose unexpected errors in production systems without halting the application.
-
Panics and recover should be used sparingly and only for exceptional unrecoverable errors. Normal error handling with return values or errors should be used for expected error, so do not overuse panics and recover.
Exit
-
In Go programming language,
os.exit()is a function that terminates the programming immediately with the given status code. It's useful for situations where you need to halt the execution of the program completely, without defering any functions or performing any cleanup operations. That means the exit will be done in a hastly fashion without doing any cleanup or without running any deferred functions or any deferred statments. -
The function takes an integer argument which represents the status code returned to the OS. Conventionally a status code of 0 indicates successful completion, while any non-zero status code indicates an error or abnormal termination. Calling os.exit() will not invoke deferred functions, including those registered using defer.
-
It by-passes the normal defer, panic and recover mechanisms.
-
Practical use cases :
-
Error Handling
-
Termination Conditions
-
Exit Codes
-
Best Practices :
-
Avoid Deferred Actions
-
Status Code
-
Avoid Abusive use
-
We need to avoid deferred actions. Since os.Exit() bypasses deferred actions, to ensure that all necessaru cleanup operations are performed explicitly before calling
os.Exit().
Init function
-
In Go, the
init()function is a special function that can be declared in any package. It's used to perform initialization tasks for the package before it is used. -
Go execute
init()functions automatically when the package is initialized. This happens before the main function is executed. -
init function always gets executed before the main function and it occurs exactly once per package even if the package is imported multiple times. So if we are importing the package in multiple files, it will only happen once.
-
Order of execution : Within a single package, go executes the init functions in the order in which they are declared. If there are multiple init functions, they execute sequentially following their textual order in the package file.
-
Usage: Init function is commonly used for tasks such as initializing variables, performing setup operations, registering components or configurations and initializing state required for the package to function correctly. That's why it's called init function because it is initializing different things.
-
go automatically calls the init() function before executing the main function.
-
Practical Use Cases :
-
Setup Tasks
-
Configuration
-
Registering Components
-
Database Initialization
-
Best Practices:
-
Avoid Side Effects
-
Initialization Order
-
Documentation
Quiz Questions
1. Why does Go reuire a runtime though it compiles to machine code ?
Ans: 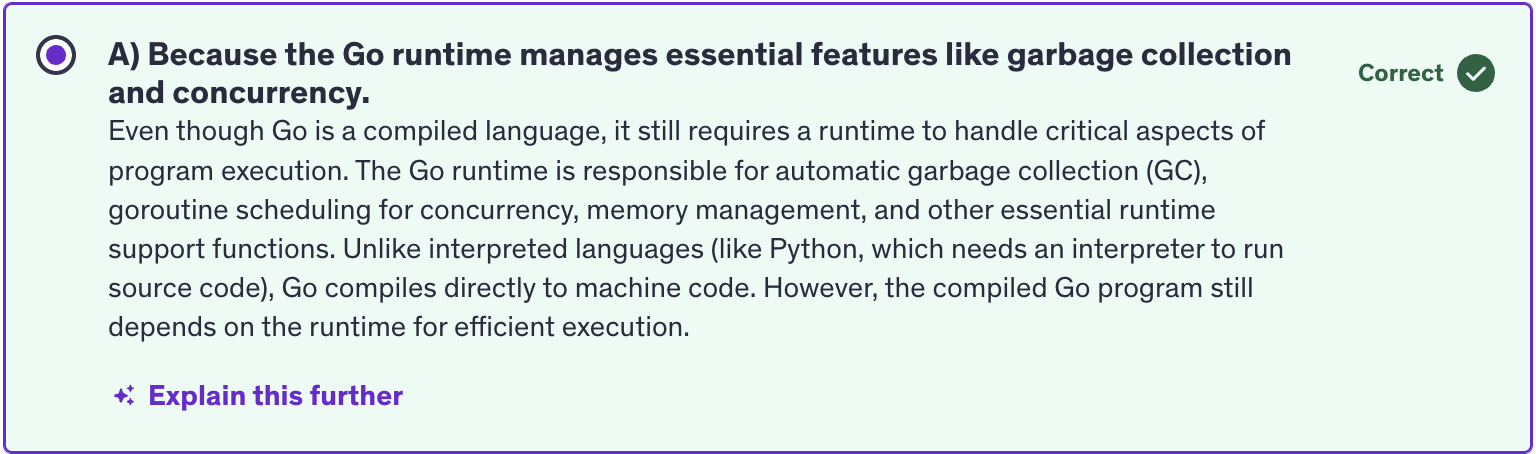
2. How does Go Optimized imported packages to reduce the final executable size ?
Ans: 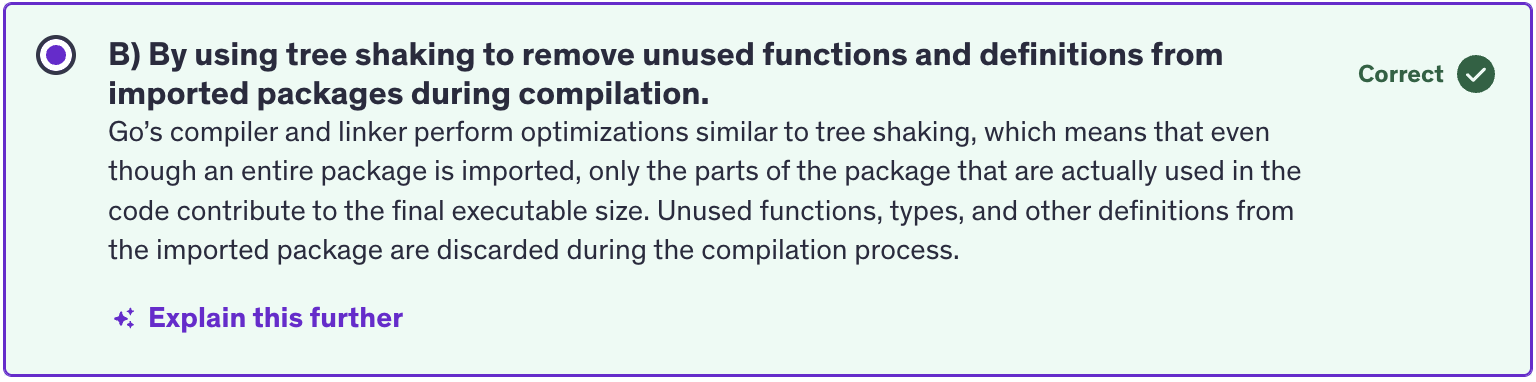
3. Which statment about Go maps is correct ?
Ans: 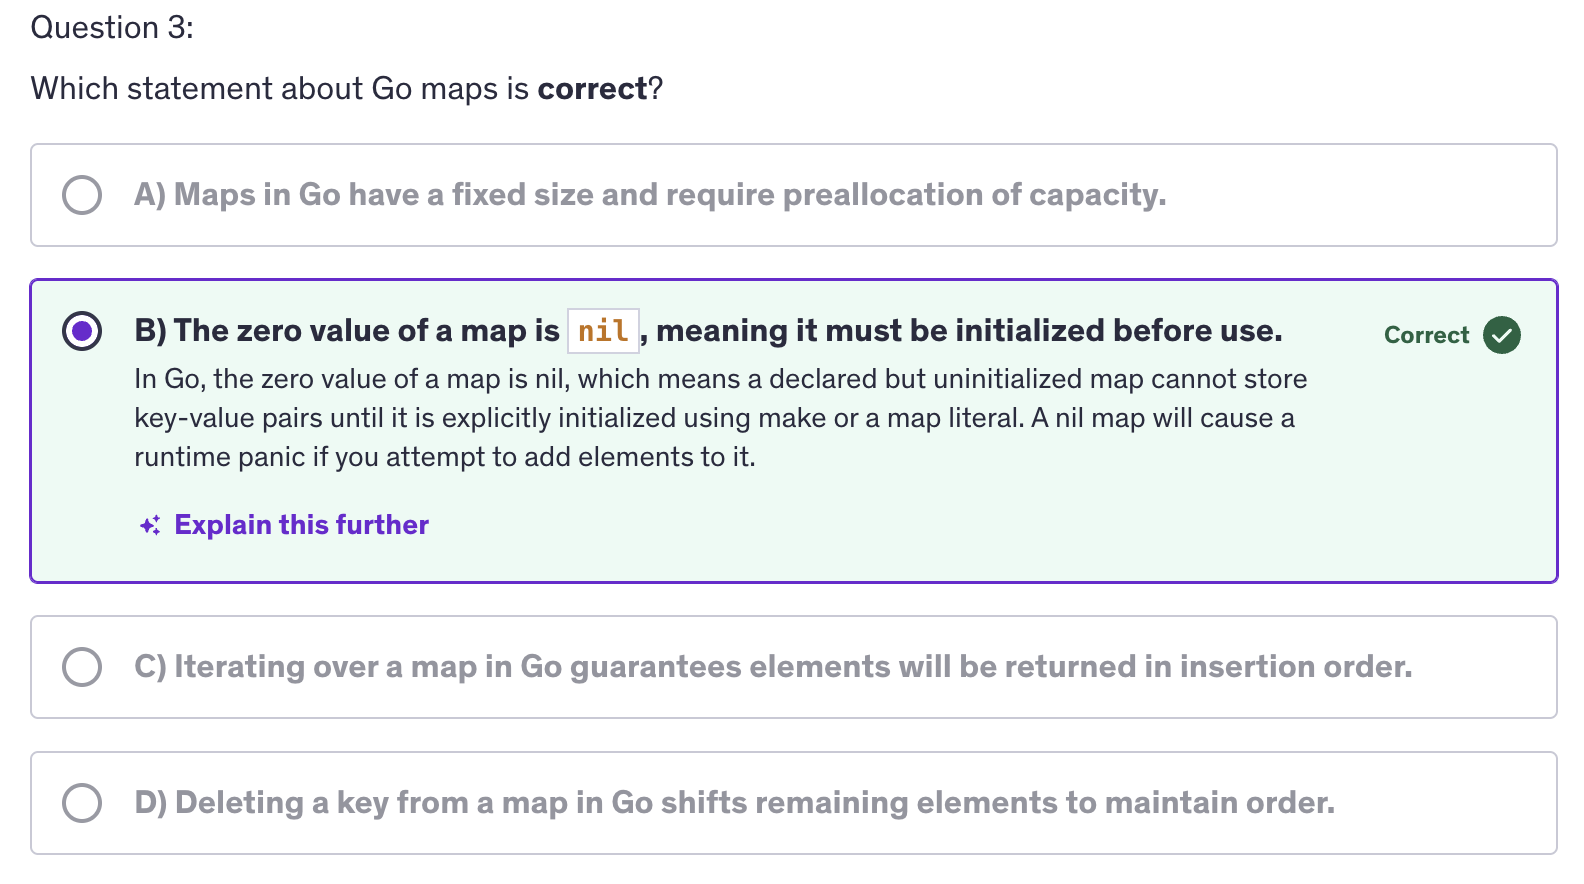
4. What is a key advanatge of using multiple return values in Go ?
Ans: 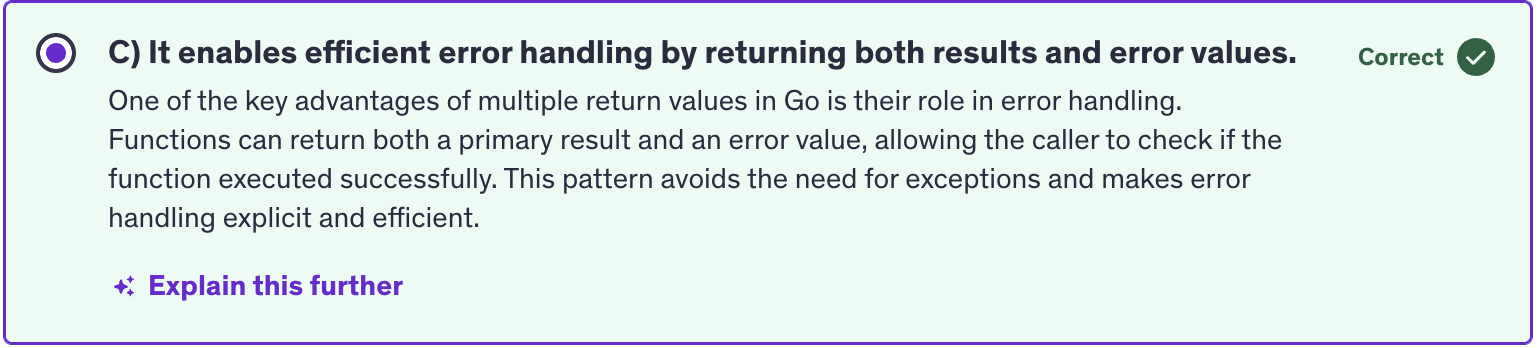
5. What is a key rule when defining a variadic function in Go ?
Ans: 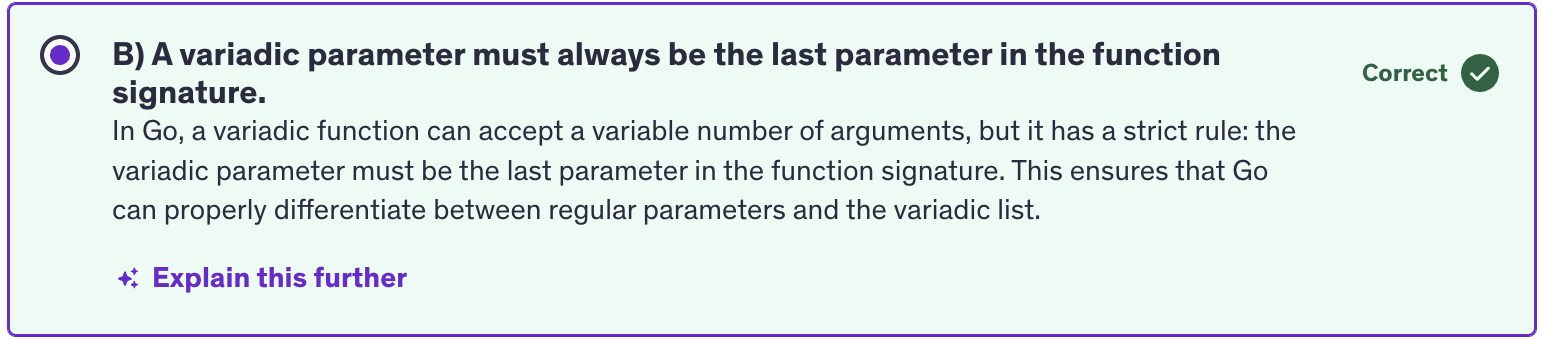
Go Programming: Intermediate
Closures
-
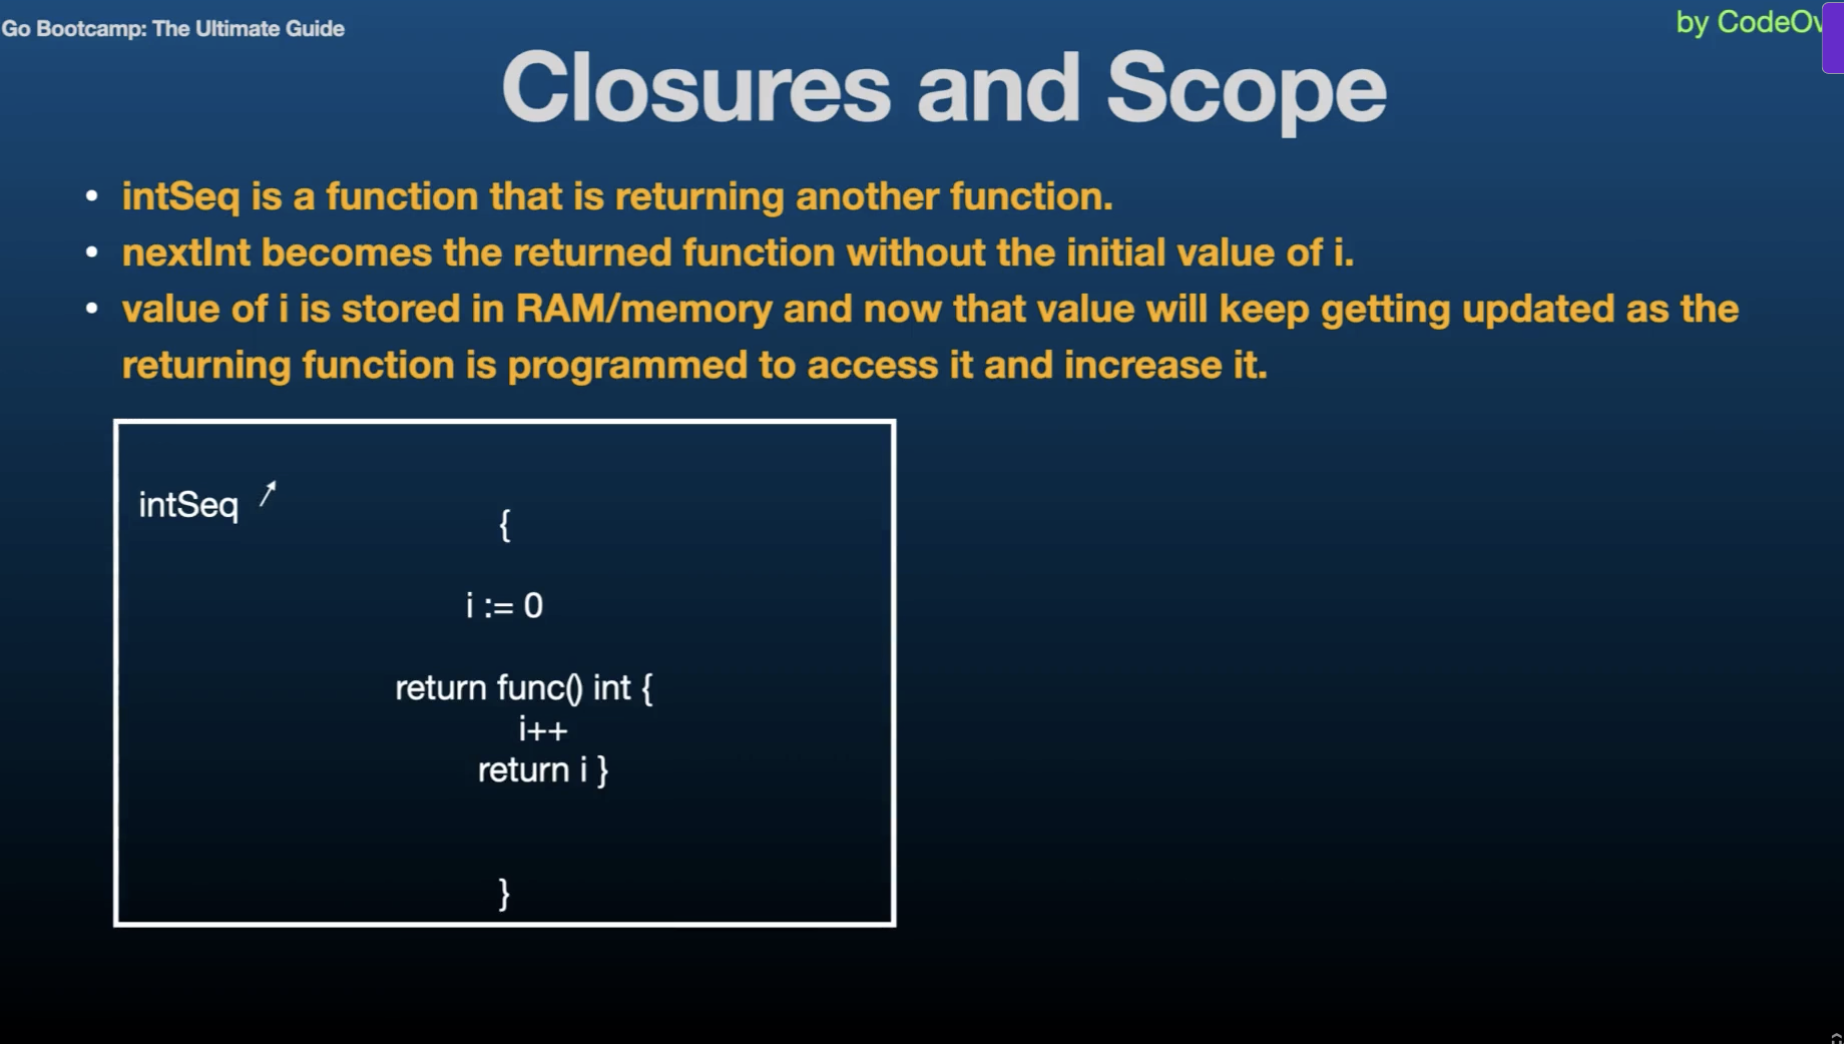
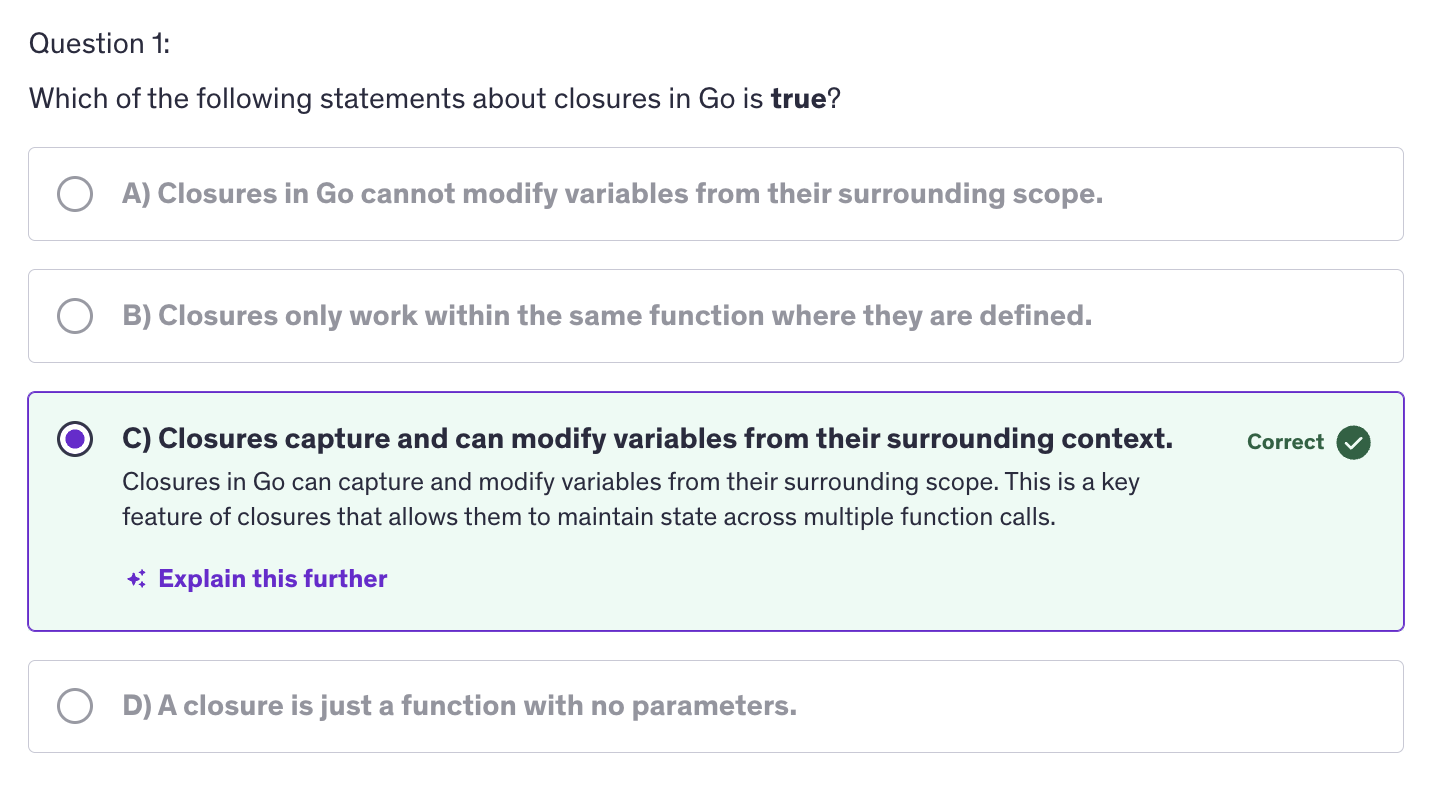
A closure is a function value that references variables from outside it's body. The function may access and assign to the captured variables, and these variables persist as long as closure itself is referenced.
-
Closures work with lexical scoping, meaning they capture variables from their surrounding context where they are defined. This allows closure to access variables even after the outer function has finished execution.
-
Closures leverage the first class objects property of functions by allowing functions to capture and manipulate their surrounding state.
-
Code Summary :
-
i and the gofer assignment zero line and the fmt.Println("Previous values of i:") run everytime you call the adder function, but they only affect the initial state of i. When you create a new closure by calling sequence but they only affect the initial state of i when you create a new closure by calling adder function.
-
Once the closure is created, the subsequent calls to the closure that is, the returned function use and modify the captured value of i.
-
Practical Use Cases
-
Stateful functions
-
Encapsulation
-
Callbacks
-
Usefulness of Closures
-
Encapsulation
-
Flexibility
-
Readability
-
Considerations
-
Memory Usage
-
Concurrency
Best Practices
-
Limit Scope
-
Avoid Overuse
-
Closures are useful for creating functions that maintain state accross multiple calls without exposing the state directly.
-
They help encapsulate functionality and data, allowing for cleaner and more modular code.
-
Closures are commonly used in callback functions, where they capture cariables to provide context or maintain state during asynchronous operations.
-
Closures can keep variables alive longer than expected if they hold references to large objects or resources.
-
Care must be taken when using closures in concurrent programs to avoid race conditions and unintended side effects. That's why it's better to limit the scope. Keep the scope of captured variables enclosures as narrow as possible to minimize unintended side effects.
Recursion
-
Recursion is the process of a function calling itself. It breaks down a problem into smaller sub-problems of the same type until they become simple enough to solve directly.
-
In every recursive function, there is a base case which is a condition where the function stops calling itself and returns a value. Without a base case, the recursion would continue indefinitely, leading to a stack overflow. And apart from the base case we have a recursive case. This is where the function calls itself with a smaller or simpler input to make progress towards the base case.
-
Practical Use cases :
-
Mathematical Algorithms
-
Tree and Graph Traversal
-
Divide and Conquer Algorithms
-
Benefits of Recursion
-
Simplicity
-
Clarity
-
Flexibility
-
Considerations
-
Performance
-
Base Case
Best Practices
-
Testing
-
Optimization
-
Recursive Case
-
Sometimes a recursive solution can be optimized using techniques like memoization. Memoization is caching results of expensive function calls.
Pointers
-
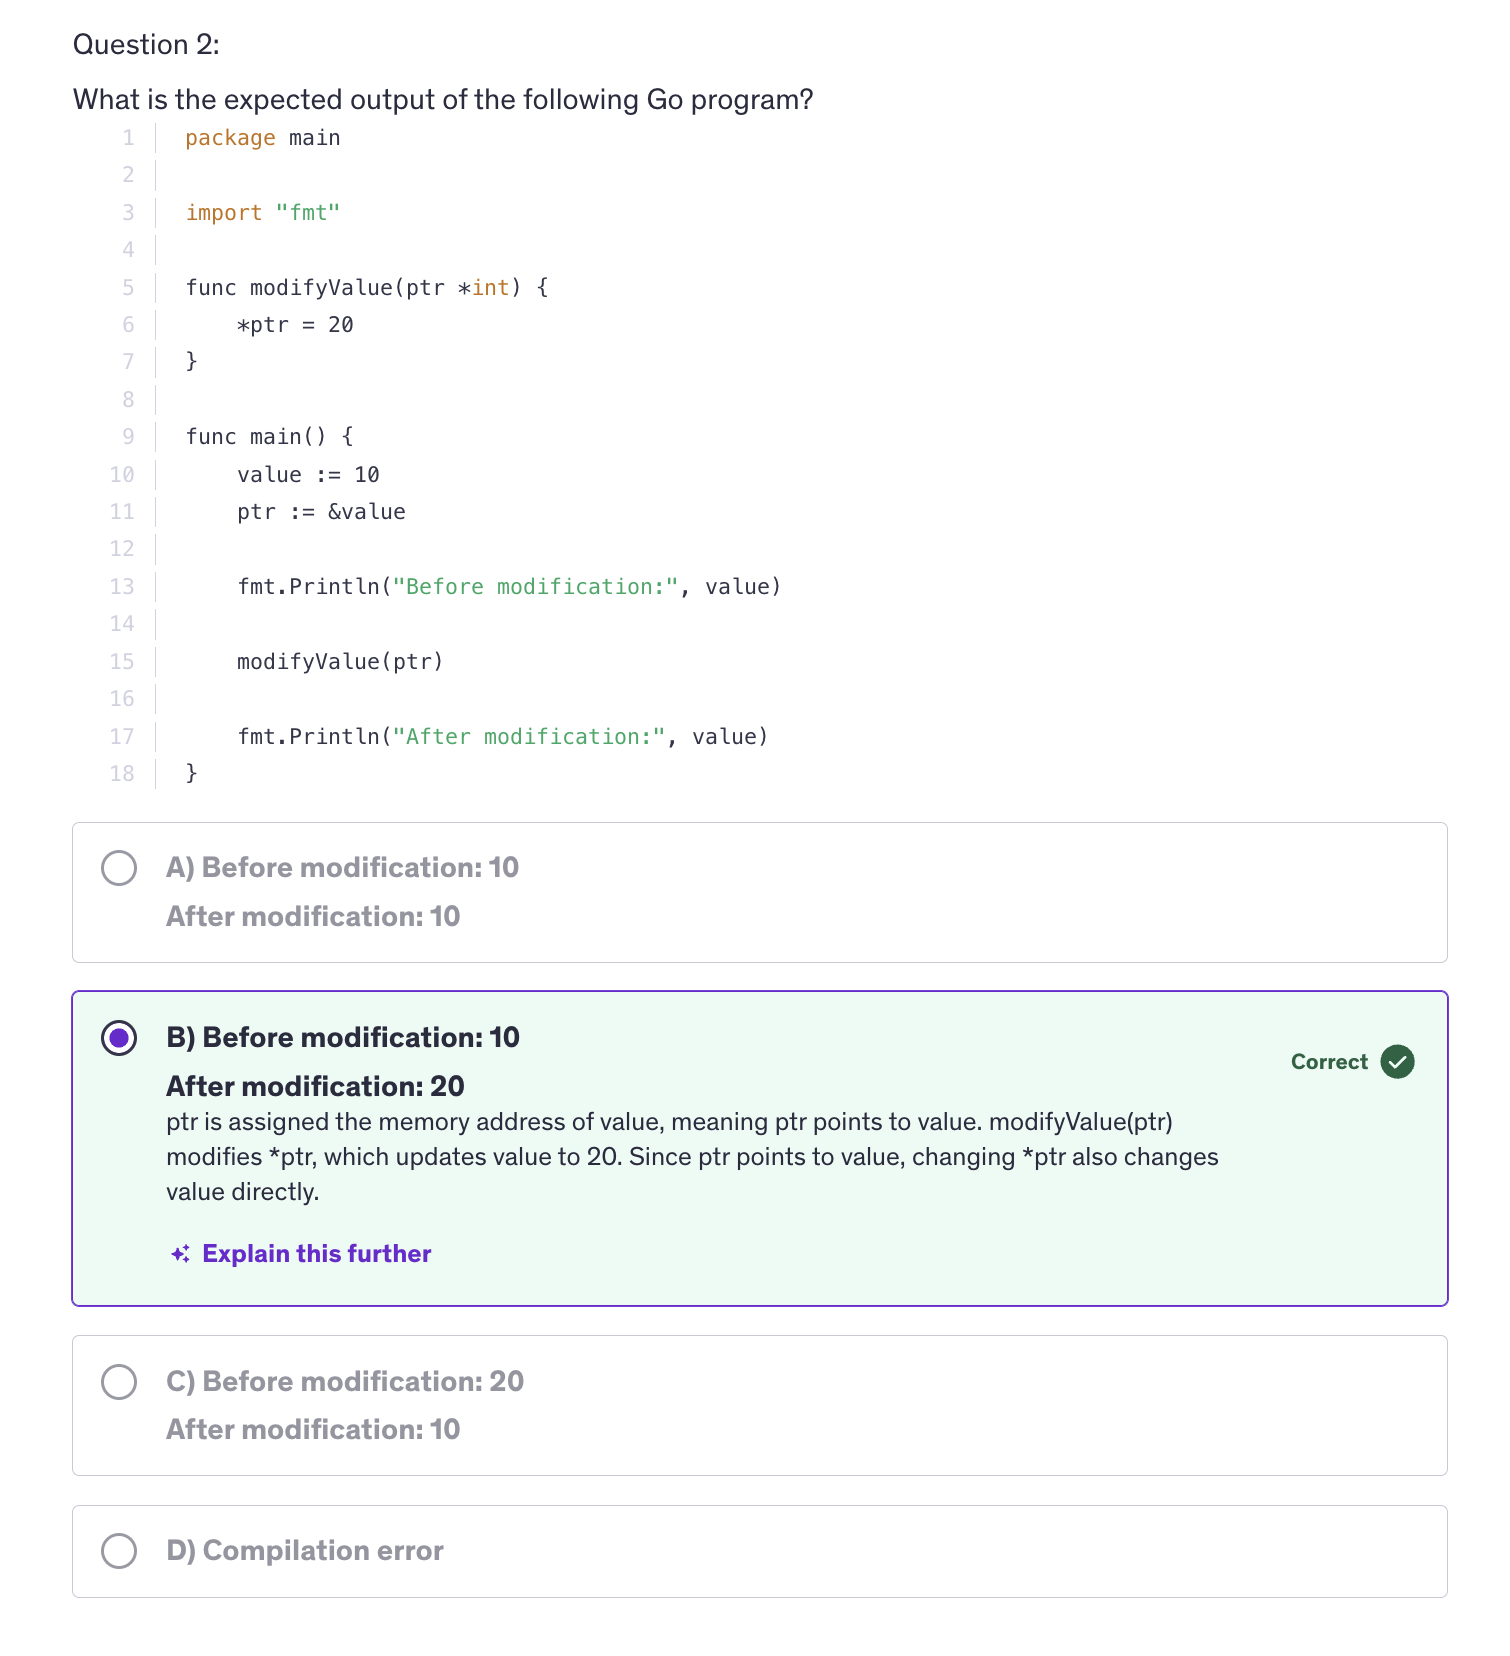
A pointer is a variable that stores the memory address of another variable.
-
Everytime we execute go run, a new executable is made. So Go Run makes a temporary executable each time we execute
go run. -
The zero value of a pointer is
nil -
When we are using pointers, the actual memory address of the variable is passed on to the function. And now the function is accessing the memory address where the number ten is stored by a.
-
Use cases :
-
Modify the value of a variable indirectly
-
Pass large data structures efficiently between functions
-
Manage memory directly for performance reasons.
-
Pointer Declaration and Intialization
-
Declaration Syntax :
var ptr *intptris a pointer to an integer -
Initialization :
var a int = 10 ptr = &aptrnow points to a's memory address -
Pointer Operations: Limited to referencing(
&) and dereferencing(*) -
Nil Pointers
-
Go does not support pointer arithmetic like C or C++
-
Passing Pointers to functions
-
Pointers to Structs
-
Use pointers when a function needs to modify an argument's value
-
unsafe.Pointer(&x)converts the address ofxtounsafe.Pointer -
We will be taking up gRPC and Protocol Buffers and we will be using pointer a lot in Protocol Buffers and gRPC.
-
Go also have an
unsafepackage and go's unsafe package allows low level operations like direct memory access and typecasting useful in certain advanced scenarios. -
In conclusion, understanding and mastering pointers in Go opens doors to more efficient memory management, enhanced control over data structures and access to low level operations when necessary.
String and Runes
-
A string is a sequence of bytes. Bytes are unsigned int8 (
uint8) values. They often represent text. A sequence of bytes represent text. -
Strings are immutable meaning, once created, their values cannot be changed.
-
Strings can be created with double quotes
" "or backticks "`". Backticks are used for raw string literals. In raw string literals the escape sequences will be discarded and everything will be treated like a character and it will print everthing out the way it was written.
message := "Hello\nWorld"  // Hello and World on different line
rawMessage := `Hello\nWorld`  // Hello\nWorld as output

message2 := "Hello, \rGo!"  // Go!lo,
-
\rtakes the cursor to the first position in the line. -
Strings are an array of unicode characters. And these unicode characters i.e. each alphabet that we see, in Go it is called
rune. -
Rune is an integer value that represents a character.
-
Since strings is an array of characters, it also has a length. We can get the length of the string using the same
len()function for arrays, slices. -
All escape sequences are treated as 1 character.
-
When we are using concatenation, we are joining two strings. And when Go is joining two strings, it will not autmatically insert a space between them. It only happens when we are using a print statement and we are using thode different variables seperated by a commas. So it knows, that these are different variables with different content and they could mean different, so that's why it automatically inserts a space between them. But when it comes to concatenation, it knows that we want to join two strings and that's why it doesn't apply any space in between.
-
Lexicographic Comparison : It is a method of comparing sequences such as strings based on the alphabetical order of their components. In Go, lexicographic comparison is used to compare strings. This comparison is essential for sorting, searching and other operations that involve ordering strings.
-
If one string is a prefix of another, the shorter string is considered smaller.
-
The compiler is comparing the ASCII value of the characters.
-
When it comes to string iteration, it's just like iterating over a slice or an array. It will have an index and a value.
-
%xplaceholder/format verb is used to get the hexadecimal value of a character. -
RuneCountInString()-> counts the utf-8 characters in a string. -
Strings a immutable that means, operations like appending, replacing or modifying, require creating new strings. So we have to manipulate strings by creating new strings.
-
We cannot append append more runes, more characters at the end or in the middle or in the begining using any method. So for that we have to create a new string and then perform a concatenation or whatever that we want to manipulate those string variables.
-
A
runeis an alias for int32 and it represents a Unicode code point, a Unicode value. So it is not a character, it is an integer value. A rune is an integer value and that value represents a Unicode code point and that will be converted into a character. -
So runes are used to represent individual characters in a string, and they facilitate working with Unicode characters efficiently.
-
Using Unicde, Go encopassess characters from a lot of languages accross the globe and that makes the jobs of the programmers much easier because we have characters from many, many languages that are used accross the world.
-
A rune is declared with the type as
rune. Runes are declared using single quotes. Double quotes and backticks are for strings.
var ch rune = 'a'
-
Rune literals are single quoted characters representing Unicde code points.
-
Runes facilitate handling of Unicode characters, supporting internationalization and mutilingual text processing.
-
We have support for Smileys in Go language. We can use smileys directly in go as chacters.
-
Strings provide a convenient abstraction for working with textual data, while runes enable precise handling of individual characters and support for diverse languages.
-
Runes and Characters
-
Similarities
- Representing Characters
- Storage Size
-
Differences
- Unicode Support
- Type and Size
- Encoding and Handling
-
Both runes and characters typically occupy a fixed amount of memory. Runes in Go are represented by int32 and represent 4 bytes of memory, allowing them to represent any unicode code point characters. But characters are usually represented by
charwhich typically occupy one byte of memory. -
Runes can represent any unicode code points from ASCII to more complex characters like emojis and non-latin scripts as well. While C also supports characters beyond ASCII through multibyte encodings like utf-8, handling unicode characters directly is not as straightforward as in Go. C libraries and implementations may vary in their support for Unicode.
-
Go natively supports Unicode and provides built-in support for handling runes through it's
runetype and unicode utf-8 package as well. This makes it straight forward to iterate over and manipulate Unicode strings. -
So Go's native support for Unicode and runes make it easier to develop applications that need to handle diverse character sets and languages. So if we are making an appplication where we need to generate text in different languages. Go has a native support for all the languages world-wide.
-
Runes provide a more modern and robust approach for handling Unicode and international text representing Go's design philosophy of simplicity and efficiency in text processing.
Formatting Verbs
-
Go offers many formatting verbs to be used with
printfstatement. -
General Formatting verbs:
-
%v -> Prints the value in the default format
-
%#v -> Prints the value in Go-syntax format
-
%T -> Prints the type of the value
-
%% -> Prints the % sign
-
Integer Formatting Verbs:
-
%b -> Base 2
-
%d -> base 10
-
%+d -> Base 10 and always show sign
-
%o -> Base 8
-
%O -> Base 8 with leading 0o
-
%x -> Base 16, lowercase
-
%X -> Base 16, uppercase
-
%#x -> Base 16 with leading 0x
-
%4d -> Pad with spaces (width 4, right justified)
-
%-4d -> Pad with spaces (width 4, left justified)
-
%04d -> Pad with zeroes (Pads an integer with zeroes to ensure it has minimum width of 4 digits)
-
String Formatting Verbs:
-
%s -> Prints the value as plain string
-
%q -> Prints the value as a double-quoted string
-
%8s -> Prints the value as a plain string (width 8, right justified)
-
%-8s -> Prints the value as a plain string (width 8, left justified)
-
%x -> Prints the value as hex dump of byte values
-
% x -> Prints the value as hex dump of byte values with spaces
-
Boolean Formatting Verbs:
-
%t -> Value of the boolean operator in true or false format (same as using %v)
-
Float Formatting Verbs:
-
%e -> Scientific notation with 'e' as experiment
-
%f -> Decimal point, no exponent
-
%.2f -> Default width, precision 2
-
%6.2f -> Width 6, precision 2
-
%g -> Exponent as needed, only necessary digits
-
Go syntax format refers to format in which values are represented in Go code. For example, strings are enclosed in double quotes.
fmt Package
-
The
fmtpackage includes functions for printing to standard output, returning formatted strings and snaning input. -
Some Key Functions of fmt package :
-
Printing functions
- Print()
- Println()
- Printf()
-
Formatting Functions
- Sprint()
- Sprintf()
- Sprintln()
-
Scanning Functions
- Scan()
- Scanf()
- Scanln()
-
Error Formatting functions
- Error()
-
We hace the
Sprint()function which formats using the default formats for it's operands and returns the resulting string. It doesn't print anything to the console. It only returns the resulting string. -
The formatting functions that we have in Go like Sprint(), Sprintln(), etc., these quite evidently can also be used to concatenate strings.
-
Sprint() does not add a space in between the different values.
-
Sprintln() is a little advanced method which adds spaces in between the arguments and also adds a new line character at the end.
-
Sprintf() function formates according to a format specifier and results the resulting string.
-
fmt pacakge also brings us some functions that can help us take input from the user through the console.
-
The
Scan()function scans the text from the standard input and stores it into the provided variables. So we have to provide a variable for the input to be stored into. -
We have to the direct memory address to scan the input and store it inside the variables passed in the scan function. Because if we pass variables as arguments, the actual variable will not be passes to the function, instead a copy of that variable will be passed, so all the modifications will be done on the copy of the variable and not the actual variable. In order for us to modify the actual variables we give the memory address to
fmt.Scan(). -
Moreover, Scan() has three dots that means it can accept
Variadic Parameters. That means it can be multiple parameters or none. -
Scanln()function is similar to Scan() but it stops scanning at a new line and requires that there be exactly one item per input. -
Scan() does not accepts a blank input
-
Scanf()function scans text from standard input, storing successive space separated values into successive arguments as determined by the format specifier. -
We have to enter our inputs in the exact format that we have declared in the
Scanf()function. -
The
Errorf()function formats according to a format specifier and returns the string as a value that satisfies the error interface. -
If there's an error, first we declare a code block to handle the error and then we move on to handling the value, whatever we want to do with the value.
-
In conclusion, the fmt package is an essential tool for Go developers providing robust functions for formatting and printing text, scanning input and handling errors.
-
In APIs
Sprint()functions are used extensively.
Structs
-
Structs in Go are composite data types that allow you to group together different types of variables under a single name. They are similar to classes in Object Oriented Languages, but they are more lightweight and do not support inheritance.
-
Structs are defined using the
typeandstructkeywords followed by curly braces{}containing a list of fields. -
Fields are defined with a name and a type.
-
Anonymous Structs
-
Anonymous Fields
-
Methods :
func (value/pointer receiver) methodName(arguments, if any ...) <return type, if any> {
    // Method implementation
}
-
Method Declaration
-
Value receiver method
func (t Type) methodName() { // Method Implementation } -
Pointer receiver method
func (t *Type) methodName(){ // Method Implementation } -
Comparing Structs
-
Structs can be initialized using a struct literal. We can provide values for individual filed during initialization. As with any variable, if we omit any field in a struct, it will be initialized with it's zero value.
-
Fields are accessed using a dot notation.
-
Similar to functions we also have anonymous structs. These anonymous structs are structs without a predefined type name. They are useful for temporary data structures.
-
Go supports attaching methods to structs. Methods are functions associated with a specific type. Methods are defined with a receiver, which is the struct type upon which the method operates.
-
Always define methods and structs outside the main function. Defining alone a struct inside main is fine but when there are methods associated with that struct inside the program, we cannot define the methods inside main function.
-
Structs and methods must be defined at the package level, not within the functions. It is by design in Go and that is because Go requires types and their associated methods to be declared in the global scope which is accessible throughout the package.
-
Another reason why structs and methods cannot be inside main is because of separation of concerns. Keeping type definitions and methods outside the main function ensures clear separation between data definitions and execution logic. This makes code more readable and more maintainable.
-
We can create instances of structs and we can call methods on those instances inside the main function. And other thing that we can do inside main function is implement our application logic and interact with our structs and their methods.
-
We do not configure the methods inside the structs. So why are methods not inside struct declarations ?
-
the first reason is design philosophy. Go emphasizes simplicity and clear separation between data types and methods. Methods are defined outside of the struct declaration to maintain a clear distinction between data and behaviour. The behaviour is dependent on the methods and data is the data types, the properties of the classes and the structs.
-
However in classes, we have class properties and methods inside the same class. The class properties of classes are like data types and the methods are similar to the methods declared in Go langauge.
-
Another reason is flexibility. Now this approach that we are defining the methods separately from structs, this approach allows methods to be defined for any type, not just structs and facilitates code organization and modularity.
-
To modify struct fields within a method, we use a pointer receiver instead of a value receiver. Pointer receivers allow the method to modify the original struct instance.
-
Pointers make the actual memory address available to the function. But if we are using value receiver it means we are passing the value to a function and it will not modify the original value. So in order to access the original value and modify that, we have to use a pointer.
-
Go supports embedding structs within other structs. This allows for creating a composition of structs.
-
We can define structs with anonymous fields as well. It simplifies the structure definition by promoting the fields of the anonymous struct to the outer struct. In Go, anonymous fieds in struct must be a type. If you declare a field like phone it needs to be of a specific type.
-
Anonymous fields simplify the structure definition by promoting the fields of the anonymous struct to the outer struct.
-
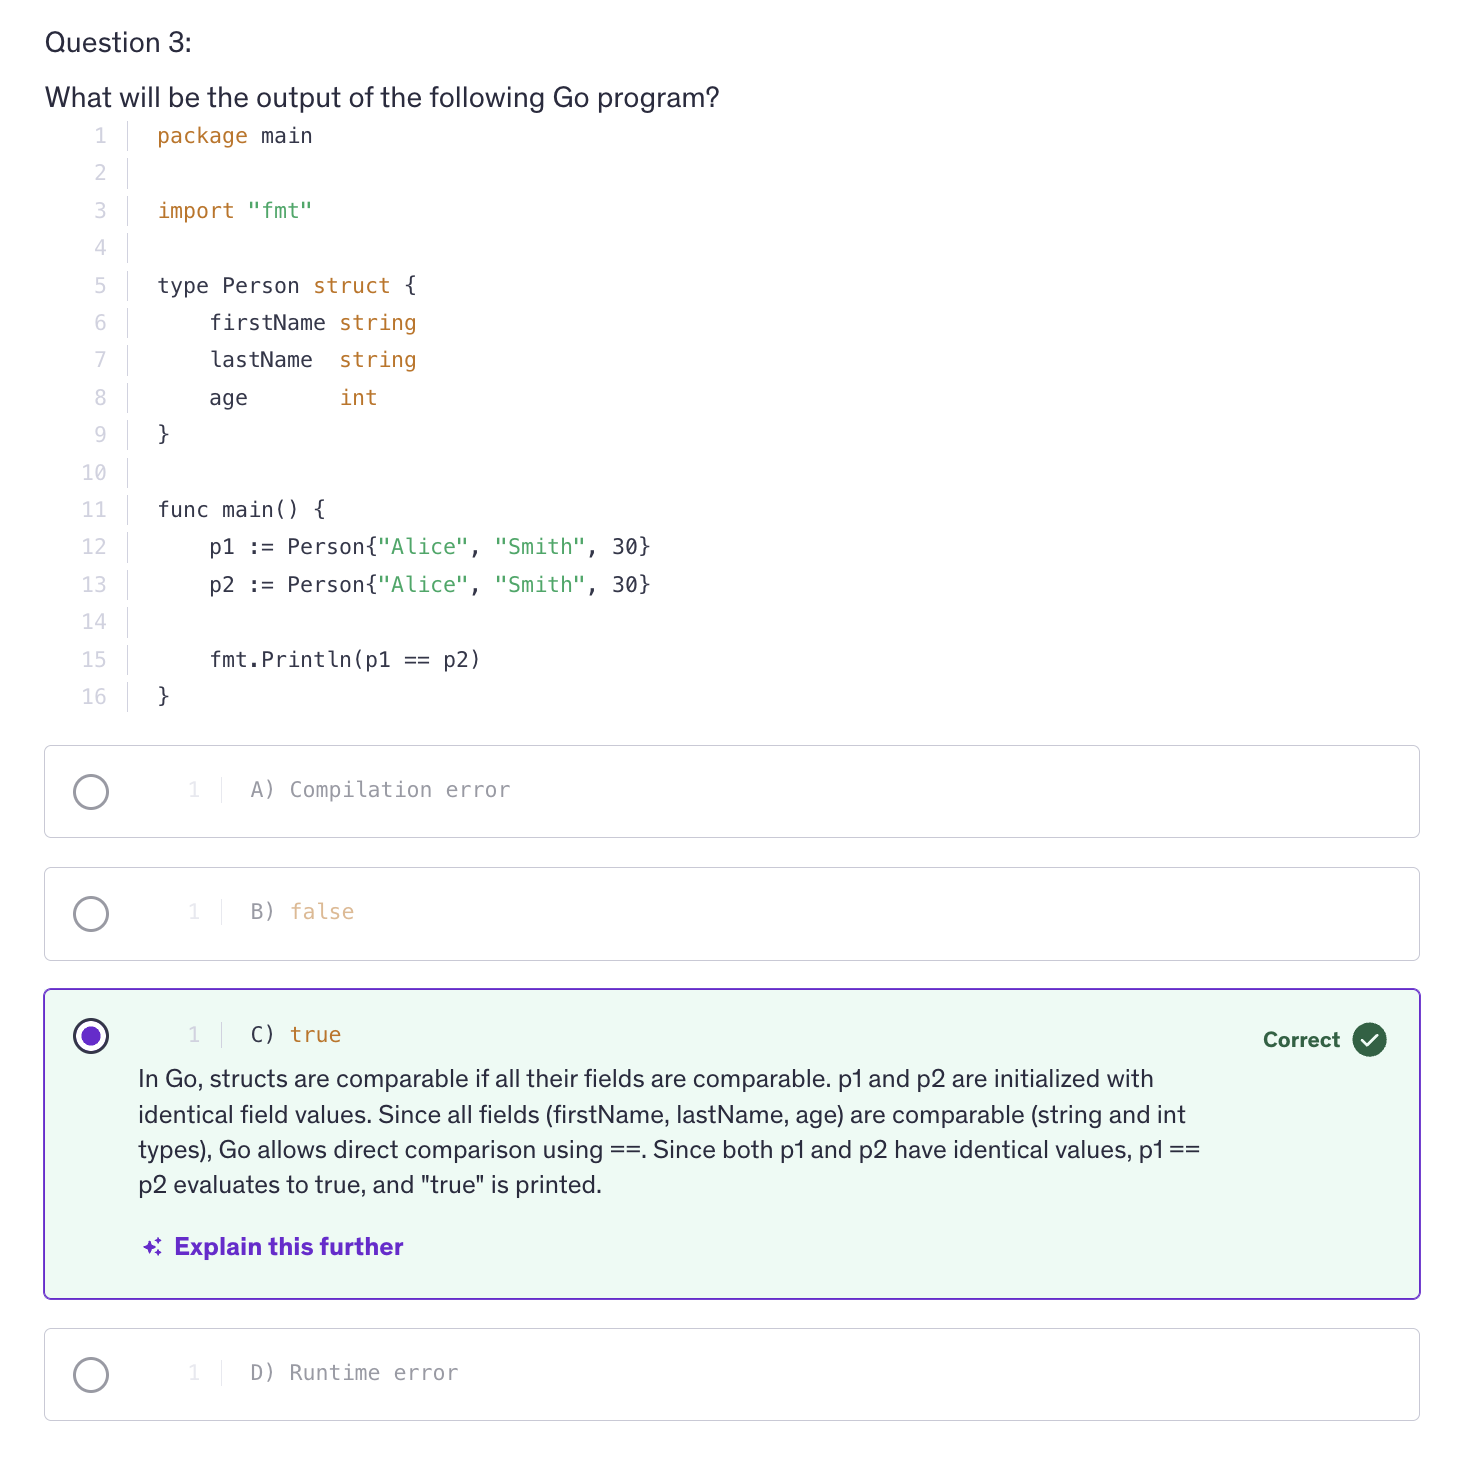
Structs are comparable if all their fields are comparable. You can compare two structs of the same type using the equality operator.
Methods
-
We make methods by declaring a receiver. The receiver will be a struct and that receiver will be associated with that method. So these methods are functions associated with a particular type not necessarily with struct.
-
So methods are not just associated with structs. They can be associated with any specific type. Methods enable us to define behaviors and we define behaviours by using functions. So we define these behaviors that operate on instances of that type.
-
Methods are essential in Go for encapsulating behavior specific to a type and promoting code reuse through structured and organized code.
-
Methods are declared with a receiver which specifies the type that the method operates on and there are two type of receivers in Go : value receivers and pointer receivers.
-
We use a value receiver if the method does not modify the receiver instance. We use a pointer receiver if the methos needs to modify the receiver instance, or if you want to avoid copying large structs because copying large structs means you are occupying a bing chunk in the memory.
-
It's not a thumb rule that you have to create an instance. You can use the type to associate the function with that type to make it a method of that type.
type MyType int

func (MyType) welcomeMessage() string{
    return "Welcome to MyType"
}
-
We don't need an instance because we are not accessing any data inside this type. So we need to use instance only if we are using the instance for extracting or modifying the value.
-
Struct embedding allows methods of an embedded structs to be promoted to the outer struct.
Interfaces
-
Interfaces promote code reuse, decoupling and polymorphism without relying on explicit inheritance.
-
An interface is declared using the
typekeyword followed by a name and keywordinterfaceand a list of method signatures. -
Interfaces are also declared outside the main function.
-
A type implicitly satisfies an interface if it implements all the methods defined by that interface.
-
Any method or any function that needs to be exported should start with an uppercase letter. So in order for us to export any method, struct or any type we have to name that type with an uppercase alphabet.
-
All a struct needs to do is implement all the methods defined in that interface. All the methods that are defined in an interface should be implemented by that struct to be able to get associated with that interface type.
-
An interface in Go is a way to define a set of methods that other types must implement in order for them to be considered the type that, which the interface if of.
-
anyis an alias of interfaces. -
We can use interface when we are ready to accept any type of value in our function. So if I use a vairadic parameter that means we can accept any number of values of different types.
-
Interface means that you are flexible to any kind of value.
-
Use empty interfaces judiciously typically for scenarios requiring dynamic types or unknown types.
-
Interfaces in Go facilitate Polymorphism and enable writing modular, testable and maintainable by promoting loose coupling between types.
Struct Embedding
-
Struct embedding allows a struct to inherit fields and methods from another struct type. It's a powerful mechanism for code re-use and structuring data.
-
Methods can be overridden by redefining them in the outer struct.
-
Anonymous fields promote all fields and methods of the embedded struct while named fields require accessing fields with their explicit names.
Best Practices and Considerations
- Composition over inheritance
- Avoid Diamonf Problem
- Clarity and Readability
- Initialization
Generics
-
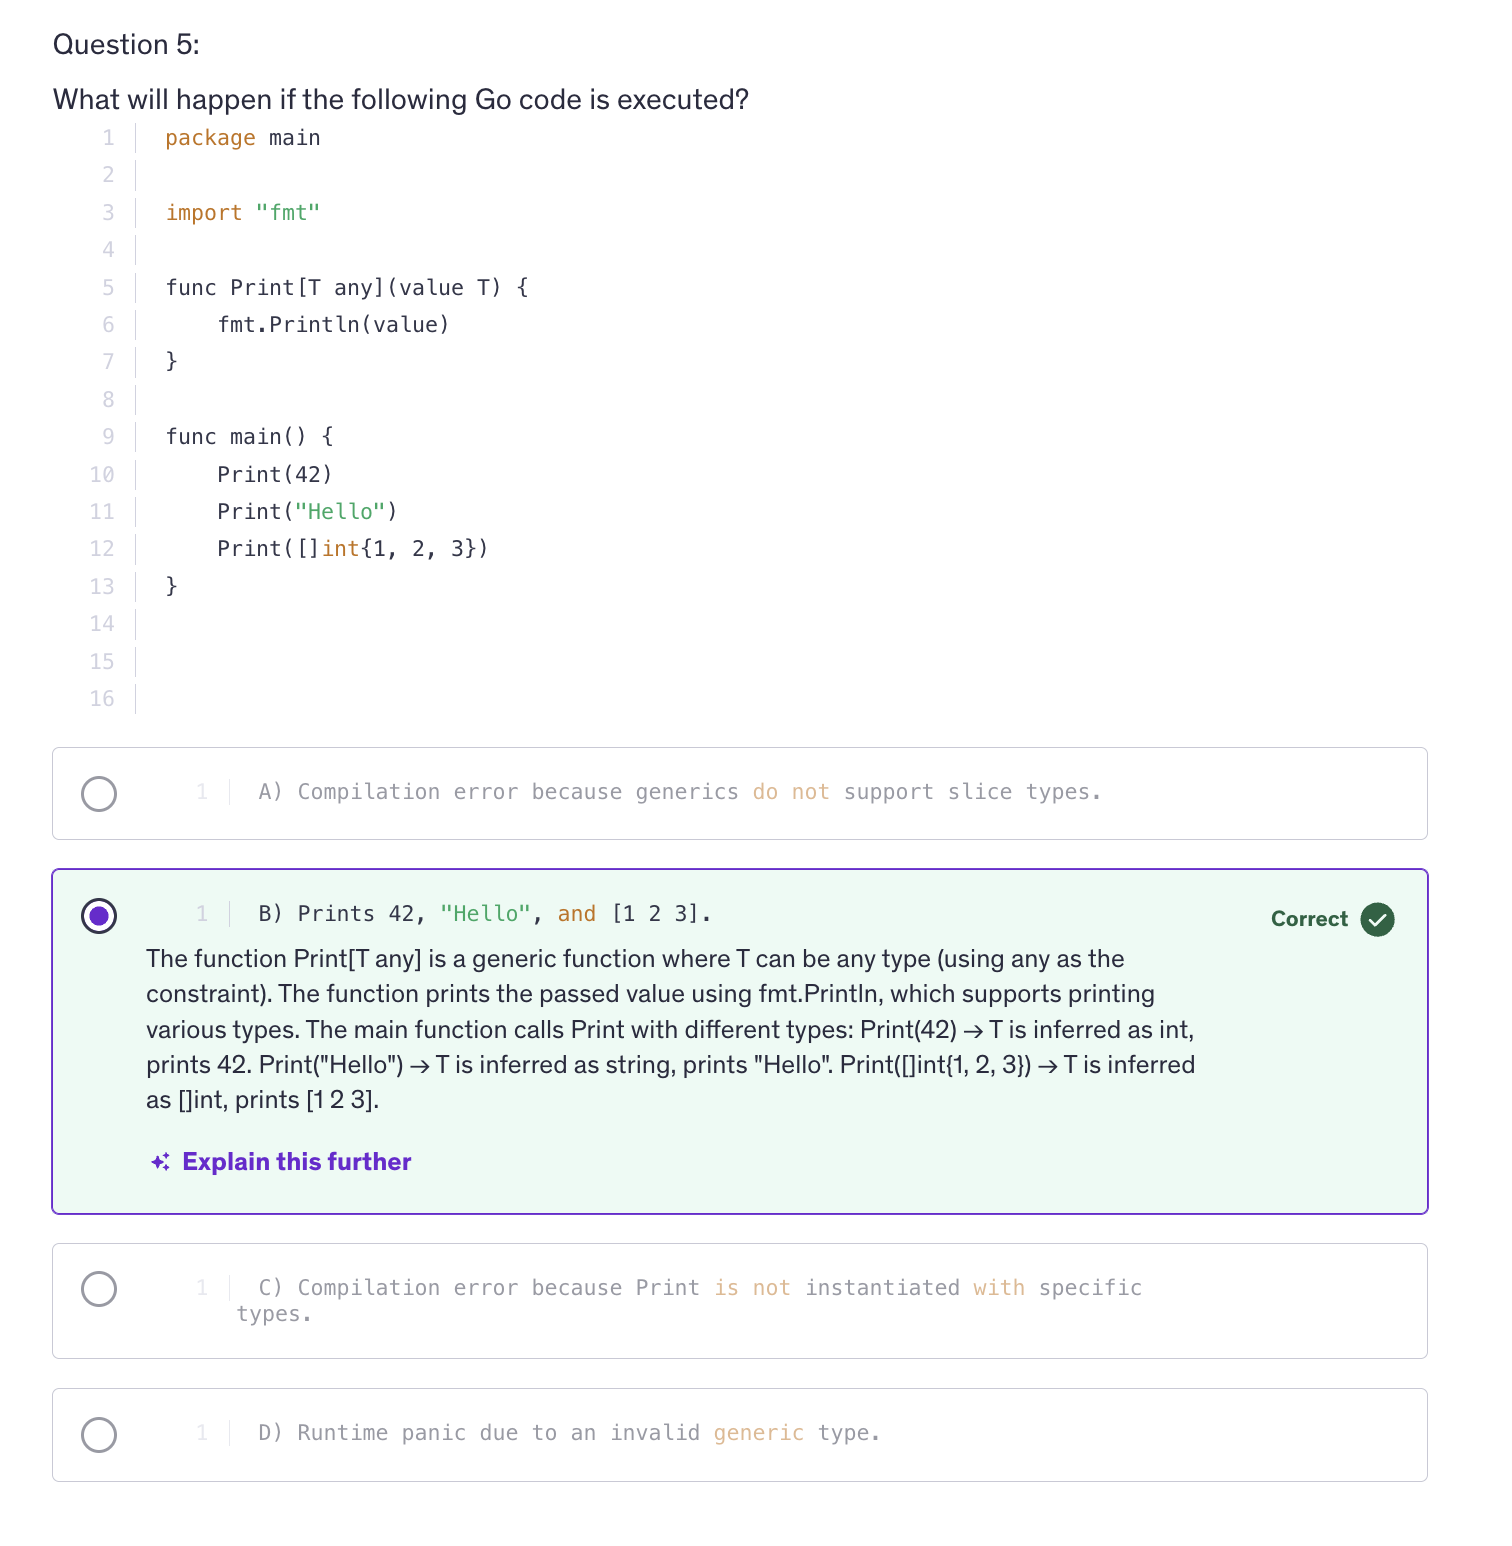
Generics in programming languages provide a way to write functions, data structures and algorithm that can handle various types without specifying each type explicitly. This promotes code re-use, type safety and enhances the flexibility of programs.
-
Generics in go are declared using type parameters, which are placeholders for types that can be specified when using the generic function or data structure.
-
anyis just an alias for interface and interface means that it can be of any type. -
Benefits of Generics :
-
Code Reusability
-
Type Safety
-
Performance
-
Considerations
-
Type Constraints
-
Documentation
-
Testing
Intermediate Quiz 1
Errors
-
Errors are a funcdamental part of any programming language, allowing programs to handle exceptional conditions gracefully.
-
In Go, Errors are represented by the error interface, which is a built-in type used to indicate the presence of an error condition.
-
Errors are typically created by using the
errorspackage or by implementing the error interface. -
Do not unnecessarily use uppercase when naming structs or any other type, always make sure that you use uppercase only when you are exporting your type, your struct or anything else outside the package.
-
Example:
func main() {
    if err1 := eprocess(); err1 != nil {
    fmt.Println(err1)
    return
    }
}
type myError struct{
message string
}

func (m *myError) Error() string{
    return fmt.Sprintf("Error: %s", m.message)
}

func eprocess() error {
    return &myError{"Custom Error Message"}
}
-
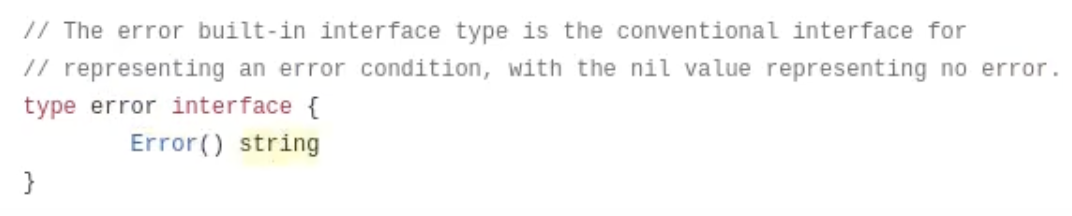
We are using Error() because Go has a built-in package. The Go's built in package have an interface which is the error interface. The error interface has a single method which is
Error(). An in Go an error is represented by the error interface, and this error method returns a string that describes the error. -
So by utilizing this interface, we can propagate our custom error messages as we please. Because it is an interface, we can modify it according to our requirements. We can use multiple lines, multiple kinds of data. We can use different kinds of formatting whatever we want because it is an interface. And interfaces are completely blank, all you need to do is implement the methode.
-
Official error interface implementation of Go
-
Error method needs to return a string and that's why our Error() method returned a string.
-
When we are using any function from the built in package it is available to us by default. The built-in pacakage is part of the Go runtime and is special in that it provides the foundations for the language itself. Therefore you can use fundamental types and functions directly in your code.
-
In conclusion, error handling in go revolves around the error interface and idiomatic practices like checking errors, propagating errors and custom error types. Proper error handling ensures that programs are robust and reliable, providing clear feedback on exceptional conditions.
Custom Errors
-
Custom Errors can encapsulate specific details about what went wrong, making it easier to debug and understand the root cause of errors. It provides an enhanced error context.
-
Context and custom errors allow us to distinguish between different types of errors and handle them differently in our application logic.
-
Custom errors also ensures consistency in error handling accross our code base, promoting maintainability.
-
In Go, custom errors are nothing but types that implement the error interface. It requires the implementation of errxor method that returns a string.
-
When we are handling errors, we have to return so that the rest of the statements do not get executed. That's the point of handling the error, right ?
-
Wrapped Errors : Wrapped Errors were introduced after Go version 1.13.
%wformatting verb stands for wrapped error. -
Our custom error helps us to pass on the error message much more efficiently and much better error description from multiple functions that we are executing in a nested way.
-
In conclusion, custom errors in go enhance our error handling by providing more context and differentiation in error reporting.
String Functions
-
Strings in go are a sequence of bytes and Go provides a rich set of built-in functions and methods to manipulate and work with strings effectively.
-
Functions
-
integer to string :
num := 18 str := strconv.Itoa(num) -
string splitting
fruits := "apple,orange,banana" parts = strings.Split(fruits, ",") // ["apple", "orange", "banana"]strings.Split()converts your original string into an array and it divides that string based on the seperator value that you give it.
-
strings.Join()-> concatenates elements of a slice into a single string with a separator.countries := []string{"Germany", "France", "Italy"} joined := strings.Join(countries, ", ")Go is smart enough to add separator only between the consecutive words and not after the last word.
-
Function to check if a string contains a subset characters, it could be one character or multiple characters combined.
strings.Contains(str, "test") // returns true or false. -
strings.Replace()-> Replaces the occurances of a substring within a string with another substring.strings.Replace(str, <string to be replaced>, <string by which it is replaced>, <no. of occurances to be replaced>) strings.Replace(str, "Go", "World") -
We can also trim leading and trailing whitespace from our string.
strwspace := " Hello Everyone! " fmt.Println(strwspace.TrimSpace(strwspace)) // "Hello Everyone!" -
We can change the case of our strings to lower or to upper during the runtime.
fmt.Println(strings.ToLower(strwspace)) fmt.Println(strings.ToUpper(strwspace)) -
strings.Repeat()-> repeat something for a fixed number of times.fmt.Println(strings.Repeat("foo", 3)) // foofoofoo -
We can also count the occurance of an alphabet or a substring inside another string.
strings.Count("Hello", "l") // 2 -
We can also check for prefix and suffix.
fmt.Println(strings.HasPrefix("Hello", "He")) // truefmt.Println(strings.HasSuffix("Hello", "la")) // false -
Go offers us a regular expression package which allows pattern matching and manipulation of strings based on complex rules.
-
regexpis a package in Go andMustCompile()is a method defined inregexppackage. -
MustCompile() -> is a function that compiles a regular expression. A regular expression is something yes which needs to be compiled.
-
The pattern needs to be inside Backticks. Regular Expressions needs to be enclosed in backticks to be considered a raw string literals. When we are using regular expressions we are defining a pattern and that pattern needs to be matched. So regular expression matches the pattern that we define with different values.
-
d -> digits
- -> it has to be one or more
eg:
\d+-> It has to be one or more digits -> check for multiple digits
str5 := "Hello, 123 Go! 78"
re := regexp.MustCompile(`\d+`)
matches := re.FindAllString(str5, -1)
fmt.Println(matches)
-1 indicates that we are looking for all the matches for that regular expression inside the source string.
FindAllStrings() -> returns an array of strings. It's going to extract all the matches and store them successively in a slice. So it returns a slice of strings. So we have to store the slice in a variable.
-
We have another package which let's us work on Unicode characters and strings and that is called the unicode
utf8package.utf8.RuneCountInStringreturns the number of runes present in the string. -
Since strings are immutable in Go, we have something called
strings.Builder()for efficient string concatenation in performance critical scenarios. -
strings.Builder()is a type in Go's standard library specifically in the strings package that provides efficient strings building. It's designed to help you concatenate strings in a memory efficient wat instead of creating many intermediate strings, which can be expensive in terms of memory and processing time.strings.Builder()allows you to build your final string incrementally. -
strings.Builder() is more efficient than using the concatenation (
+) operator or even when usingfmt.Sprintf()fo concatenating multiple strings. strings.Builder is still much better than these options because it minimizes memory allocations and copies. -
Builder provides several ways for adding content such as write, writeString, writeRune and writeByte. and builder can be used immediately after declaration without initialization.
-
A builder can be reused by calling the reset method which clears it's internal buffer. The final string can be retrieved using the string method.
-
We can keep on building that string. And this builder is memory efficient and prevents memory leaks. It does not make copies. It keeps on building the string in a memory efficient way and in a memory secure way.
-
we have to include character in
builder.WriteRune()and characters are stored in single quotes. -
builder keeps on writing to the existing string that it has stored in its memory. So everything that we write a rune, a string or anything, it will keep on adding to the existing data that it has.
-
So in order for us to start a new string, we need to reset the builder.
-
When it comes to memory efficiency, prefer strings.Builder or bytes.Buffer for building large strings to avoid unnecessary memory allocations.
String Formatting
-
String formatting in Go refers to the techniques used to create formatted output from variables or constants. Go provides several mechanisms for formatting strings, including the fmt package, string interpolation or format specifiers.
-
When it comes to format specifiers, we can use flags or string alignment as well to format our strings in a desired way.
-
Go supports string interpolation using backticks.
-
BAckticks makes a string raw, a raw string literal, which means that it is going to consider everything as a string literal and it's not going to let any escape sequence execute.
-
When you need to embed special characters or multiple lines of text without interpreting escape sequences, backticks are very useful. This is particularly handy when dealing with regular expressions. This improves readability and reduces the chances of errors due to missed escape sequences.
-
Another use case would be when we are using SQL query. So in SQL queries using backticks ensures that the query remains intact without needing to escape special characters or worry about line breaks. It enhances readability and reduces the cognitive load when writing or maintaining such code.
Text Templates
-
Text templates in go are a powerful feature that allow you to define and execute templates for generating text output. They are particulary used when you need to generated structured texts wuch as HTML, JSON, SQL Queries or any other formatted text output.
-
A template is a string or a file that contains one or more action sequences. These actions control the template execution, such as inserting values, iterating over data or executing conditionals.
-
Concept of Actions: These actions are enclosed in double curly braces. There are several types of actions like variable insertion.
-
Variable Insertion: [{.FieldName}]
-
Pipelines: {{functionName .FieldName}}
-
Control Structures: {{if .Condition}} ... {{else}} ... {{end}}
-
Iteration: {{range .Slice}} ... {{end}}
-
Advanced Features
-
Nested Templates: {{template "name" .}}
-
Functions
-
Custom Delimiters
-
Error Handling: template.Must()
-
Use Cases
-
HTML Generation
-
Email Templates
-
Code Generation
-
Document Generation
Best Practices
-
Separation of Concerns
-
Efficiency
-
Security
-
Templates are executed by applying them to data structures known as Template Data. These data structures can be simple values, structs, slices, maps or any custom types that you define.
-
Templates are a part of 2 packages:
-
We have text template as well as html template package. HTML template package has some advanced features that text template package does not have. Text template package has basic features of templating.
-
Once we have create a template, we have to parse the template, we have to process that template. We use
.Parse()method. It takes an argument which is a string, but this string is not a usual string. This is actually a string that we want to be processed as a template. -
Template is something that we can reuse repeatedly for different values, and the name is going to be changing everytime we use this template.
-
To output the message from the template use
.Execute()function on that template. It will return an error if there is one so make sure to handle the error in a variable.
err := tmpl.Execute(os.Stdout, data)
-
Execute takes the first argument as the target, the destination where it needs to send the output to. So we are sending our output to the standard output device of our computer which is the console. And the next argument is the data.
-
There's another way of using template via using
template.Must()where we don't have to handle the errors ourselves and template.Must() will automatically panic if we have an error while parsing our template.
tmpl := template.Must(template.New("example").Parse("Welcome, {{.name}}! How are you doing?\n"))
this code is equivalent to :
tmpl, err := template.New("example").Parse("Welcome, {{.name}}! How are you doing?\n")
if err != nil {
    panic(err)
}
-
.Must() is used to handle the error from the parse. And we'll not have to handle the error ourselves, which will save us some more typing and which will make our code mmore readable.
-
template.New() -> creates a new template and it takes the name of the template as an argument.
-
template.Parse() -> parses the template definition. So it takes a string and that string is in the format of template that we want. And then template.Parse will process the string and convert it into a template that we will use further in our program. So
template.Parse()helps us to parse the template string and it turns the string into a reusable template object that can be executed with custom data. -
template.Execute()-> used to apply a parsed template to a data structure and write the result to an output destination. It could be a file or it could be a console or something else. -
bufio-> Buffered input output package. -
bufio.NewReader(os.Stdin)-> to read from the console. Console is the standard input device. -
to get the input from the user :
reader := bufio.NewReader(os.Stdin)
- .ReadString() -> takes an argument as a delimeter. So that means it is going to accept the input from the console until it reads the delimeter from the console. It takes a
bytestype as an argument, that's why we have to use single quotes.
reader.ReadString('\n')
ReadString()-> generates a string and an error so handle both of them by storing them in the variable. Always read strings from the console and then convert them to whatever you want.
Best Practices
-
Separation Of Concerns: Keep your templates focused on presentation logic avoiding business logic.
-
Precompile you templates for re-use if performance is critical to your application.
-
Also sanitize inputs to prevent injection attacks, especially when generating HTML because there are a lot of attacks which happen using the user input.
-
Overall, text templates in Go are a powerful tool for generating textual output based on structured templates and dynamic data. They offer flexibility, ease of use and support for complex scenarios like conditional logic, iteration and function invocation within templates whether for web applications, system administration scrips or data processing tasks.
Regular Expressions
-
Regular expressions provide a powerful way to search, manipulate and validate text strings based on patterns. They are widely used in text processing, searching and data extraction tasks where patterns of characters need to be matched or manipulated.
-
In Go, the regular expression package provides support for working with regular expressions.
-
To work with the regex pattern in Go, you first compile it using the
regexp.Compile()orregexp.MustCompile(). -
regular expression to match email address
re := regexp.MustCompile(`[a-zA-Z0-9._+%-]+@[a-zA-Z0-9.-]+\.[a-zA-Z]{2,}`)
-
The
+means that anything inside the bracket is going to have multiple notable occurances. -
A period is declared with a backslash because it is outside the square brackets.
\. -
To limit the occurances use
{}. eg:{2,}means two or more occurances. -
The hyphen
-has a special meaning. And meaning is a range. So if we are not using hyphen as a range, it needs to come as the last character to let the compiler know that we are not using hyphen as a range, but as a symbol, as an acceptable character. that's why[+-%]is invalid and[+%-]is valid regexp. -
Regular expressions allow capturing parts of the matched strings using parentheses. Parentheses create capturing groups which allow us to extract parts of the complete matched string.
-
Regex to capture dates
re := regex.MustCompile(`(\d{4})-(\d{2})-(\d{2})`)
-
There are many regular expression generators online for such tasks.
-
We can also replace characters in our target string.
-
Flags and Options:
-
i-> case insensitive. we are accepting characters in all cases. -
m-> multi-line model. -
s-> dot matches all -
?i-> Flag which makes the regular expression case insensitive. WHen we are using Flags we need to make sure that those flags start with a question mark. This is how regular expressions accept flags. -
When using regular expressions, be careful about complex patterns or large input strings, because regular expressions sometimes take up a lot of processing power and they can impact the overall performance of our application or API in a way that we didn't even anticipate.
-
So benchmark your regular expression pattern if performance is critical.
Time
-
Time handling in Go is essential for dealing with dates, times, durations and time zones. It provides functionalities to create, manipulate, format and compare times.
-
In Go, time values are represented by the
time.TimeStruct(). You can create time values using various methods liketime.Now(),time.Date()ortime.Parse(). -
time.Parse()-> accepts a layout string and a value string. Now this layout it's for a very specific date. -
In Go, when we are using time.Parse() we need to use a reference time. We can use it in any format but that date and time has to be specific. It's actually in a format like this:
Mon Jan 2 15:04:05 MST 2006 -
So we have to convert our date into any format that we want and then get our input to be used as a date, to be processed as a date.
-
The first argument in out time.Parse is a reference layout. So this will be the layout of the value that we are passing to this argument because it is going to check this layout against it's default value and it is going to understand the format YYYY-MM-DD
-
The reference time for the Go compiler or Go runtime is
Mon Jan 2 15:04:05 MST 2006. So they are going to reference your layout with this value. -
If we already have a time and we need to format it according to our need then we will use
time.Format(). -
time.Parse() takes string and time.Format() works on a time type of value, a value which is already of type time.
-
We can add and subtract durations. We can also round or we can truncate time. We use
time.Add()for addition and we usetime.Round()andtime.Truncate()for rounding out or truncating time to the nearest or previous duration. -
So what truncation does is, it rounds down the time. So time.Truncate() is similar to time.Round() but time.Round() can go up and it can round off the time to the next hour. But truncate will always round down the time, so it will always go doen when giving the output.
-
In conclusion, time handling in Go provides powerful functionalities for creating, manipulating, formatting and comparing time values. And by understanding these concepts, these methods you can effectively manage date and time operation in your applications, ensuring accurate and reliable time based functionality.
-
Understanding time zones, durations and arithmetic operations is crucial for comprehensive time management in your go programs.
Epoch
-
Epoch refers to a specific point in time that serves as a reference for timestamps and calculations. It's often used in computing and programming to represent time as a single number of count of seconds or milliseconds since a defined starting point.
-
The epoch time is usually defined as a unix epoch, which is zero hours, zero minutes and zero seconds UTC on January 1st, 1970.
00:00:00 UTC on Jan 1, UTC. This point was chosen because it precedes most modern computer systems and allows for a simple representation. -
In many programming languages including Go, time is often represented as the number of seconds or milliseconds elapsed since the Unix epoch. So this representation is convenient for storing, comparing and manipulating time related data.
-
So epoch time units are seconds. Unix time in seconds which is a timestamp. Milliseconds are used for more precise calculations and to capture smaller time intervals and epoch time values are positive values or negative values. Positive value represent times after the unix epoch which is a mentioned here Jan 1, 1970 and negative values represent times before the Unix epoch, which is the midnight of Jan 1, 1970.
-
Go's time package provides a roust support for handling time related operations including time formatting, time calculations, time zones and it also has dome Unix time functions like
-
time.Now() which retrieves the current time.
-
time.Unix() which converts Unix time to a
time.Timeobject -
time.Since, time.Until() calculate durations since or until a specified time.
-
Epoch Applications in Programming :
-
Storing timestamps in databases using Unix like time simplifies sorting and querying data based on time intervals.
-
many OS and file systems record file creationg, modification times as Unix timestamps.
-
Epoch time is Universal accross platforms and programming languages, facilitating interoperatbility.
-
Considerations :
-
Unix time does not account for leap seconds which are adjustments made to keep time synchronized with Earth's rotation and this can lead to slight inaccuracies over long periods.
-
Depending on requirements, Unix time in miliseconds might be necessary for finer granularity.
-
Unix time traditionally count seconds but modern systems and applications often require higher precision and nanoseconds provide this higher precision allowing for more accurate timestamps. Including nanoseconds allows the time.Time objects to represent a specific point in time more precisely than just using seconds alone.
Time Formatting / Parsing
-
Time Formatting and Parsing are crucial for converting time values between human readable formats and machine friendly representations like Unix timestamps. In Go, the time package provides robust support for these operations offering a variety of layout patterns to format time and methods to parse time strings into time.Time objects.
-
Some consideration when using time is that always consider time zones when formatting and parsing time to avoid discrepancies. Because we live in an age where our applications are accessed from many countries accross the globe and each country has it's own different time zone and we want the time to be shown to each user depending on their location. So always consider time-zone when you are making your application.
-
Handle errors returned by time.Parse() when parsing time strings to ensure robustness.
Random Numbers
-
Random numbers play a crucial role in many applications from simulations and games to cryptography and statictical sampling.
-
In Go, generating random number involves
math/randpackage which provides functions for generating pseudo random and cryptographically secure random numbers. -
A
seedis a starting point for generating a sequence of random numbers. In Go, default pseudo random number generator provided by math/rand uses a seed to initialize the sequence. -
By default Go's
math/randuses a deteministic algorithm to generate pseudo random numbers based on the seed. To initialize the generator with a specific seed, we use a specific function, a specific method from the rand package. -
True random numbers vs pseudo random numbers. True random numbers are truly random. They are actually random. But pseudo random numbers are generated by algorithms that produce sequences of numbers that appear random but are determed by an initial value known as seed. Most software applications use Pesudo Random Number Generators (PRNGs)
-
The seed acts as the starting point for the sequence and determines the sequence of numbers that the generator will produce. The purpose of seeding is reproducibility. By setting the same seed, you can generate the same sequence of random numbers each time you run your program and this is useful for debugging and testing where you need consistent results. And similarly we can use different seeds to generate different numbers. SO that's why in earlier programming, we used to use the current time as the seed to generate a different number each time the program is run. So the current time will be entered as the seed in a program and then the program will run.
-
rand.NewSource()-> it returns a new pseudo random source seeded with the given value. example snippet for seeding:
val := rand.New(rand.NewSource(50))
fmt.Println(val.Intn(6) + 5)    // a particular random number between 5 and 10
-
when we are using
rand.Intn(n), it automatically has a seed. The internal method is automatically seeded by the rand package. -
Considerations:
-
Deterministic Nature
-
Thread Safety
-
Cryptographic Security
-
math/randpackage is not safe for concurrent use. SO we need to use sync.Mutex() or sync.RWMutex() to synchronize access if needed. -
When we are using random numbers for cryptographic purposes, always use
crypto/randpackage to generate random numbers. If we want to generate random bytes, hexadecimal number or a 64bit integer. So depending on your usage, use thecrypto/randpackage to generate random numbers for cryptographic use.
Number Parsing
-
Number parsing is the process of converting textual representations of numbers into their corresponding number values.
-
In Go, Number Parsing is typically done using functions from the string conversion package for basic types and specialized functions for specific needs. The string conversion package is denoted by
strconv. -
strconv.ParseInt()-> converts a string to an integer with specified base and bit size. Takes 3 argument : string, base, bitSize -
strconv.Atoi()-> it converts to an integer and that integer is of type int. -
But let's way if we want an integer of a specific size, maybe int64, so in that case we are going to use strconv.PaseInt().
-
strconv.ParseFloat()-> takes 2 arguments: string, bitSize. -
When working with parsing, always be careful about handling errors because maybe we actually pass incorrect values.
-
In conclusion number parsing in Go is essential for converting textual representations of numbers into usable numeric values in applications. The
strconvpackage provides robust functions for parsing integers and floating point numbers with various bases and error handling capabilities. And understanding these functions and their usage ensures reliable handling of numeric input in our Go program.
Intermediate Quiz 2
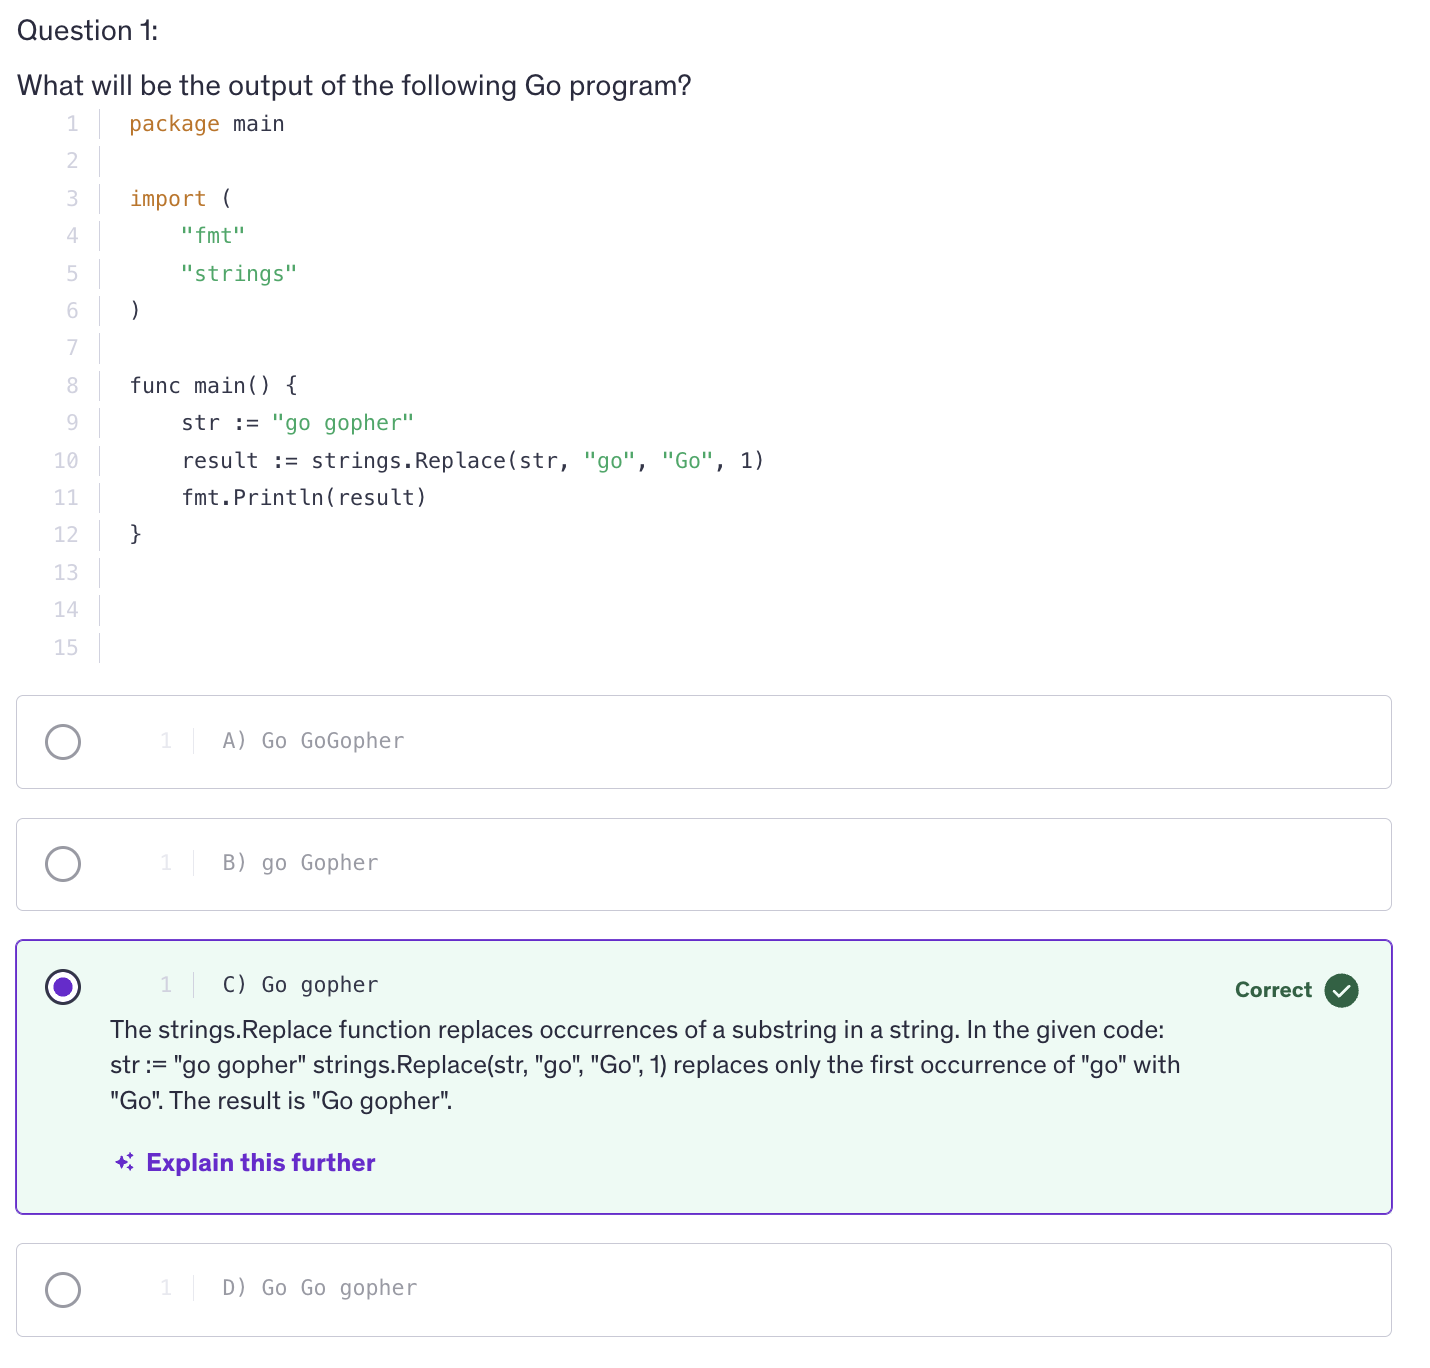
<kbd>
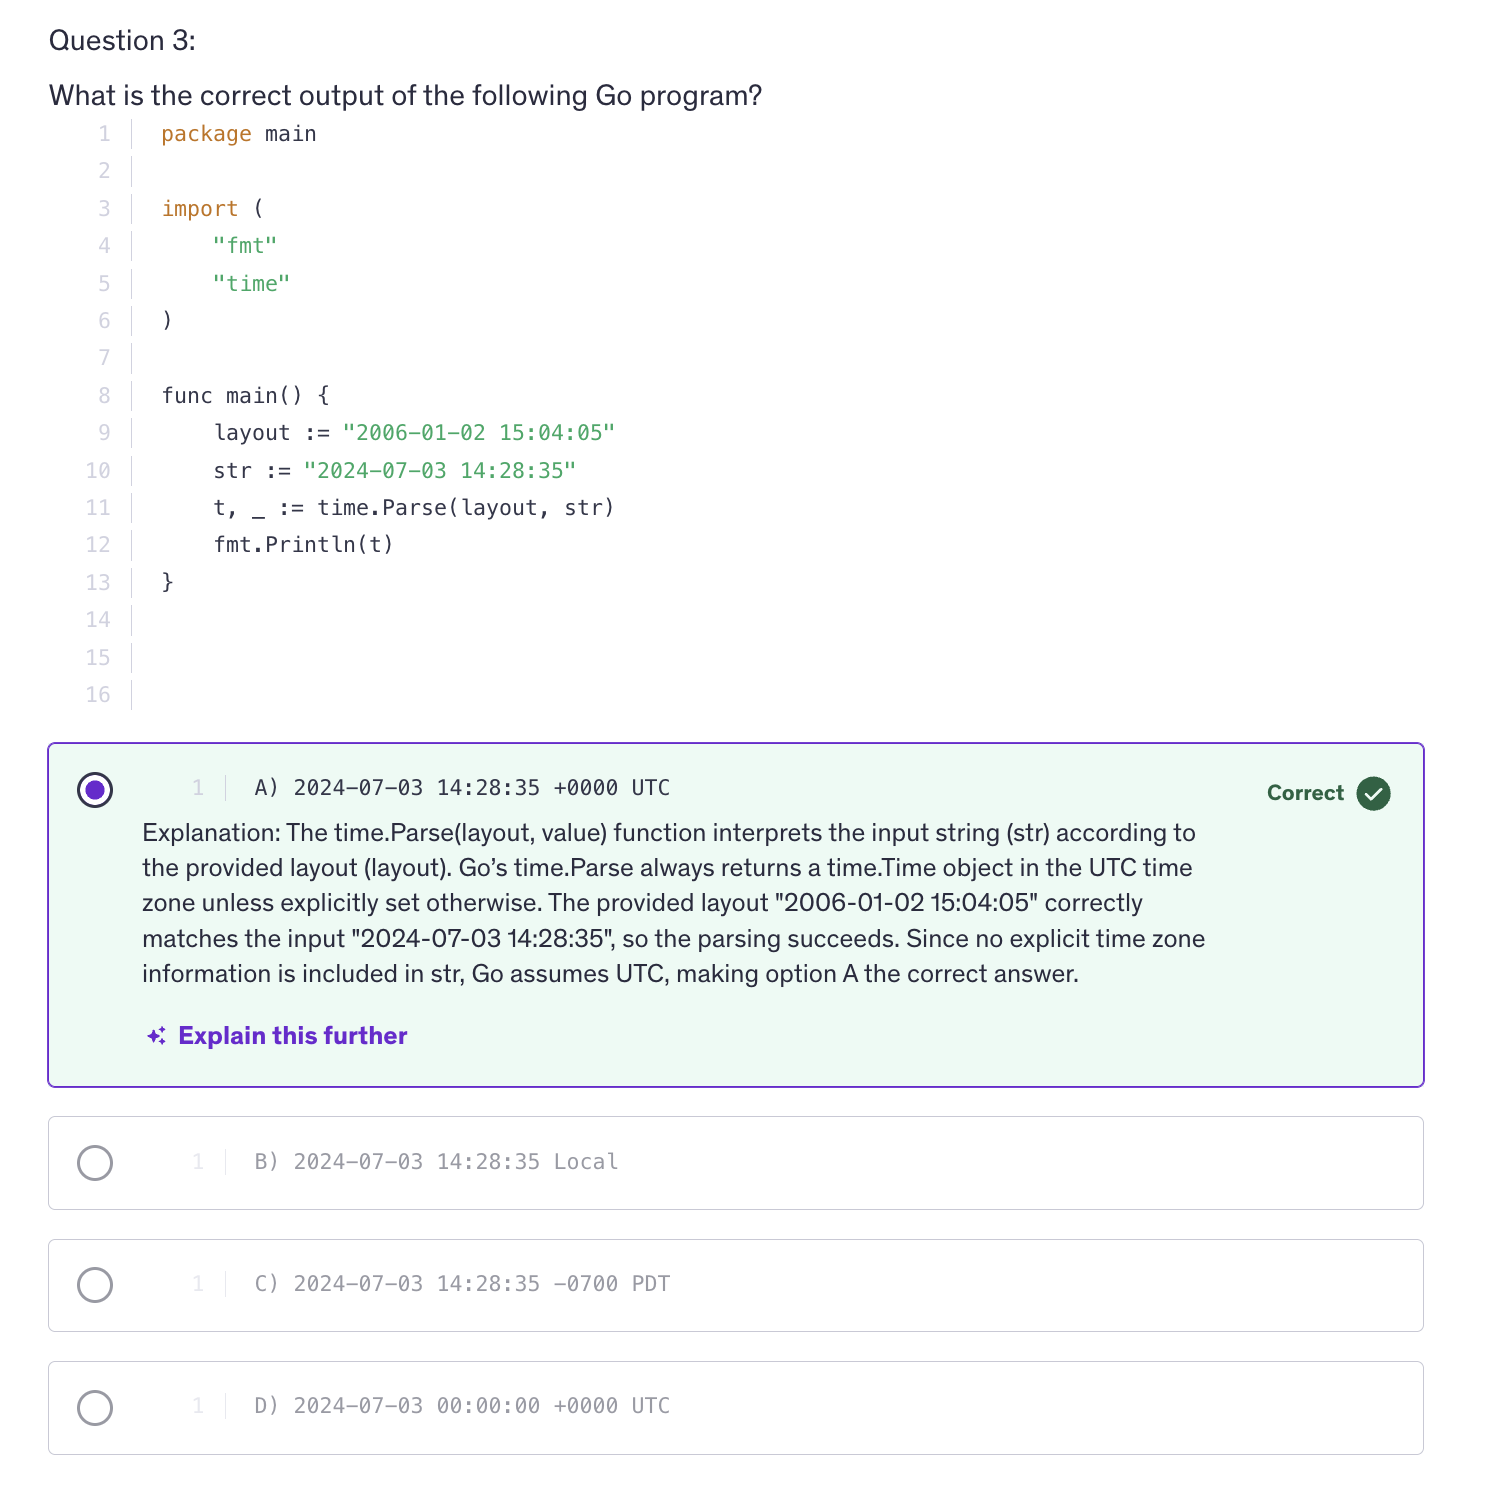
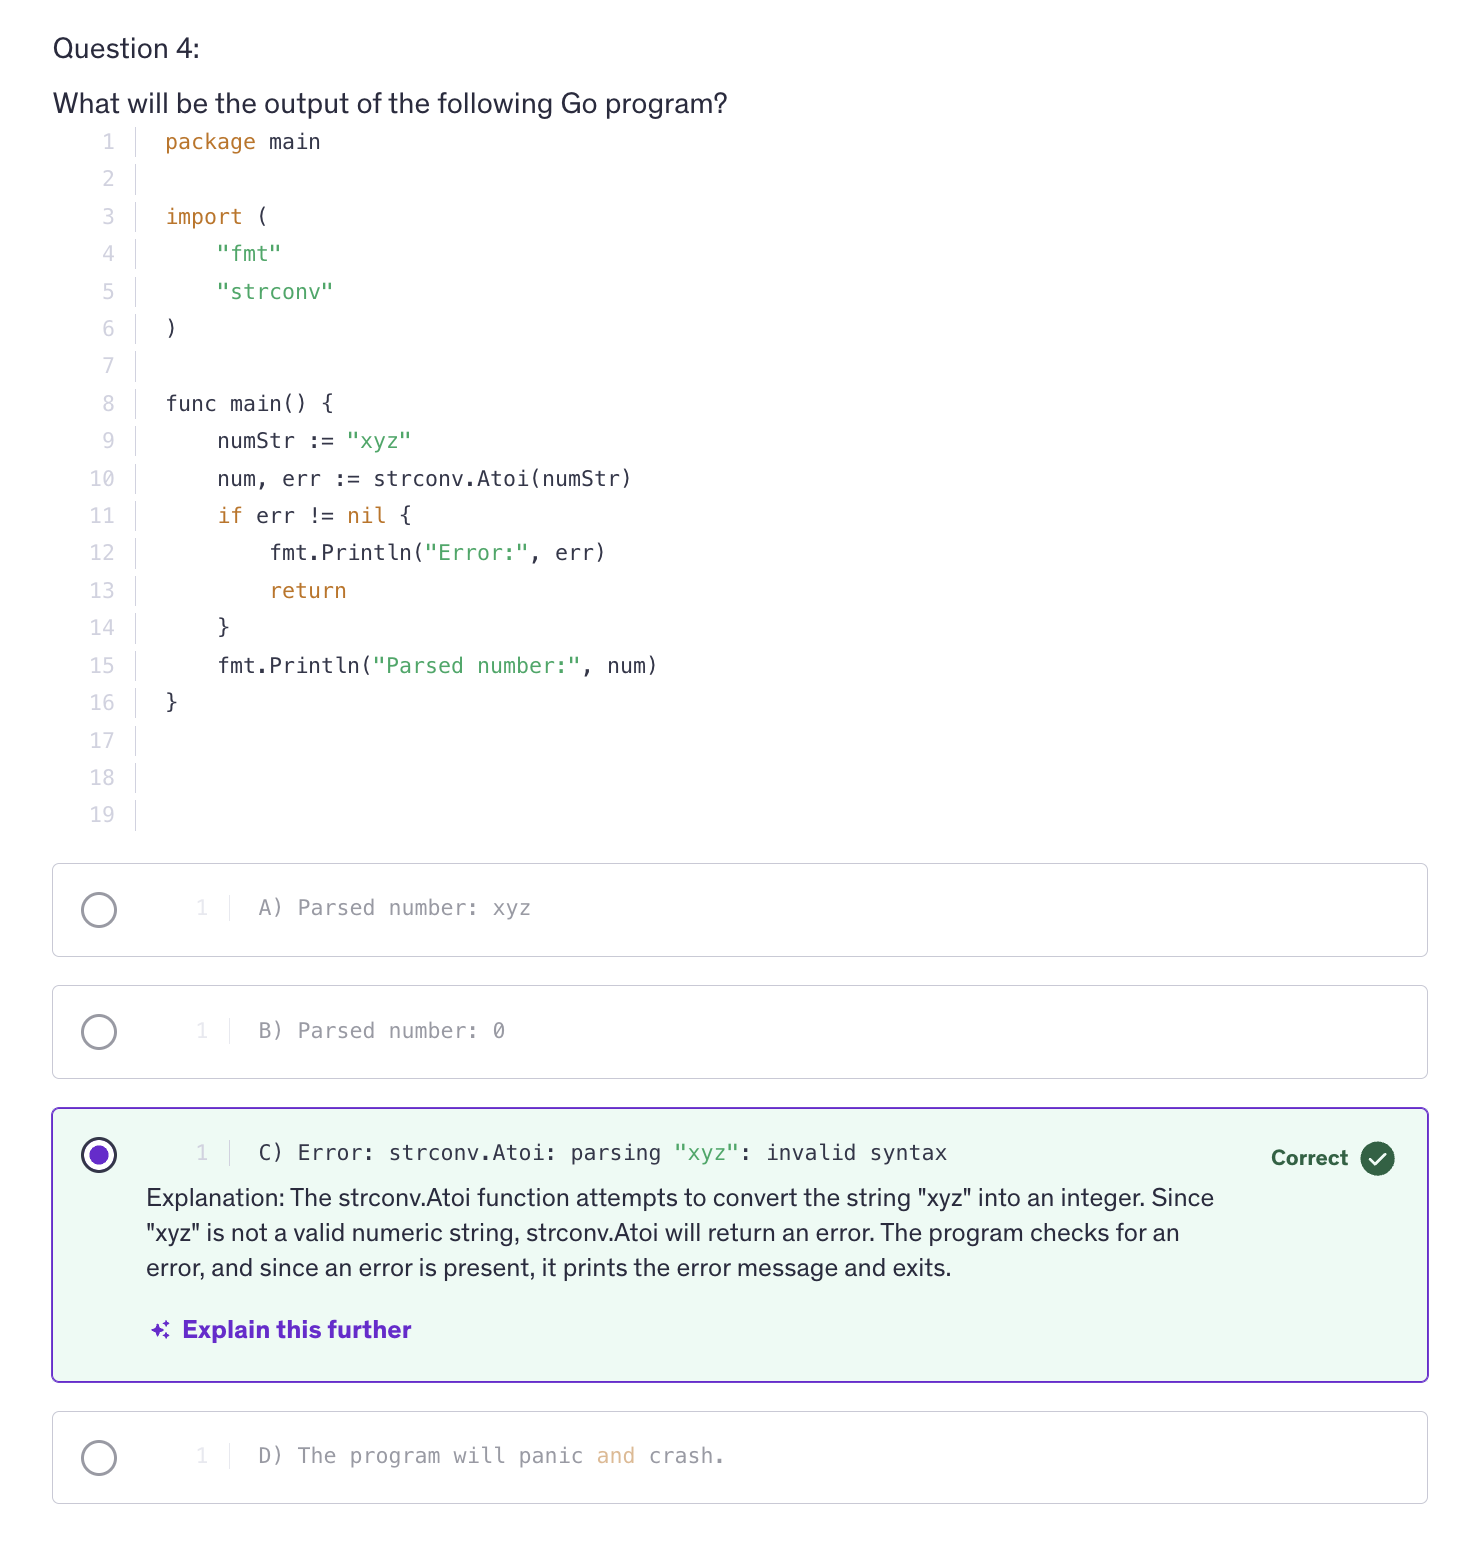
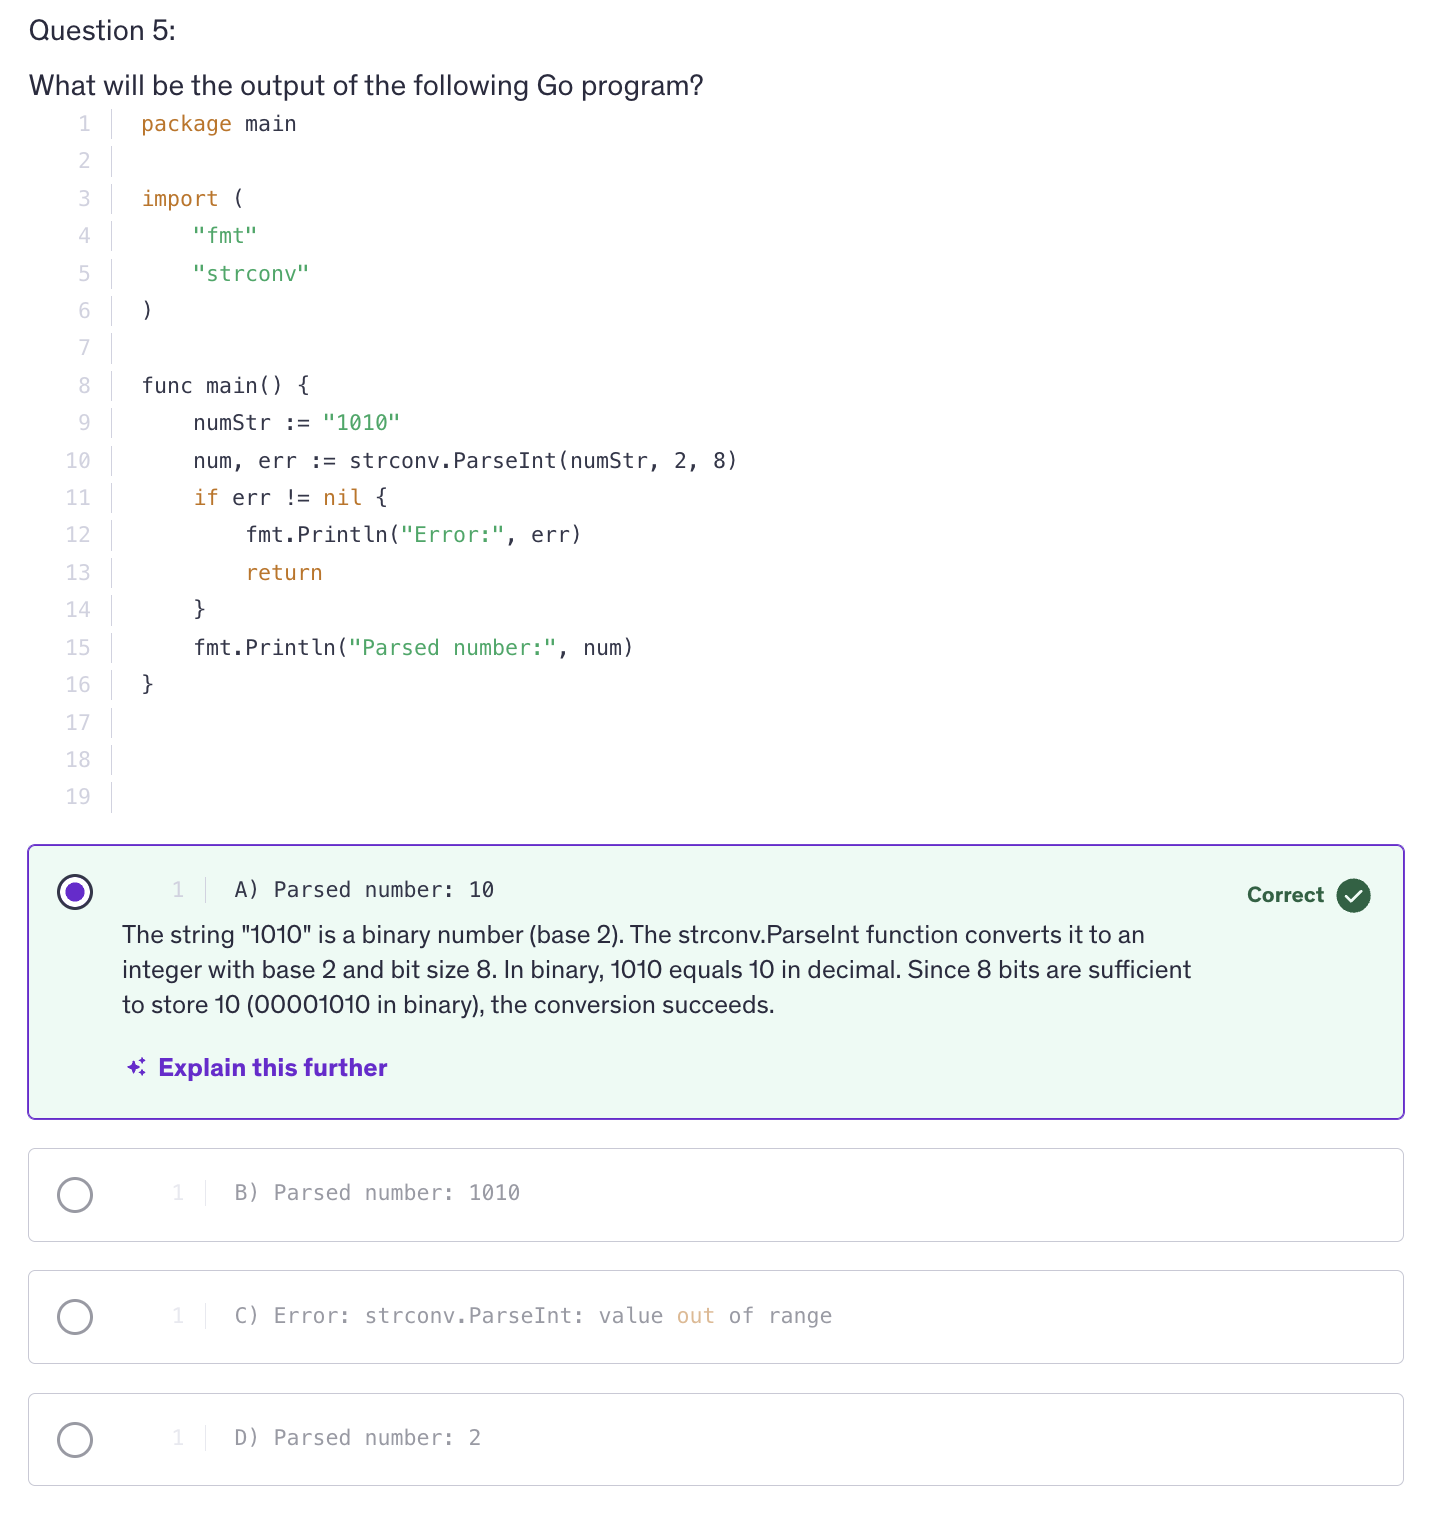
## URL Parsing
-
URL parsing in Go involves extracting various components like scheme, host path, query parameters, etc from a URL string. This is crucial for tasks like building web applications, API endpoints, or processing URLs in general.
-
A URL which is acronym for Uniform Resource Locator has the following structure :
[scheme://][userinfo@]host[:port][/path][?query][#fragment]
-
schemeis also called the protocol. The protocol can be http, https, ftp. -
userinfocontains username and password which is optional. -
Next we have
hostwhich is the domain name or the IP address. -
After that we have a
portnumber which is optional. -
After the port we have
path, path to the resource on the server. -
next to that we have
queryparameters. Query parameters are in key value pairs. -
Next we have
fragmentidentifier. These are optional and used for specifying a location withing the resource. -
Go's standard library
net/urlprovides a comprehensice package for parsing URLs and manipulating their components. -
In Programming, Parsing means we are processing some data and we are manipulating or we are extracting something out of that data. We make different methods using parse and they all do different things.
-
In conclusion,
net/urlpackage is essential for extracting and manipulating various components of URLs and understanding how to parse, build and handle URLs ensures robust handling of web related tasks in Go applications.
bufio package
-
bufiopackage in GO provides buffered input output operations which can significantly improve performance when reading or writing data, especially for large volumes of data. -
It wraps an
io.Reader()orio.Wirter()and provides buffering with additional methods for more efficient reading and writing. -
the
bufio.Reader()struct wraps an io.Reader and provides buffering for efficient reading of data. -
What does buffering actually mean ? Ans:
-
What buffering does is, it reads and writes data in chunks and we can decline these chunks according to our own will. So if we want the data to be sent to the user with five seconds or 10s of the movies, then we are sending the movie in those chunks and that is a faster way of communicating, a faster way of transfering data. So if you are sending smaller chunks they get transferred easily and there is a seamless user experience of utlizing that data, using that data.
-
It can be used in chat software or streaming platform or an audio playing platform where you play music, songs, so buffering gets used over there as well.
-
And buffering is also used in uploading as well. So when we are uploading a file, instead of uploading the complete chunk of data, it uses buffering to send the data to upload the data in chunks.
-
Buffering is transfering data, communicating between two ends in chunks. So we are transfering data between two ends utlizing small chunks of that data.
-
Key Components :
-
bufio.Reader()-
func NewReader(rd io.Reader) *Reader: creates a Reader instance and it reads from a source. -
func (r *Reader) Read(p []byte) (n int, err error): The aboveReaderinstance will execute aRead()method, that will read data from a source into a byte slice. SoRead()method will read a finite amount of data from source into a byte slice and that finite amount of data, we choose how much to limit that data, how much we want to read from the source and transfer into our target. -
func (r *Reader) ReadString(delim byte) (line string, err error): Similarly we have aReadString()method that the reader instance can use and reader instance will ReadString when we are reading a line string. When we want to read lines and we want to stop reading when we encounter a delimeter like a new line. So we can use ReadString and give it a delimeter character so that it will stop reading when it encounters that delimeter character. So we are not limiting the ReadString using the number of bytes, but we are limiting the ReadString method by using a delimeter character.
-
-
bufio.Writer():- func NewWriter(wr io.Writer) *Writer
- func (w *Writer) Write(p []byte) (n int, err error)
- fun (w *Writer) WriteString(s string) (n int, err error)
-
Sample code to read a string:
reader := bufio.NewReader(strings.NewReader("Hello World with bufio package!\n"))
-
The Reader object is an interface that allows you to read data from the string, just like you would read from a file or network connection. Imagine you have a book and that book has the content of the string above. So this the content of that book and you want to read this book.
strings.NewReader()turns that book into a special tool that allows you to read from it in a controlled way. it's a tool that lets us read a book. A book in a way here is the string that has been passed to it. -
So
bufio.NewReader()is a wrapper around the exisiting reader from the previous step. So, bufio.NewReader() creates a newReaderobject and it wraps around an existing reader. It takes an existing reader and returns aboveio.Readerobject. -
This
io.Readerobject provides additional functionality on top of basic reader like buffering the data and offering more methods to read data in various ways. -
Continuing with the book analogy, bufio.NewReader is like adding a special feature to your book reading tool. This feature allows you to read the book more efficiently and provides extra capabilities such as reading entire lines or chunks of data more easily in an efficient way.
-
So this complete line creates a new bufio.Reader object which is ready to read the string. So we now have a tool which is reader, the reader variable and it lets us read the string in a more flexible and efficient way. This tool can read byte by byte or line by line or in other ways as needed.
-
Example Reading data in bytes
reader := bufio.NewReader(strings.NewReader("Hello World! bufio package tutorial\n"))

// Reading the byte slice
data := make([]byte, 20)
n, err := reader.Read(data)
if err != nil {
    fmt.Println("error reading the string:", err)
    return
}
fmt.Printf("Read %d bytes: %s\n",n,data[:n])
-
So when we are reading data, it is reading and then transfering the data that it read into byte slice called the
data. It's not keeping the read data with itself. It needs to transfer the data. AndRead()is a method, a function to tranfer data from one point to another. So we are transfering the data from the source (string input) to a target (data). So when we read data we are either getting uploaded data from somewhere of we are transfering data to be downloaded. -
When we are reading data, we are receiving data from somewhere, so we need to store that data into something at some place.
-
Example using
ReadString()
// Reading the string with delimeters
line, err := reader.ReadString('\n')
if err != nil {
    fmt.Println("error eading the string:", err)
}
fmt.Println("Read String:", line)
-
Previously we are reading the data in bytes and we stopped. And reading when it stops and then after stopping when it again starts, it starts from the point where it left.
-
bufio.Writer()is a struct that wraps around anio.Writerobject and provides buffering for efficient writing of data. -
Similar to the reader, the syntax goes like this :
-
We initiate a new instance of writer by calling the
NewWriter()method. -
This instance of NewWriter is going to wrap around an existing writer or an output device.
-
The instance of the NewWriter is going to have methods like
Write(),WriteString()and many more. -
Write()will be limited by the number of bytes. -
WriteString()will be writing complete string to the output. -
os.Stdoutis an acceptable Writer. To confirm we can visit the os.file and see that it implements the write method with the same function definiton that theiopackage defines for awrite()method. And the io.Writer interface tells us that any struct that implements thewritemethod will be considered as the same type asio.Writer. -
Example writing a byte slice :
data := []byte("Hello, bufio package!\n")
n, err := writer.Write(data)
if err != nil {
    fmt.Println("error writing:", err)
    return
}
fmt.Printf("Wrote %d bytes\n", n)
-
but we will not see any output, that's because we haven't flushed the buffer.
-
So what happens with bufio.Writer is that all the data that is written to the writer is stored in an internal buffer and it's not immediately written to the os.Stdout or any other writer that we pass as an argument.
-
the
Write()methods writes the data into the buffer, but does not automatically flush the buffer to the underlying writer. So any writer that we pass to the above NewWriter, it will not automatically receive the data. We have to flush the buffer to the underlying writer.
err = writer.Flush()
if err != nil {
    fmt.Println("error flushing writer:", err)
    return
}
-
Difference between
Write()andWriteString(): We are using byte slice for Write() and string for WriteString(). -
And similarly, there's a difference between using io and bufio packages. bufio provides efficient buffering of data, reducing the number of system calls which can improve performance. Moreover, bufio wraps around the io.Reader and io.Writer, so errors are propagated from the underlying io.Reader and io.Writer, making it easy to handle errors consistently.
-
Use Cases and Benefits:
-
Buffering
-
Convenience Methods
-
Error Handling
Best Practices
-
Check Error
-
Wrap Reader and Writer instances for efficient buffered I/O operations
-
Don't forget to call Flush
-
Always check errors returned by buffio.Reader and bufio.Writer methods. Always do that because it can happen sometimes and with buffering, yes there might be errors occasionally. So we must be handling these errors. We cannot discard these error.
-
And it is a good idea to use bufio.Reader and bufio.Writer to wrap io.Reader and io.Writer instances for efficient buffered IO operations. So even when you are using io.Reader and io.Writer, it's a good idea to use bufio as a wrapper on them for efficient operations.
-
And when you are using bufio.Writer don't forget to call
Flush()otherwise the buffered data will not be written to the underlying io.Writer. -
In conclusion, the bufio package in Go provides essential utilities for efficient buffered input output operations. Understanding and leveraging it's capabilities can lead to significant improvements in the performance and reliability of file and network input output operations.
Base64 Coding
-
Encoding is essentially the methode used to translate data from it's orignal format into a specific format that can be used by other systems, applications or protocols. This translation allows for data to be correctly interpreted and utilized accross different environments. So, in simpler terms what encoding means is the process of converting data from one format to another so it can be stored, transmitter or processed effectively.
-
Encoding is used for data storage, different systems might use different formats for storing data. Encoding ensures that data can be correctly stored and retrieved.
-
Encoding is also important for data transmission. Data sent over networks or between different systems must often be encoded to ensure that it is transmitted correctly and can be understood by the receiving system.
-
Encoding is also important in terms of data interoperability. Encoding helps in ensuring that the data can be understood and processed by various systems or software regardless of their internal data formats.
-
Why Base64 ?
- text transmission
- storage
- urls and data urls
-
Why is Encoding Important ?
- Data storage
- Data transmission
- Data interoperability
Common examples of encoding
-
Text encoding
- ASCII
- utf8
- utf16
-
Data Encoding
- Base64 : method for encoding binary data into a text format. Commonly used in email and url encoding.
- URL encoding : converts characters into a format that can be transmitted over the internet. eg: spaces are encoded as
%20
-
File encoding
- binary encoding : data is encoded in binary format which is suitable for files such as images or executable files.
- text encoding : converts text into a specific format such as utf8 for use in text files.
-
Base64 is a binary to text encoding scheme that converts binary data into a textual representation using a set of 64 ASCII characters. It is commonly used for transmitting binary data over text based protocols such as emails or storing binary data as text in databases or files, so the encoding process of base64 involves converting binary into a textual format using a fixed set of 64 characters and these 64 characters comprise of uppercase, lowercase, digits from 0 to 9, plus sign and forward slash and optionally an equal sign as well.
-
Equal sign is used for padding at the end of the encoded data.
-
Base64 enables binary data to be stored as text in databases or files that do not support binary formats. Apart from that, Base64 encoding is used in URLs, especially url safe variants and in data urls for embedding small resources directly into HTML or CSS.
-
Apart from that Base64 is used for text transmission as well, which allows binary data to be transmitted as text, which is useful for protocols that only support text data and in Go language, we use Base64 by utilizing the encoding base64 package.
-
Usually URLs may require special handling due to characters like forward slash and plus symbol being used in standard base64 encoding. So how do we make an encoded value URL safe ? So when we are trying to generate a URL safe encoding we are trying to avoid the forward slash and plus sign.
-
So base64 encoding is useful in embedding small images or files directly into html or css using data urls. And similarly, we can also store binary data in text based formats such as JSON, XML and while using base64 encoding there are some security considerations that we need to be careful about.
-
Use Cases:
- Binary Data transfer
- Data Storage
- Embedding Resources
-
Security Considerations
- It is not Encryption
- Proper handling of padding
- Use appropriate variants.
-
Base64 encoding is a reversible encoding scheme and we need to ensure proper handling of padding. We should use appropriate variants of encoding. If we need standard encoding and we are okay with the special symbols, then we should use the standard encoding. Otherwise if we want an encoding that is URL safe, then we use URL encoding and it is based on the context that is standard versus URL safe.
SHA256 / 512 Hashes / Hashing / Cryptography
Hashing
-
Hashing is a process used in computing to transform data into a fixed size string of characters, which typically appears random, and this transformation is done using a special algorithm called a hash function.
-
Key Components
- Deterministic
- Fast Computation
- Pre-Image Resistance
- Collision Resistance
- SHA-256
- SHA-512
- Salting
Best Practices - Use of Standard Libraries - Algorithm Updates
-
Hashing results in a unique output. So that means even a small change in the input will produce a completely different hash. This property is known as the
avanlanche effect. -
Salting adds an extra layer of security by combining the password with a unique random value so that it can be random, or you can store a string as a salt and use that with every password that you are hashing. The practice of salting helps you protect against dictionary attacks and rainbow table attacks. So, salt is a value added to the password before hashing and it's purpose is that it ensures that even if two users have the same password, their hashed values will be different due to different salts.
-
So what happens is we are going to generate a random byte slice and then we are going to store that in our database with the user information in the salt column and in the password hash column we are going to store the hashed password. Now that hashed password has been hashed using the password as well as the salt string.
-
io.ReadFull()is a function from io package and it will read exactly the length of the byte slice from the give reader into the salt slice.
salt := make([]byte, 16)
_, err := io.ReadFull(rand.Reader, salt)
if err != nil {
    return nil, error
}
return salt, err
-
rand.Reader()-> generates cryptographically secure random numbers. -
So, its going to read the cryptographic random numbers equal to the length of salt slice which is 16.
-
Cryptographically secure random numbers are different from the general random numbers because these numbers are generated in a way that makes them unpredictable and resistant to reverse engineering. General random numbers however are predictable if enough information about the internal state is known. For example, a common pseudo random number generator might have patterns or weaknesses that make it less secure. However in case of cryptographically secure random numbers, the algorithms used to generate these ensures that even if part of the data is known, predicting the rest is computationally infeasible.
Writing Files
-
Writing to files involves creating or opening a file, writing data to it and handling any errors that may occur during these operations.
-
We have
ospackages that provide convenient methods for handling file operations. -
The os package in Go provides functions for operating system functionality including file operations. We have functions like create that will create or truncate a file with the given name and returns a file descriptor or the created file.
-
OpenFile method -> opens a file with the specified name, flags and permissions and it's also going to return a descriptor.
-
Write() -> method of file struct os.FileStruct().
-
Key Components :
-
ospackage functions :- Create(name string) (*File, error)
- OpenFile(name string, flag int, perm FileMode) (*File, error)
- Write(b []byte) (n int, err error)
- WriteString (s string) (n int, err error)
Best Practices - Error Handling - Deferred Closing - Permissions - Buffering
- We can use
deferfor cleanup actions and closing a file, closing a database, closing connections are cleanup actions.
Best practices: - error handling - deferred closing - permissions - buffering
Reading Files
-
Reading Files is a common operation in programming for tasks such as configuration loading, data parsing, or processing large datasets.
-
ospackage is useed for file operations including files. -
to create a scanner to read the file line by line use the
bufiopackage. -
ALong with the newline character we also have the EOF character. There's no way to go after the EOF.
-
Scanner reads from a file and if we want to read a file line by line we use scanner.Scan(). It loops over tokens and those tokens are lines. It keeps on overwritting the text with the new line that it scans and we are saving th output of scanner.Text() into a line variable and we print that afterwards.
-
EOF is signified by absence of data. So if there's no more data, that means that's the end of file.
-
make sure that you always check errors returned by file operations like os.Open, file.Read, scanner.Error.
-
Reading files in Go involves opening a file, reading it's content using methods such as reading byte slices or lines and handling errors effectively. Go's
osandbufiopackages provide efficient and straightforward APIs for file input output operations, making it easy to work with file data in various applications.
Line Filters
-
Line filtering refers to the process of processing or modifying lines of text based on specific criteria. It involves reading text line by line and applying certain operations or conditions to each line. This is a common task in text processing, data cleaning and file manipulation.
-
Some examples of line filtering are filtering lines based on content that means we only print lines that contain a specific keyword. Another example is removing empty lines, so we can exclude blank or empty lines from the output. We can also tranform the line content. We can convert all text in lines to uppercase or lowercase and we can also apply filters lines by any criteria.
-
Sombest practices
-
Use buffered input output for efficient reading of input especially when dealing with large volumes of data.
Best Practices - Efficiency - Error Handling - Input Sources - Flexibility
- Practical Applications
- Data Transformation
- Text Processing
- Data Analysis
File Paths
-
Absolute path specifies the complete path from the root directory.
-
Relative path specifies the path relative to the current working directory.
-
Go provides
path/filepathpackage for working with File Paths which handles platform specific path issues and provides utilities for path manipulation. -
Some useful functions:
- filepath.Join() -> contructs a path by joining individual components with the appropriate seperator.
- filepath.Split() -> splits the path into directory and file name components.
- filepath.Clean() -> normalizes a path, cleaning up redundant separators and resolving dot and double references.
- filepath.Abs() -> returns the absolute path of a given relative path.
- filepath.Base() -> retrieves the last element of the path which is the file or maybe a directory name.
- filepath.Dir() -> retrieves the directory part of the path.
-
we can use
ospackage to make directories. -
filepath offers us platform independence. So when we use filepath package functions it ensures portability accross different operating systems.
-
When it comes to filepath or url paths, always validate and sanitize user provided file paths to avoid security vulnerabilities such as directory traversal attacks and we sanitize our user input by trimming unwanted symbols or unwanted characters from that user input.
Best Practices - Platform Independence - Handling Errors - Security
-
Practical Applications
- File I/O operations
- Directory Navigation
- Path Normalization
-
In conclusion, file paths in Go provide a standardized way to reference files and directories accross various operating systems.
Directories
-
Directories or folders are containers used to organize files on computer's file system. In software development, understanding how to work with directories programmatically is essential for tasks such as creating, reading, navigating and deleting directories.
-
In Go, the
ospackage provides functions for interacting with directories and performing file system operations. -
Key Concepts:
-
os.Mkdir -
os.MkdirAll -
os.ReadDir -
os.Chdir -
os.Remove -
os.RemoveAll -
second argument of os.Mkdir is permission and permissions are of type os.FileMode so they are in a numerical format. In Linux, the numerical format of a file that I own is 0755.
-
WalkDir is often preferred for performance reasons as compared to Walk() because WalkDir avoids some internal allocations by working directly with directory entities. WalkDir uses os.DirEntries under the hood which is more efficient while filepath.Walk() uses os.FileInfo which provides more details but may be less efficient.
Best Practices - Error Handling - Permissions - Cross Platform Compatibility
- Practical Algorithms
- Organizing files
- File System Navigation
- Batch Processing
- We use these directory operations in many practical applications like organizing files, creating and managing structures file systems and also for the file system navigation meaning navigating to directories to access specific files or directories and also for batch processing, like performing operations on multiple files withing directories.
Temporary Files and Directories
-
Temporary files and directories are essentials in many programming scenarios where temporary storage is needed for data processing, caching or other transient operations.
-
Go provides mechanisms to create, manage and cleanup temporary files and directories efficiently.
-
Why Use Temporary files and directories ?
-
Temporary Storage
-
Isolation
-
Automatic Cleanup
-
Default Values and Usage.
Best Practices
-
Security
-
Naming
-
Practical Applications
-
File processing
-
Testing
-
Caching
-
Considerations
-
Platform Differences
-
Concurrency
Embed Directive
-
Embed Directive is a feature introduced in Go 1.16 to embed static files or directories into GO binaries at build time. This directive provide a convenient and efficient way to include assets directly withing your Go programs eliminating the need to manage these assets separately.
-
The reason we use embed directive is for simplicity. Embedding files simplifies deployment as it reduces the number od separate files to manage. And also for efficicieny. Embedding files into binaries makes distribution and execution straightforwards without worrying about file paths or external dependencies because all our dependencies, all our assets, all the extra files that we needed are combined into our executable.
-
Embedded files are bundled within the binary, reducing exposure to external manipulation or unauthorized access.
-
The embed directive support files, the individual files that we have and their directories. Entire directories and their contents can be embedded recursively. And that means that we can embed almost anything into our executables.
-
To embed a directory, it's a little different in Go, we have to use special comments. Go Embed directive should be before a var declaration.
import  _ "embed"

//go:embed example.txt
var content string
-
We are importing
embedpackage only for the sole purpose of using it's side effects. The underscore before the embed tells the compiler that it's okay, we are using the embed package for it's side effects and we are not importing it to use any of it's assosciated functions, any of it's exported names. Technically this is called ablank import. A lank import prevents the compiler from complaining about an unused import. -
When we are embedding a folder, we need to specify the type of the variable that succeeds the embed directory of the folder as
embed.FS. -
embed offers us a read only file system and that's why we can use our
embed.FSin place offs.FS. One advantage of usingfspackage is that, it is cross platform compatible. -
The embed directive finds it's use in web-servers for embedding static html, css and javascript files for serving web content and also in configuration files. Embedding configuration files or templates directly into CLI tools or services.
-
Supported Types:
-
Files
-
Directories
-
Use Cases:
-
Web Servers
-
Configuration files
-
Testing
-
Considerations
-
File Size
-
Update Strategy
-
Compatibility
-
Embedded files cannot be modified at runtime and we may need to rebuild the binary for any updates.
Intermediate Quiz 3
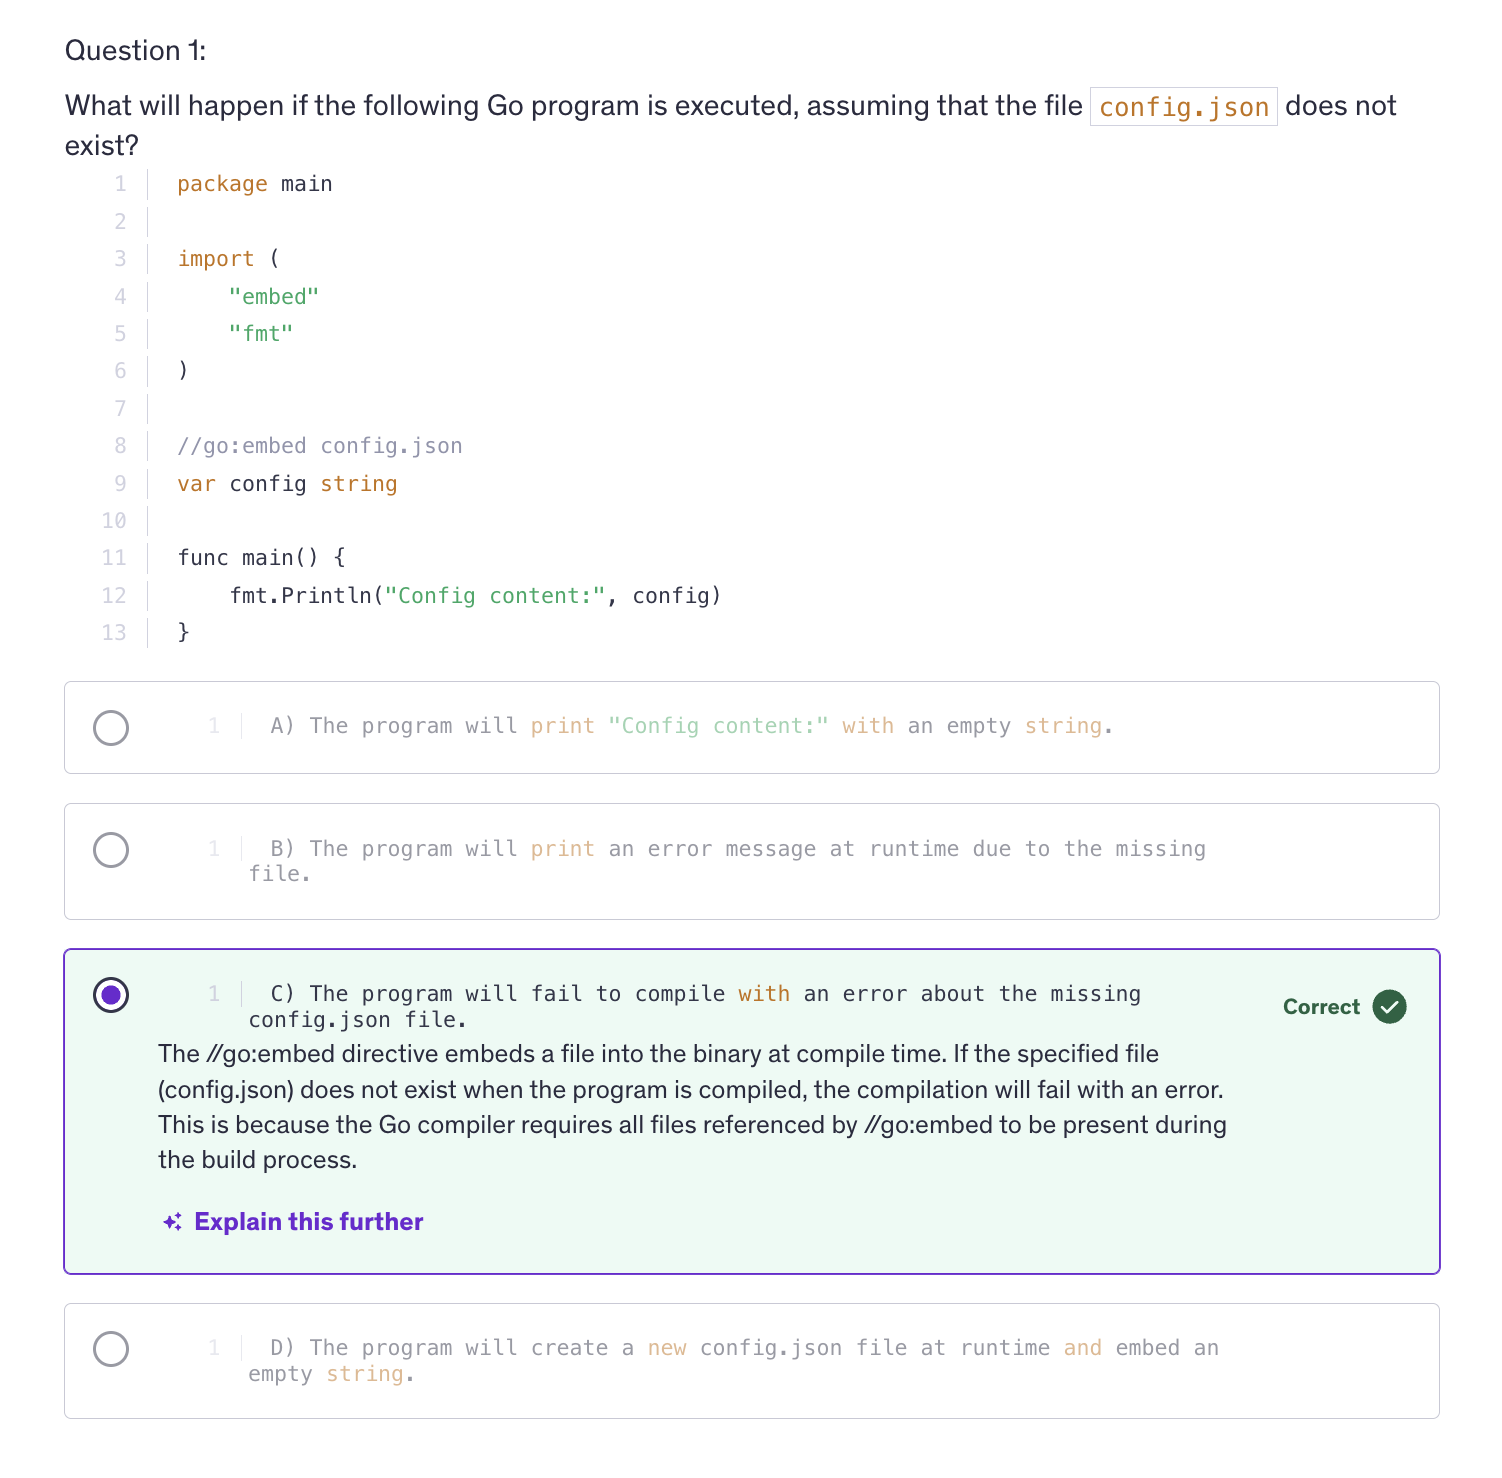
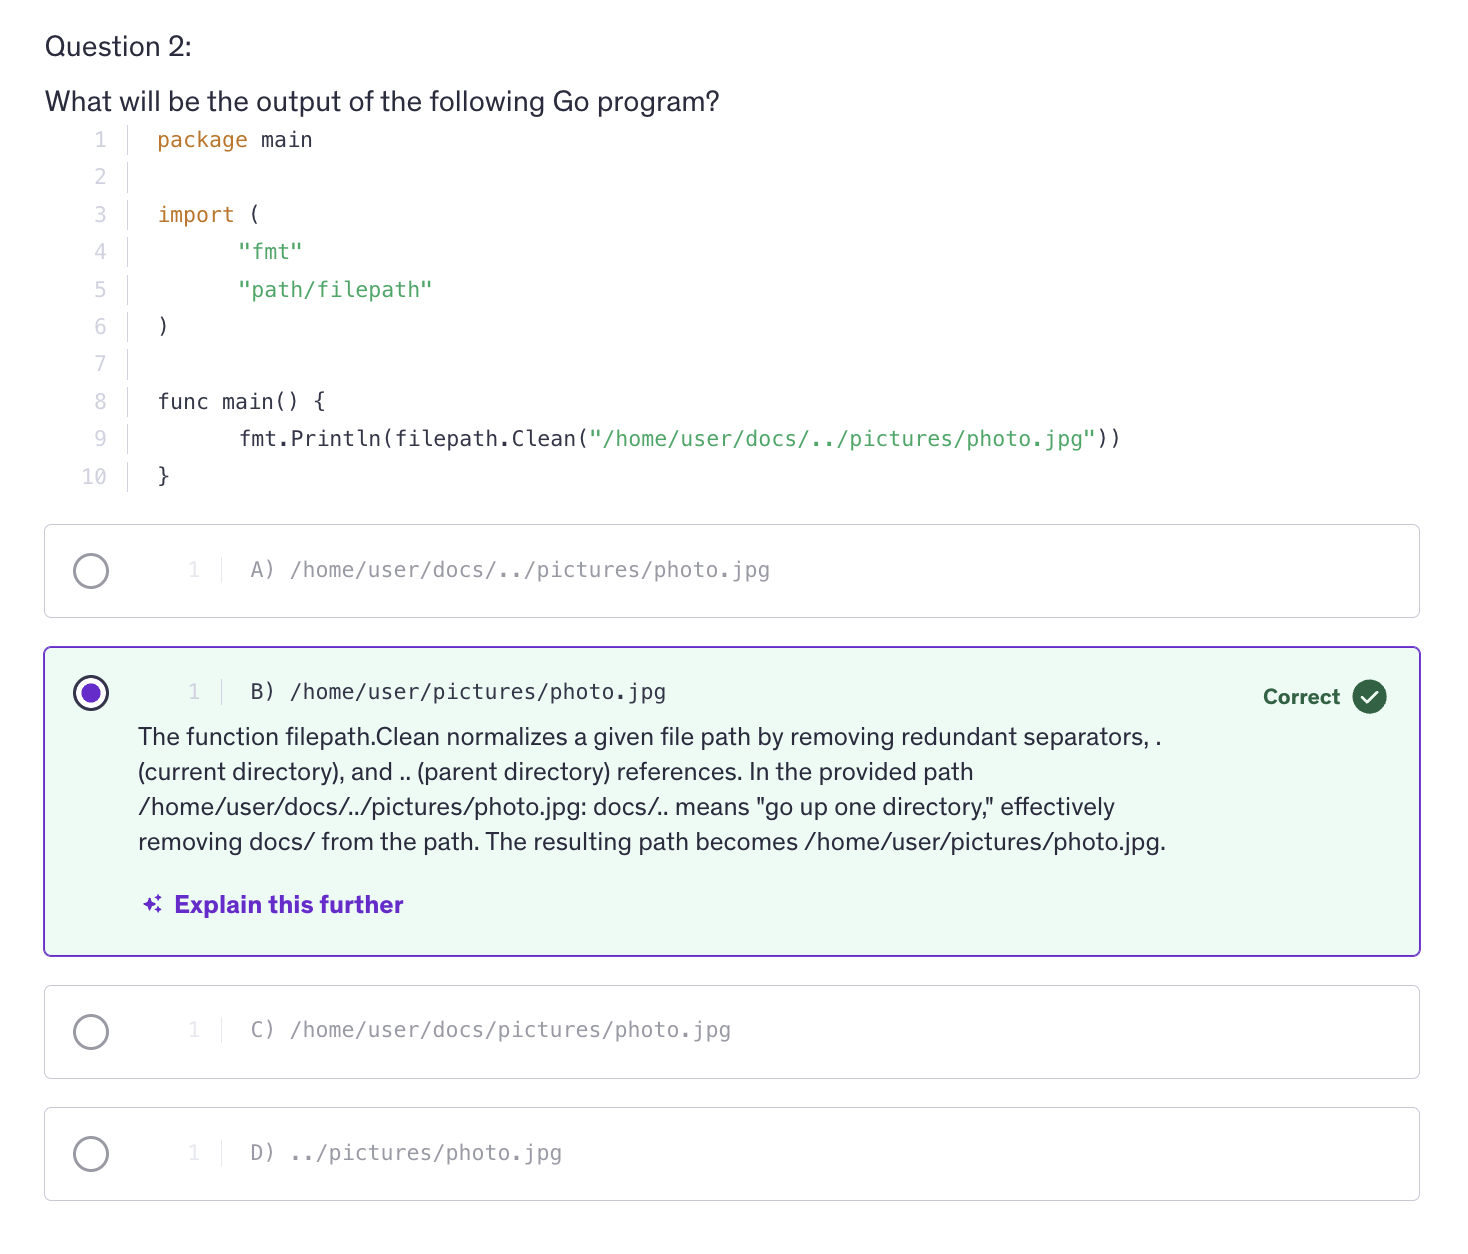
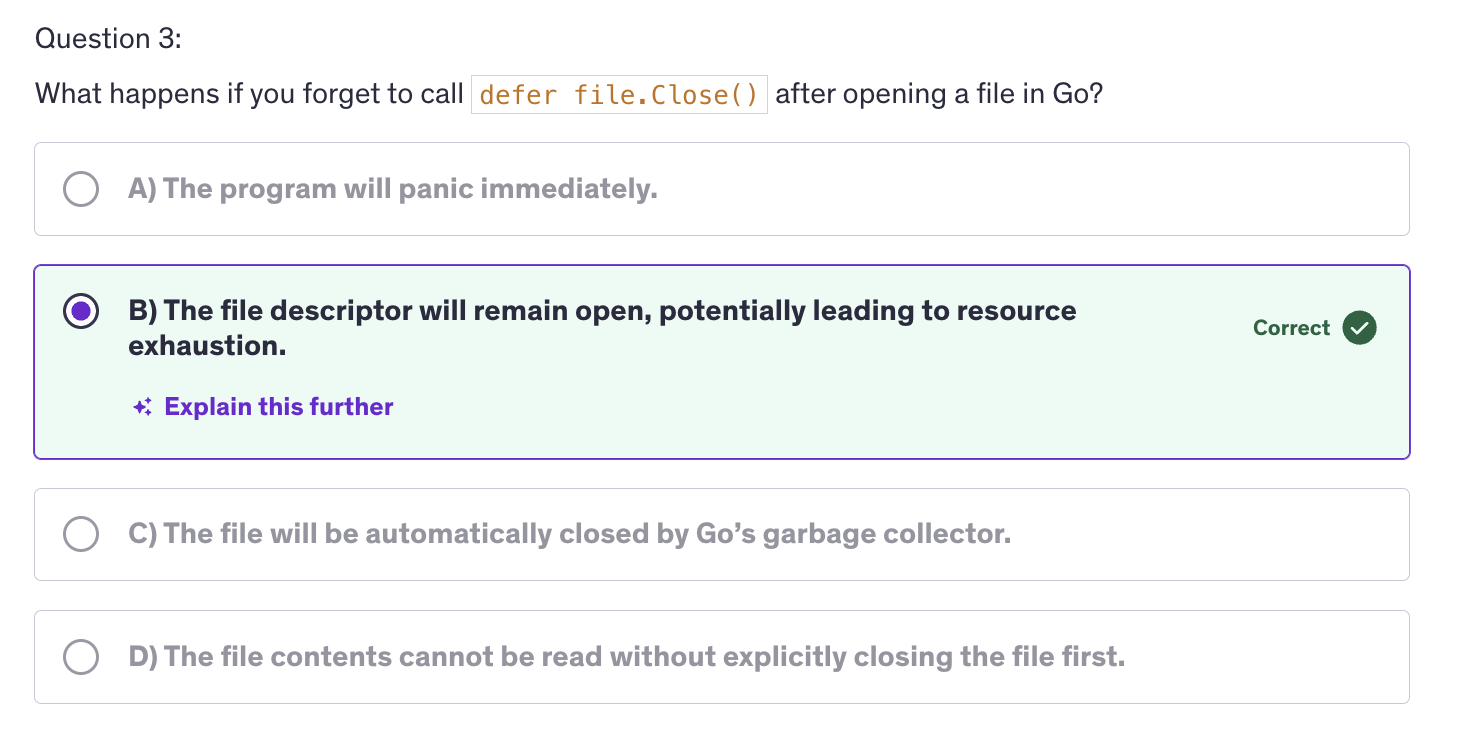
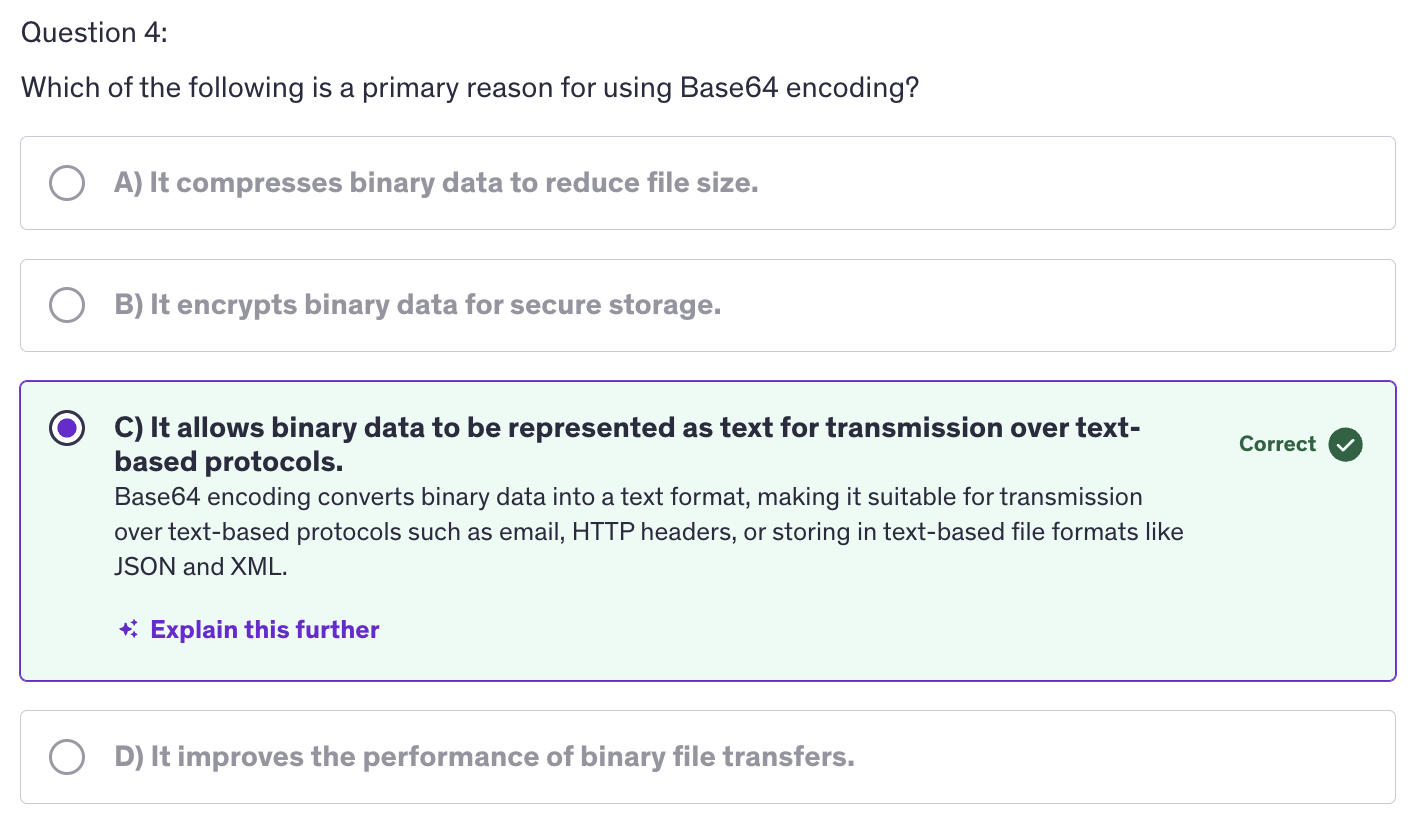
Command Line Arguments / Flags
-
Command Line arguments are a common way to pass parameters to a program when it is executed from a terminal or command prompt.
-
In Go, handling command line arguments is straightforward, leveraging the OS package for accessing arguments and flags. In Go, the command line arguments are accessible via the
os.Argsslice, whereos.Args[0]is the name of the command or the name of the program itself. After zero we have 1, 2, 3. So the subsequent numvers will contain the actual arguments passed to the program. -
While
os.Argsprovides raw access to command line arguments, more complex argument parsing can be achieved using packages likeflagor manually processingos.Args. -
The flag package provides a convenient way to define and parse command line flags in Go program. Flags are parameters preceded by a hyphen, a single hyphen or a double hyphen that modify the behaviour of the program.
-
use
equal tosign(=) for entering values for the subcommand. -
--helpwill only list the commands and not the subcommands. This is the default nature of --help. -
Key Concepts:
-
os.Argsslice -
Parsing Arguments
-
flagpackage -
Default Values and Usage
-
Considerations
-
Order of Arguments
-
Flag Reuse
-
Order of Flags
-
Default Values
-
Help Output
Best Practices
-
Clear Documentation
-
Consistent Naming
-
Validation
-
Whenever we are accepting user input, always anitize the user input before using it in your program.
Command Line Sub Commands
Environment Variables
-
Environment vairables are key value pairs that are part of the environment in which a process runs. They provide a convenient way to pass configuration information, credentials and other runtime parameters to applications without hard coding those values into the application itself.
-
In Go, environment variables are accessed through the
ospackage.
Best Practices
-
Security
-
Consistency : Use All Caps for configuring the key for any environment variable.
-
Documentation
-
Considerations
-
Cross Platform Compatibility
-
Default Values
-
Overall environment variables in Go provide a flexible and secure way to configure applications without hardcoding sensitive information.
Logging
-
Logging is a critical aspect of software development and operations as it allows developers and system administrators to monitor and debug applications.
-
In Go, logging is straightforward and the standard library provides robust support through the log package. The standard log package doesn't have built in support for logging levels like debug, info, warn, error. However, we can create custom logging functions to handle different levels.
-
JSON is a widely used format for data interchange, making it easy to integrate with other systems and services that expect log data in JSON format.
-
JSONFormatter improves readability for developers and operators who prefer structured data. JSON logs can be more readable and easier to understand than plain text logs, especially when logs contain complex data.
-
Adding context to logs can be very useful for tracking the flow of requests and debugging.
Best Practices
-
Always use Log Levels
-
Structured Logging
-
Contextual Information
-
Implement Log Rotation : to manage log file sizes and prevent disk space issues.
-
External Services
-
Log Rotation is a technique used to manage the size of log files by periodically rotating them out and starting new ones. This helps prevent log files from growing indefinitely and consuming all available disk space. Implementing log rotation ensures that old log data is archived, deleted or compressed making it easier to manage logs and maintain system performance.
JSON
-
JSON which stands for Javascript Object Notation, is a lightweight data interchange format that is easy for humans to read and write, and easy for machines to parse and generate. It is commonly used for transmitting data in web applications.
-
In Go, the
encoding/jsonpackage provides functions to encode which is called Marshall and decode, which is unmarshal json data. -
json.Marshal()-> convert Go data structures into JSON (encoding) -
json.Unmarshal()-> convert JSON into Go data structures (decoding) -
Backticks in structs are primarily used for struct field tags which provide metadata about the fields. These tags are especially useful when you need to convert a struct to JSON or interact with databases.
-
In Go structs, each field has a tag specifying the JSON key to use when the struct is marshalled to JSON. So what we are doing is we are mentioning the field that needs to be there when this struct is changed into a JSON.
-
Struct tags can be used for tags that can specify column names or primary keys, etc., when using database ORM (Object Relation Management). Tags can also provide validation rules for example in making APIs. We can use
dbinsteadjsontags when working with databases and in that case the tags will represent the column names in the database. -
Similar to structs, JSON objects can also be nested inside each other.
-
encoding/jsonpackage handles the encoding and decoding of arrays and slices as well.
Best Practices
- Use JSON Tags
- Mapping Struct Fields to JSON keys
- Omitting Fields - if empty (
omitkey) or always (-) - Renaming Fields
- Controlling JSON encoding / decoding behaviour.
- Validate JSON
- Use
omitempty - Handle Error
- Custom Marshalling / Unmarshalling
Struct Tags
-
Struct tags play a crucial role in controlling how data is encoded and decoded in Go, especially when working with JSON. They allow us to specify details about how struct fields should be represented in JSON, providing more flexibility and control.
-
Struct tags can be used to map struct field names to specific JSON keys, which might not match the Go field names, and this is useful when working with APIs pr data sources where the JSON keys hace different naming conventions.
-
Struct tags can also indicate that certain fields should be omitted from the JSON output either when they have zero values, or always omitting zero values, we use
omitemptyand for always omitting that field we use-. -
We can also rename struct fields in the JSON output using struct tags. This is useful for ensuring the JSON output meets specific schema requirements, and schema is very important when we are storing data into a database or accessing data from a database.
-
Struct tags allow you to control the behavior of the encoding JSON package, such as specifying is a field should be ignored or how it should be serialized.
-
Having no value is equivalent to having zero value of that type. And having zero value is equivalent to having no value.
-
Struct tags in Go provide a powerful way to control how JSON data is encoded and decoded. They allow you to map struct fields to specific JSON keys and they also allow you to omit fields with zero values or omit fields entirely.
-
By using struct tags effectively we can ensure that our Go applications produce and consume JSON data that meets our requirements and integrates smoothly with external systems and APIs.
XML
- XML stands for extensible markup lanaguage, is a markup language used for encoding documents in a format that is both human readable and machine readable. It is widely used for data interchange between systems and for configuration files.
Best Practices
- Use XML Tags
- Validate XML
- Handle Nested Structures
- Handle Errors
- Custom Mashalling/Unmarshalling
- Real World Scenarios
- Web Services and APIs
- Spring Framework
- Microsoft .NET Applications
- Data Interchange and Storage
- RSS and Atom Feeds
- Electronic Data Interchange(EDI)
- Industry Standards
- Health Care (HL7)
- Finance (FIXML)
Go Extension
Type Conversions
- Type conversion is a fundamental concept that allows you to convert a value of one type into another. This is especially usefull when you need to ensure that values are in the correct format for various operations or functions.
IO Package
-
Why is the io package important ?
-
It facilitates interaction with various data sources (files, networks, in-memory buffers).
-
Provides a consistent interface for handling I/O operations.
-
Core Interfaces:
-
io.Reader
-
io.Writer
-
io.Closer
-
Common types and functions
-
io.Reader
-
io.Writer
-
io.Copy()
-
io.MultiReader()
-
io.Pipe()
-
Working with Buffers
-
bytes.Buffer
-
bufio.Package
-
io.Pipe()creates a pipe with a connected io.Reader and io.Writer. So essentially what it does is, it returns us two values. One value will be a reader and another value will be writer. It's not a common value of Reader and Writer, there are two different return values from io.Pipe and we can use these return values, the Reader and the Writer to read and write data. And these are both connected. -
Go routines are essentially any immediate function (Immediate functions are the functions that are executed immediately once they are defined). If we add
gokeyword before a function, it becomes go routine. And Go routines are functions that are immediately executed and they are anonymous. -
The
gokeyword -> It extracts this function out of the main thread and the execution will fall on to the next line. And this function, once it is completed, then it will come back to the main thread. -
A pipe is a way to connect two pieces of code so that data can flow from one to the other. It's like a tunnel through which information travels. In Go the io.Pipe() creates a pipe with two ends. The Reader end is the end from which data will be read and Writer is the end to which data will be written. Reading will be don from the reading end of the pipe.
-
io vs bufio :
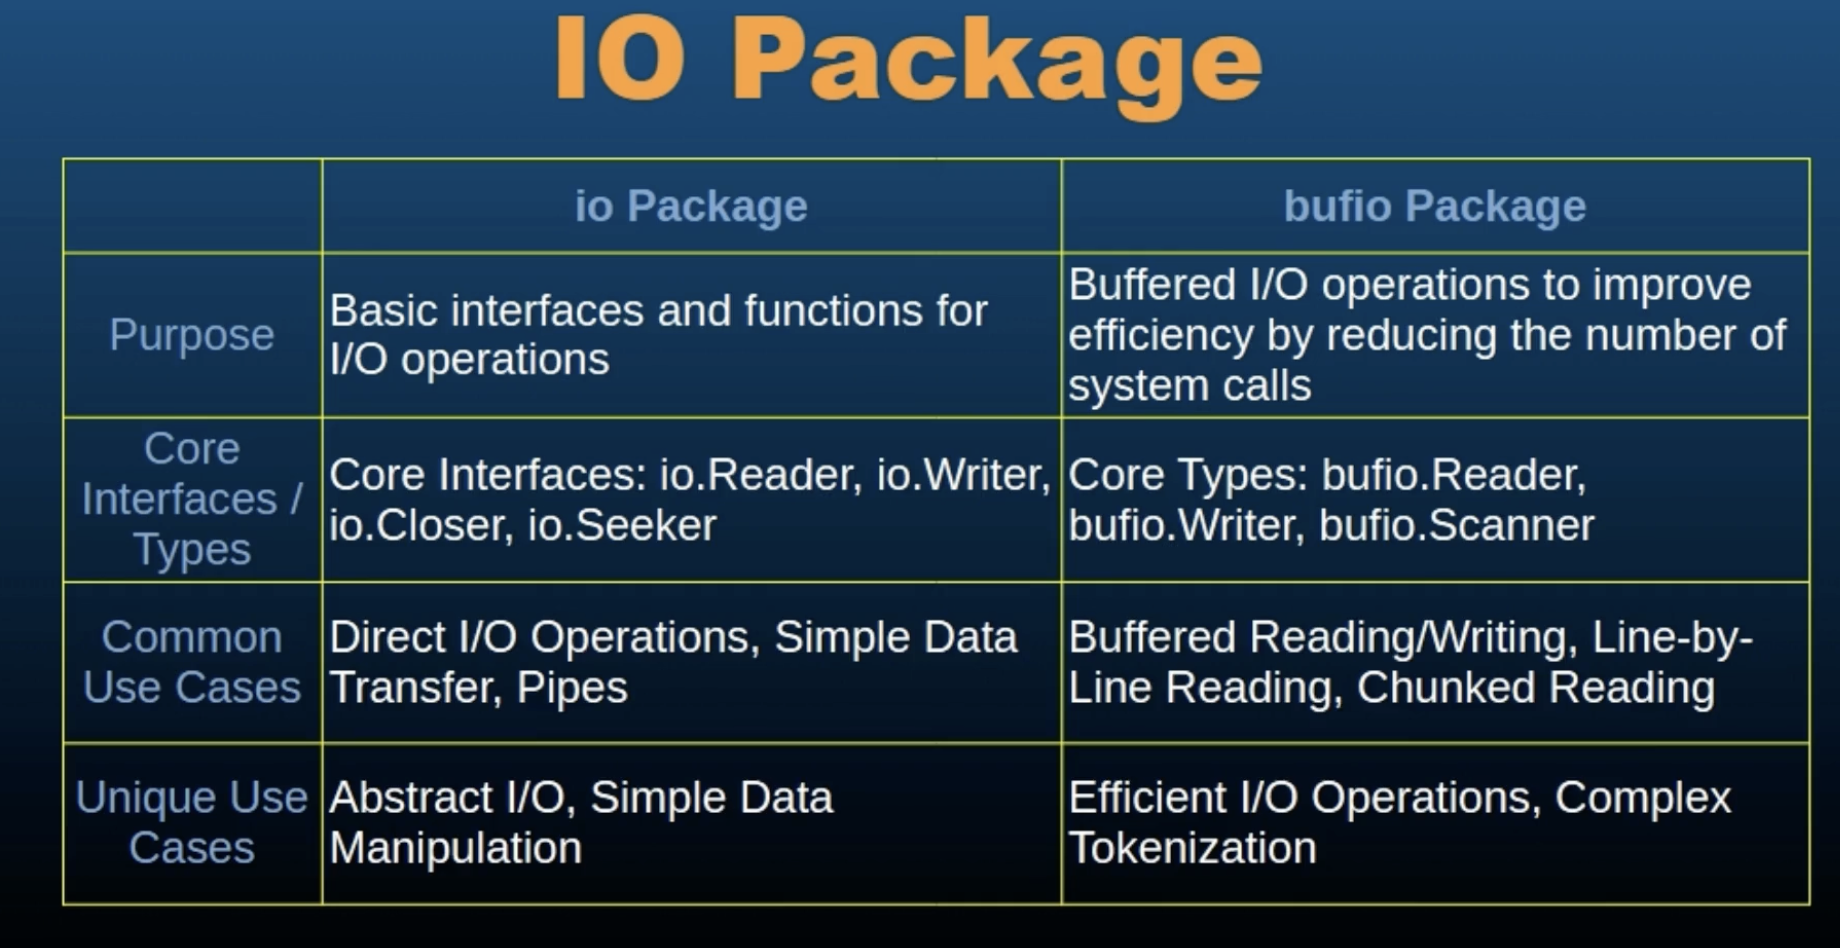
Math Package
-
math package in Go provides basic constants and mathematical functions for common tasks such as computing square roots, trignometric functions, logarithms and more.
-
This package is essential for many applications, ranging from simple arithmetic operations to complex scientific computation.
-
Constants:
    p := math.Pi

e := math.E

ph := math.Phi

sqrt2 := math.Sqrt2

sqrtE := math.SqrtE

sqrtPi := math.SqrtPi

sqrtPhi := math.SqrtPhi

ln2 := math.Ln2

ln10 := math.Ln10

log2E := math.Log2E

log10E := math.Log10E
-
Basic Mathematical Functions
-
Absolute Value func Abs(x float64) float64 fmt.Println(math.Abs(-3.14)) // Output: 3.14
-
Square Root func Sqrt(x float64) float64 fmt.Println(math.Sqrt(16)) // Output: 4
-
Power func Pow(x, y float64) float64 fmt.Println(math.Pow(2, 3)) // Output: 8
-
Exponential func Exp(x float64) float64 fmt.Println(math.Exp(1)) // Output: 2.718281828459045
-
Logarithms func Log(x float64) float64 // Natural logarithm func Log10(x float64) float64 // Base-10 logarithm fmt.Println(math.Log(math.E)) // Output: 1 fmt.Println(math.Log10(100)) // Output: 2
-
Trigonometric Functions
func Sin(x float64) float64 func Cos(x float64) float64 func Tan(x float64) float64 fmt.Println(math.Sin(math.Pi / 2)) // Output: 1 fmt.Println(math.Cos(math.Pi)) // Output: -1 fmt.Println(math.Tan(math.Pi / 4)) // Output: 1
-
Inverse Trigonometric Functions func Asin(x float64) float64 func Acos(x float64) float64 func Atan(x float64) float64 func Atan2(y, x float64) float64 fmt.Println(math.Asin(1)) // Output: 1. 5707963267948966 fmt.Println(math.Acos(0)) // Output: 1.5707963267948966 fmt.Println(math.Atan(1)) // Output: 0.7853981633974483 fmt.Println(math.Atan2(1, 1)) // Output: 0.7853981633974483
-
Hyperbolic Functions
func Sinh(x float64) float64 func Cosh(x float64) float64 func Tanh(x float64) float64 fmt.Println(math.Sinh(1)) // Output: 1.1752011936438014 fmt.Println(math.Cosh(1)) // Output: 1.5430806348152437 fmt.Println(math.Tanh(1)) // Output: 0.7615941559557649
Special Functions
func Gamma(x float64) float64 fmt.Println(math.Gamma(0.5)) // Output: 1.772453850905516 func Erf(x float64) float64 func Erfc(x float64) float64 fmt.Println(math.Erf(1)) // Output: 0.8427007929497149 fmt.Println(math.Erfc(1)) // Output: 0.15729920705028513
Rounding Functions
-
Ceiling func Ceil(x float64) float64 fmt.Println(math.Ceil(1.3)) // Output: 2
-
Floor func Floor(x float64) float64 fmt.Println(math.Floor(1.7)) // Output: 1
-
Round func Round(x float64) float64 fmt.Println(math.Round(1.5)) // Output: 2
Utility Functions
-
Minimum and Maximum func Min(x, y float64) float64 func Max(x, y float64) float64 Example: fmt.Println(math.Min(1, 2)) // Output: 1 fmt.Println(math.Max(1, 2)) // Output: 2
-
Hypotenuse func Hypot(p, q float64) float64 fmt.Println(math.Hypot(3, 4)) // Output: 5
Intermediate Quiz 4


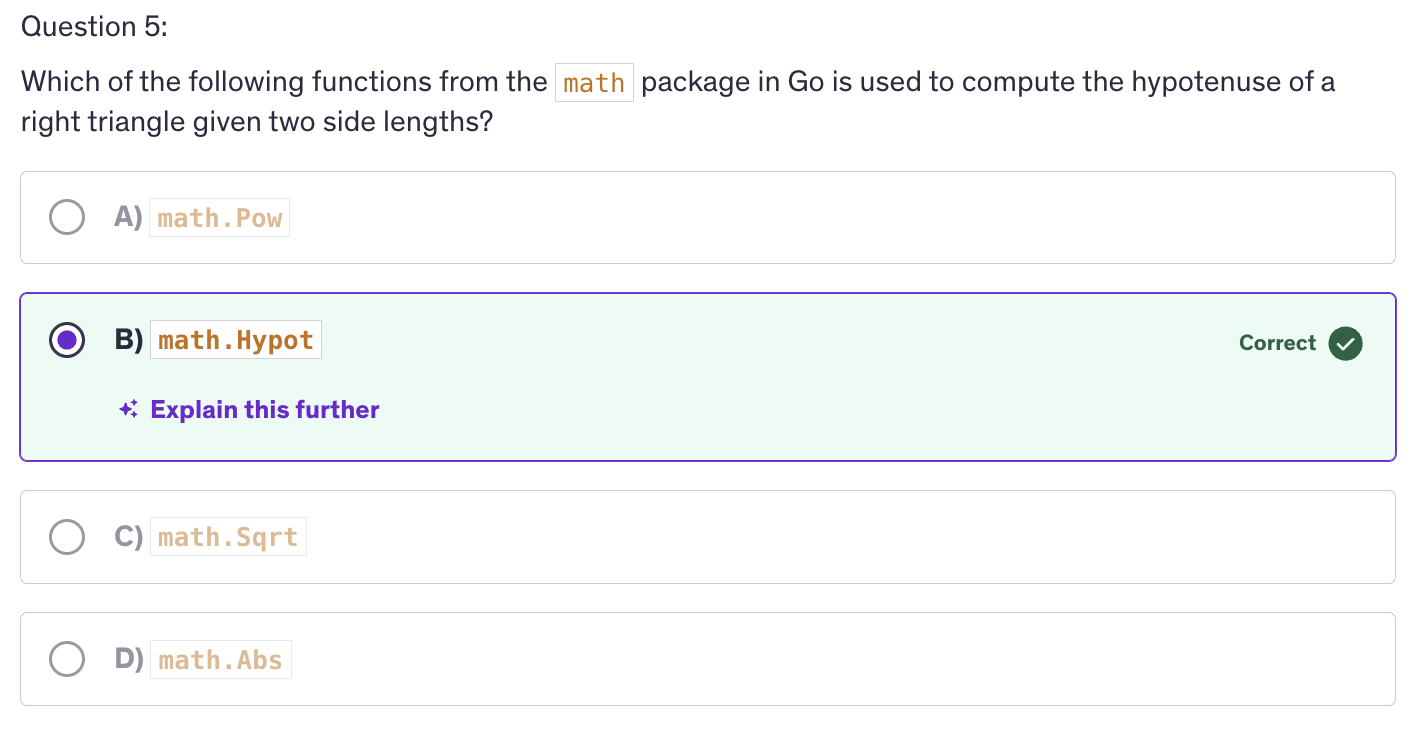
Go Programming Advanced
Goroutines
-
Goroutines are lightweight threads managed by the Go runtime. They enable concurrent execution of functions, allowing you to perform multiple tasks concurrently within a single Go program.
-
Goroutines are one of the key features of GO making it easy to write concurrent and parallel programs. We use Go routines to efficiently handle parallel tasks such as input output operations, calculations and more.
-
Goroutines provide us a way to perform taks concurrently without manually managing threads. To create a new goroutine, we use
gokeyword preceding the function and execute that function immediately in the main function. -
Why use Goroutine:
- Simplify concurrent Programming
- Efficiently handle parallel tasks such as i/o operations, calculations and more.
- Provide a way to perform tasks concurrently without manually managing the threads.
-
Basics of Goroutines:
- Creating Goroutines (use the
gokeyword to start a new Goroutine) - Goroutine Lifecycle
- Goroutine Scheduling
- Creating Goroutines (use the
-
Goroutines are just functions that leave the main thread and run in the background and come background and come back to join the main thread once the functions are finished/ready to return any value.
-
Goroutines do not stop the program flow and are non-blocking in nature. Similary to async await and promises in Javascript. Goruntime handles the goroutines. It immediately extracts the function preceding with
gokeyword out of the main thread. -
Goroutine Life cycle:
-
A goroutine starts when created and runs concurrently with other goroutines.
-
A goroutine exits when the function it is running completes. So goroutine contains a function and if the function completes, then it exits.
-
It's the GoRuntime that manages goroutine scheduling and execution.
-
-
What is Goroutine Scheduling ?
- Goroutine scheduling is managed by the Goruntime scheduler. It uses M:N scheduling model. M goroutines run on N os threads.
- Another thing that the goroutine scheduling does is that it efficiently multiplexex goroutines onto available threads.
-
Go uses M:N scheduling model where, M goroutines are mapped onto N operating system threads. Your processor have cores and threads and your goroutines are mapped onto those limited number of cores and threads. This model allows goruntime to manage many Go routines with fewer operating system threads, improving efficiency and scalability. The goroutine scheduler efficiently multiplexex Go routine onto available threads.
-
Multiplexing is like switching. Goroutine scheduler multiplexes or switches goroutines onto available OS threads. The scheduler is switching goroutines onto the available operating system threads. It means, it can run many goroutines on a limited number of threads by dynamically scheduling and rescheduling goroutines as needed. And this efficient use of resources ensures high concurrency and performance.
-
Goroutine Scheduling in Go :
- Managed by the Go runtime scheduler
- Uses M:N scheduling model
- Efficient Multiplexing
-
Common pitfalls and best practices
- Avoiding Goroutine leaks
- Limiting Goroutine creation
- Proper error handling
- Synchronization
-
Goroutine execution is concurrent in nature. And Goroutines run independently and concurrently.
-
Concurrency vs Parallelism overview :
-
Concurrency means multiple tasks progress simultaneously and not necessarily at the same time. But parallelism states that tasks are executed literally at the same time on multiple processors. So goroutines facilitate concurrency and the goruntime scehdules them accross available CPUs for parallelism when possible.
-
So goroutines are a tools that Go has provided us to make use of concurrency in Go programs and Goruntime schedules thos go routines accross the available CPU threads, CPU cores for parallelism if it is possible.
-
-
Associated topics:
- Wait groups
- Worker pools
- Channels
-
Handling Errors in Goroutine through a concept called error propagation. So goroutines execute functions concurrently and in that case errors need to be communicated back to the main thread, so use return values or shared error variables if not using channels. So if we are not using channels we can use shared error variable.
Channels - Introductions
-
Channels and Goroutines go hand in hand.
-
Channels are a ways for goroutines to communicate with each other and synchronize their execution. They provide a means to send and receive values between Goroutines, facilitating data exchange and coordination.
-
We use channels to enable safe and efficient communication between concurrent goroutines. Using channels hels synchronize and manage the flow of data in concurrent programs.
-
Why use channels ?
- Enable safea and efficient communication between concurrent Goroutines.
- Help synchronize and manage the flow of data in concurrent programs.
-
Basics of Channels
- Creaing channels :
make(chan Type) - Sending and Receiving Data
<- - Channels Directions
- Send-only:
ch <- value - Receive-only:
value := <- ch
- Send-only:
- Creaing channels :
-
Common Pitfalls and Best Practices
- Avoid Deadlocks
- Avoiding Unnecessary Buffering
- Channel Direction
- Graceful Shutdown
- Use
deferfor unlocking
-
Concept:
// variable = make(chan Type) greeting := make(chan string) greetString := "Hello Go" greeting <- greetString receiver := <- greeting fmt.Println(receiver)-
Issue with this code is that it tries to send a value to a channel without having a Goroutine ready. A goroutine should be there to receive from that channel and without a goroutine to receive from the channel, it cause deadlock because channels in Go are blocking.
-
Goroutines are non-blocking. They are extracted away from the main thread, the main execution thread of our application where the main function is running and will continue to run seamlessly in a non-blocking way if we have goroutine.
-
If we have a function here, then that function , if it is not declared with a Go keyword, it will block the execution of the rest of the statements after that function until the time that function is complete. But if we use a go keyword that function is extracted out of main thread, and then the next statements will continue to run before that function is even processed.
-
Similarly, like a function that blocks the execution flow of our main function, a channel will also block the execution of our main function of our main thread.
-
So that's why we need to receive values into a channel inside a goroutine so that it doesn't block the main execution thread.
-
Correct Code:
// variable = make(chan Type) greeting := make(chan string) greetString := "Hello Go" go func(){ greeting <- greetString }() receiver := <- greeting fmt.Println(receiver) -
Here
receiveris receiving outside of the goroutine in the main funciton, so why is it not blocking the execution ?- Because
receiveris part of the main goroutine. The main execution thread is a goroutine because it is running continuosly and it is the main funcition of our application. - So receiver is also a part of a go routine and that's how this channel is communicating the goroutine and the main goroutine. So receiver is not just an independent receiver, it is a receiver inside another go routine. And that makes the
greetingcommunicate between two go routines.
- Because
-
Receiving from a channel is also blocking and if there is no value to receive, then it will wait for a value to be received and next line will not be executed until the time it receives a value.
-
Unbuffered Channels and Runtime Mechanism
-
By default when we make a channel with the above syntax, it is an unbuffered channel.
-
Buffered channel means a channel with storage. A buffer is a storage. So a channel with associated storage. Channel buffering allows channels to hold a limited number of values before blocking the sender.Buffered channels are useful for managing data flow and controlling concurrency.
-
Why should we use buffered channels over unbuffered channels ?
-
Buffered channels allow asynchronous communication, which means that buffered channels allow senders to continue working without blocking until the buffer is full. Buffer channels will only block when the buffer is full.
-
Buffer channels also help us in load balancing, handling bursts of data without immediate synchronization and hence buffer channels also allow for a better flow control, meaning that we can manage the rate of data transfer between the producers and consumers.
-
-
Unbuffered channels always needs an immediate receiver and that is why we cannot use a send inside the main function. We cannot send data into an unbuffered channel inside the main function because as soon as we do that, it will immediately look for a receiver and it will not find the receiver. The receiver will be in next line, however the unbuffered channels require an immediate receiver as soon as they are receiving a value inside them. They need someone to receive those values into. They need a variable to which they can pass their value to.
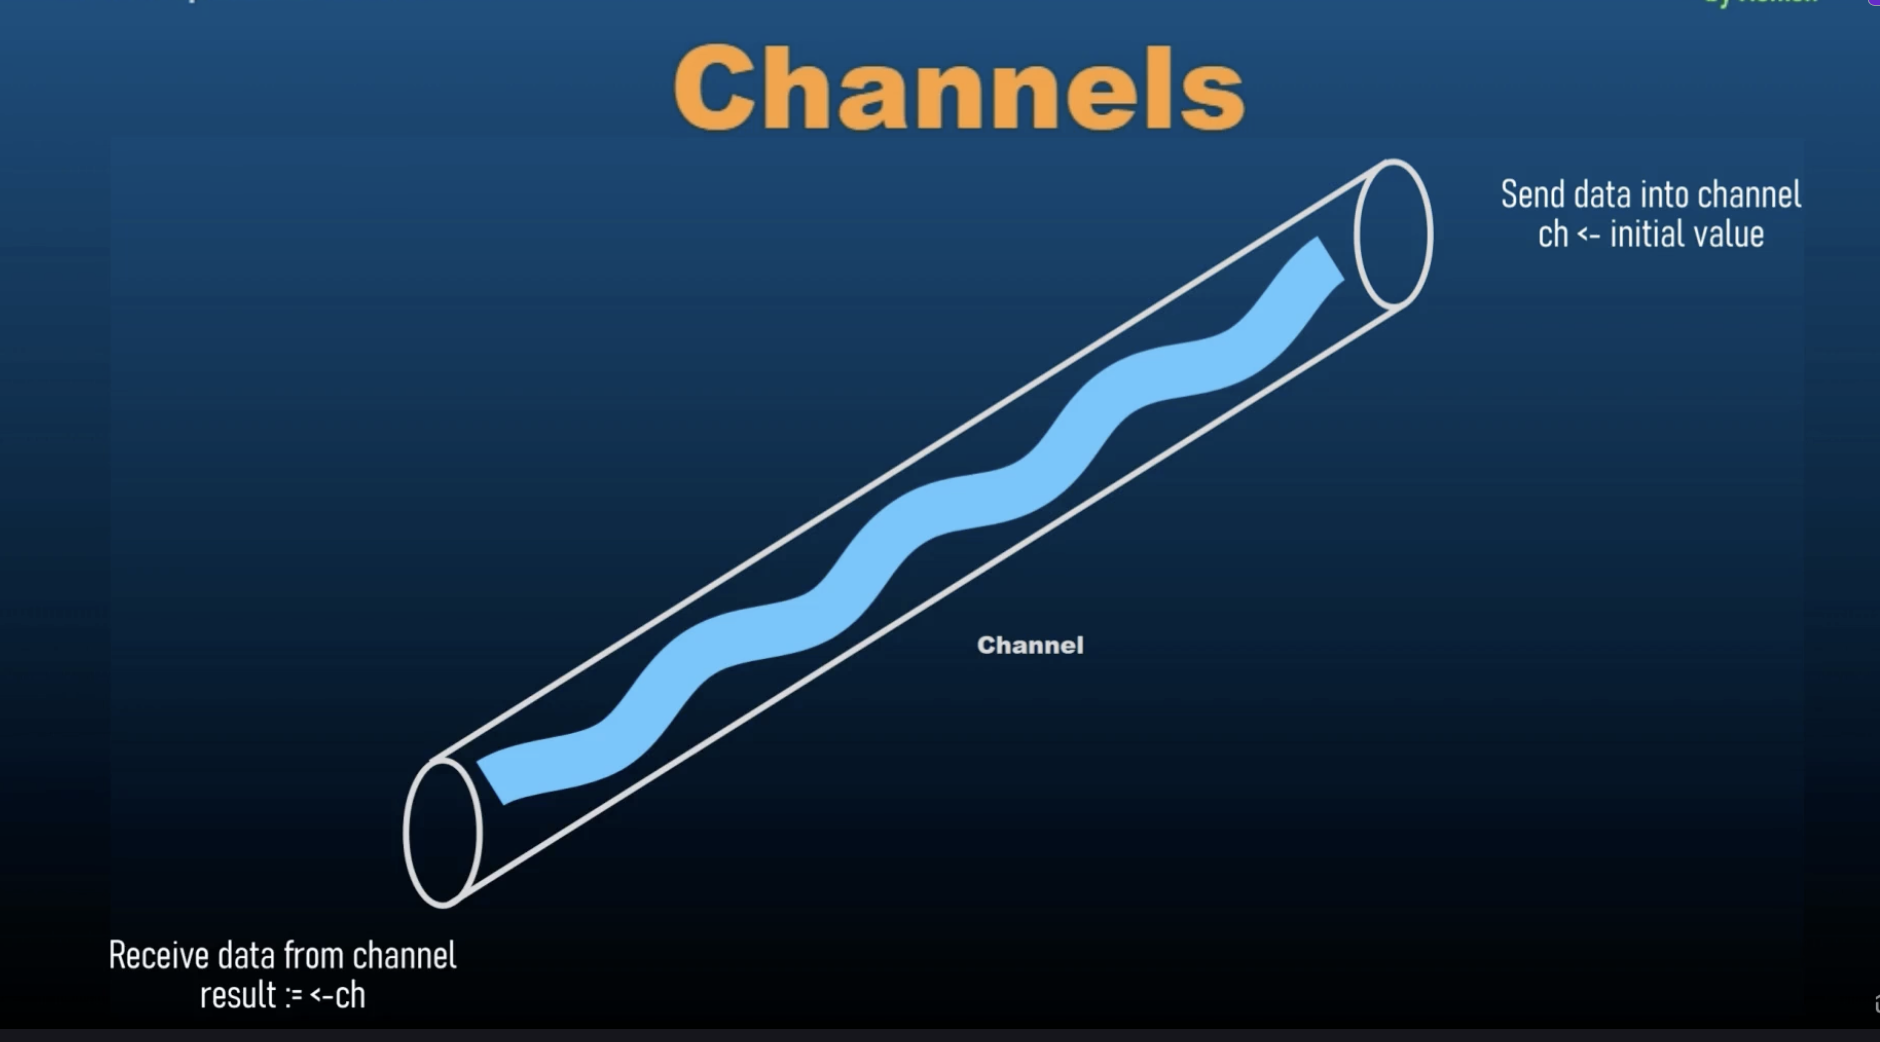
-
As soon as we receive the value inside a channel, it will try to find a channel that is going to emit this value to another variable. The main thread works faster than the goroutine because goroutine takes time to get out of the main thread and then it goes on to the next line. As soon as a channel receives a value, it needs to pass that value to a receiving end, it cannot hold those values.
-
Channels and goroutines, they go hand in hand.
-
Receiver will wait for all the goroutine to finish and then it ill throw an error.
-
Unbuffered channels block on receive if there is no corresponding send operation ready and as soon as there is a send operation ready, then it doesn't block. Then it receives the value from that send operation and uses that value as per our instructions.
-
Another property of unbuffered channels is that, unbuffered channels block on send if there is no corresponding receive operation ready but if there is a goroutine, they wait for the goroutine to finish.
-
The basic property of channel is to wait for a goroutine to finish and as soon as it receives its value then it will let the execution flow to move on to the next line. Until then it will keep the execution at halt and it won't let it move forward.
-
The default behavior for channels is that they allow for goroutines to finish, even if those go routines are not relevant to those channels.
Buffered Channels
-
Buffered channels allow channels to hold a limited number of values before blocking the sender. Buffered channels are useful for managing data flow and controlling concurrency.
-
So buffer essentially means storage. We are allowing channels to store values. In unbuffered channels, channels cannot store values. They need an immediate outflow of the value that they receive. As soon as they have an incoming value, they need a receiver a receive the value because they cannot hold a value. However, buffered channels can hold values inside them. They do not require an immediate receiver. Due to this buffered our main function is not blocked and hence buffered channels offer us an asynchronous communication.
-
Buffered channels allow senders to continue working without blocking until the buffer is full and they do not require an immediate receiver. They will only block when the buffer is full and they will only blocj when we are trying to insert more value, when we are trying to send more value inside the channel when it is already full. So the channel will not return an error or will not block as soon as it gets full. It will only block or return an error when we try to send more value.
-
Other than that, we also use buffered channels when we are handling burst of data without immediate synchronization. Immediate synchronization means that we are receiving values and sending values to a receiver immediately. But we don't need immediate synchronization because we are storing values inside a buffer.
-
If the buffer is empty we cannot receive data. So if we try to receive when the buffer is empty, then it should block our code instead of giving an error.
-
While sending data to a channel, it will implement a blocking mechanism when the buffer is full. That's for sending data into a buffered channel.
-
And when we are receiving data into a buffered channel, we will encounter a blocking mechanism when the buffer is empty, when we are trying to receive values from a buffer which is empty.
-
Other than these two, buffer channels have non-blocking operations. They allow non-blocking sends and receives as long as the buffer is not full or empty.
-
Impact on Performance :
- Buffered channels can improve performance by reducing synchronization overhead and when it comes to unbuffered channels, they typically use strict synchronization where sender and receiver must be synchronized, they must be ready at the same time to send and receive values.
-
We should chose buffer size based on the expected volumes of data and concurrency requirements and that is because large buffers reduce the likelihood of blocking but increase memory usage, and smaller buffers increase the likelihood of blocking, but use less memory.
-
Why use buffered channels ?
- Asynchronous Communication
- Load Balancing
- Flow Control
-
Creating Buffered Channels:
make(chan Type, capacity)- Buffer capacity
-
Key Concepts of Channel Buffering
- Blocking Behaviour
- Non-Blocking Operations
- Impact on Performance
-
Best Practices for using Buffered Channels
- Avoid over-buffering
- Graceful shutdown
- Monitoring buffer usage
Channel Synchronization
-
Why is Channel Synchronization important ?
- Ensures that data is properly exchanges between Goroutines.
- Coordinates the execution flow to avoid race conditions and ensure predictable behavior.
- Helps manage the lifecycle of Goroutines and the completion of tasks.
-
Common pitfalls and best practices
- Avoid Deadlocks
- Avoid unnecessary blocking
- Close channels
-
Channel synchronization refers to the coordination of go routines using channels to ensure orderly execution and data exchange.
-
Channels help synchronize goroutines by providing a mechanism to block and unblock goroutines based on the channel's state.
-
Channel synchronization is important because this is going to be used in real world scenarios. These are the concepts that will be used in a chat application or a real-time stock market application or a news channel application where news feed comes in through a stream and it needs to be regularly and differe news to be shown continuously to the users .
-
If we have a channel and it is continuously sending data, we can loop over that channel and that will create receiver and it will keep on receiving the value. So here's a new concept that we can range over the channel.
-
Channel Synchronization aims to provide a thorough understanding of how channels can be used to coordinate and manage concurrent execution in Go programs.
Advanced: Quiz-1
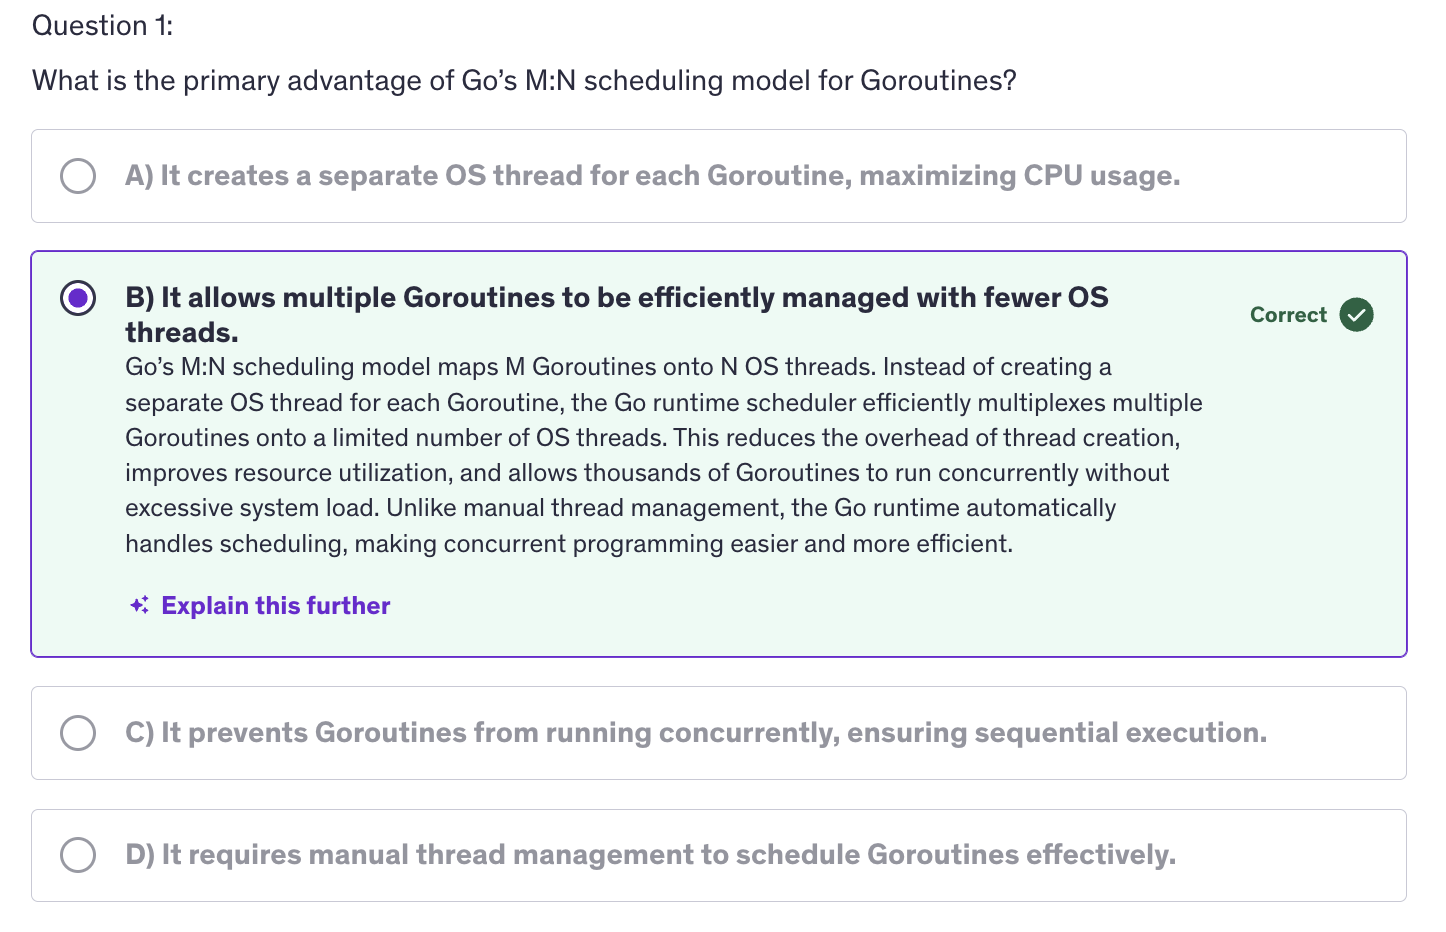
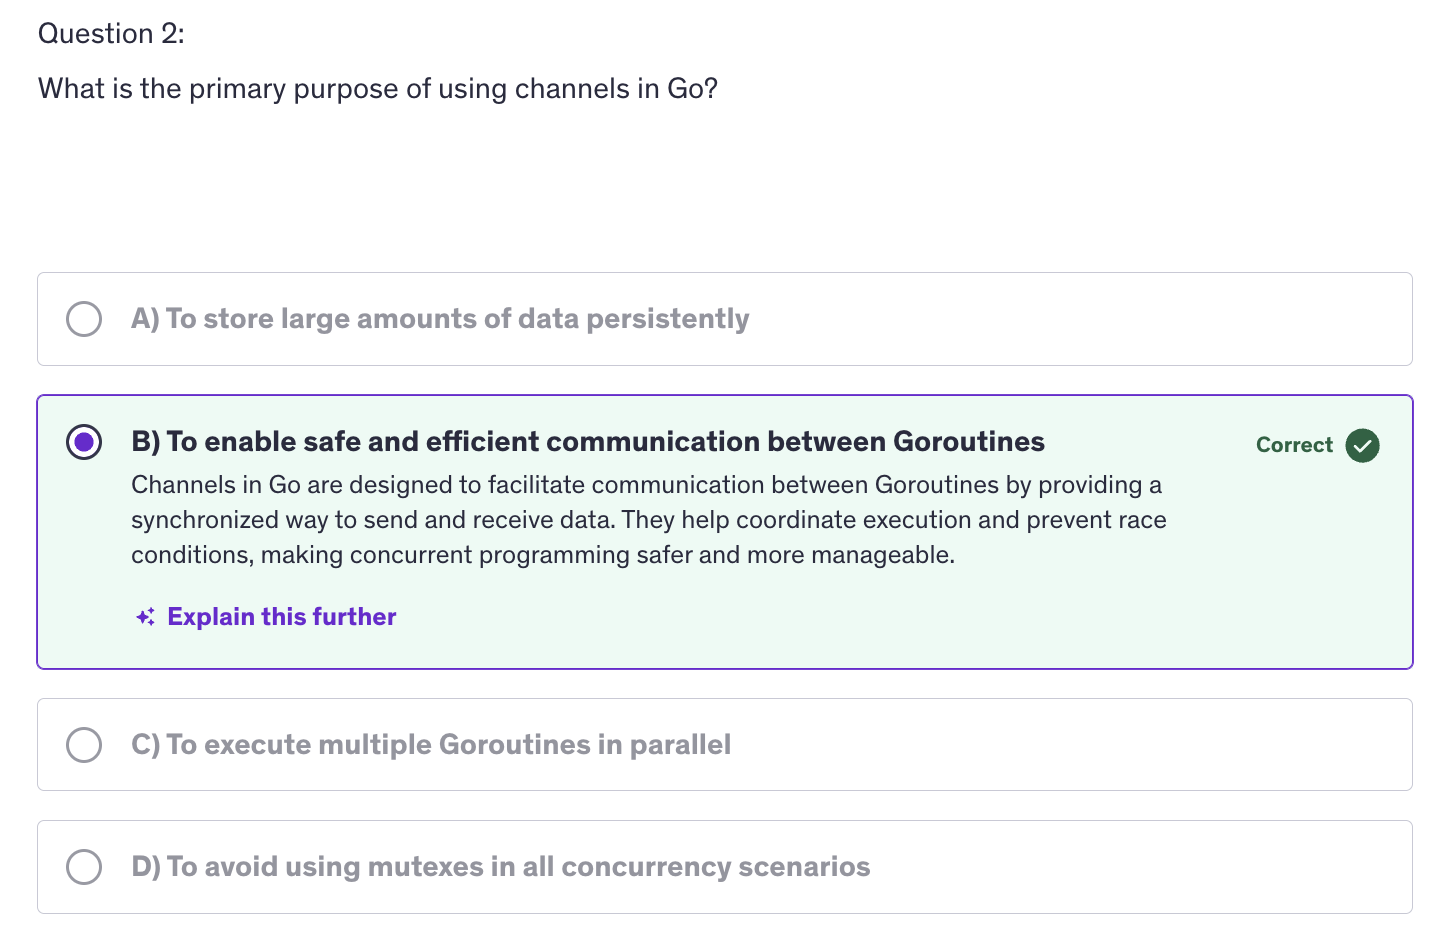
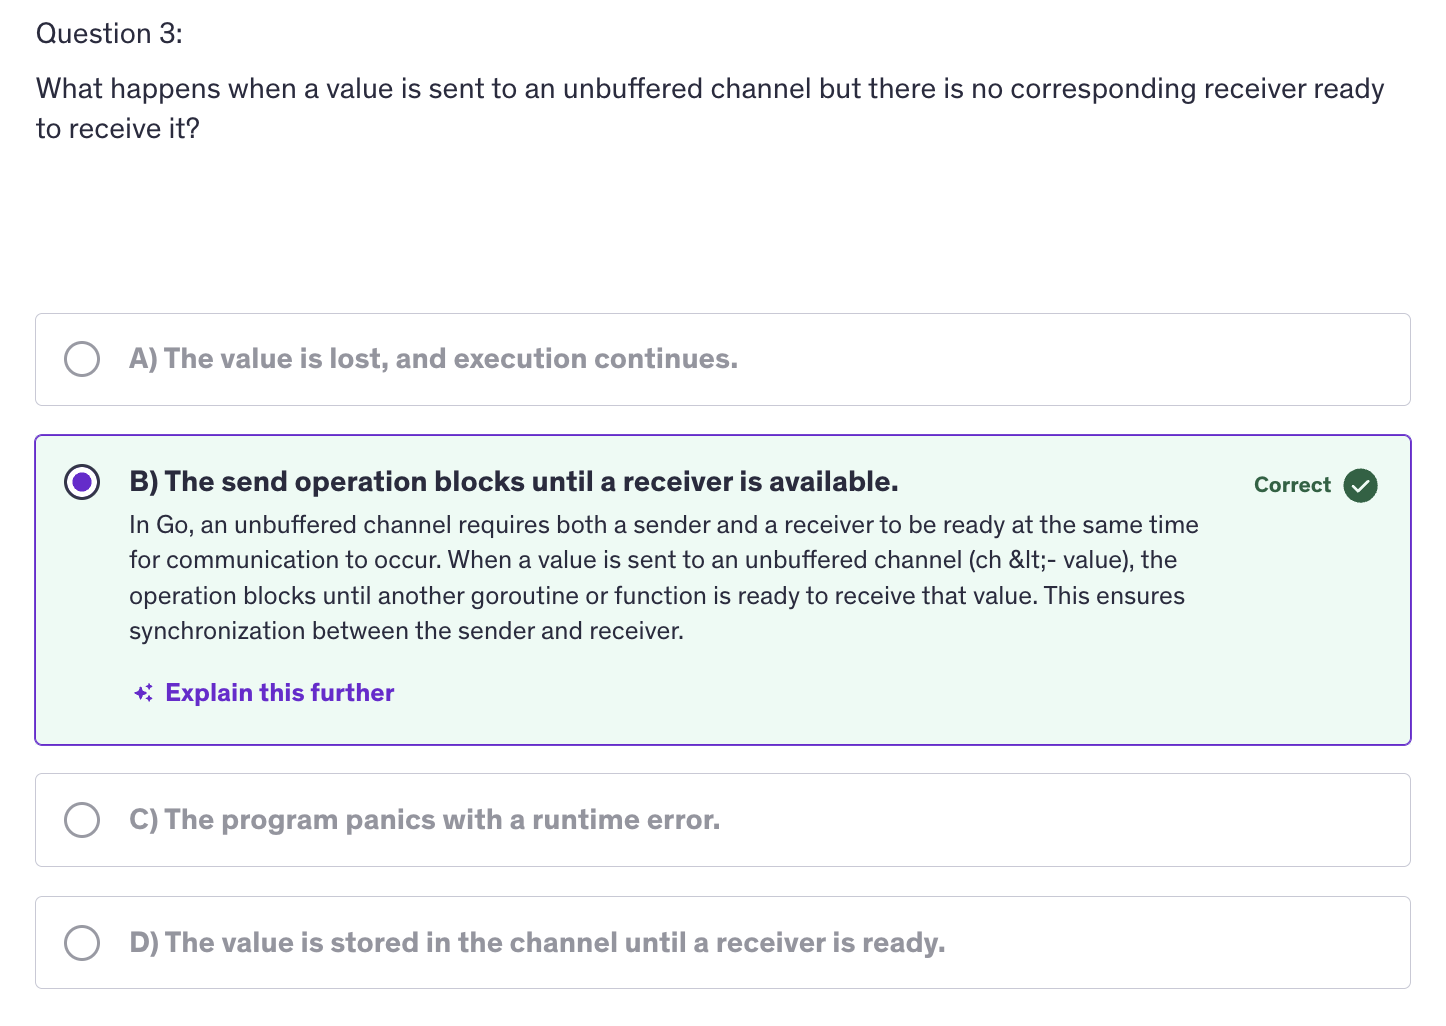
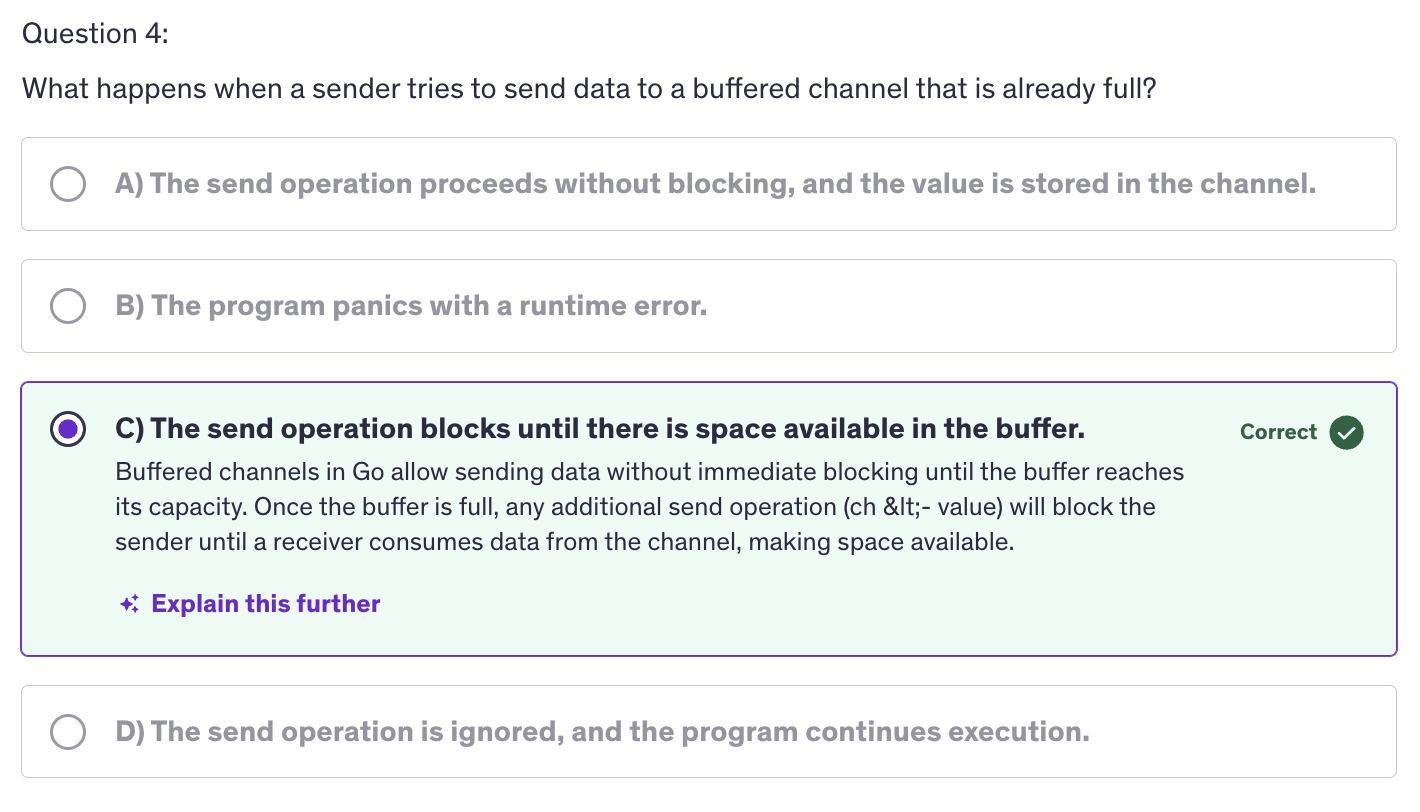
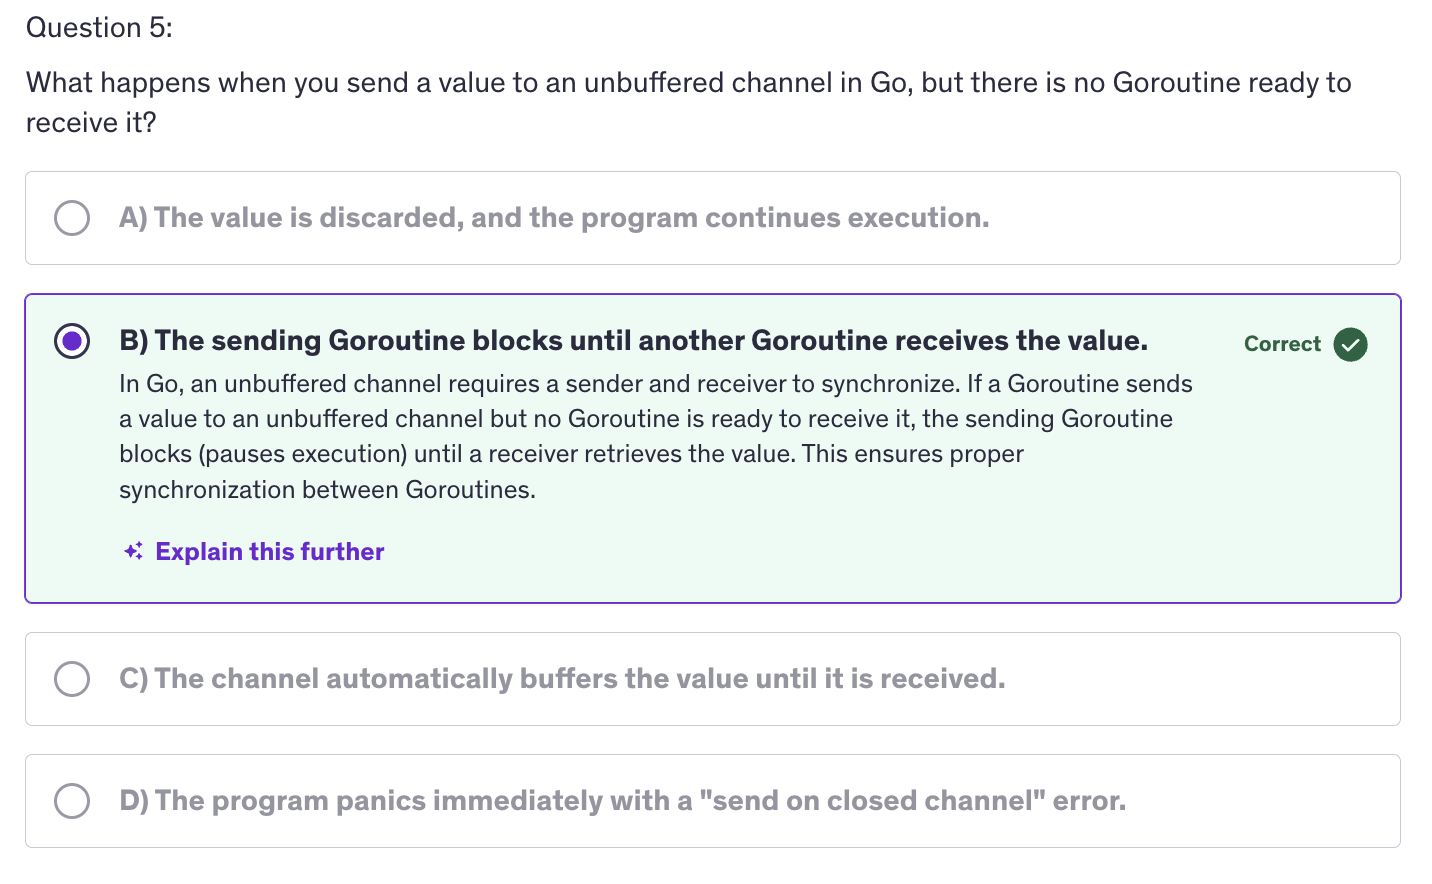
Channel Directions
- Channel directions specify the allowable operations on a channel, either sending or receiving. They are used to enfore and document the intended use of channels in functions and goroutines.
NOTE: Channel directions are intended for use in functions and goroutines, not as an independent variables that we declare.
-
Why are channel directions important ?
- Improve code clarity and maintainability
- Prevent unintended operations on channels
- Enhance type safety by clearly defining the channel's purpose.
-
Basic Concepts of Channel Directions :
- Unidirectional Channels
- Send-Only channels
- Receive-Only channels
- Testing and Debugging
-
Defining Channel Directions in Function Signatures
- Send Only Parameters
func produceData(ch chan <- int) - Receiving Only Parameters
func consumeData(ch <- chan int) - Bidirectional Channels
func bidirectional(ch chan int)
- Send Only Parameters
-
Send-Only channel means that we can send value into the channel. Receive-Only channel means a channel from which we can only receive data.
-
Unidirectional channels are used in function signatures to specify whether a function can send or receive data. This helps to avoid misuse and clarify the role of each functino in a concurrent program.
-
And during channel creation, make channel with type creates a bidirectional channel. The unidirectional channels make sense when they are only declared in function signatures, but they don't make any sense when created directly with make function.
-
By using unidirectional channels in function signatures, you can design your concurrent code to be more robust and explicit about how channels are used.
Multiplexing using Select
-
Multiplexing is the process of handling multiple channel operations simultaneously, allowing a go routine to wait on multiple channel operations and react to whenever operation is ready first.
-
The select statement in Go facilitates multiplexing by allowing a goroutine to wait on multiple channel. Multiplexing is like a switch. So
selectstatement that we have used before. -
Multiplexing manages multiple concurrent operations within a single goroutine and it manages those concurrent operations seamlessly with improved readability.
-
Multiplexing efficiently handles operations that might block without looking up resources so it handles the blocking operations pretty efficiently.
-
More importantly we get to implement timeouts and cancellation mechanism. We can cancel channels using multiplexing. So the basic syntax of
selectis very simple:select case default.Select-caseis only for handling channels to be precise for handling multiple channel operations simultaneously. -
We can use select with
timeoutsand it makes our job easier to implement cancellation of channels. We usetime.After()function to implement timeouts, providing us a way to handle operations that take too long. -
When we are done sending the values to the channel, we should close the channel. It's a good practice to close the channel we are using oonce we are done with the channels. If you are continuously receiving a stream of data, then don't close it, then defer the close until the time the channel gets closed from the source or close it when we shut down our application.
-
When the channel is closed, the select statement will receive the zero value from that channel, zero value of the string, int or zero value of a struct, whatever types that channel is.
-
The select statement in Go is used for implementing multiplexed communication with channels. It allows you to wait on multiple channel operations simultaneously and perform a corresponding action when one of them becomes ready. Some key use cases and features of the
selectstatement are multiplexing channel operations, which means that the primary use of Select is to wait for multiple channel operations to become ready and then execute the corresponding case block. This enables concurrent handling of multiple communication channels without needing separate goroutines for each channel. -
Another feature of the select statement is non-blocking communication. The
selectstatement enables non-blocking communication with channels. If none of the channel operations are ready, select does not block the execution of the program, this allows you to perform other tasks or take alternative actions if all channel operations are blocked. And we use adefaultcase for that. -
By using
select, we can prevent potential deadlocks that may occur when sending or receiving from channels. For example we can combine, channel sends and receives with timeouts or default cases to handle scenarios where communication may block indefinitely. -
Next important feature is synchronization and coordination.
Selectcan be used for synchronization and coordinatino between Goroutines by coordinating multiple Goroutines through shared channels and usingselectto wait for specific events, you can design concurrent programs with precise control over their execution flow. -
Why use Multiplexing :
- Concurrency
- Non-Blocking
- Timeouts and Cancellations
-
Best Practices for using
select:- Avoiding busy waiting
- Handling deadlocks
- Readability and maintainability
- Testing and debugging
Non-Blocking channel operations
-
Why use Non-Blocking Operations:
- Avoid Deadlocks
- Improve Efficiency
- Enhance Concurrency
-
Best practices for Non-Blocking operations
- Avoid Busy waiting
- Handle channel closure properly
- Combine with contexts for cancellations
- Ensure channel capacity management
-
Non-Blocking operations on channels allow a goroutine to perform a channel operation like send or receive without getting stuck, if the channel is not ready. They help maintain responsiveness and prevent goroutines from getting blocked indefinitely.
-
Why do we need to use non-blocking operations ?
- To avoid deadlocks, prevent goroutines from waiting indefinitely on channel operations and a
- To improve efficiency i.e allow goroutines to continue processing or handle other tasks if channels are not immediately ready.
- Most importantly, to enhance concurrency. Manage multiple concurrent operations more effectively by not blocking on individual channel operations.
-
The select statement with a default case allows for non-blocking receives by immediately executing the default case if no other channels are ready.
-
We use non-blocking operations to handle real-time data processing where timely responses are critical.
-
Another non-blocking operation is handling channel closures. Channels do send out an
oka boolean value to let us know if the channel is open or closed.
Closing Channels
-
Why close channels ?
- Signal Completion
- Prevent Resource Leaks
-
Best Practices for Closing channels:
- Close channels only from the sender
- avoid closing channels more than once
- avoid closing channels from multiple goroutines
-
Common patterns for closing channels
- Pipeline pattern
- Worker Pool pattern
-
Debugging and Troubleshooting Channel Closures
- Identify Closing channels errors
- USe
sync.WaitGroupfor coordination
-
Signal Completion: : It indicates that no more data will be sent on the channel, which helps goroutines that are receiving data know when to stop waiting.
-
Prevents Resource Leaks: Closing channels ensures that resources assosciated with the channel are properly cleaned up.
-
For closing a channel we use the close function and after a channel is closed, no more values can be sent to it. However, we can receive values from a closed channel if it is a buffered channel. A buffered channel may have some values stored in it, and those values can be received even if the channel is closed because closing a channel means that the channel is closed for sending data into the channel, not for receiving values from a channel. We can always receive values from a channel if it has some values, if it is not empty.
-
Basic Principles / Guidelines rules :
-
Close channels only from the sender. Do not close channel from the receiving end. Only the goroutine that is sending data should close the channel. Other goroutines that are receiving should only read from the channel.
-
Sometimes we close a channel more than once and that results in a runtime panic. So always ensure that channels are closed exactly once.
-
Similarly, we need to ensure to that only one goroutine is responsible for closing the channel to avoid race conditions and panics. We should not close a channel twice and we should not close channels from multiple goroutines because one goroutine might be sending data to the channel while the other goroutine closes the channel and if the channel is closed in between, and then the other goroutine is still trying to send data into the channel then that will again cause an error.
-
-
There are certain patterns for closing the channels like :
-
Pipeline Pattern: Channels are used to pass data through a series of stages which are pipelines. Each stage closes the channel when it is done processing, so we are going to have a producer and a filter and these functions, which are producer and filter are going to close the channels respectively which they should.
-
Worker Pool Pattern: dicussed in later lectures
-
-
SO now we need to know that whether it's a buffered channel or an unbuffered channel, every channel needs to be closed manually by us and a channel is closed by using the close function, and once a channel we cannot send any more values to that channel. And once a channel is closed, it sends out a value, a boolean value to the receiver and we can receive that value and check if the channel is open or closed and if the channel is closed, we can handle the closing channel gracefully in our program.
Advanced: Quiz-2
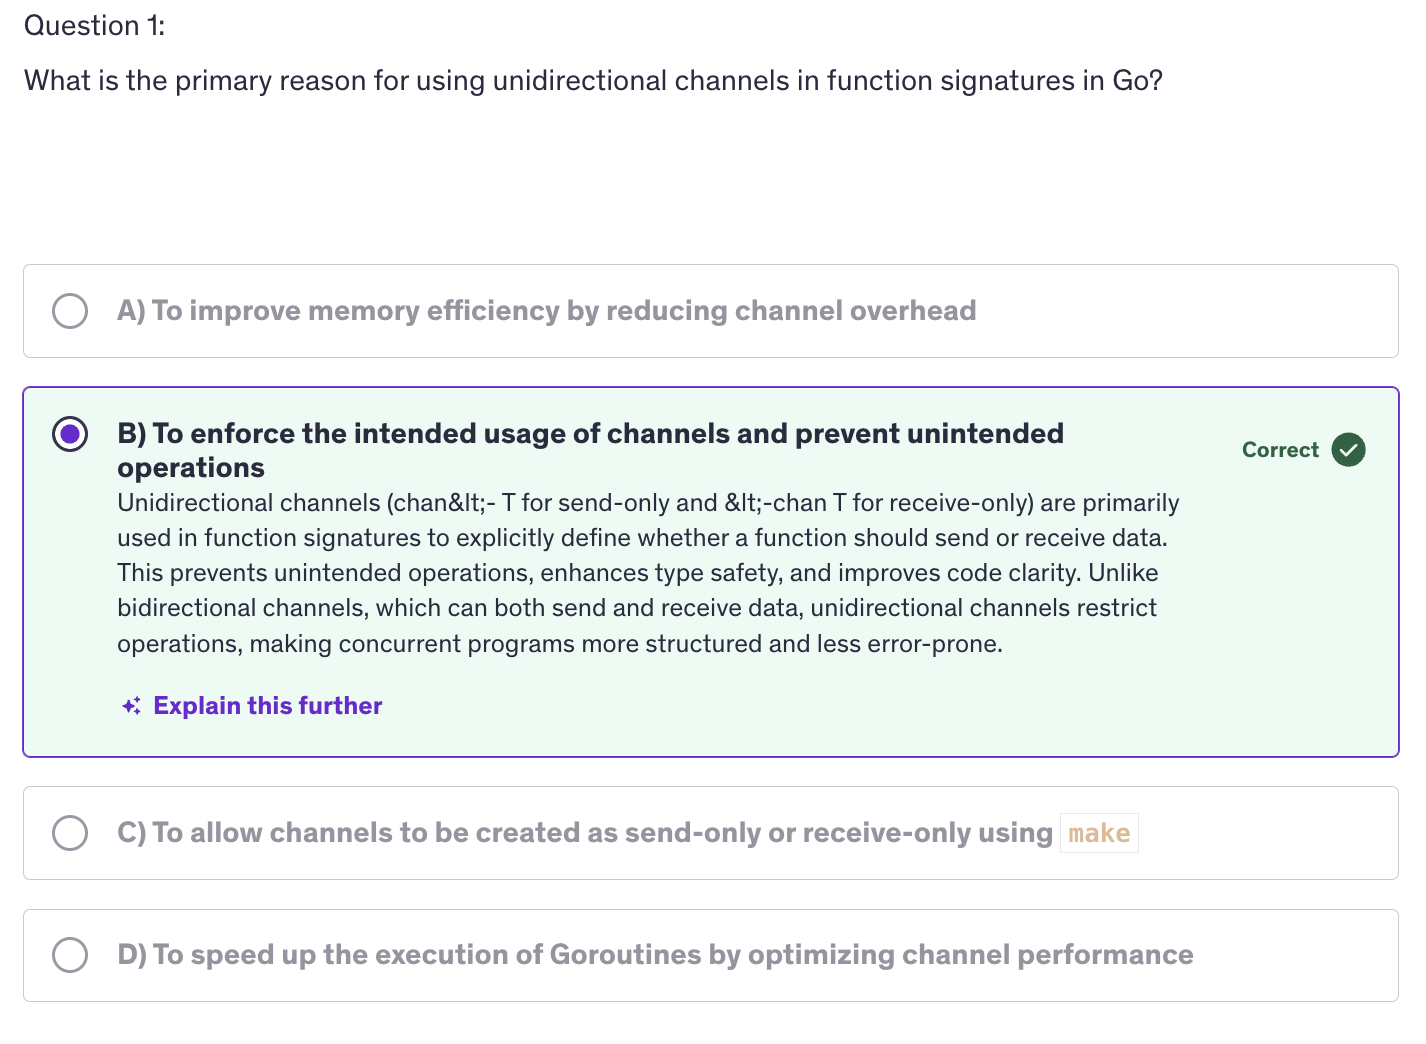
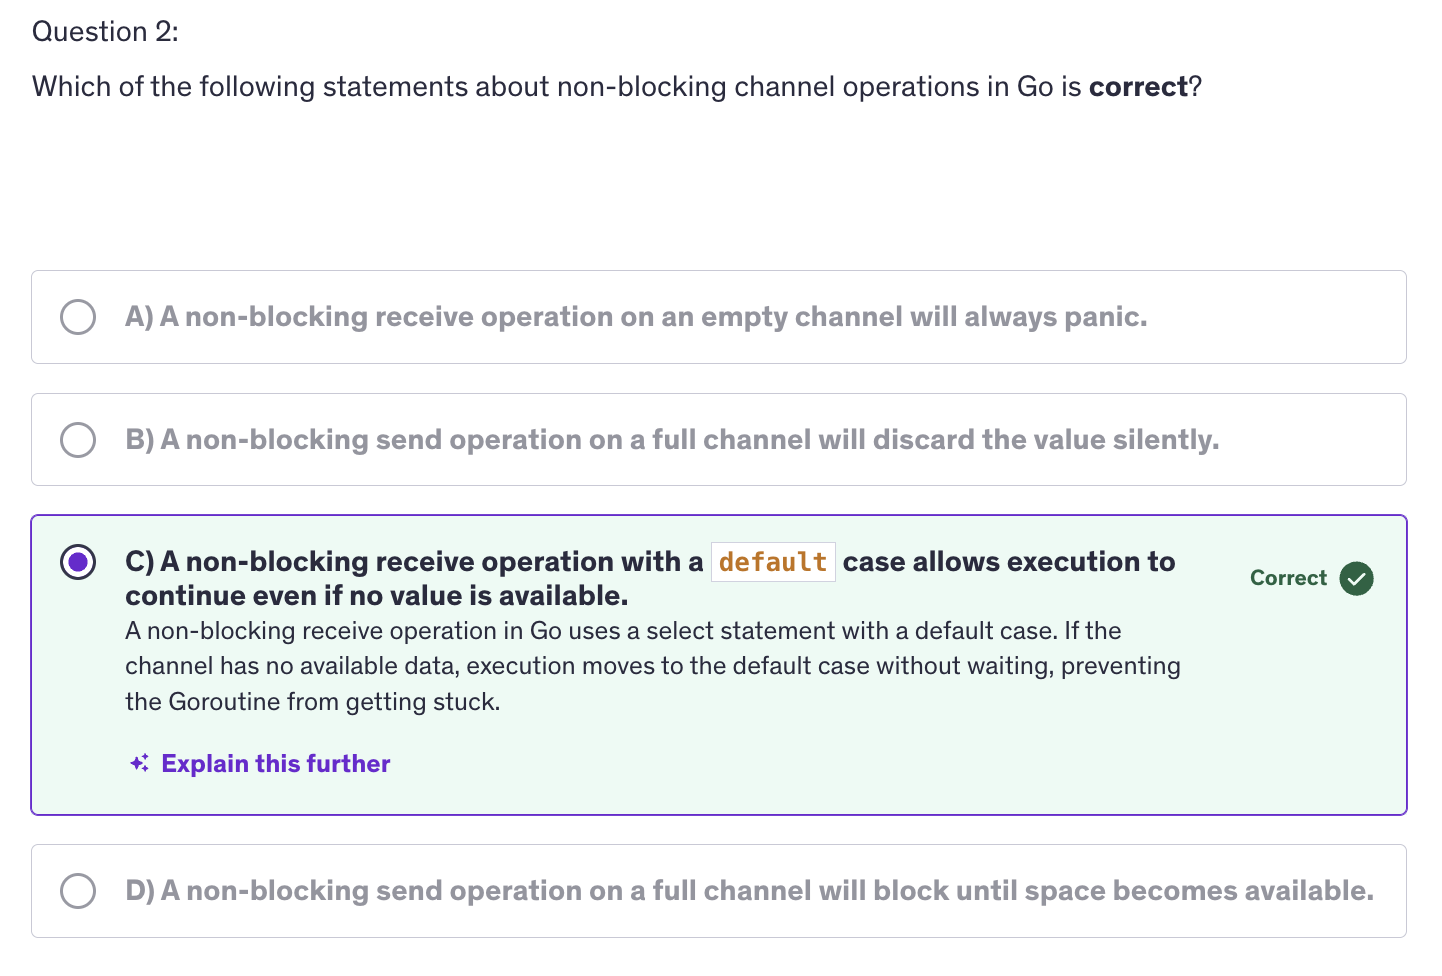


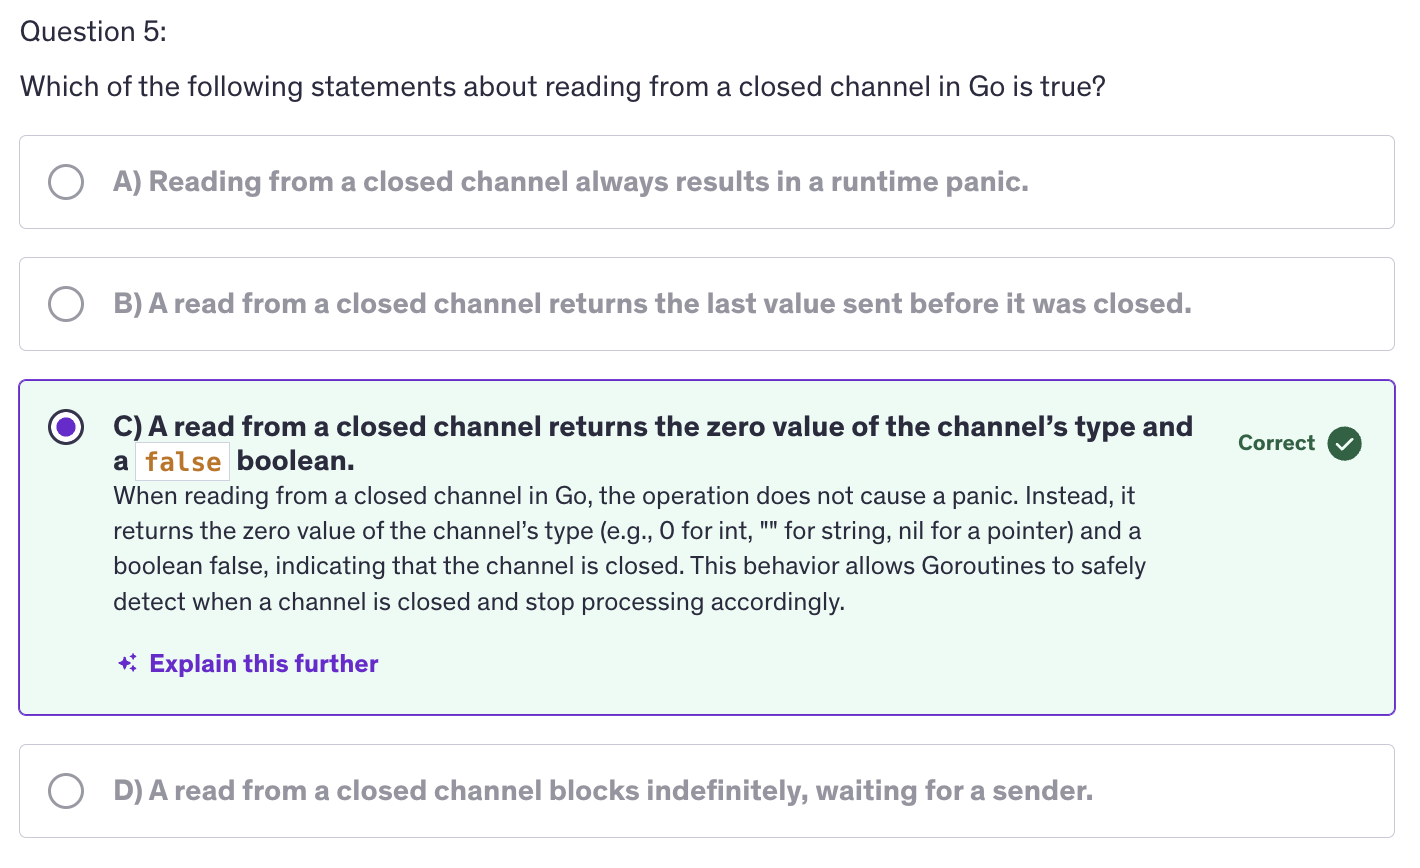
Context
-
Context is a type from the
contextpackage. -
COntexts are used to carry deadlines, cancellation signals and request scoped values.
-
Contexts are closely associated with APIs. When we are creating any kind of APIs be it gRPC API or a Rest API, contexts are frequently used and by default assosciated with creating APIs.
-
In the definition of context, we have a mention of request scoped values. It means that we are passing request scoped data accross API boundaries. And apart from passing request scoped data, we are also managing timeouts and deadlines for operations and we are handling cancellation of operations using context. But apart from that we are also carrying values in key-value pairs.
-
We create a context using
context.Background()orcontext.TODO(). -
A context in Go is an object that carries information about deadlines, cancellation signals and other request scoped values accross API boundaries and goroutines. Contexts are also used in goroutines to carry values, cancellation signals and many other things. It is used to manage the lifecycle of processes and to signal when the operations should be aborted. Some key features of contexts include cancellation signals, deadlines and timeouts and values. SO, In a very broader way, contexts are variables that store values in key value pairs.
-
context.TODO()is used when you are unsure about which context to use, or if you plan to use a proper context later. It just acts as a placeholder and it doesn't carry any deadlines, cancellations. -
Code Explanation :
ctx = context.Background() ctx, cancel := context.WithTimeout(ctx, 2*time.Second) defer cancel()-
We create a context and then we give it a deadline using
WithTimeoutby giving a timeout value of 2 second. That means that this context will cancel after 1 second. -
Context cancellation does not mean context will delete or context will cease to exist. Context cancellation means that it will send a cancellation signal. (that's it). After cancellation signal, it will retain all the data that it contains, but it will send a cancellation signal when we run cancel.
-
Once the cancellation signal has been sent,
context.Done()receives a channel struct which indicates a cancellation signal.
-
-
context.Background()is a way to signify a base or a root context from which other contexts can be derived. It does mean it's running in background nor it's a goroutine. It's simply a kind of variable but with more functionalities.context.Background()is intended to be the top level context. Usually it is created in the main function initialization or a top level request handlers. -
context.Background()has no deadlines, no cancellation and carries no values. context.Background and context.TODO, they don't carry values themselves. We can use these root context to then pass tocontext.WithValue(),context.WithBackground(), and then those functions are going to modify or are going to add some more features to the root context. But the root context itself cannot store values or have any deadline or cancellations. context.Background() is neutral and unintialized, making it a clean slate for creating contexts. The term background was chosen to imply that it's always available in the background of your application. It is ready to be used a foundation for other contexts. It's a context that doesn't do anything by itself, but it provides a baseline or backdrop for deriving more secific contexts. -
Why use context ?
- Cancellation
- Timeouts
- Values
-
Basic Concepts
- Context Creation
context.Background()context.TODO()
- Context hierarchy (How contexts are created and derived)
context.WithCancel()context.WithDeadline()context.WithTimeout()context.WithValue()
- Context Creation
-
Practical Uage
- Context Cancellation
- Timeouts and Dealines
- Context Values
-
Best Practices
- Avoid storing contexts in structs
- Propagating context correctly
- Handling context values
- Handling context cancellation
- Avoid creating contexts in Loops
-
Common Pitfalls:
- Ignoring Context Cancellations
- Misusing context values.
TImers
-
A timer in Go allows you to schedule an event to occur after a specified duration. It is useful for implementing timeouts, scheduling periodic tasks and delaying operations.
-
One of the key reasons for using timers is timeouts. We can implement timeout functionality to limit how long a particular operation should wait.
-
Another reason would be to use delays in schedule operations to occur after a certain delay.
-
Other than that, we can define periodic tasks using timers. These tasks execute recurringly at regular intervals.
-
timer will send the current time on its channel after a specified duration. It sends the current time after a time duration.
-
time.NewTimer()is non-blocking in nature.time.Sleep()is blocking in nature. -
Why use Timers :
- Timeouts
- Delays
- Periodic Tasks
-
The
time.Timertype:- Creating a Timer
- Timer Channel
- Stopping a Timer
-
Practical Use Cases for Timers:
- Implementing Timeouts
- Scheduling Delayed Operations
- Periodic Tasks
- Handle Large Numbers of Goroutines
- Use
deferfor Unlocking
-
Best Practices
- Avoid Resource Leaks
- Combine with channels
- Use
time.Afterfor simple timeouts
-
Best Practices:
-
Always remember to stop timers when they are no longer needed to avoid resource leaks and we should use
deferto ensure proper cleanup. So we shall use defertimer.Stop()even if the timer has expired, we still need to stop the timer. -
It's important because we need to manage the lifecycle of a timer properly to ensure efficient resource usage. Stopping a timer helps in freeing up resources and avoiding unexpected behaviour. If you do not stop a timer and it is no longer needed, it will still consume resources. Although the timers channel will eventually be garbage collected, the timer itself will remain until it either fires or is stopped.
-
Tickers
-
Ticker in Go is a mechanism for producing ticks at regular intervals. Tickers are useful for performing periodic tasks or operations on a consistent schedule. Tickers are often used in scenarios where the tasks need to be repeated at fixed intervals such as polling, periodic logging or regular updates.
-
Using tickers ensures operations at regularion intervals maintaining a consistent schedule. Using tickers also simplifies the implementation of recurring tasks without manually handling timing logic.
-
Ticker is created using
time.NewTicker(), so we are using time package and with that we use NewTicker() with a specific time interval. -
Similar to timers, tickers also have a channel associated. So when we create an instance of a ticker, it will have a
Cfield of the ticker type, which is a channel that receives ticks at regular intervals. -
Why use Tickers ?
- Consistency
- Simplicity
-
Best Practices for Using Tickers ?
- Stop Tickers when no longer needed
- Avoid Blocking Operations
- Handle Ticker Stopping Gracefully
-
Similar to timers, we have a
Stop()method to stop a ticker. It is important to stop a ticker to release resources and prevent it from producing further ticks because ticker does not expire. Timers have an expiry but tickers don't. -
A very common use for ticker is periodic task execution. We can use a ticker to execute tasks at regular intervals, such as polling data, updating status or performing routine maintenance.
-
There are many scenarios where we combine tickers with timers to create complex timing logic where certain tasks need to be performed periodically with timeouts or delays. Similarly we can handle multiple tickers as well.
Worker Pools
-
A worker pool is a design pattern used to manage a group of workers (goroutines). Multiple goroutines are working like a group of workers. These goroutines which are working like group of workers process a queue of tasks. This pattern helps in controlling the number of concurrent Goroutines and efficiently handling tasks.
-
The reason why we use worker pools is for resource management. It limits the number of concurrent goroutines to avoid overwhelming system resources, and we can limit the number of concurrent goroutines according to our will. It doesn't depend on the number of threads number of cores on the machine. It depends on us, how many concurrent goroutines we want to run, we can limit the number even much lesser than the number of cores or threads available.
-
Next reason is task distribution because using working pools, we efficiently distribute tasks among a fixed number of worker.
-
And obviously, the first two points result in the last point, which is scalability. We can now scale the processing of tasks without creating an excessive number of goroutines.
-
Building a basic worker pool requires using the building blocks of basic worker pool, and the building blocks are tasks, the units of work that need to be processed. Next building blocking is workers. Workers are goroutines that perform the tasks, the jobs. Next we have a task queue or the job queue, and that is the channel or data structure to hold tasks waiting to be processed.
-
How do we implement worker pool ?
We create a task channel. This channel holds tasks that workers will process. Next we create worker goroutines. These workers listen on the task channel and process tasks as they arrive. Next we distribute those tasks. We send tasks to the tasks channel and they will get processed by the workers. And finally, we implement graceful shutdown. We ensure that all workers complete their tasks and exit properly.
-
This is a design pattern for handling more number of tasks with a small number of workers.
-
Advanced Worker Pool Patterns
- Dynamic Worker Pools
- Task Prioritization
- Error Handling
- Worker Pool with Task Prioritization
-
Best Practices for Worker Pools
- Limit the Number of Workers
- Handle Worker Lifecycle
- Implement Timeouts
- Monitor and Log
-
We need to Limit the number of workers. Avoid creating too many workers. Use a reasonable number based on available system resources. Do not stress out your system because otherwise the efficiency will decrease.
-
And when working with worker, properly start, stop and clean up workers to prevent resource leaks and ensure graceful shutdowns. And in order to do that, also implement timeouts. Use timeouts to avoid indefinite blocking or hanging operations.
-
And worker pools can get complex in real world scenarios, so monitor the performance of the worker pool and log relevant information to diagnose issues or optimize performance.
-
Overall, worker pools in Go are a powerful tool for managing concurrent tasks processing, improving efficiency and optimizing resource utilization by understanding the key concepts, best practices and advanced patterns of worker pools, you can effectively implement and manage them in your go applications to handle large volumes of tasks concurrently.
Wait Groups
-
Wait group is a synchronization primitive provided by the sync package in Go. It is used to wait for a collection of goroutines to complete their execution.
-
It means, we have another mechanism to wait for goroutines to finish other than using channels. The reason we use wait groups is for synchronization. We wait for multiple gorountines to finish before proceeding.
-
Wait groups also help us in coordination. Wait groups coordinate the completion of concurrent tasks, ensuring that all tasks are completed before moving on.
-
Wait groups also helps us with resource management. Wait groups manage resources and cleanup after concurrent operations.
-
To create an instance of a wait group we use sync package and the actual function is
sync.WaitGroup(). -
Add()increments the wait group counter by the argument that we pass it. Typically it is used to indicate the number of goroutines to wait for.Done()decrements the counter by one. This method should be called inside each goroutine when it finished it's tasks. TheWait()blocks until the counter inside the wait group is decremented to zero. -
Why use Wait Groups ?
- Synchronization
- Coordination
- Resource Management
-
Basic Operations
- Add(delta int)
- Done()
- Wait()
-
Quiet frequently in our daily work, we will combine
WaitGroupswith channels. -
Best Practices:
- Avoid Blocking Calls inside goroutines
- Use
deferto callDone - Ensure Proper use of
Add - Handle Large Number of Goroutines
- Use
deferfor Unlocking
-
Common Pitfalls:
- Mismatch between
AddandDone - Avoid Creating deadlocks
- Mismatch between
Advanced: Quiz-3
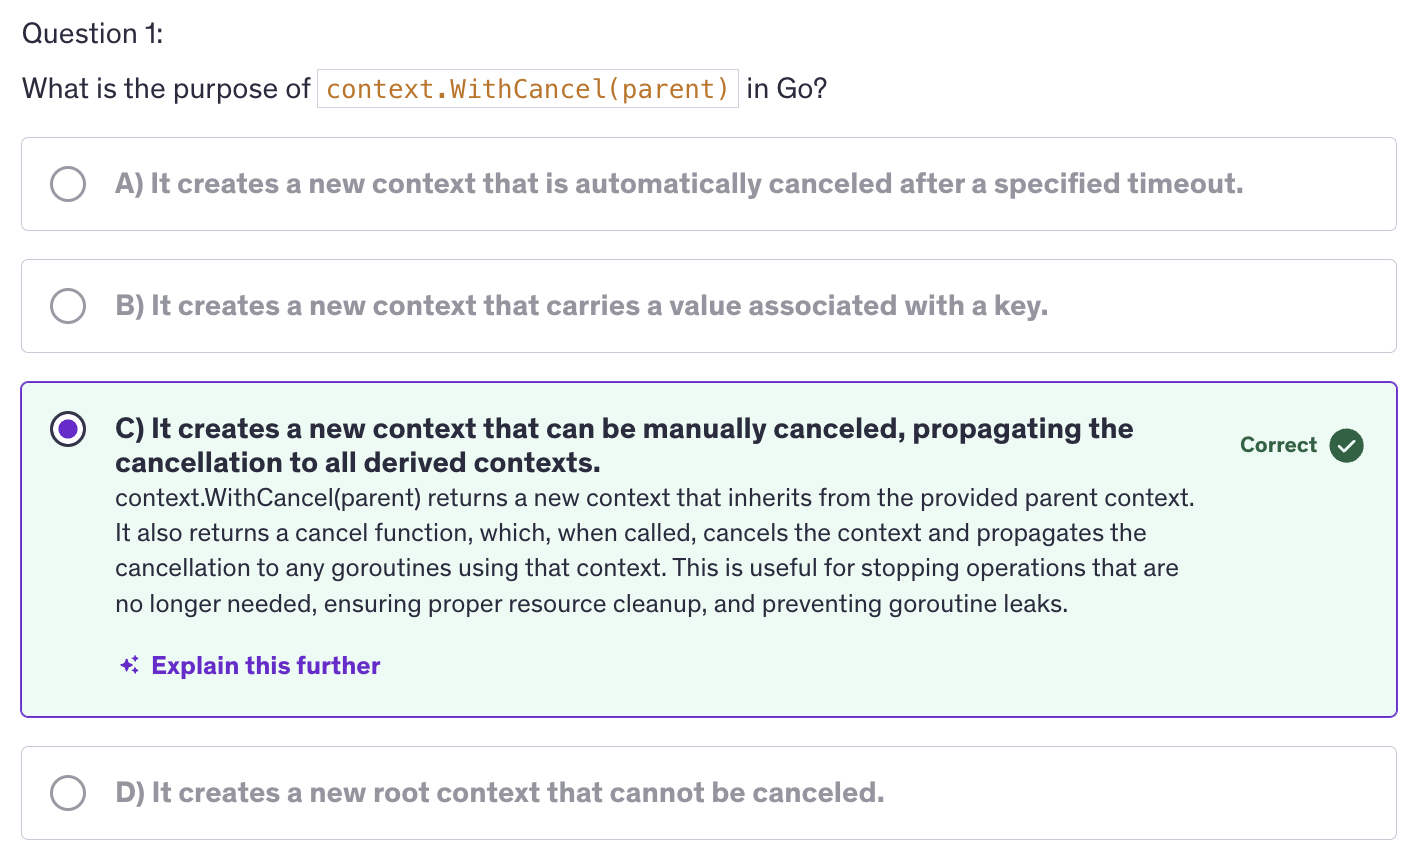
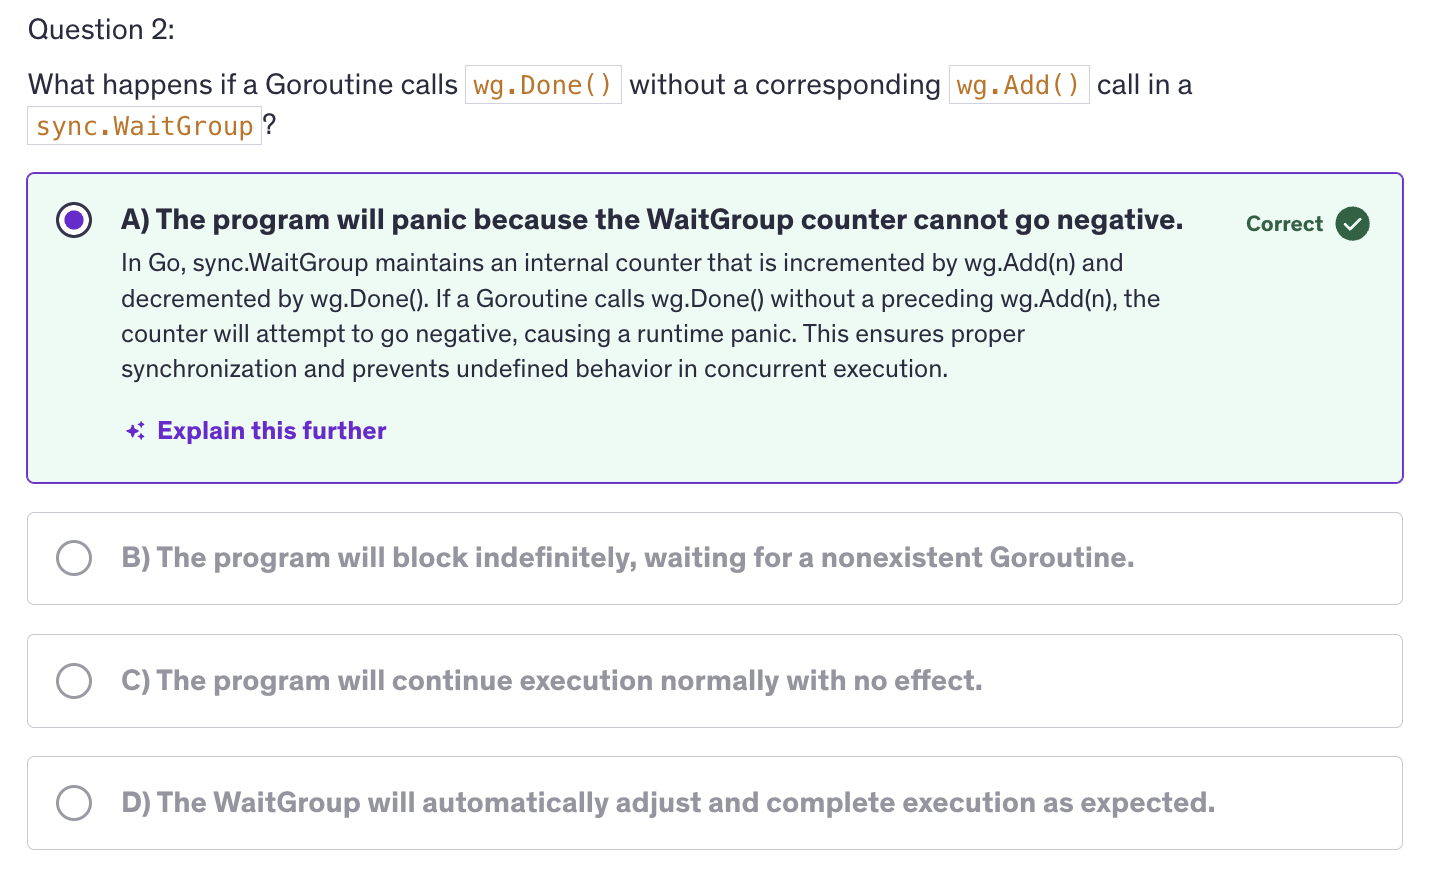
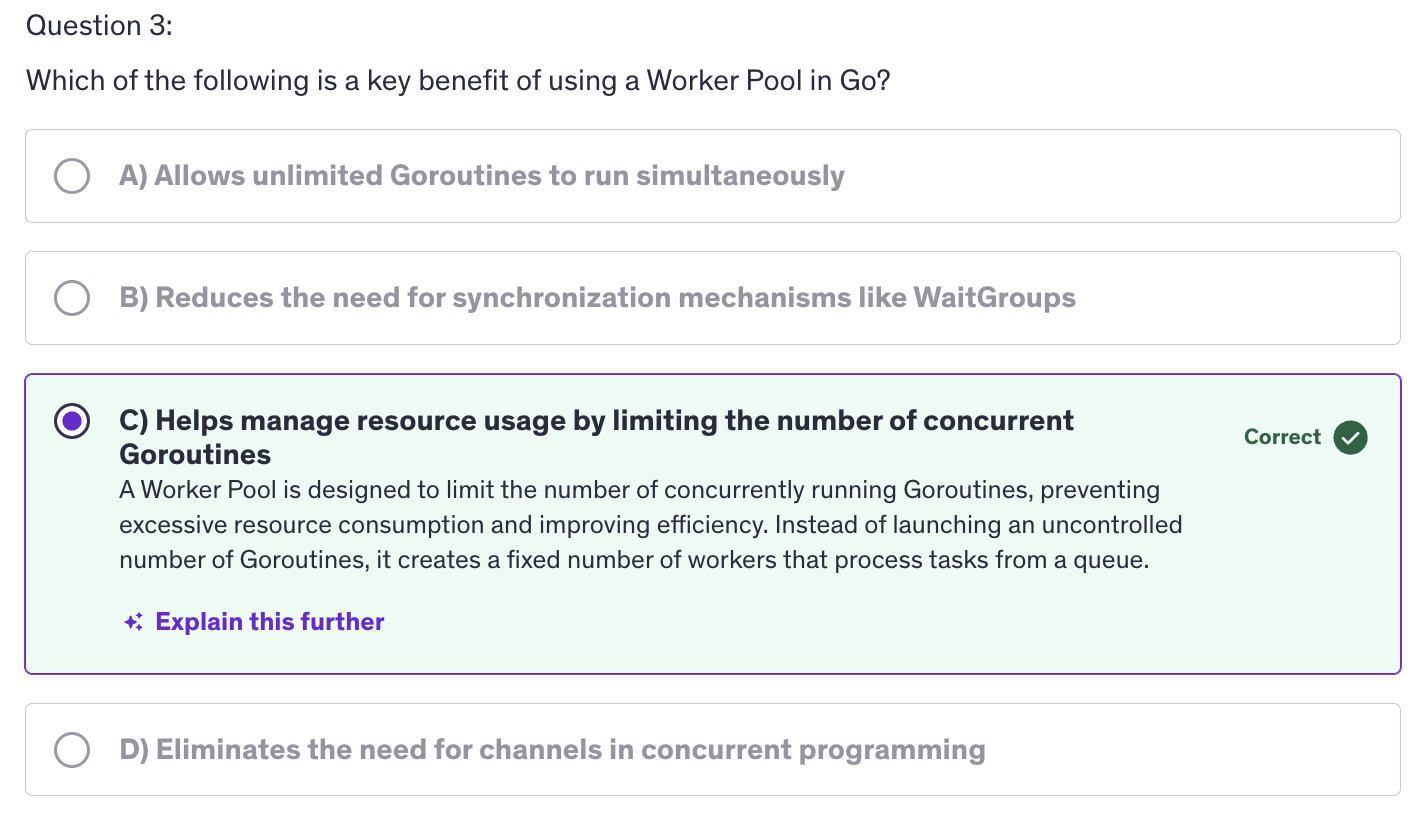
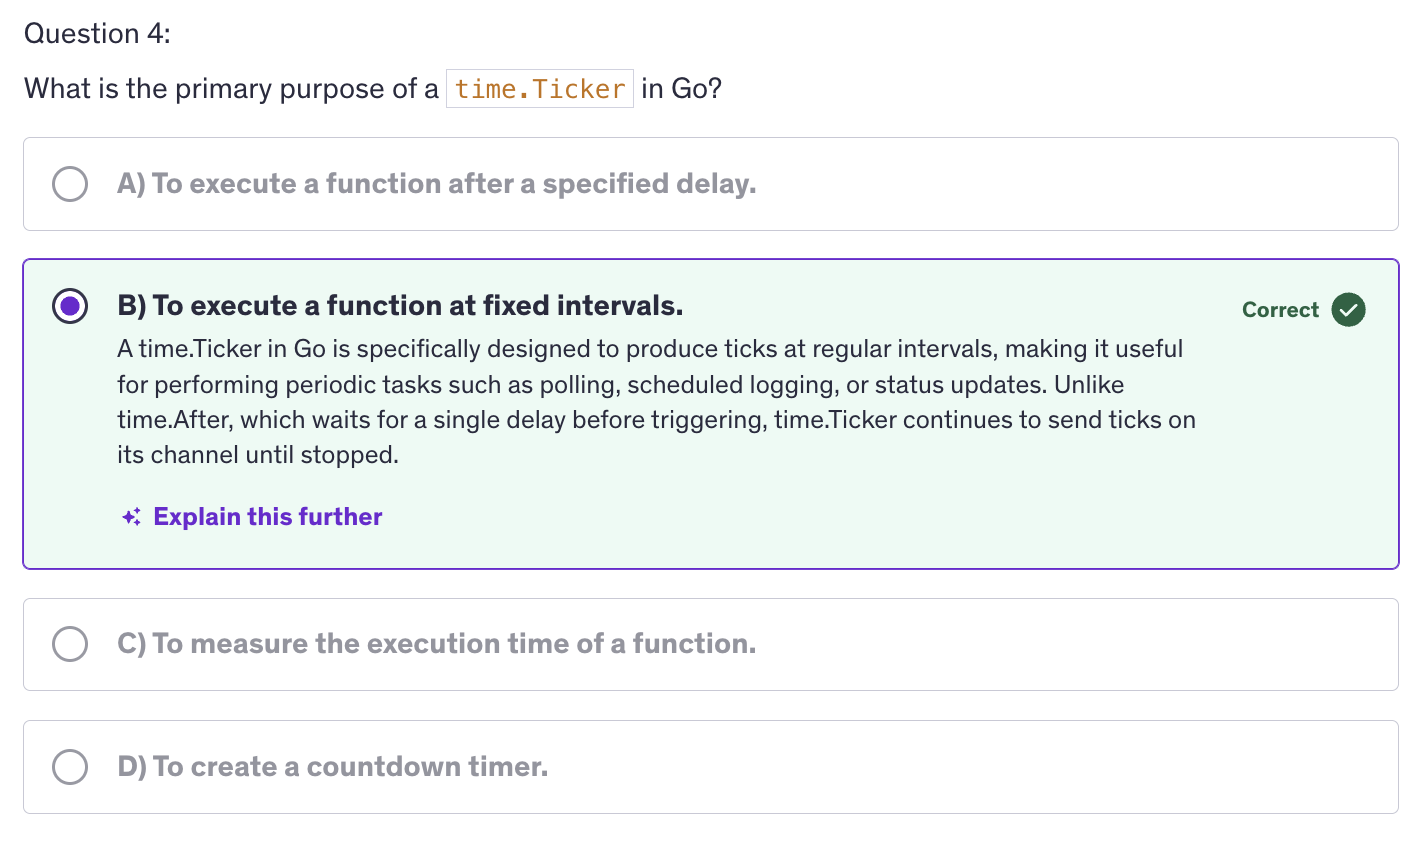
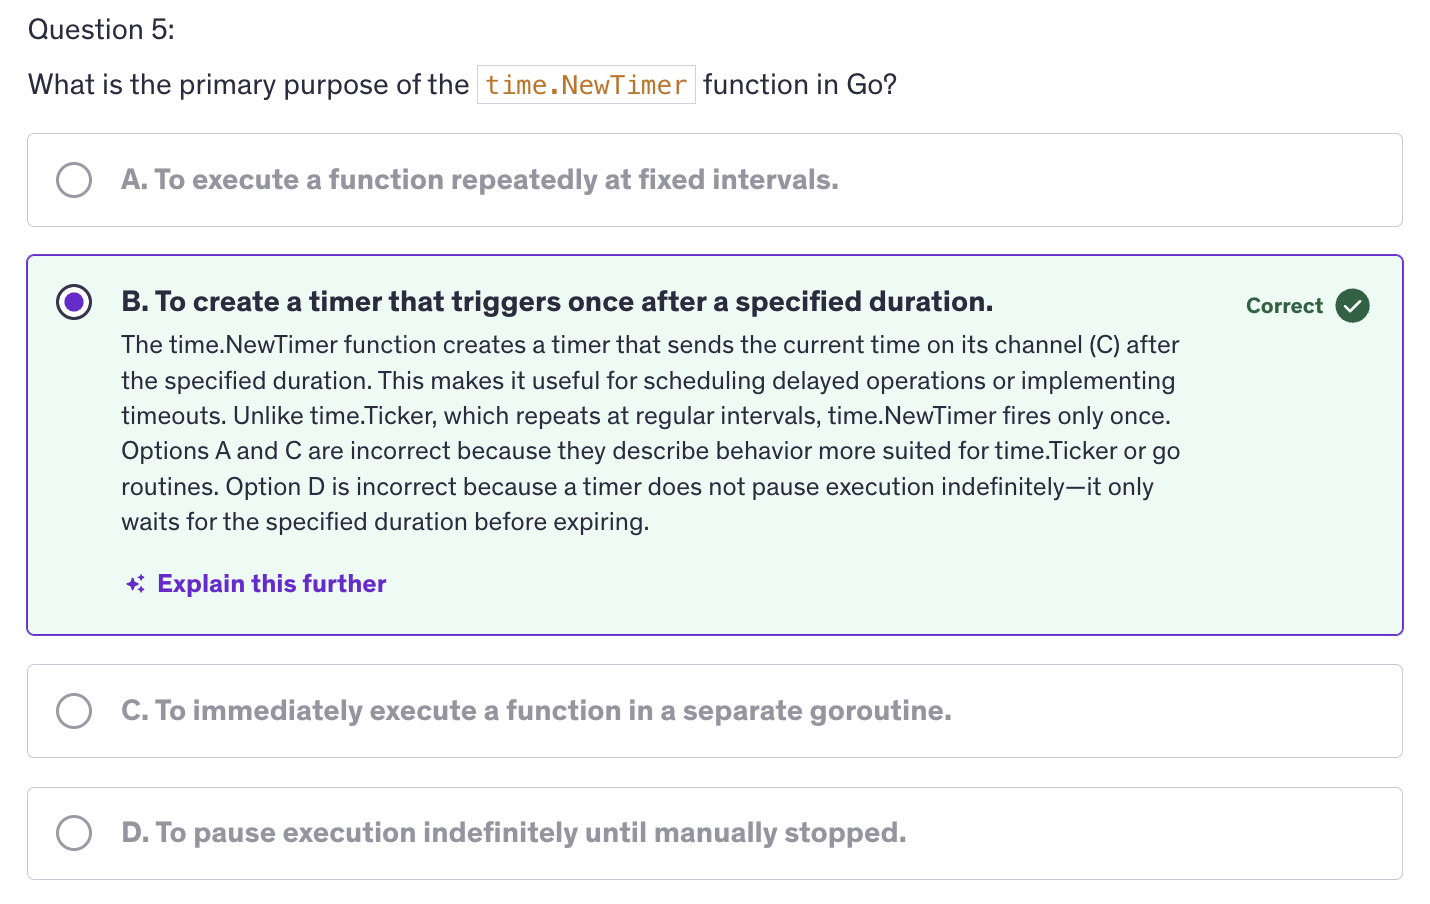
Mutexex
-
Why use Mutexes ?
- Data Integrity
- Synchronization
- Avoid Race Conditions
-
Basic Operations
- Lock()
- Unlock()
- TryLock()
-
Mutex and Performance
- Contention
- Granularity
-
A mutex which is short for mutual exclusion, is a synchronization primitive used to prevent multiple goroutines from simultaneously accessing shared resources or executing critical sections of code. It ensures that only one goroutine can hold the mutex at a time, thus avoiding race conditions and data corruption.
-
Mutual exclusion is a principle used in concurrent programming to prevent multiple threads or processes from accessing a shared resource, simultaneously, ensuring data integrity and avoiding race conditions.
-
Why Mutual Exclusion is important ?
- Data Integrity
- Consistency
- Safety
-
How Mutual Exclusion is Achieved ?
- Locks (Mutexes)
- Semaphores
- Monitors
- Critical Sections
-
Why they are often used in structs ?
- Encapsulation
- Convenience
- Readability
-
How do mutexes work ?
-
Mutexes are basically locking and unlocking mechanism. Mutexes have a marking mechanism. They mark the begining and ending of a critical section.
mu.Lock()marks the begining of a critical section.mu.Unlock()marks the end of the critical section. And anything in between lock and unlock will be marked as the critical section, the section that the mutexes will protect. -
Mutex itself doesn't know what code to lock. It merely prevents other goroutines from acquiring the lock until it's unlocked and it protects the critical section, which is defined by the code between mu.Lock and mu.Unlock. This code must be written carefully to ensure that the critical section only includes operations on shared resources that need protection.
-
-
Best Practices for using Mutexes
-
Minimize Lock Duration: Keep the critical section as short as possible to reduce the time the mutex is held, thereby minimizing contention and improving performance.
-
Avoid Nested Locks: Avoid acquiring multiple locks simultaneously to prevent deadlocks. And if nested locking is necessary, ensure a consistent lock order.
-
Prefer sync.RWMutex for Read-Heavy Workloads
-
Check for Deadlocks: Regularly review you code to identify potential deadlock situations and always use defer for unlocking.
-
Use
deferfor Unlocking: to ensure that the mutex is released, even if an error occurs or the function exits prematurely.
-
-
Common Pitfalls
-
Deadlocks
-
Performance: execessive locking or holding locks for too long can degrade your application performance. Optimize by using lock contention and minimize critical section length.
-
Starvation: Concept where on or more goroutines are perpetually denied access to a resource due to frequent acquisition by others. Ensure fair access and consider using additional synchronization techniques if necessary.
-
-
Contention in computing refers to the situation where multiple processes or threads compete for the same resource such as a mutex, CPU, or memory at the same time. In terms of mutexes and concurrency, contention specifically describes the competition among goroutines or threads to access to a shared resource that is produced by a mutex.
Atomic Counters
-
Why use Atomic Counters ?
- Performance
- Simplicity
- Concurrency
-
Atomic Operations in Go
- Window Duration
- Request Counting
- Reset Mechanism
-
sync/atomicpackage :atomic.AddInt32/atomic.AddInt64atomic.LoadInt32/atomic.LoadInt64atomic.StoreInt32/atomic.StoreInt64atomic.CompareAndSwapInt32/atomic.CompareAndSwapInt64
-
An atomic counter is a type of counter used in concurrent programming to manage and track counts or values in a thread safe manner, without the need for explicit locking. It leverages atomic operations to ensure consistency and prevent race conditions.
-
Atomic Operations are often faster than using Mutexes due to lower overhead. Atomic Counters ensures that the counter updates are sade and consistent accross multiple goroutines.
-
Atomic counters are offered by the
sync/atomicpackage in Go, which provides low level atomic operations for synchronizing access to shared variables. It offers functions to performing atomic operations on integers and pointers. -
Atomic operations refers to operations that are indivisible and uninterruptible. This concept is crucial for ensuring safe, concurrent access to shared resources in a multithreaded environment.
-
Indivisible: atomic operation is one that completes in a single step relative to other threads or processes. It means that once the operation starts, it runs to completion without being interrupted or observed in an intermediate state by other threads.
-
Uninterruptible: operation is performed without any possibility of interruption. Once being, it runs to completion without any other thread being able to observe or interfere with its intermediate state.
-
Goal is to increment counter many times from different goroutines without causing issues like data races.
-
Atomic Operations are special operations that are performed as a single indivisible step. They are crucial for safely handling shared data in concurrent programming.
-
In Go, we are using
sync/atomicpackage which provides functions to perform atomic operations. -
Mechanism fo atomic counters is pretty much similar to mutexes. Mutexes had a locking and unlocking mechanism, and here we are free from locking and unlocking manually. Behind the scenes, atomic operations implement the same locking and unlocking mechanism at a lower level.
-
What does
Atomicmean ?- Indivisible
- Uninterruptible
-
Why use Atomic Operations ?
- Lost Updates
- Inconsistent Reads
-
How Atomic Operations Work ?
- Lock-Free
- Memory Visibility
-
Issues without Atomic Operations :
- Data Race
- Inconsistent Results
-
A data race occurs when two or more goroutines access the same variable concurrently and at least one of those accesses is a write. Since there is no synchronization mechanism in place, the result of these concurrent operations is unpredictable. This unpredictability results in data risks and inconsistent results.

-
What might go wrong (without atomic counters):
- Incorrect Final Count
- Unpredictable Behaviour
- Possible Crashes or Corruption
-
Best Practices
- Use Atomic Operations for simple counters
- Avoid complex operations
- Ensure Memory visibility
- Monitor performance
-
Common Pitfalls
- Incorrect Use of Atomic Operations
- Overuse of Atomic Counters
- Race conditions
Rate Limiting
-
Rate limiting is a technique used to control the amount of incoming or outgoing traffic to or from a system. It ensures that resources are not overwhelmed and that usage remains withing predefined limits. It is commonly used in web-servers, APIs and applications to prevent abuse, manage load and ensure fair usage.
-
Rate limiting is used to prevent overload, to protect our systems from being overwhelmed by too many requests or operations. Rate limiting ensures equitable distribution of resources among users or clients. It mitigate the risk of abuse or misuse of resources.
-
Why use rate limiting ?
- Prevent Overload
- Fairness
- Abuse Prevention
- Cost Management
-
Common Rate Limiting Algorithms:
-
Token Bucket Algorithm: It uses a bucket to hold tokens that represent the ability to perform operations. These tokens are added at a fixed rate and operations can only be performed if tokens are available. It allows burst of traffic while maintaining a steady rate over time.
-
Leaky Bucket Algorithm: Similar to the token bucket but with a fixed leak rate. Requests are added to the bucket and the bucket leaks at a constant rate. Key property - It smooths out burst of traffic to ensure a constant output rate.
-
Fixed Window Counter: It counts requests within a fixed time window (example per minute, 15 sec, etc). If the count exceeds the limit, further requests are denied until the window resets. Key property - simple to implement but may allow for bursts at the window boundaries.
-
Sliding Window Log: Keeps a log of request timestamps and enforces limits based on the number of requests in a sliding window of time. Key property - It provides more precise rate limiting compared to fixed windows but it requires more memory.
-
Sliding Window Counter: Combines fixed window and sliding window approaches. It maintains a counter for recent requests and adjusts the count based on sliding time windows. Key property: It balances precision and memory usage.
-
Rate Limiting - Token Bucket Algorithms
-
using empty struct in channel is a common patter in Go when you want to signal or count something without needing to store any actual data. So why chose struct ?
-
The best answer and the most important aspect of using struct is zero memory overhead. Empty structs in Go take up zero bytes of memory. This is because they don't contain any data and when you use struct as the type for your tokens, you are effectively creating a token that has no associated data, which minimizes memory usage.
-
Signaling without data: In cases where the presence of a token rather than the value of the token is what matters, an empty struct us a perfect fit.
-
In context of a rate limiter, you only care whether there is a token available or not, not what the token contains.
-
And using structs makes it clear that the values in the channel are only for signaling purposes and do not carry any data. This can improve the readability of your code by making it clear that the channel's purpose is simply to count or send signals or receive signals.
-
Key Points:
- Memory Efficiency: using structs avoids unnecessary memory allocation since it occupies zero bytes.
- Signalling intent: it clearly signals the intent that the channel is used for signaling or counting.
- Makes our code simpler: simplifies the code by avoiding the need to create and manage more complex types when the simple signaling is sufficient.
-
Using empty structs in channels is a Go idiom that leverages the language's zero byte storage optimization for empty structs, providing a clear and efficient way to implement signaling and counting mechanism.
-
-
The token bucket algorithm is used in networking and rate limiting scenarios to control the rate of events and ensure fair usafe of resources.
Rate Limiting - Fixed Window Counter
-
Fixed Window Counter
-
How it works:
- Each window has a counter that tracks the number of requests.
- If the number of requests in the current window is below the limit, the request is allowed, and the counter is incremented.
- If the number of requests reaches the limit, subsequent requests in the same window are denied.
- At the start of a new window, the counter is reset.
-
Key Points of Fixed Window Algorithms :
- Window Duration
- Request Counting
- Reset Mechanism
-
-
Token Bucket Algorithm
- How it works ?
- Tokens are added to the bucket at a fixed rate (refill rate).
- Each request consumes one token from the bucket.
- If the bucker has tokens, the request is allowed and a token is removed.
- If the bucket is empty, the request is denied.
- The bucket has a maximum capacity to limit the number of accumulated tokens.
- How it works ?
-
Practical use cases for rate limiting:
- API Rate Limiting
- Traffic Shaping
- Preventing Abuse
- Load Management
-
Best Practices
- Choose the right algorithm
- Handle the edge cases
- Monitor and adjust
- Graceful handling of rate limits
Rate Limiting - Leaky Bucket Algorithm
-
Token Bucket vs Fixed Window vs Leaky Bucket Algorithms for Rate Limiting
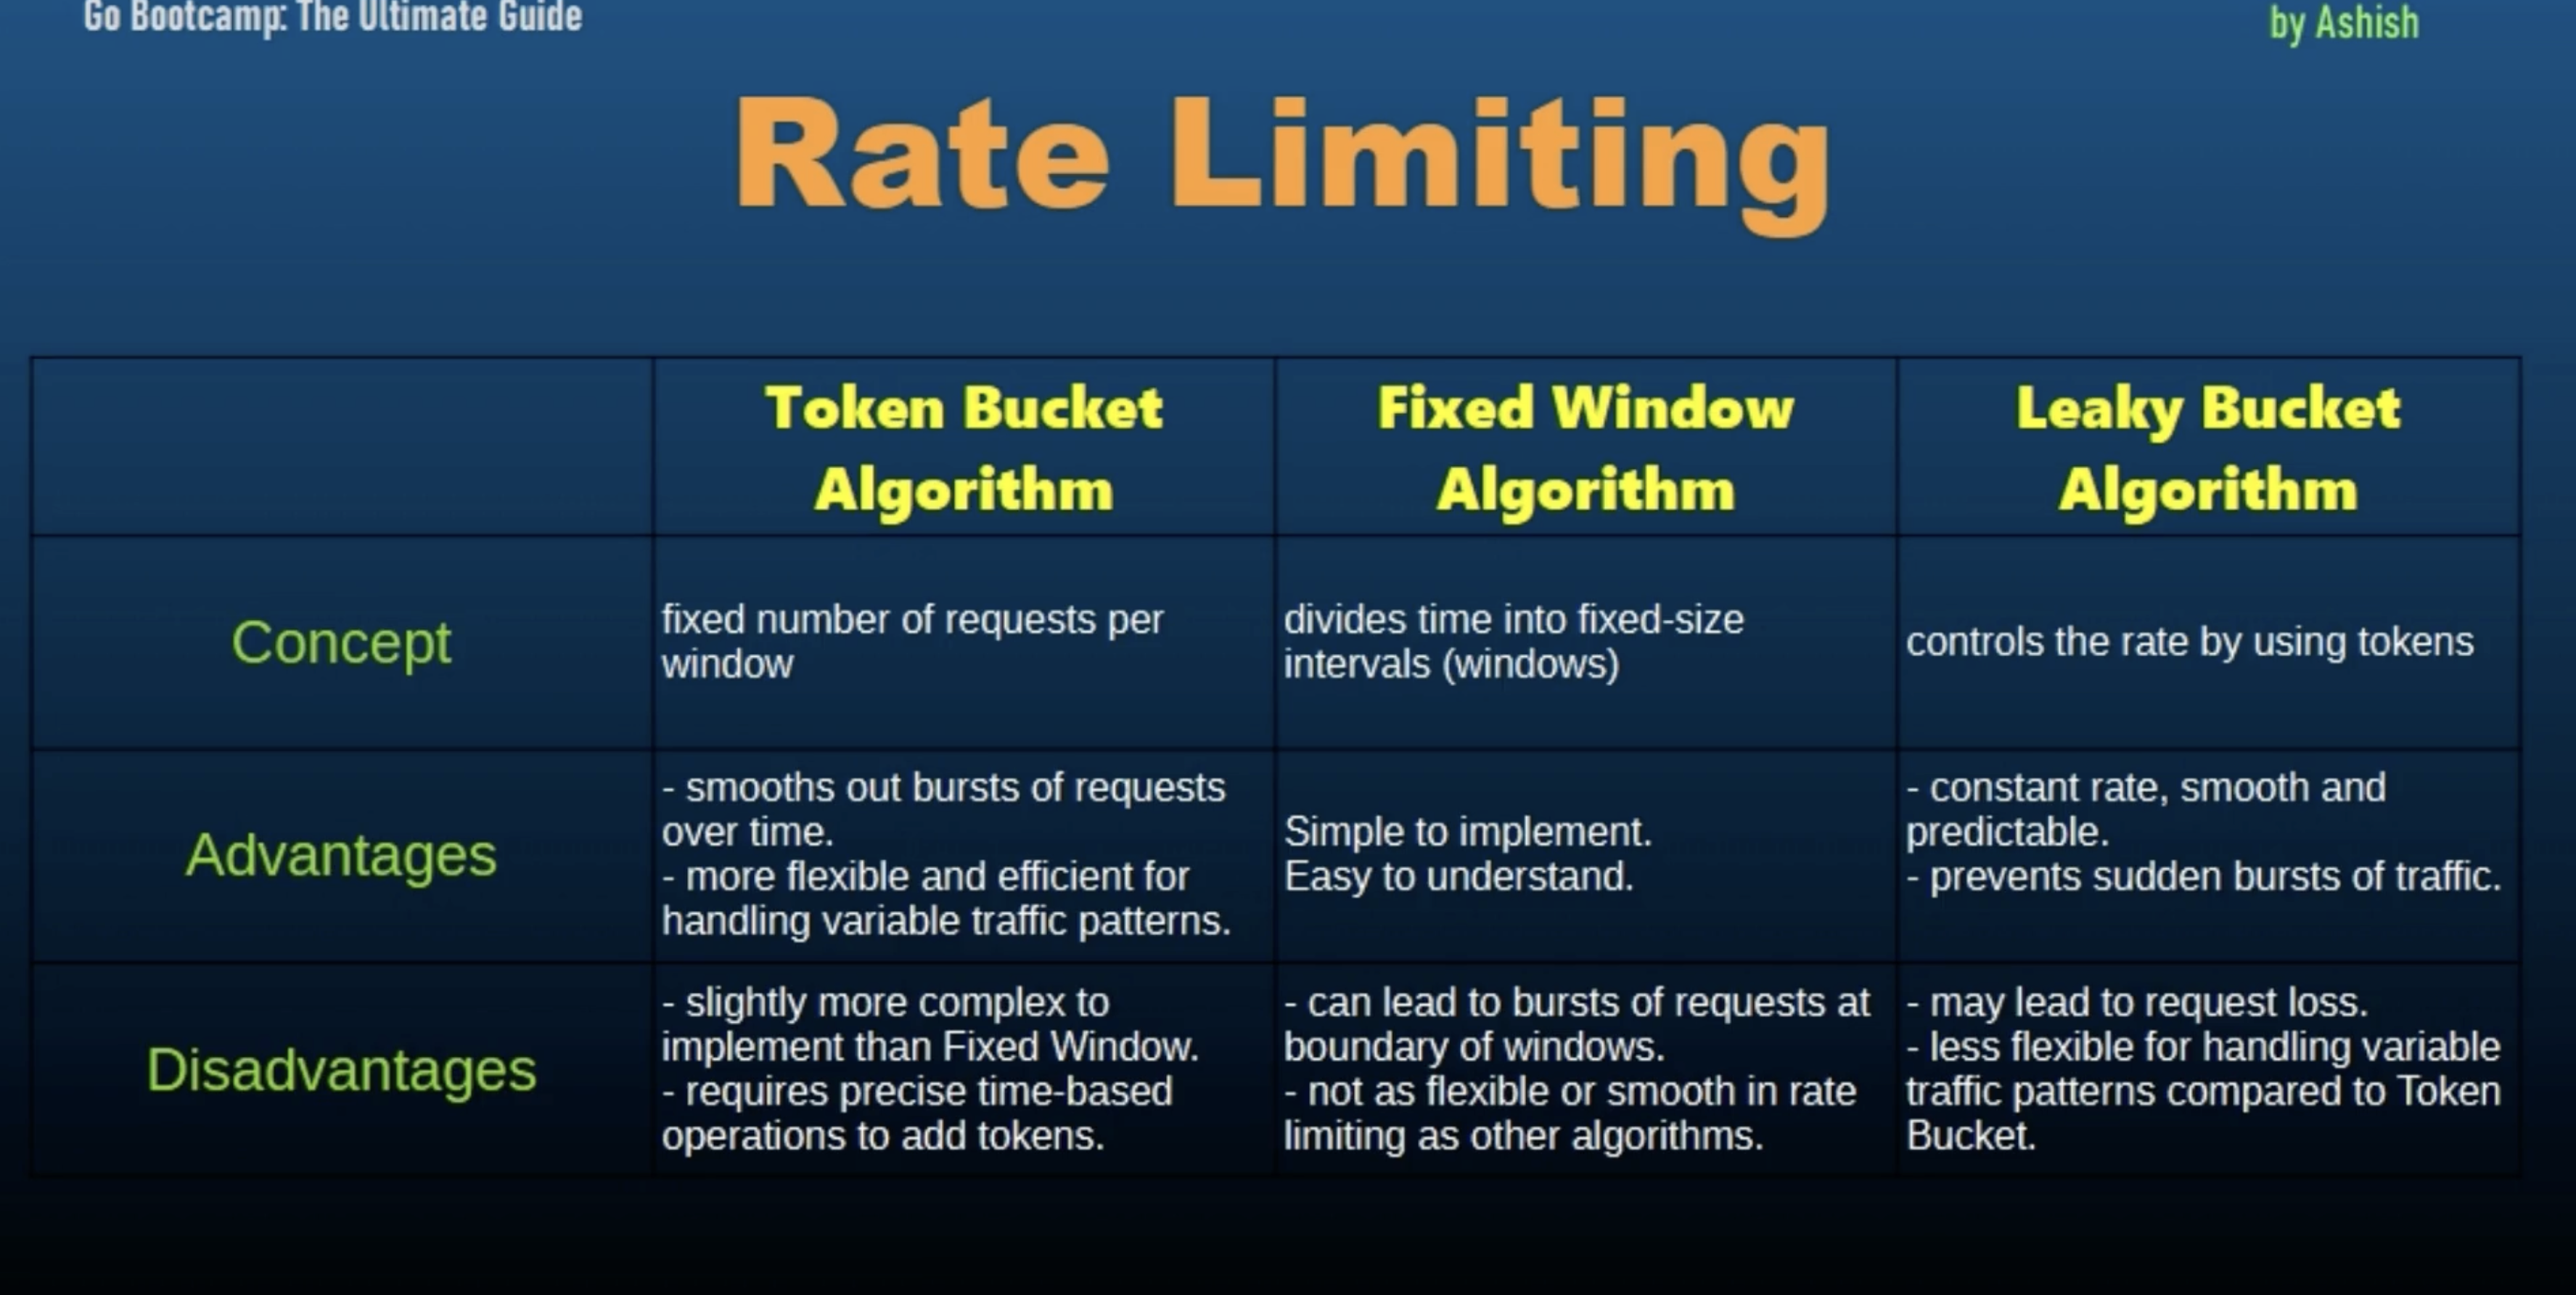
-
How Leaky Bucket Algorithm Works:
- Requests arrive and are added to the bucket (queue).
- The bucket processes (leaks) requests at a fixed rate.
- If the bucket is full (the queue is at capacity), incoming requests are discarded.
- Ensures that requests are handled at a steady, controlled rate.
Stateful Goroutines
-
A Stateful goroutine is a goroutine that maintains and updates its own internal state accross multiple invocations or interactions.
-
Unlike stateless goroutines which perform operations without retaining any information between executions, Stateful goroutines keep track of state information that influences their behaviour and responses.
-
The reason we use stateful goroutines is for state management, which means that is essential for applications where the execution context or progress must be preserved between function calls.
-
Another usecase is concurrency, because it allows multiple goroutines to manage their own state independently enabling complex concurrent behaviour.
-
Stateful goroutines are useful in scenarios where tasks need to remember their progress or context, such as managing a queue of jobs or processing streams of data.
-
Why use Stateful Goroutines ?
- State Management
- Concurrency
- Task Execution
-
Key Concepts of Stateful Goroutines:
-
State Preservations: stateful goroutines keep track of data or context that affects their execution over time. This data is stored in variables or fields within the goroutines scope.
-
Concurrency management: Proper management of concurrent access to state is crucial to avoid race conditions and ensure consistency. Techniques such as mutexes, channels, or atomic operations can be used to synchronize access.
-
Lifecycle Management: Stateful goroutines have a lifecycle that includes intialization execution, and termination. Managing this lifecycle effectively ensures that state is correctly handled throughout the goroutines execution.
-
-
Handling Concurrency and Synchronization:
-
Mutexes and Locks : to protect shared state and ensure that only one goroutine accesses it at a time.
-
Atomic Operations: for simple integer counters and flags.
-
Channels for Communication: we can use channels to communicate state changes and synchronize between goroutines, escpecially when the state needs to be shared or updated concurrently.
-
-
Common Use cases :
- Task Processing
- Stateful Services
- Data Stream Processing
-
Best Practices
-
Encapsulate State: we need to encapsulate state within the goroutine or struct to avoid exposing internal details and ensure proper management.
-
Synchronize Access: We have to ensure that access to state is properly synchronized to avoid race conditions and ensure data consistency.
-
Monitor Debug
-
Sorting
-
Sorting is a fundamental operation on computer science used to organize data, making it easier to search, analyze and manipulate.
-
the
sortpackage in Go provides builtin functions for sorting slices and user defined collections. -
Why is Sorting important?
- Efficiency
- Readability
- Algorithms
-
Built-in Functions
- sort.Ints([]int)
- sort.Sort(sort.Interface)
- sort.Strings
-
sort.Interfaceconsist of three methods:Len() int: returns the number of elements in the collection.Less(i,j int) bool: it compares the elements at indices i and j and returnstrueif the element at i should be sorted before the element at j.Swap(i, j int): swaps the elements at indices i and j.
-
the
sortpackage in Go requires us to implement sort.Interface to sort custom data types. -
A
typecan have it's own method. structs do not have methods,typehave methods.type By func(p1, p2 *Person) bool -
Best Practices:
- Reuse Sorting Functions
- Optimize Comparison Logic
- Test for Edge Cases
-
Performance Considerations:
- Complexity
- Stability
- Memory Usage
Advanced: Quiz-4
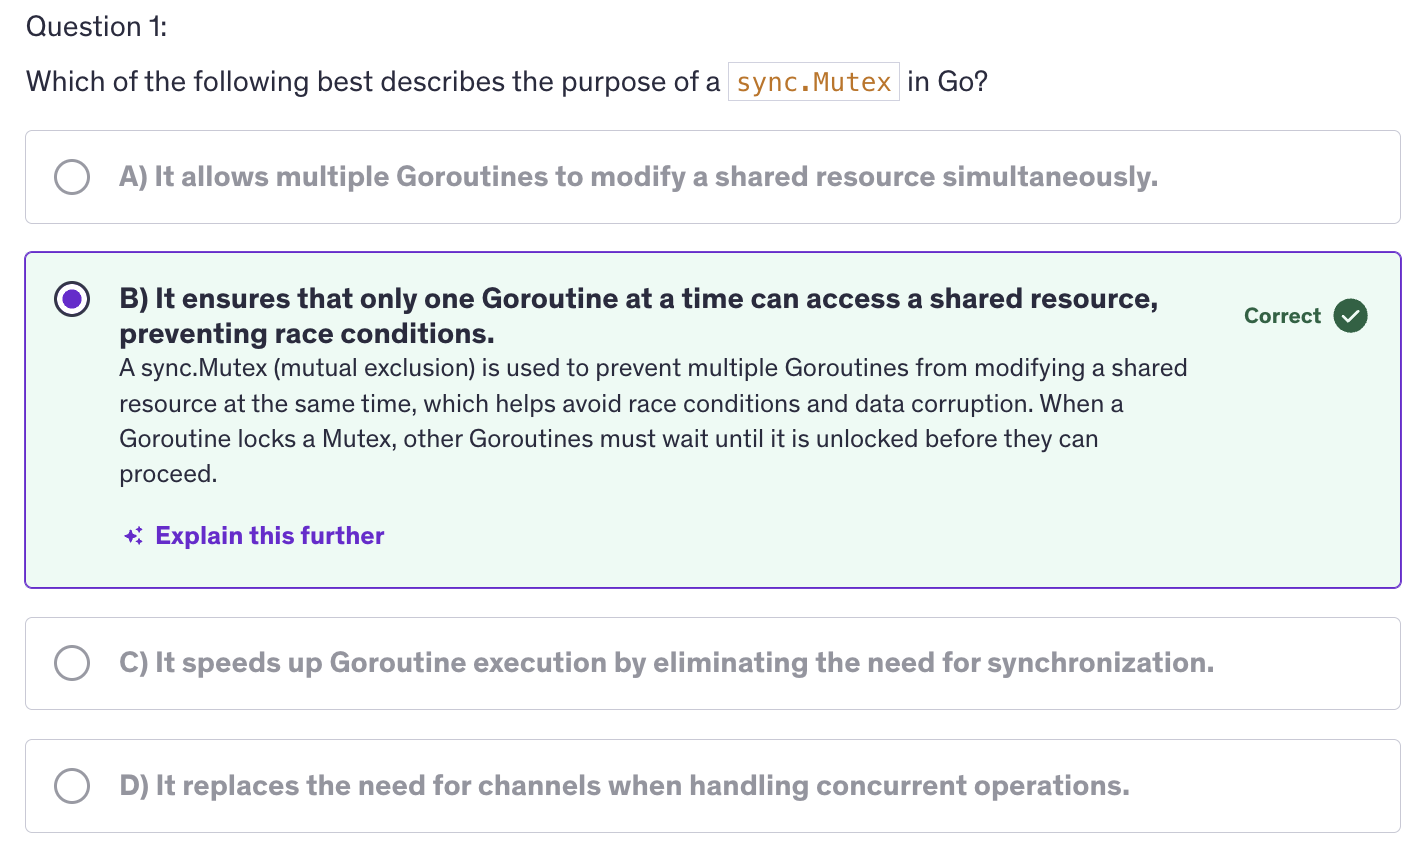
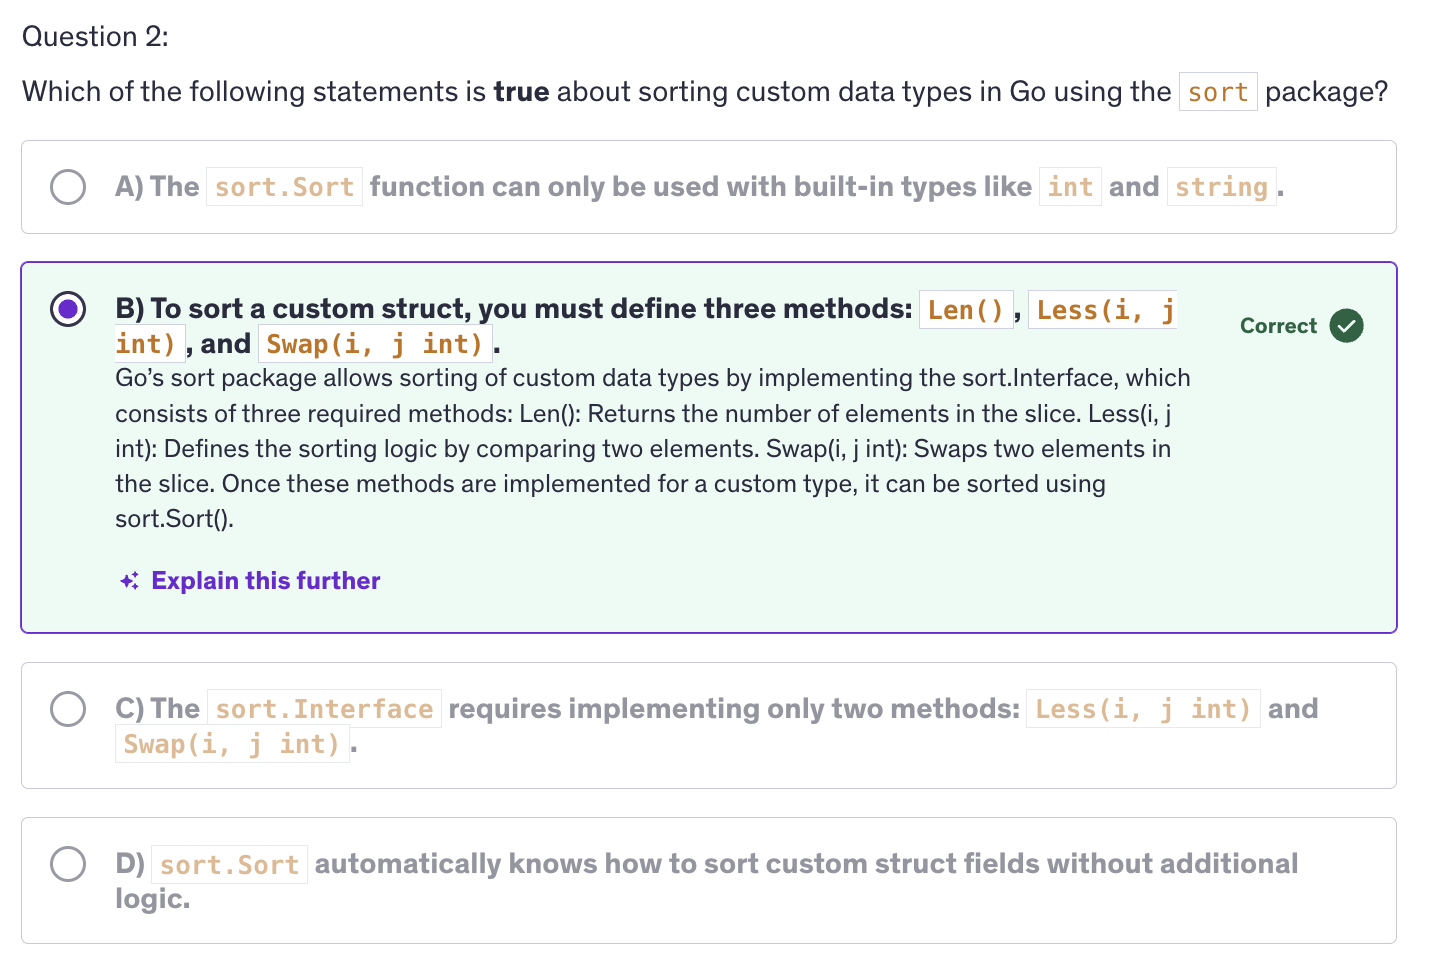
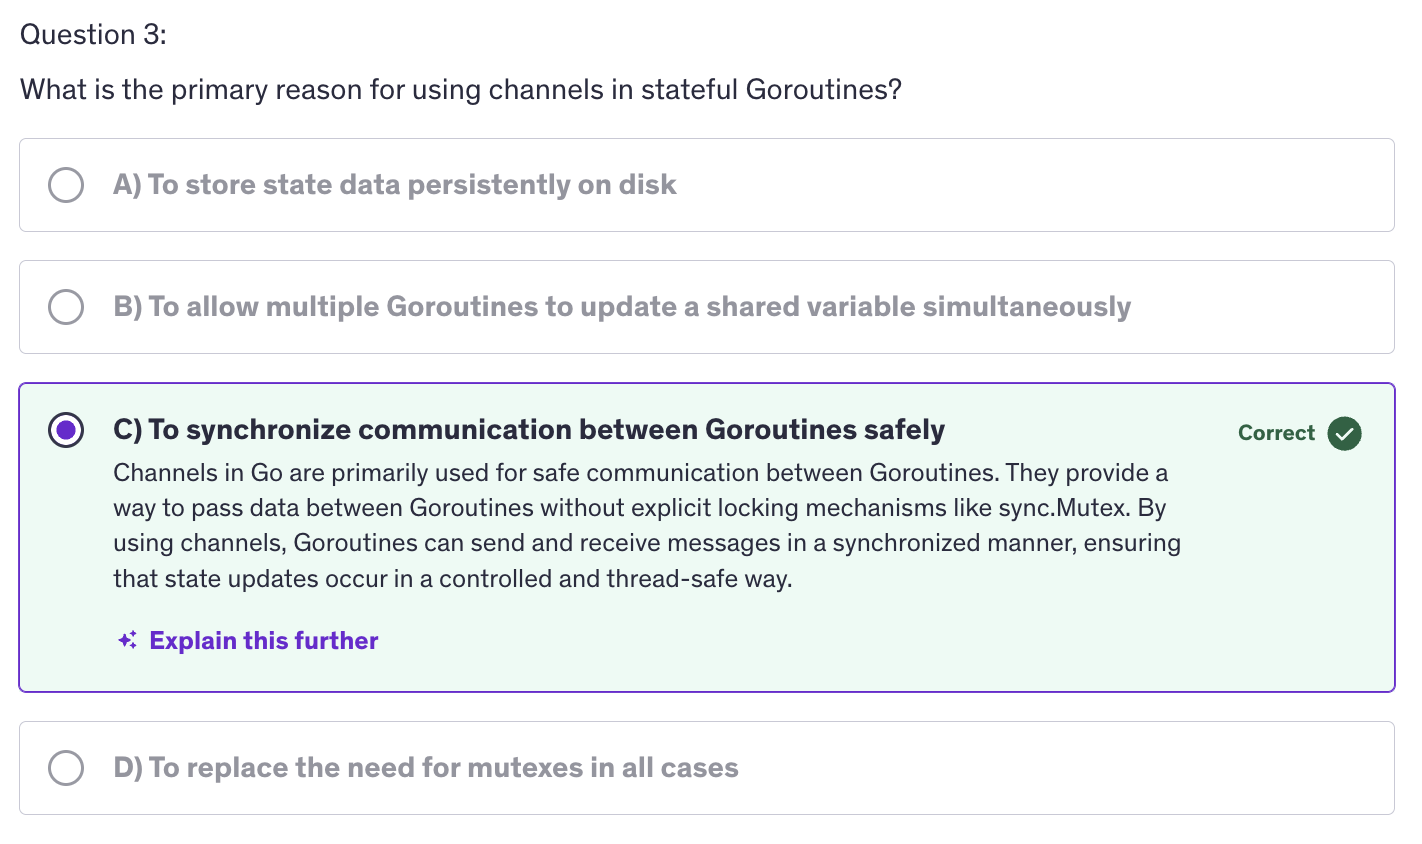
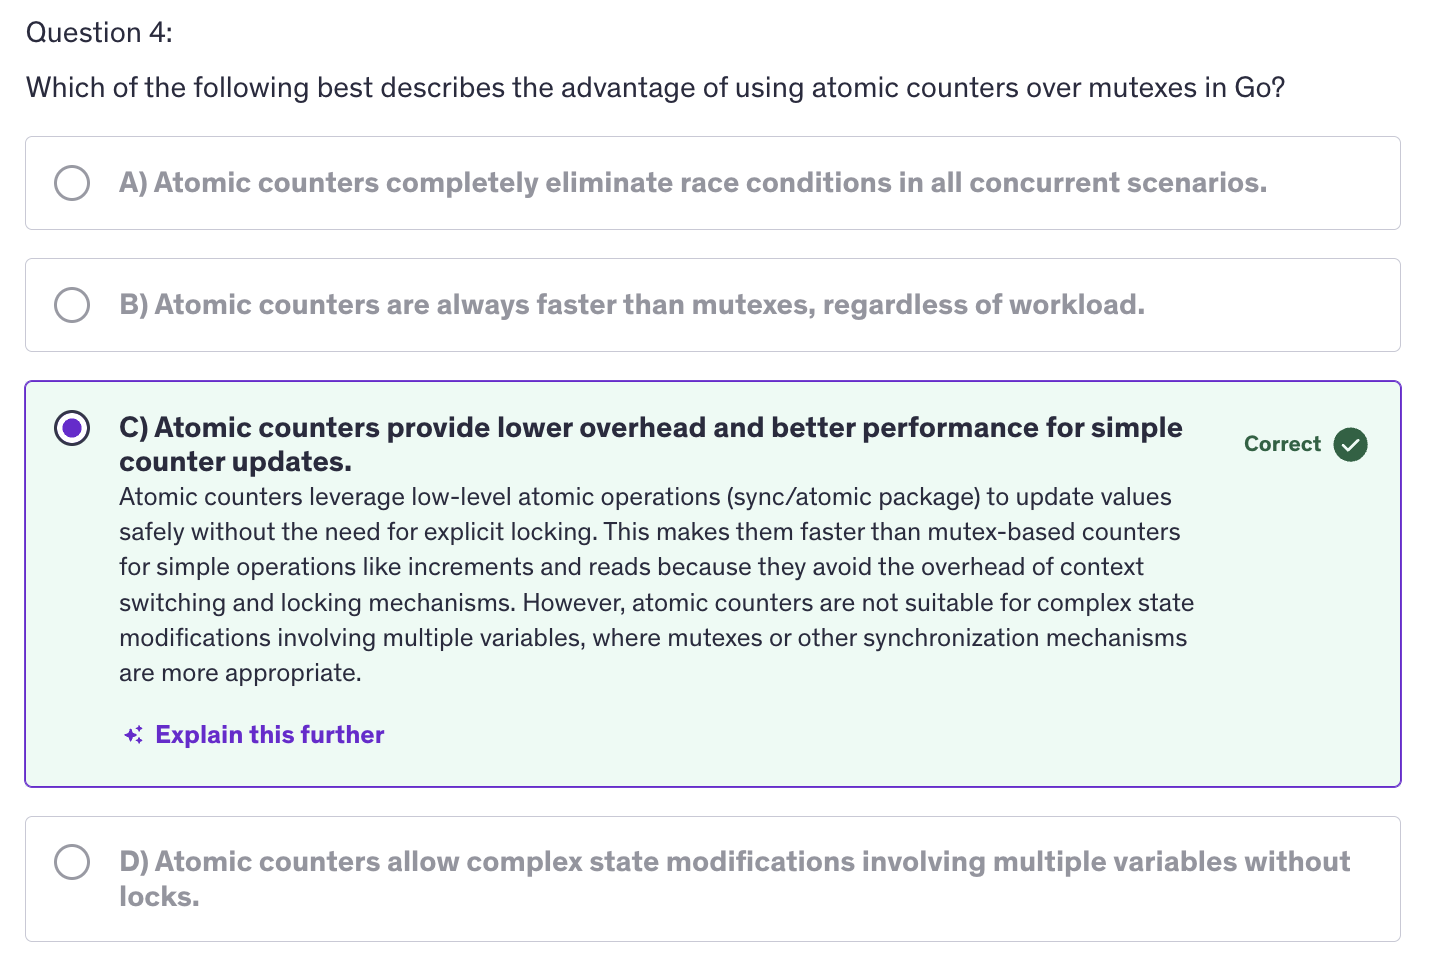
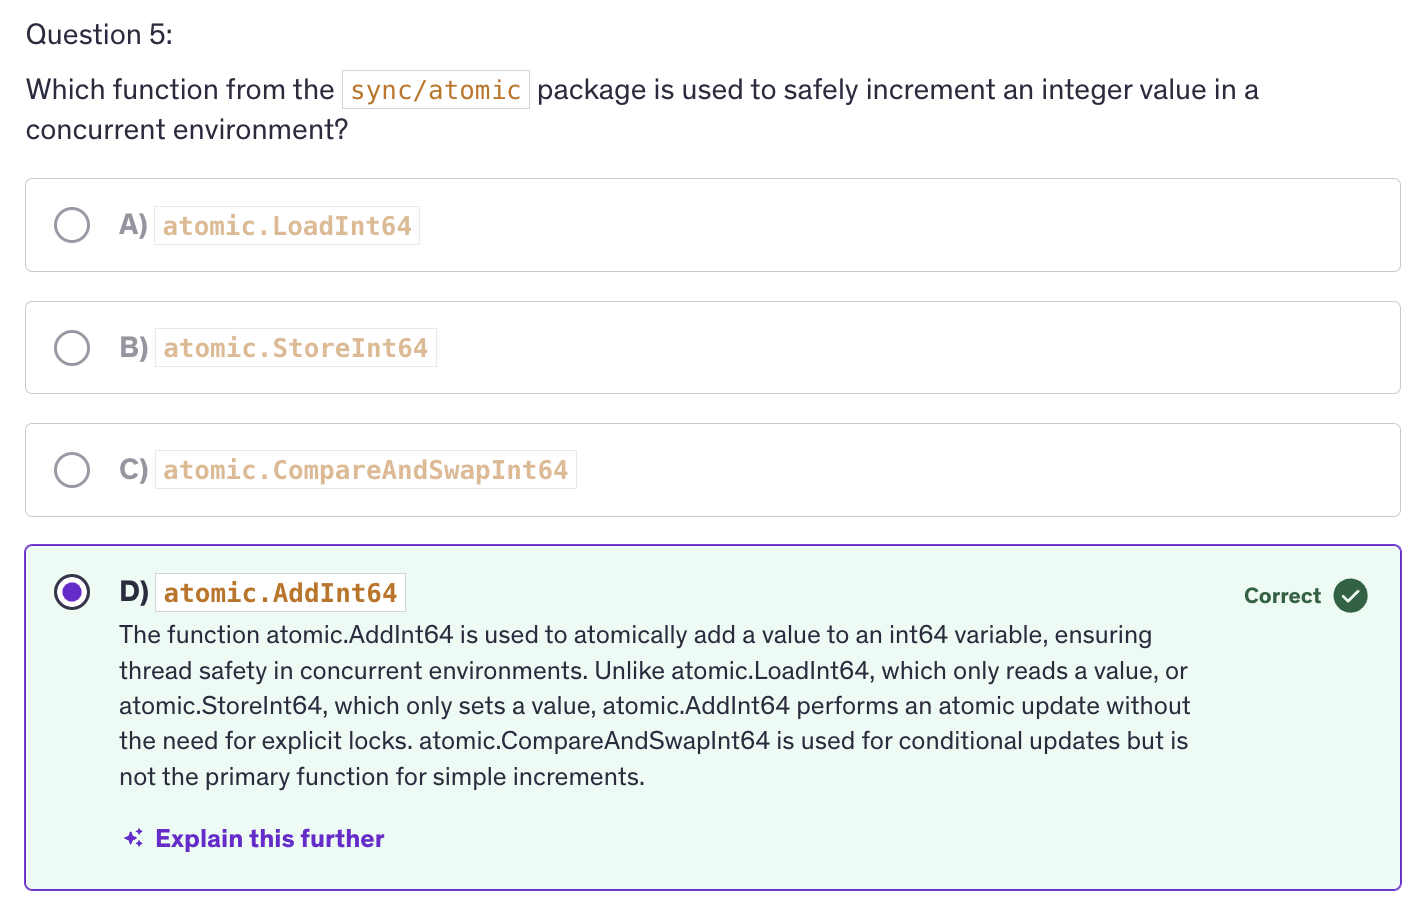
Testing / Benchmarking
-
Testing is the process of verifying that a program behanves as expected and meets the requirements set for it. It involves writing and executing test cases to identify and fix bugs, ensure code correctness and improve software quality.
-
Why is Testing important ?
-
Reliability: It ensures that the code functions correctly and as intended.
-
Maintainability: Testing makes it easier to refactor and update code without introducing new bugs.
-
Documentation: testing provides a kind of documentation that demonstrates how code is expected to behave.
-
-
Go provides a builtin testing package that simplifies writing and running tests.
-
test files have a suffix:
_test.go. eg:FILENAME_test.go. The file name should have this suffix so that the go compiler knows that it is a test file otherwise it may give an error. -
no main function needed inside the test file.
-
to run the test files type :
go test FILENAME_test.go -
Subtests allow grouping related tests and provides better test organization and reporting.
-
Benchmarking measures the performance of code. Specifically, how long it takes to execute a function or operation. This helps identify performance bottlenecks and evaluate the impact of code changes on performance.
-
For benchmarking, Go provides us a
benchmarkingpackage which is in the testing package. The testing package also supports benchmarking with functions that start with benchmark. -
Start the benchmark functions with names staring with the keyword
Benchmarkeg:BenchmarkAdd(b *testing.B)- We should loop over
b.Nto perform the benchmarking.
- We should loop over
-
By resetting the timer, we ensure that the setup time is not included in the benchmark timing and this allows us to measure only the time taken by the operation we are interested in benchmarking and providing a more accurate performance measurement.
-
Commands used:
> go test testing_benchmarking_test.go > go test -bench=. testing_benchmark_test.go | grep -v 'cpu' > go test -bench=. -benchmem testing_benchmark_test.go | grep -v 'cpu' > go test -bench=. -memprofile mem.pprof testing_benchmarking_test.go | grep -v 'cpu' > go tool pprof mem.pprof-
We use the pipe with
grep -v 'cpu'to hide the details about the CPU. -
benchmemflag tells Go to include memory allocation statistics along with the benchmarking results.
-
-
Profiling:
- Profiling provides detailed insights into the performance of your application, including CPU usage, memory allocation and goroutine activity.
- Use
pprofto collect and analyze CPU profile data.
-
Best Practices
- Write Comprehensive Tests
- Maintain Test Coverage
- Use Benchmarks Effectively
- Profile Regularly
-
Testing for quality assurance
-
Benchmarking for performance optimization
-
Profiling for Performance Analysis
Executing Processes / OS Processes / Other Processes | SPAWNING PROCESSES
-
Process Spawning refers to creating and managing separate operating system processes from within a Go program. This involves starting new processes to run tasks concurrently or in isolation from the main program. We use process spawning for concurrency, isolation and resource management.
-
Why use Process Spawning ?
- Concurrency: runs tasks in pararllel to utilize multiple CPU cores for isolation.
- Isolation: executes tasks in separate environments to avoid interference and improve stability.
- Resource Management: Process Spawning offloads resource intensive tasks to separate proceses to manage system resources more effectively.
-
os/execpackage:exec.Commandcmd.Stdin/cmd.Stdoutcmd.Start/cmd.Waitcmd.Output
-
grepis a linux terminal command. It searches for a line that contains the word, the argument that is passed to it. -
Use Cases and Considerations
- When to use Process Spawning
- Resource-Intensive Tasks
- Isolation
- Concurrency
- Performance and Resource Management
- Overhead
- System Limits
- When to use Process Spawning
-
Spawning processes in Go is a powerful technique for executing external commands and integrating them into your Go applications. The
os/execpackage provides robust and flexible ways to start and manage external processes, handle their input and output and capture their results.
Signals
-
Signals are a form of inter-process communication used to notify processes of certain events or states. They are commonly used to handle asynchronous events such as interruptions or terminations.
-
Why use signals ?
-
Graceful shutdown: to allow programs to handle interruptions and shutdown gracefully.
-
Resource Cleanup: ensure proper release of resources before exiting.
-
Interprocess Communication: we need to notify or communicate between different processes.
-
-
Go provides a way to handle signals using the
os/signalpackage which allows programs to listen to and respond to signals. -
Signals in Unix like OS:
- SIGINT (Interrupt Signal)
- SIGTERM (Terminate Signal)
- SIGHUP (Hang Up Signal)
- SIGKILL (kill)
-
Using the
killcommand:- Find the Process ID (PID)
- Send the signal
- Some examples:
kill -s SIGINT 8078
kill -s SIGTERM 8992
kill -s SIGHUP 10537
-
Signal Types and Usage:
- Interrupts: SIGINT
- Terminations: SIGTERM
- Stop/Continue: SIGCONT, SIGSTOP
-
Debugging and Troubleshooting
- Debugging Signal Handling
- Common issues
- Signal lost
- Deadlocks
-
As we use signal, if that signal has a specific functionality associated with it, we actually override that functionality as soon as we use that signal in our program.
-
Best Practices :
-
Graceful shutdowns: handle termination signals to allow your applications to clean up resources and exit gracefully.
-
Use signals to Handle Resource Cleanups: ensure that files, network connections or other resources are properly released before exiting.
-
When using signals, ensure that you use non-blocking methods to ensure that signal handling does not delay or block other operations.
-
-
Using signals for graceful shutdowns and cleaning up resources is a common practice but aprat from that we can also use signals for inter-process communication. We can communicate state changes or events between processes using signals.
-
Keep in mind some performance considerations like ensuring that signal handling is efficient and does not introduce performance bottlenecks.
-
For security considerations: validate and handle signals securely to avoid potential security risks.
Reflect
-
Reflection is a mechanism that allows a program to inspect and manipulate its own structure and behavior at runtime.
-
In Go, reflection is provided by the
reflectpackage. We use reflection for dynamic type inspections. Inspecting types and values dynamically. -
Reflection is also used for generic programming, where we implement functions and data structures that operate on any type.
-
Apart from that we use reflection for serialization and deserialization as well. Using reflect package we can convert between data representations like JSON, XML and go types.
-
The reflect package provides types and functions to inspect and manipulate objects at runtime. Key types include: Type, Value and struct fields.
-
Why use Reflection ?
- Dynamic Type Inspection
- Generic Programming
- Serialization/Deserialization
-
Few Methods
reflect.TypeOf(): represents the type of a value.reflect.Value(): represents the value of a variable.reflect.ValueOf()reflect.ValueOf().Elem()
-
In Go, whether a field can be accessed and modified via reflection depends on its visibility.
-
The lowercase naming of variable / struct members, constricts the visibility of a struct and the fields of the struct to the package only.
-
If we are using Uppercase alphabet as the first alphabet of a struct field, then that field or that struct or that type, it can be any type, or anything, then it can be exported.
-
And if it is a lowercase alphabet in the begining of the name, then it is a private type. It is only visible to the other types which are in the same package, but it is not exported.
-
Exported fields are fields with names starting with an uppercase letter and these fields are accessible outside of the package they are declared in and can be accessed and modified using reflection.
-
However fields with names starting with a lowercase letter are unexported. These fields are only accessible within the same package and are not accessible via reflection from outside the package.
-
Because of this, when using reflection, only exported fields can be accessed and modified and this is because the reflection API respects Go's visibility rules. During the runtime, relfect is accessing and modifying these values from outside.
-
-
TypeOf(): only contains the type and the number of methods but not an executable method. So for getting the tangible asset of any type and using those tangible assets of that type, we need to use theValueOf()method. -
Reflect also helps us in dynamic function invocation, means we can implement frameworks or libraries that need to call functions dynamically.
-
We can use Reflect to map database records to Go structs dynamically which is quite helpful when it comes to ORM libraries.
-
Limitations and Considerations for
reflect:-
reflection can be slower compared to direct code access due to its dynamic nature.
-
Using reflection can make code harder to understand and maintain, so use it judiciously.
-
Reflection bypasses static type checks which may lead to runtime errors. So ensure type safety when using reflect package.
-
Advanced: Quiz-6
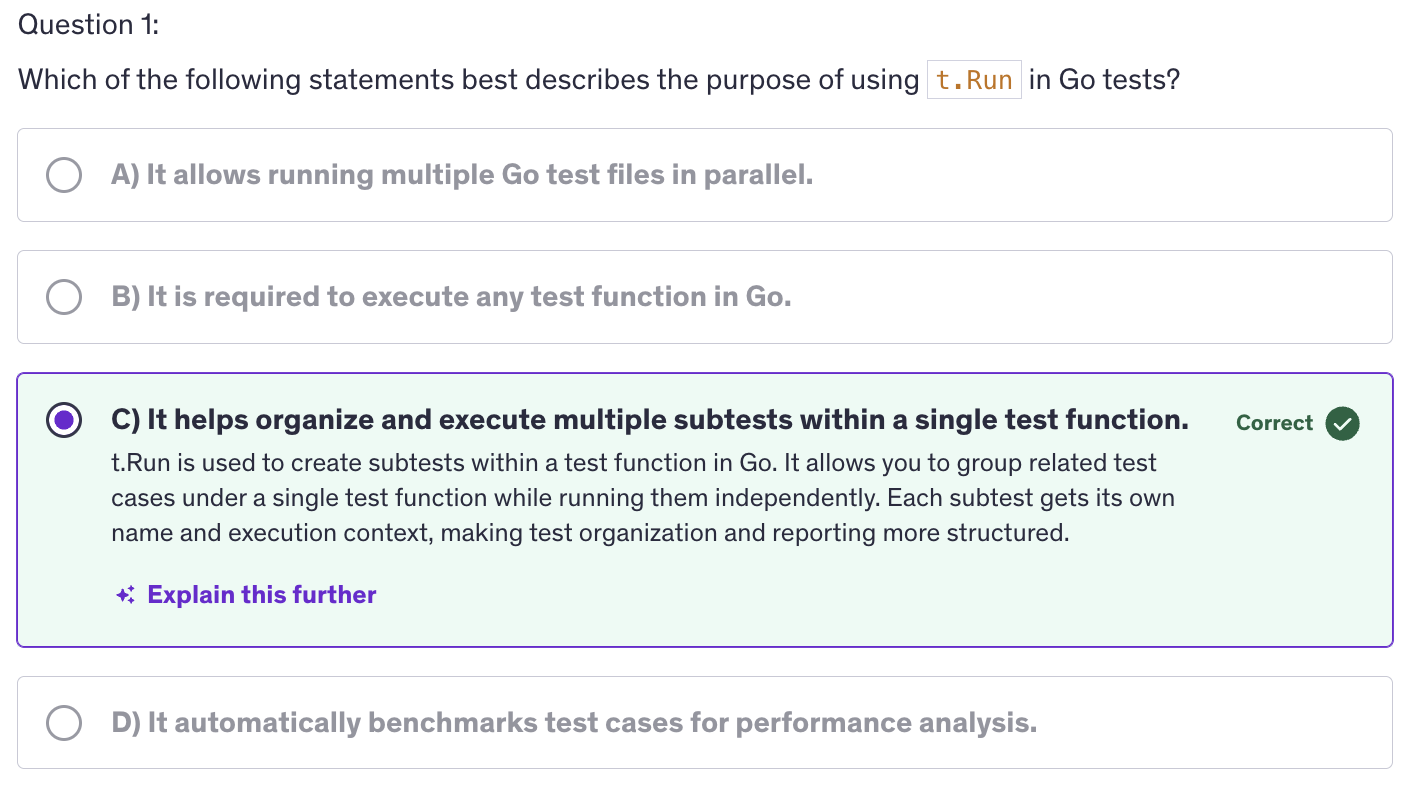
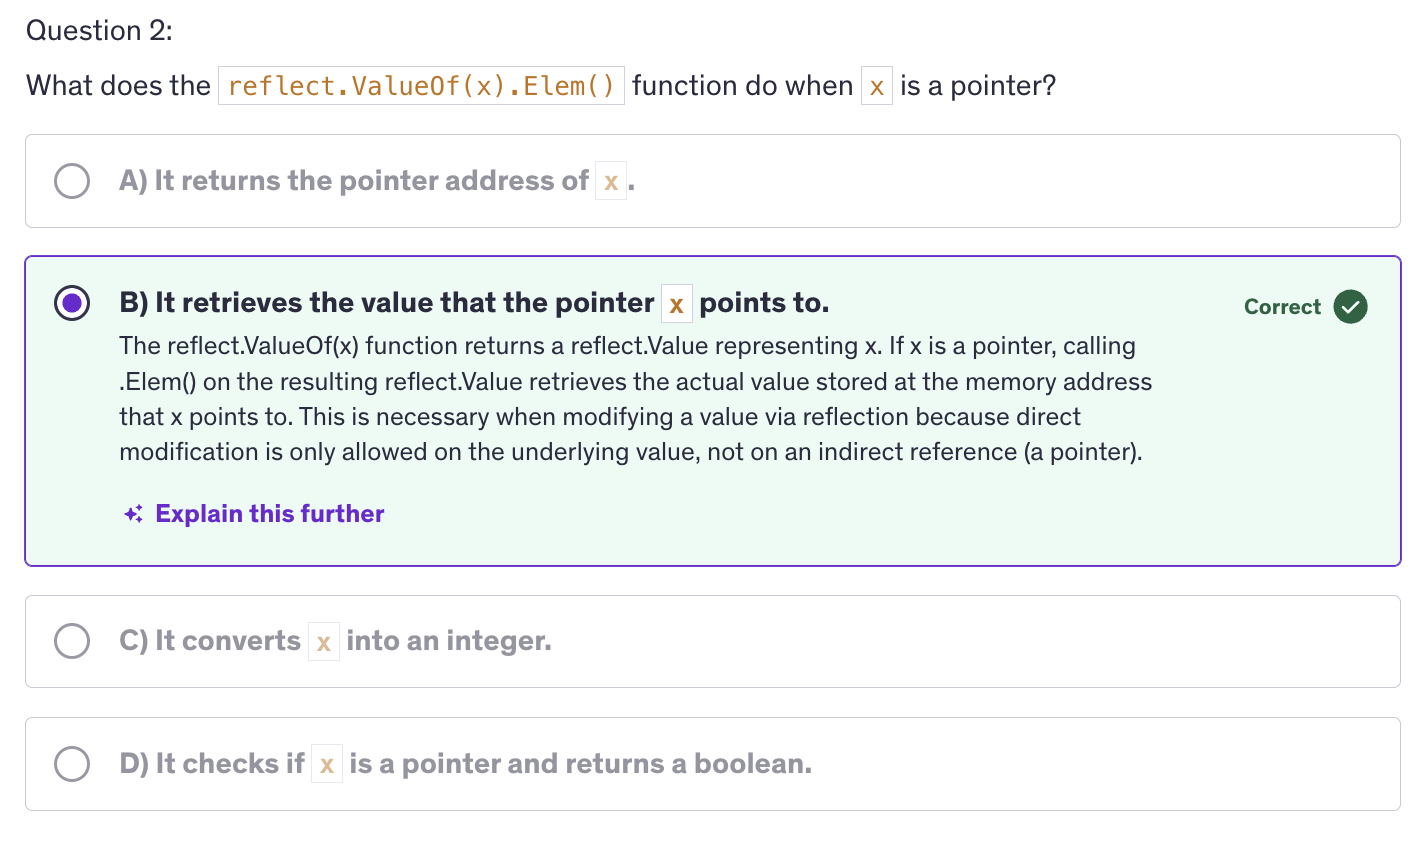
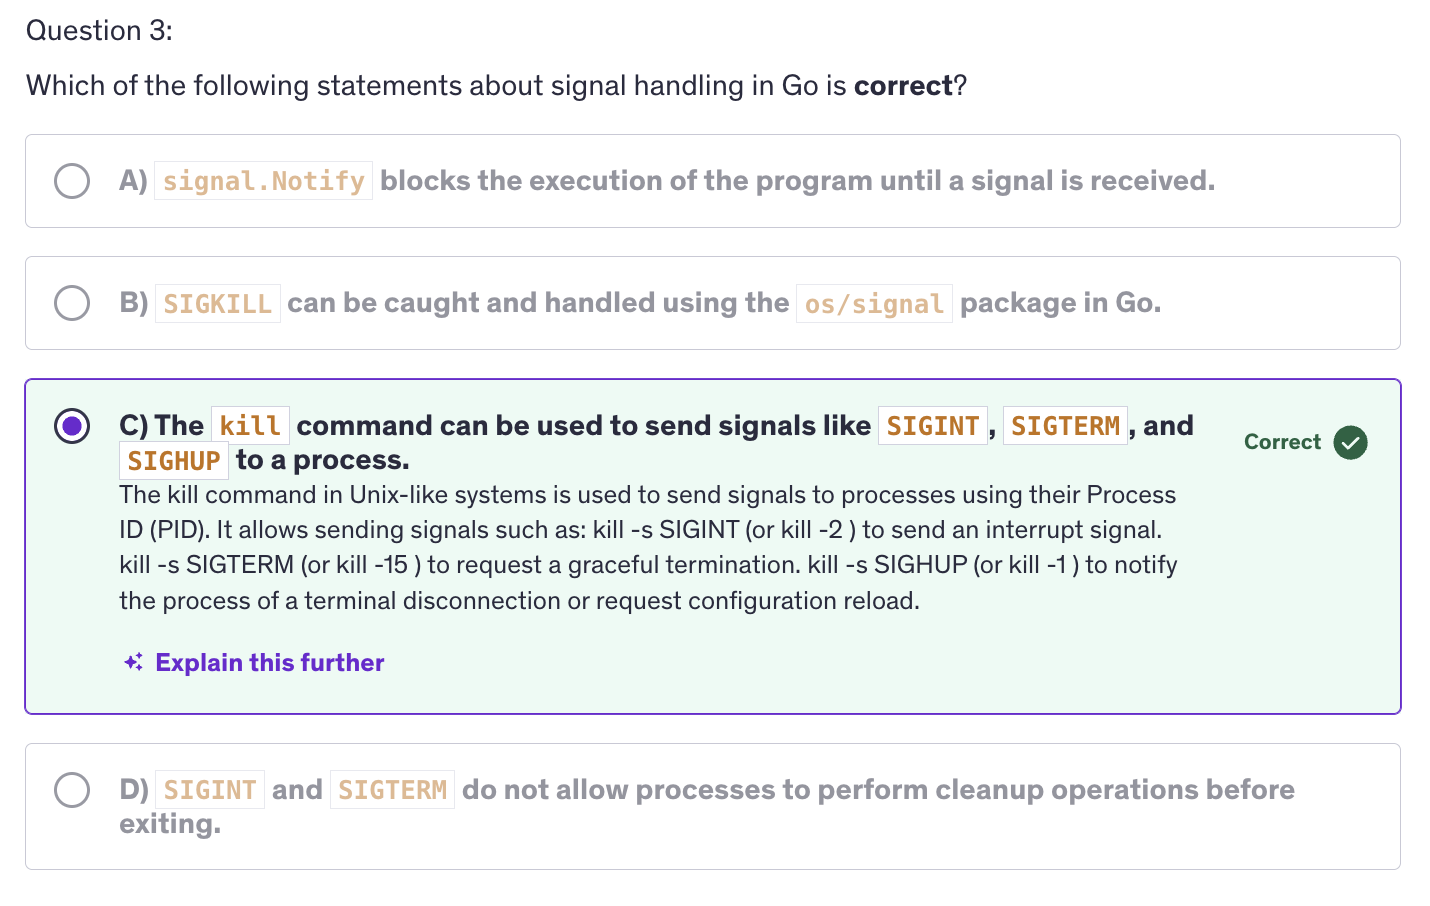
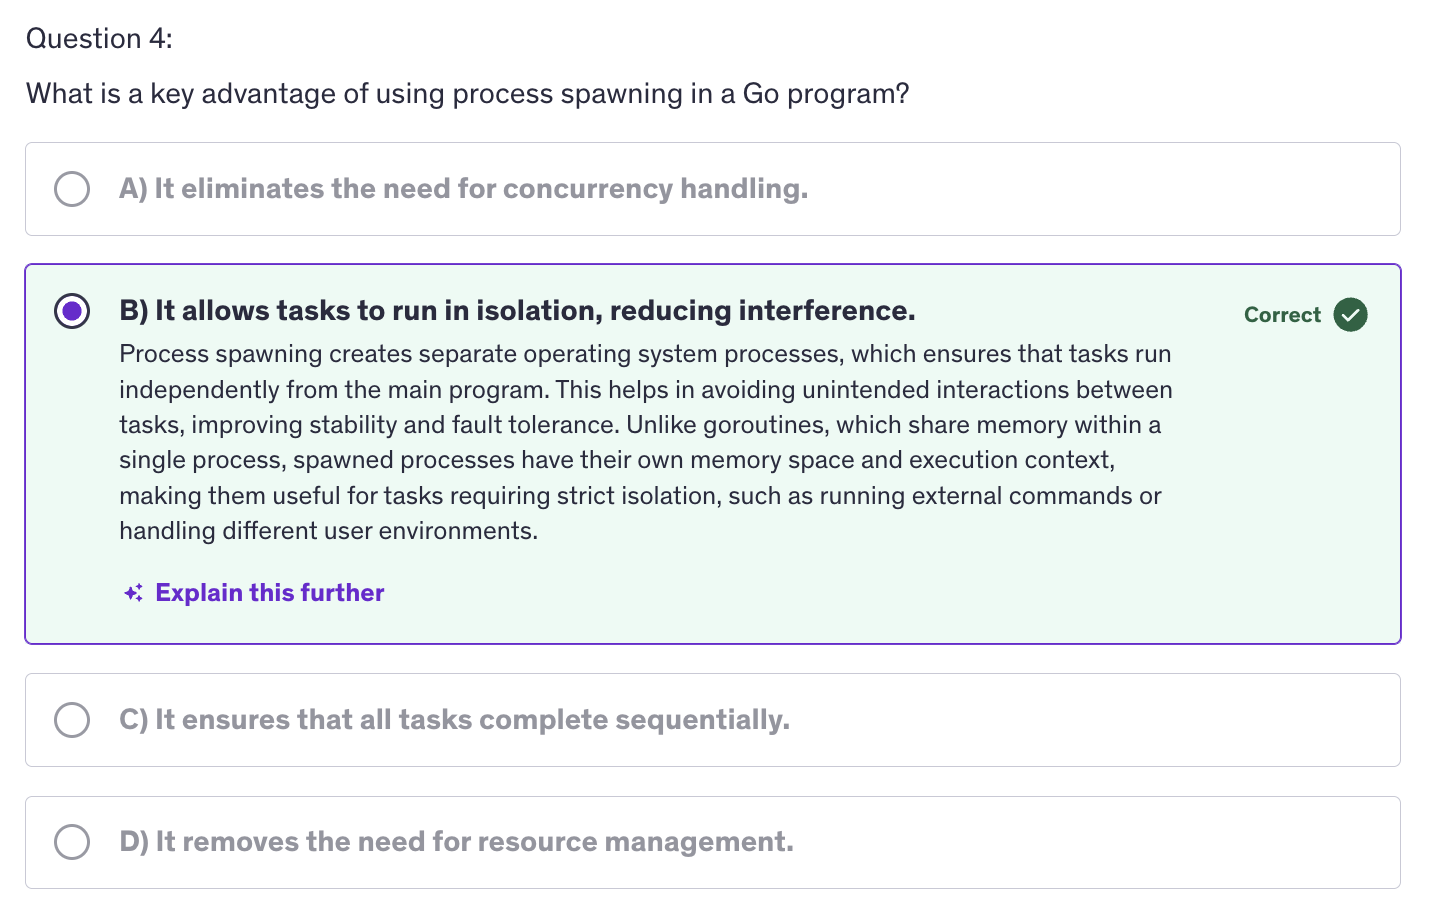
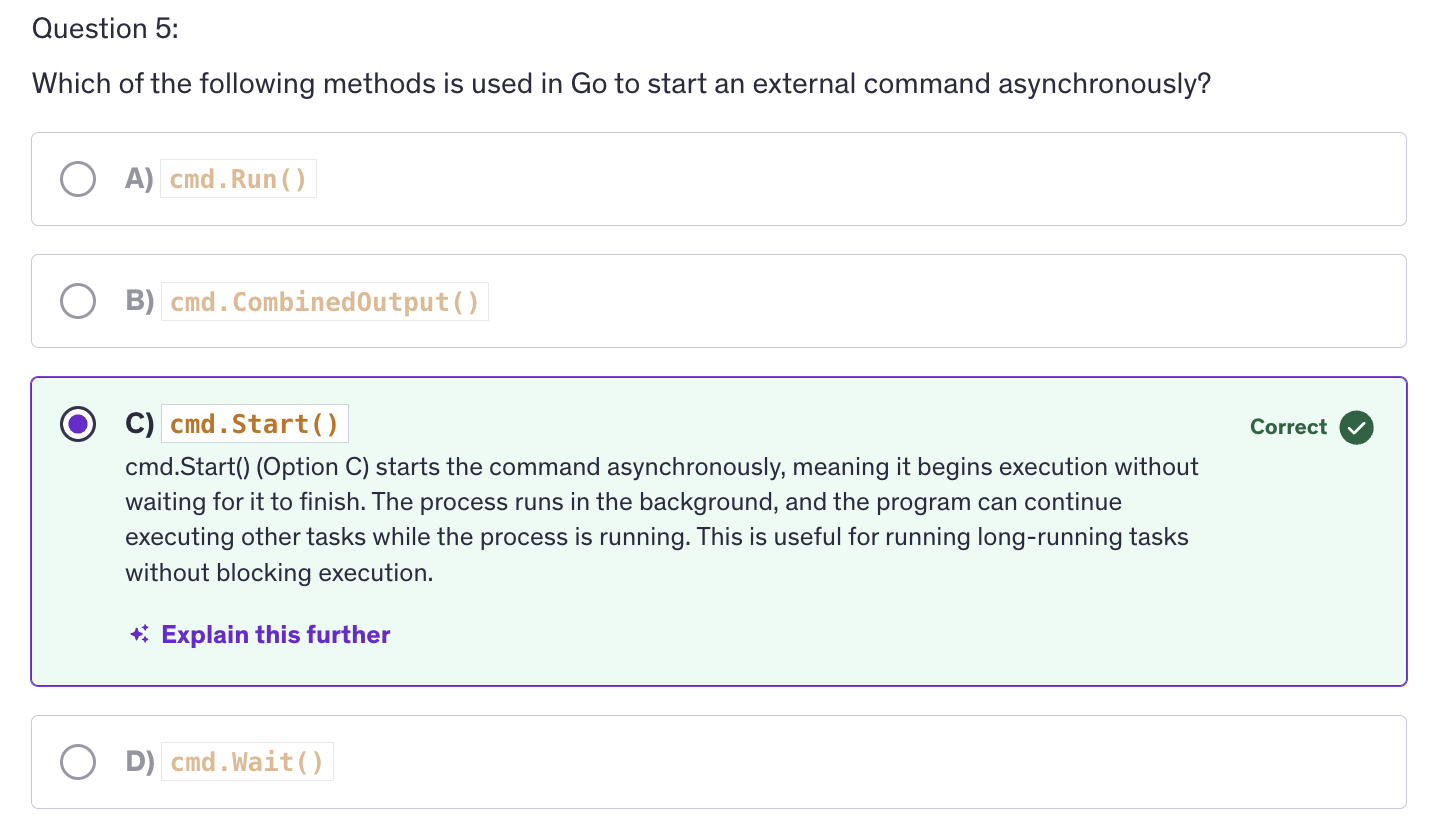
More About Concurrency
Contents :
- Concurrency vs Parallelism
- Race Conditions
- Deadlocks
- RWMutex
- sync.NewCond
- sync.Once
- sync.Pool
- for select statement
- Quiz-11: Advanced Concurrency
Concurrency vs Parallelism
Introduction
-
Concurrency: The ability of a system to handle multple tasks simultaneously. It involves managing multiple tasks that are in progress at the same time but not necessariliy executed at the same instant.
-
Parallelism: The simultaneous execution of multiple tasks, typically using multiple processors or cores, to improve performance by running operations at the same time.
-
Parallelism is all about executing multiple tasks simultaneously, typically on multiple cores or processors and this is a subset of concurrency.
Code:
package main

import (
	"fmt"
	"runtime"
	"sync"
	"time"
)

func main() {

	concurrencyVsParallelism1()
	concurrencyVsParallelism2()

}


func heavyTask(id int, wg *sync.WaitGroup){
	defer wg.Done()
	fmt.Printf("Task %d is starting..\n", id)
	for range 100_000_000 {

	}
	fmt.Printf("Tasks %d is finished at time %v\n", id, time.Now())
}

func concurrencyVsParallelism2(){
	numThreads := 4

	runtime.GOMAXPROCS(numThreads)
	var wg sync.WaitGroup

	for i := range numThreads{
		wg.Add(1)
		go heavyTask(i, &wg)
	}

	wg.Wait()
}


func printNumbers(){
	for i := range 5 {
		fmt.Println(i, ":", time.Now())
		time.Sleep(500 * time.Millisecond)
	}
}

func printLetters(){
	for _,letter := range "ABCDE"{
		fmt.Println(string(letter), ":",time.Now())
		time.Sleep(500 * time.Millisecond)
	}
}

func concurrencyVsParallelism1(){
	go printNumbers()
	go printLetters()

	time.Sleep(3 * time.Second)
}
How parallelism is implemented in GO ?
-
It's the go runtime. Go's runtimes scheduler can execute Go routines in parallel, taking advantage of multiple core processors.
-
We can have processes that are executed concurrently without being parallel. And that happens when we have a single core CPU with time slicing. The single core CPU will divide time using time slicing and work on those multiple tasks simultaneously by dividing time and giving time to different functions, different tasks in a shared way. eg: So maybe 200 milliseconds to a tasks and then next 200 ms to another tasks and next 50 ms to the first task that it left earlier, and so on.
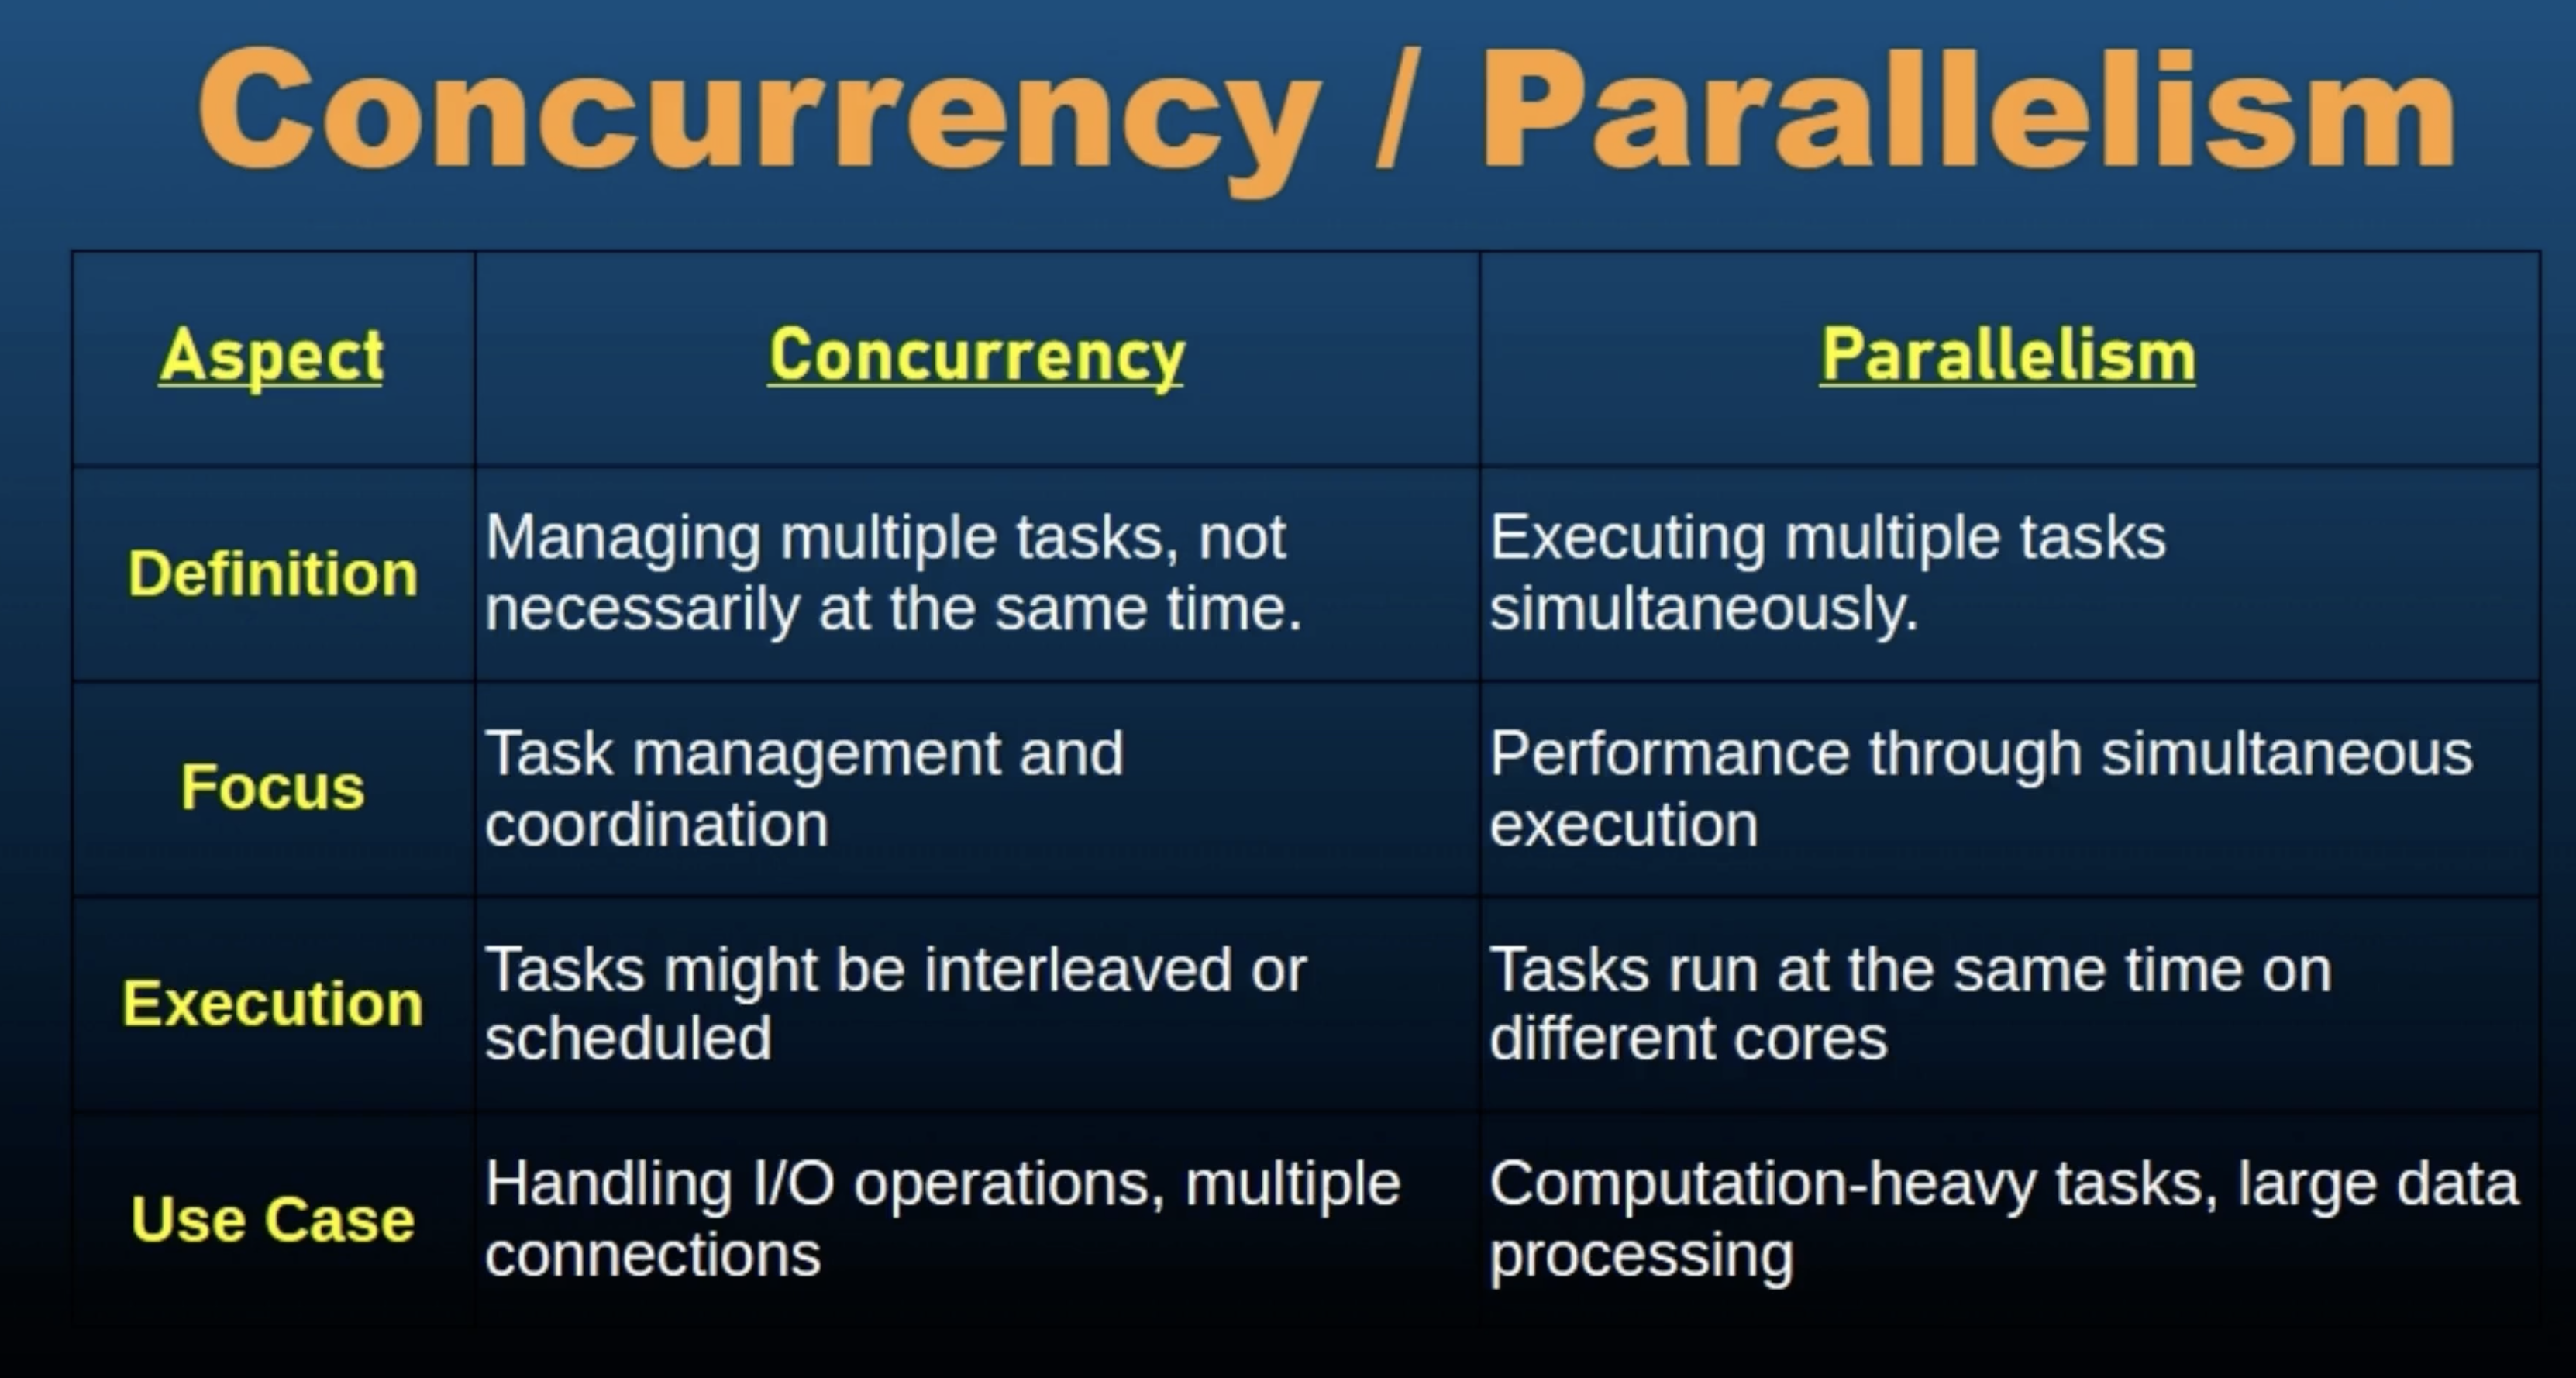
-
Practical Applications:
- Concurrency Use cases:
- I/O bound tasks
- Server Applications
- Parallelism Use Cases
- CPU Bound tasks
- Scientific Computing
- Concurrency Use cases:
-
Challenges and Considerations :
- Concurrency Challenges
- Synchronization: managing shared resources to prevent race conditions.
- Deadlocks: avoid situations where tasks are stuck waiting for each other.
- Parallelism Challenges
- Data Sharing
- Overhead
- Performance Tuning
- Concurrency Challenges
Race Conditions
Introduction
A race condition occurs when the outcome of a program depends on the relative timing of uncontrollable events such as thread or goroutine scheduling. It usually happens when multiple threads or goroutines access shared resources concurrently without proper synchronizatino, leading to unpredictable and incorrect behavior.
Why does it matter ?
- Race conditions can cause bugs that are difficult to reproduce and debug, leading to unreliable and inconsistent program behavior.
Code:
package main

import (
	"fmt"
	"sync"
)

func main() {
	mutexStructMain()

}

type counter struct {
	mu sync.Mutex
	count int
}

func (c *counter) increment(){
	// c.mu.Lock()     // --> Possible Solution is using mutexes
	// defer c.mu.Unlock()
	c.count++
}

func (c *counter) getValue() int {
	c.mu.Lock()
	defer c.mu.Unlock()
	return c.count
}

func mutexStructMain(){
	var wg sync.WaitGroup
	counter := &counter{}

	numGoroutines := 100

	for range numGoroutines{
		wg.Add(1)
		go func(){
			defer wg.Done()
			for range 1_000_000{
				counter.increment()
			}
		}()
	}
	wg.Wait()
	fmt.Println("Final Value of counter:", counter.count)
}
Notes
- To check if the program has a race condition, add the
-raceflag during running the program.
go run -race race_conditions.go
-
When we have multiple goroutines accessing the same value, trying to modify the same value or trying to do something at the same time with a same type/variable/object, then in that case, use this
-raceflag and find if you have a data race in your program. -
Go provides a builtin race detector tool that helps identify the race conditions in your programs. The race detector monitors accesses to shared variables and reports data races during execution. Finally in the output, the race detector shows where data races occur including the read and write operations.
-
We use mutexes or stateful goroutines or atomic operations to avoid race conditions.
-
Best Practices to Avoid Race Conditions :
-
Proper Synchronization: use synchronization primitives like mutexes or atomic operations to ensure exclusive access to shared resources.
-
Minimize Shared State: reduce the amount of shared state between concurrent operations to lower the risk of race conditions.
-
Encapsulate State: use encapsulation to manage state within structs or functions limiting exposure to shared data.
-
Code Reviews and Testing: regularly review code for potential race conditions and utilize tools like the race detector to identify issues during development.
-
-
Practical Considerations
- Complexity of Synchronization
- Avoiding Deadlocks
- Performance Impact
Deadlocks
Introduction
A deadlock is a situation in concurrent computing when two or more processes or goroutines are unable to proceed because each is waiting for the other to release resources. This results in a state where none of the processes or goroutines can make progress.
Deadlocks can cause programs to hand or freeze, leading to unresponsive systems and poor user experience. Understanding and preventing deadlocks is crucial for reliable and efficient concurrent systems.
Code:
package main

import (
	"fmt"
	"sync"
	"time"
)

func main() {
	var mu1, mu2 sync.Mutex
	go func(){
		mu1.Lock()
		fmt.Println("Goroutine 1 locked mu1")
		time.Sleep(time.Second)
		mu2.Lock()
		fmt.Println("Goroutine 1 locked mu2")
		mu1.Unlock()
		mu2.Unlock()
	}()

	go func(){
		mu2.Lock()
		fmt.Println("Goroutine 1 locked mu2")
		time.Sleep(time.Second)
		mu1.Lock()
		fmt.Println("Goroutine 1 locked mu1")
		mu2.Unlock()
		mu1.Unlock()
	}()
	// time.Sleep(3 * time.Second)
	// fmt.Println("Main function Completed")
	select {}

	/* CORRECT CODE AVOIDING DEADLOCKS
	One of the Soln: Follow the same lock order

	go func(){
		mu1.Lock()
		fmt.Println("Goroutine 1 locked mu1")
		time.Sleep(time.Second)
		mu2.Lock()
		fmt.Println("Goroutine 1 locked mu2")
		mu1.Unlock()
		mu2.Unlock()
	}()

	go func(){
		mu1.Lock()
		fmt.Println("Goroutine 1 locked mu1")
		time.Sleep(time.Second)
		mu2.Lock()
		fmt.Println("Goroutine 1 locked mu2")
		mu1.Unlock()
		mu2.Unlock()
	}()

	time.Sleep(3 * time.Second)
	fmt.Println("Main function Completed")
	// select {}
	*/
}
Causes of Deadlocks: Four Conditions for Deadlocks :
-
Mutual Exclusion: at least one resource is held in a non-shareable mode. Only one process or goroutine can use the resource at a time.
-
Hold and Wait: process or goroutine holding at least one resource is waiting to acquire additional resources held by other processes or goroutines.
-
No Preemption: resources cannot be forcibly taken away from processes or goroutines. They must be released voluntarily.
-
Circular Wait: a set or processes or goroutines are waiting for each other in a circular chain, with each holding a resource that the next one in the chain is waiting for.
-
Detecting Deadlocks:
- Deadlock Detection Strategies
- Static Analysis
- Dynamic Analysis
- Deadlock Detection Tools
- Deadlock Detection Strategies
select {}
-
A blank select statement waits indefinitely for the goroutines to finish.
-
mutex.Lock()is blocking in nature. -
Deadlock happens when two locked mutexes try to access each other's values/ each other's mutex.
-
Consitent lock order helps us avoid deadlocks. If we do not follow a consistent lock order then we might have a deadlock. So by acquiring locks in a consistent order accross all goroutines, we can avoid the deadlock scenario and ensure that the program runs smoothly.
-
Best Practices for avoiding deadlocks:
- Lock Ordering
- Timeouts and Deadlock Detection
- Resource Allocation Strategies
-
Best Practices and Patterns :
- Avoid nested locks
- Use lock-free data structures
- Keep critical sections short
-
Practical Consierations:
- Complex Systems
- Testing for Deadlocks
- Code Reviews
RWMutex
Introduction
RWMutex stands for read-write mutex, is a synchronization primitive in Go that allows multiple readers to hold the lock simultaneously while ensuring exclusive access for a single writer. It provides an efficient way to handle concurrent read and write operations, particularly when read operations are frequent and writes are infrequent.
RWMutex is designed to optimize scenarios where multiple goroutines need to read shared data concurrently. But write operations are less frequent.
So RWMutex helps to improve performance by reducing contention during read operations while still maintaining exclusive access for write operations.
Key Concepts of sync.RWMutex
-
Read Lock (RLock): allows multiple goroutine to acquire RLock simultaneously. It is used when a goroutine needs to read shared data without modifying it.
-
Write Lock (Lock): ensures exclusive access to the shared resources and only one goroutine can hold the write lock at a time. Moreover all readers and writers are blocked until the write block is released.
-
Unlock (Unlock and RUnlock)
When to use RWMutex
- Read Heavy Workloads
- Shared Data Structures
Code
package main

import (
	"fmt"
	"sync"
	"time"
)

var (
	rwmu sync.RWMutex
	counter int
)

func readCounter(wg *sync.WaitGroup){
	defer wg.Done()
	rwmu.RLock()
	fmt.Println("Read Counter:", counter)
	rwmu.RUnlock()
}

func writeCounter(wg *sync.WaitGroup, value int){
	defer wg.Done()
	rwmu.Lock()
	counter = value
	fmt.Println("Writing value to counter: Done")
	rwmu.Unlock()
}


func main() {
	var wg sync.WaitGroup
	for range 5{
		wg.Add(1)
		go readCounter(&wg)
	}

	wg.Add(1)
	time.Sleep(3*time.Second)
	go writeCounter(&wg, 18)

	wg.Wait()

}
How RWMutex Works
-
Read Lock Behavior
-
Write Lock Behavior
-
Lock Contention and Starvation
-
When a write lock is requested, may block readers if a write lock is pending. Conversely long held read locks can delay the acquisition of a write lock. Only one goroutine can acquire the write lock at a time.
-
While a goroutine holds the write lock, no other goroutine can acquire either a read or write lock. However for the read lock behavior, multiple goroutines can acquire the read lock simultaneously, provided no go routine holds the write.
-
Read Locks are shared and do not block other readers.
-
Starvatinos means that your write operation (or any other operation) needs to acquire the lock but it is being held in a limbo, waiting for the lock to be released.
Best Practices for Using RWMutex
-
Minimize Lock Duration: to avoid blocking other goroutines unnecessarily.
-
Avoid Lock Starvation: Be mindful of long held read locks potentially causing write lock starvation. If write operations are critical, ensure that read operations are not indefinitely blocking writes because then your write operation will be starving.
-
Avoid Deadlocks
-
Balance Read and Write Operations
Advanced Use Cases:
- Caching with RWMutex
- Concurrent Data Structures
sync.NewCond
Introduction
NewCond is a function in Go's sync package that creates a new condition variable. A condition variable is a synchronization primitive that allows goroutines to wait for certain conditions to be met while holding a lock. It is used to signal one ore more goroutines that some condition has changes.
Condition variables are essential for more complex synchronization scenarios beyond simple locking mechanisms. They are useful in situations where goroutines need to wait for specific conditions or events before proceeding.
-
Key Concepts of
sync.NewCond:- Condition Variables
- Mutex and Condition Variables
-
Methods of
sync.CondWait()Signal()Broadcast()
Code
package main

import (
	"fmt"
	"sync"
	"time"
)

const bufferSize = 5

type buffer struct {
	items []int
	mu sync.Mutex
	cond *sync.Cond
}

func newBuffer(size int) *buffer {
	b := &buffer{
		items: make([]int, 0, size),
	}
	b.cond = sync.NewCond(&b.mu)
	return b
}

func (b *buffer) produce(item int){
	b.mu.Lock()
	defer b.mu.Unlock()

	// Conditional infinite for loop
	for len(b.items) == bufferSize {
		b.cond.Wait()
	}

	b.items = append(b.items, item)
	fmt.Println("Produced:", item)
	b.cond.Signal()    // signal the consumer that the producer has done it's job to produce an item.
}

func (b *buffer) consume() int{
	b.mu.Lock()
	defer b.mu.Unlock()

	for len(b.items) == 0 {
		b.cond.Wait()
		// This functions stops doing anything and waits for
		// other functions to append to the slice
	}
	item := b.items[0]
	b.items = b.items[1:]
	fmt.Println("Consumed:", item)
	b.cond.Signal()
	return item
}

func producer(b *buffer, wg *sync.WaitGroup){
	defer wg.Done()
	for i := range 10 {
		b.produce(i+1000)
		time.Sleep(200 * time.Millisecond)
	}
}

func consumer(b *buffer, wg *sync.WaitGroup){
	defer wg.Done()
	for range 10 {
		b.consume()
		time.Sleep(1500 * time.Millisecond)
	}
}


func main() {

	buffer := newBuffer(bufferSize)
	var wg sync.WaitGroup

	wg.Add(2)
	go producer(buffer, &wg)
	go consumer(buffer, &wg)

	wg.Wait()

}
Notes:
Key Points :
-
Signal is for waking up the other goroutine. Wait is for making our goroutine fall asleep.
-
sync.NewCond: it allows goroutines to wait for or signal changes in program state. It creates a new condition variable associate with the buffers mutex, which it takes as an argument. -
b.cond.Wait(): makes the goroutine wait until the signal is received. It puts the goroutines to sleep and Signal wakes up that sleeping goroutine. -
b.cond.Signal(): sends a notification to notify a consumer.
Best Practices for using sync.NewCond
- Ensure Mutex is held
- Avoid spurious wakeups
- Use condition variables judiciously
- Balance signal and broadcast
Advanced Use Cases
- Task Scheduling
- Resource Pools
- Event Notification Systems
sync.Once
Intro
A once ensures that a piece of code is executed only once, regardless of how many goroutines attempt to execute it. It is useful for initializing shared resources or performing setup tasks.
Code
package main

import (
	"fmt"
	"sync"
)


var once sync.Once

func initialize(){
	fmt.Println("This function is executed only once, no matter how many times you call it")
}

func main() {
	var wg sync.WaitGroup
	for i:= range 10{
		wg.Add(1)
		go func(){
			defer wg.Done()
			fmt.Println("Goroutine: #", i)
			once.Do(initialize)
		}()
	}
	wg.Wait()
}
sync.Pool
sync.Pool is a type provided by the go standard library in the sync package. It implements a pool of reusable objects. The primary purpose of sync.Pool is to reduce the overhead of allocating and deallocating objects frequenty by providing a pool where objects can be reused.
Why does it matter ?
Because object allocation and garbage collection can be expensive, especially in high performance applications or scenarios with frequent allocations. sync.Pool helps maintaining this by mitigating a pool of objects that can be reused, reducing the need for frequent allocations and garbage collection.
-
Key Concepts of
sync.Pool:- Object Pooling
- Object Retrieval and Return
-
Methods of
sync.Pool:Get()Put(interface{})New(Optional)
-
It works on the LIFO principle.
-
The new field will create a new instance if the object pool is empty.
Code
package main

import (
	"fmt"
	"sync"
)

type person struct{
	name string
	age int
}

func main() {
	poolWithNew()
	poolWithoutNew()

}

func poolWithoutNew(){

	var pool = sync.Pool{}
	pool.Put(&person{name: "John", age: 26})
	person1 := pool.Get().(*person)

	fmt.Println("Person 1:", person1)


	fmt.Printf("Person1: Name: %s | Age: %d\n", person1.name, person1.age)

	pool.Put(person1)
	fmt.Println("Returned Person to Pool")

	person2 := pool.Get().(*person)
	fmt.Println("Got Person 2:", person2)

	person3 := pool.Get()
	if person3 != nil {
	fmt.Println("Got Person 3:", person3)
	person3.(*person).name = "James"
	} else {
		fmt.Println("Sync Pool is empty. So person3 is not assigned anything")
	}

	// Returning object to the pool again
	pool.Put(person2)
	pool.Put(person3)

	person4 := pool.Get().(*person)
	fmt.Println("Got Person 4:", person4)

	person5 := pool.Get()
	if person5 != nil {
	fmt.Println("Got Person 3:", person5)
	person5.(*person).name = "James"
	} else {
		fmt.Println("Sync Pool is empty. So person5 is not assigned anything")
	}
}

func poolWithNew(){

	var pool = sync.Pool{
		New: func() interface{}{
			fmt.Println("Creating a new Person")
			return &person{}
		},
	}

	// Get an Object from the pool
	person1 := pool.Get().(*person)
	person1.name = "John"
	person1.age = 18
	fmt.Println("Person 1:", person1)

	fmt.Printf("Person1: Name: %s | Age: %d\n", person1.name, person1.age)

	pool.Put(person1)
	fmt.Println("Returned Person to Pool")

	person2 := pool.Get().(*person)
	fmt.Println("Got Person 2:", person2)

	person3 := pool.Get().(*person)
	fmt.Println("Got Person 3:", person3)
	person3.name = "James"

	// Returning object to the pool again
	pool.Put(person2)
	pool.Put(person3)

	person4 := pool.Get().(*person)
	fmt.Println("Got Person 4:", person4)

	person5 := pool.Get().(*person)
	fmt.Println("Got Person 5:", person5)
}
Key Notes:
-
Best Practices for using
sync.Pool:- Use for expensive object allocations
- Keep Objects in Pool Clean
- Avoid Complex Objects
-
Advanced Use Cases
- Reusing Buffers
- Managing Database Connections
- High Performance Applications
-
Considerations and Limitations
- Garbafe Collection
- Not for Long-Lived Objects
- Thread Safety
for select statemet
Code
package main

import (
	"fmt"
	"time"
)

func main() {
	ticker := time.NewTicker(1 * time.Second)
	quit := make(chan string)

	go func(){
		time.Sleep(5 * time.Second)
		close(quit)
	}()

	for {
		select {
		case <- ticker.C:
			fmt.Println("Tick")
		case <-quit:
			fmt.Println("Quiting..")
			return
		}
	}
}
Quiz - 11: Advanced Concurrency
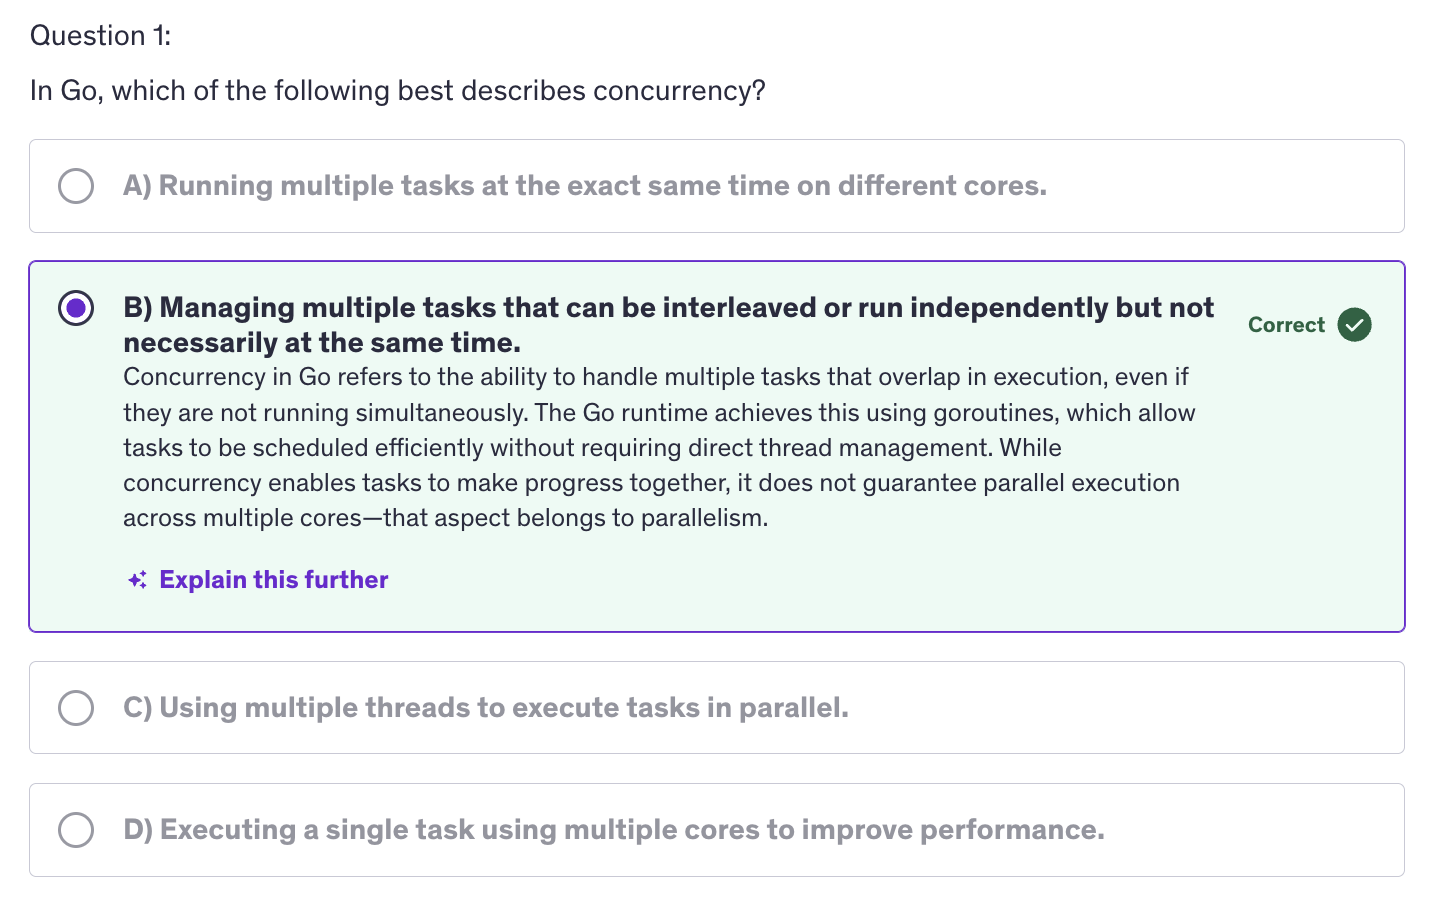
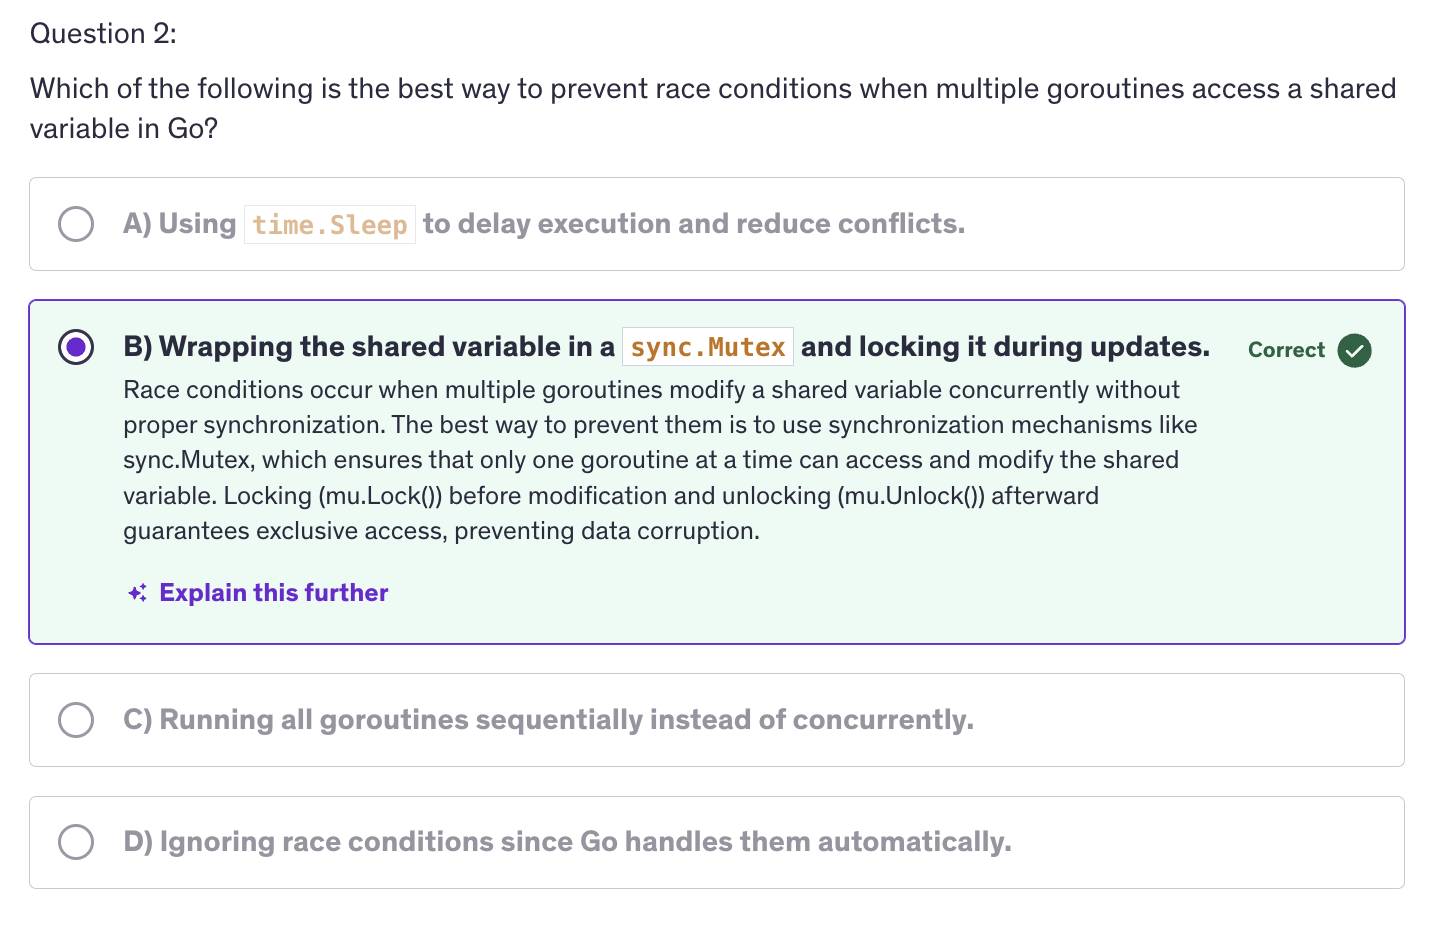
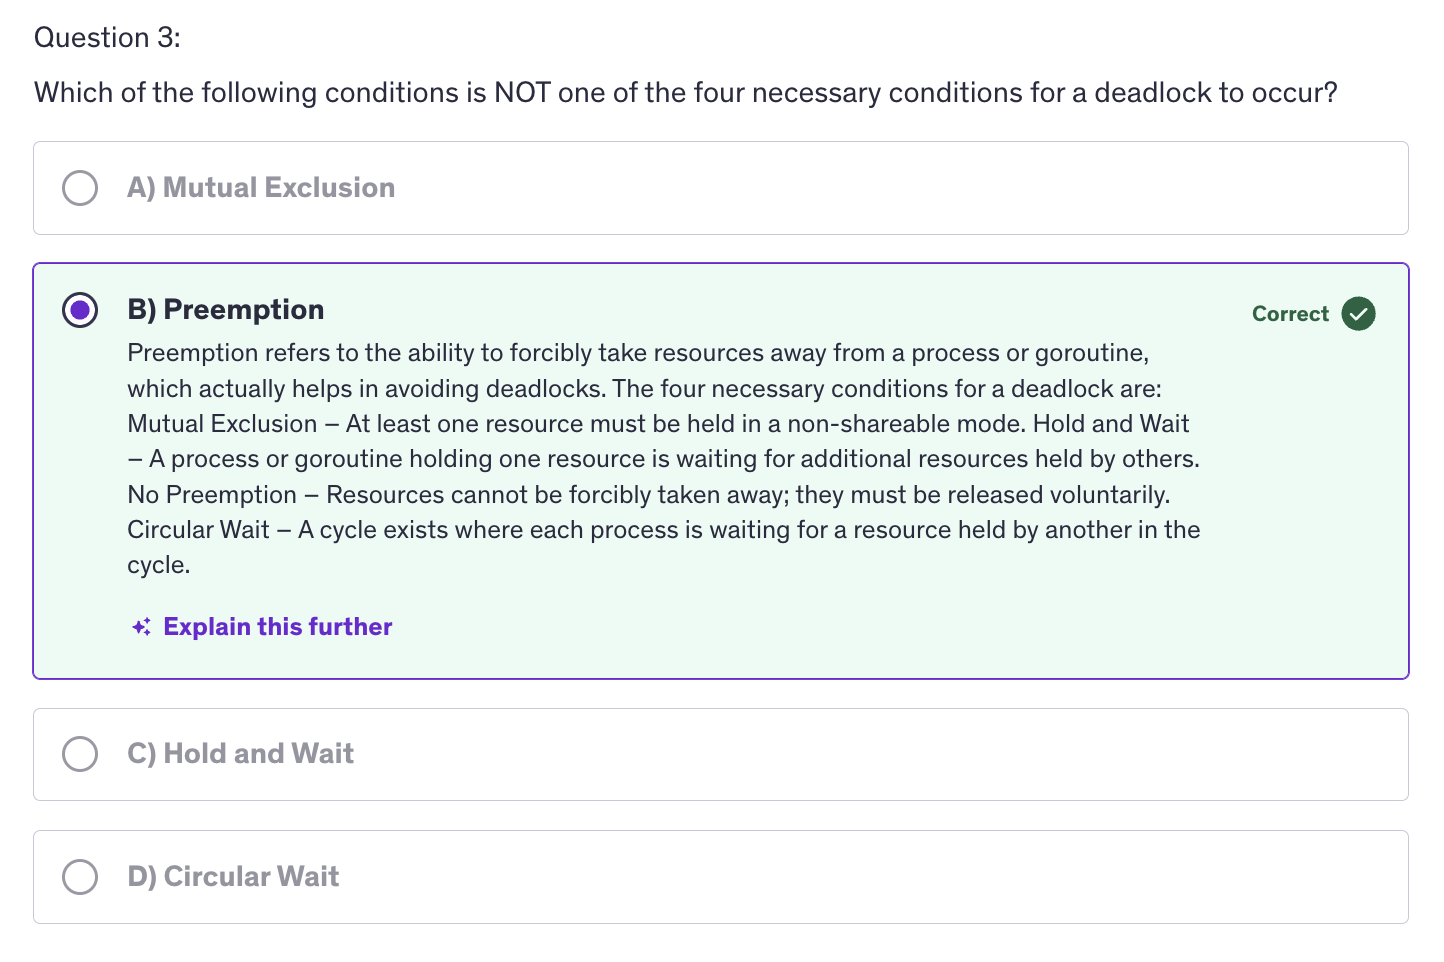
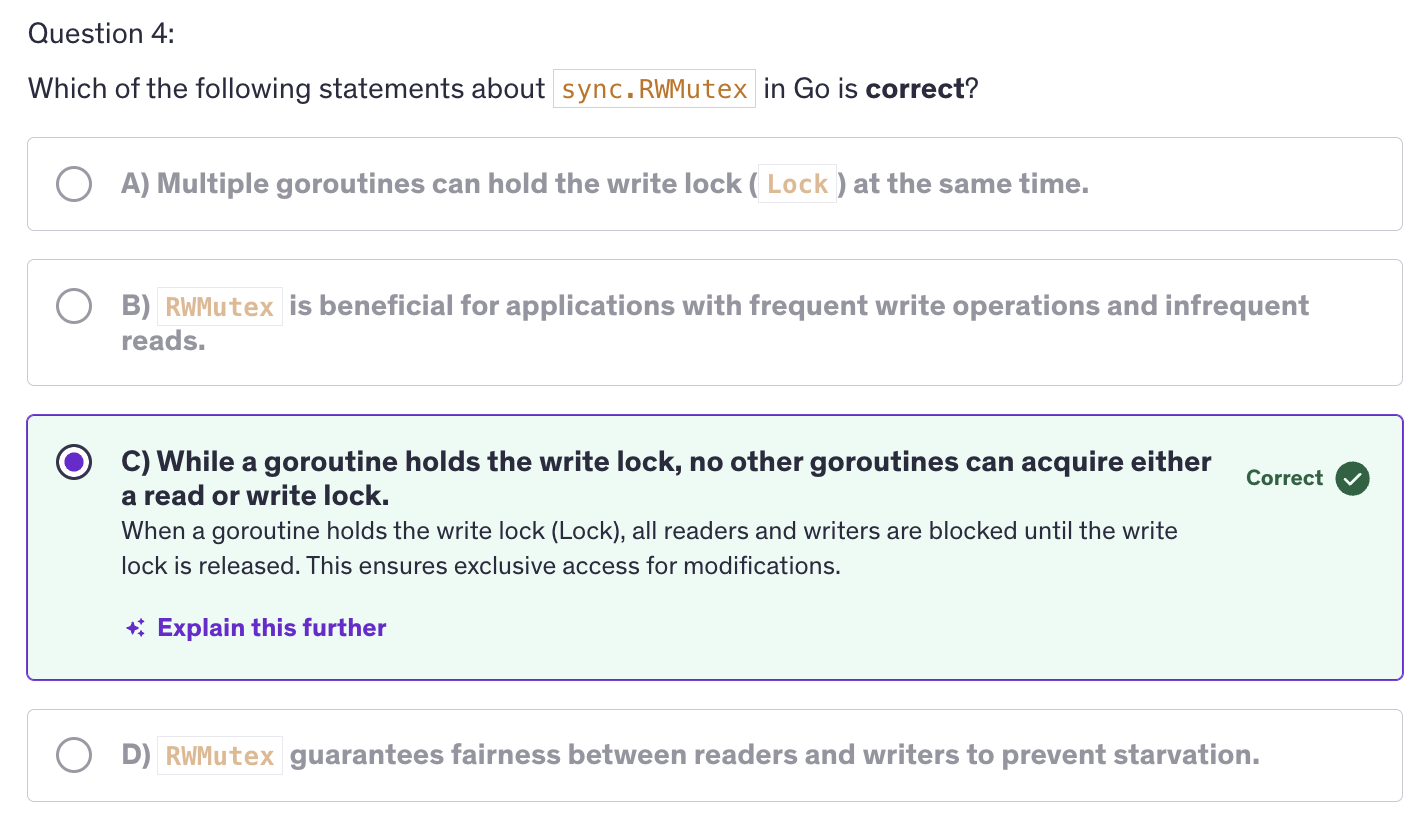
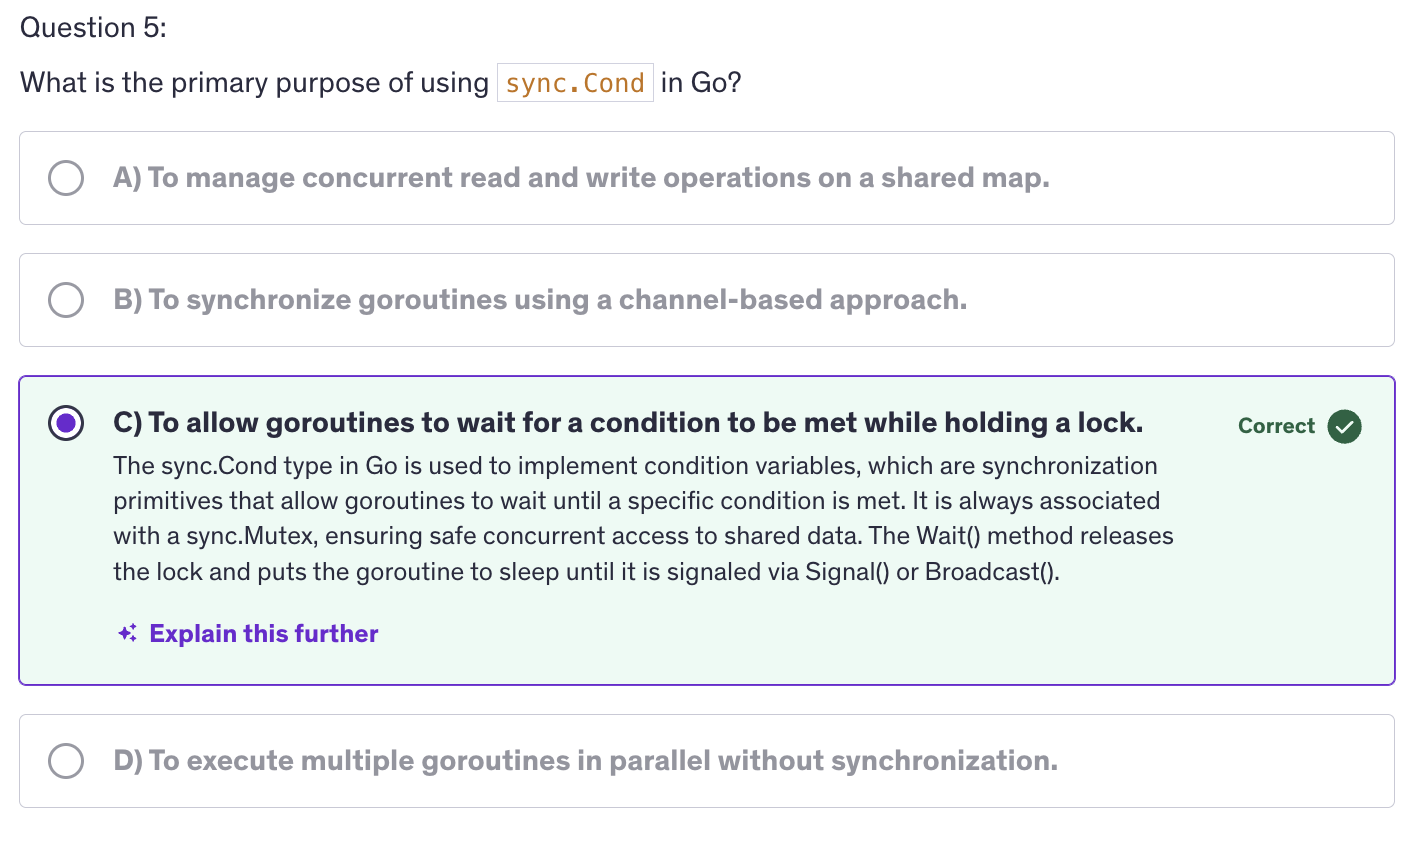
REST API Project
Contents
What is REST API
Introduction
API (Application Programming Interface):
- Set of rules and protocols that allows different software applications to communicate with each other.
- It's a standardized way for applications to interact and exchange data.
REST (Representational State Transfer)
REST is an architectural style for designing networked applications. RESTful systems communicate via HTTP and use a stateless client server and cacheable communication protocol.
Key Components:
- Statelessness: each request from a client to the server must contain all the information the server needs to fulfill the request. The server does not store any state about the client session between requests.
- Client Server Architecture: Client server architecture focuses on separation of concerns between client and server. The client is responsible for the user interface while the server manages data and business logic.
- Uniform Interface: A consistent interface accross the system that simplifies and decouples the architecture, allowing for independent evolution of components is Uniform Interface.
- Resource Based: REST is resource based which are data objects are identified by URLs. Each resource is accessed using standard http methods like GET, POST, PUT, DELETE.
- Stateless Communication: Every request from a client to server must contain all necessary information example authentication tokens, query parameters, etc. The server does not store any information about previous requests.
- Cacheability: Responses from the server must define whether they are cacheable or not. Proper caching reduces the need for request and improve performance.
RESTFUL API
RESTful API is an API that adheres to the principles of REST. It uses standard http methods to perform operations on resources identified by URLs. It provides a way for different applications or services to interact with each other using a uniform interface.
Key Components
- Resources: Resources are the objects or data that the API exposes. Each resource is identified by a URL.
- Endpoints: Specific URLs where resources are accesses or manipulated are called endpoints. Only the server has the endpoints and not the frontend.
- HTTP Methods: incudes GET, POST, PUT, PATCH and DELETE.
- Request and Response Formats: Client sends request to the server, request include https methods, urls, headers and optionally a body. Next the server sends response to the client. Response includes status code, headers and a body containing the requested data or the result of the operation.
Benefits of RESTful APIs
- Scalability: Support scalability by supporting client and server concers and allowing for distributed systems. They are stateless, which simplifies server design and scaling.
- Interoperability
- Flexibility
- Explanation
- Cacheability
Limitations
While statelessness simplifies server design, it can increase the complexity of client side state management especially for applications requiring complex interactions. REST APIs can involve additional overhead due to the need for multiple HTTP requests, headers and status codes.
REST APIs are request response based and may not be suitable for real time applications where immediate are required. Alterantives like WebSockets or GraphQL might be used in those cases.
Summary
REST APIs are a powerful way to enable communication between web applications and services. They follow the principles of REST such as statelessness, uniform interface and resource based interaction using standard http methods to perform operations on resources.
Endpoints
An endpoint is a specific URL or URI where an API interacts with clients. It represents a specific resource or collection of resources exposed by an API. Endpoints define where an how the API can be accessed and what operations can be performed on the resources.
Components of an API Endpoint
- Base URL -
https://api.example.com/v1/ - Path -
/users,/orders,/products - Query Parameters -
?status=active&limit=10 - HTTP Method -
GET /users,POST /orders
Types of Endpoints
- Resource Endpoints: represents a single resource or a collection of resources. They are used to retrieve, create, update or delete resources.
- Single Resource:
/users/123 - Collection:
/users
- Single Resource:
- Action-Based Endpoints: perform specific actions or operations that are not necessarily related to CRUD operations.
/users/123/activate/orders/checkout
- Query-Based Endpoints: uses query parameters to filter or modify the data returned.
/products?category=electronics/orders?status=shipped&limit=10
Designing API Endpoints principles:
- Resource Naming
- Consitent and Predictabel URLs
- Versioning
- Error Handling
Best Practices
- Use RESTful Principles
- Ensure Security
- Optimize Performance
- Document Endpoints
In summary, API endpoints are crucial for defining how clients interact with an API. They represent specific resources or actions and use URLs, HTTP methods and query parameters to facilitate communication. Proper endpoint design and adherence to best practices ensure a reliable and efficient API.
HTTP Client
The net/http package provide tools to make http requests. This package allows us to create HTTP Clients that can communicate with web servers using various HTTP methods like GET, PUT, POST, PATCH and DELETE.
The core compoent for making http requests in GO is the http.Client{} struct. This struct can be used to send request and receive responses from a server.
Code
package main

import (
	"fmt"
	"io"
	"net/http"
)

func main() {

	// Create a new Client
	client := &http.Client{}

	resp, err := client.Get("https://jsonplaceholder.typicode.com/posts/10")
	// resp, err := client.Get("https://swapi.dev/api/people/1")
	if err != nil {
		fmt.Println("Error making GET request:", err)
		return
	}
	defer resp.Body.Close()

	body, err := io.ReadAll(resp.Body)
	if err != nil {
		fmt.Println("Error reading body:", err)
		return
	}
	fmt.Println(body)
	fmt.Println(string(body))
}
HTTP Server
The net/http package provides robust tools for building http servers. Understanding how to create and manage HTTP servers is fundamental for developing web applications and APIs. To create an HTTP server in Go, we need to define HTTP Handlers. HTTP handlers are functions that handle the logic, the business logic for an endpoint. User sends request to a specific endpoint, then the handler will be executed when that endpoint receives a request from a client. And apart from defining http handlers, we also configure routes and we need to configure that in our API in our server. And finally we start the server to listen on a specific port.
Code
package main

import (
	"fmt"
	"net/http"
)

func main() {

	http.HandleFunc("/", func(resp http.ResponseWriter, req *http.Request){
		fmt.Fprintln(resp, "Hello World")
	})
	// const serverAddr string = "127.0.0.1:8080"
	const port string = ":8080"
	fmt.Println("Server Listening on Port:", port)
	err := http.ListenAndServe(port, nil)
	if err != nil {
		fmt.Println("Error starting the server:", err)
	}
}
Ports
A port in networking is a virtual point where network connections start and end. It helps yout computer distinguish between different types of network traffic. Ports act like separate doors for different types of data, ensuring that information gets to the right place. A computer has 65,535 ports.
A computer has 65,535 ports
- Well Known Ports (0-1023) : used by system or well known services like web servers.
- Registered Ports (1024-49151): assigned to specific services and applications.
- Dynamic or Private Ports(49152-65535): used for dynamic, private or ephemeral purposes used by client applications for short term.
Common Ports:
- Port 80 : http
- Port 443: https
- Port 25: smtp
- Port 21: ftp
- Ports 3000, 8080, 8000: commonly used for web development and running local servers.
Analogy:
The first principle is that port is only used for communicating with the outside world. Ports are reserved entry points to internal processes for outside world. Outside world can use these entry points which are ports to access our internal processes which hosted on our computer when executing on our computer.
The databases are meant to communicate with the outside world to store a lot of data from many remote resources. They are going to receive data from anywhere in the world and they are going to store that data into one location.
Similarly API by design is meant to be connected with the outside world and that communication with the outside world is done by using ports.
Ports are crucial for the functioning of a computer network. They allow multiple services to run simultaneously without interfering with each other.
Modules
-
Modules are collections of related Go packages
-
Why are Modules important ?
- Versioning
- Reproducibility
- Organizational Clarity
-
Key Commands for working with Modules :
go mod tidygo getgo buildgo run
How are packages different from Modules ?
-
Definition and Scope
-
Purpose
-
Usage
-
Relationship between modules and packages
-
Versioning
- Packages - Not versioned
- Modules
Add HTTP2 and HTTPs to our API
In order to incorporate https functionality on our server we need to use certificate. These certificates are usually issued by certifying authorities like Google Trust Services or Cloudflare. We don't need certificates as of now coz we are in development phase and we are not putting our API in production. During deploying our API into production, we would need certificates from a certifying authority because those are widely accepted by the browsers.
Steps :
- As of now we will just generate self-signed certificates on your computer. Command :
openssl req -x509 -newkey rsa:2048 -nodes -keyout key.pem -out cert.pem -days 365
- We configure out server using those certificates that we generated. And we define the port and the handlers of the orders route and the users route.
// Load the TLS cert and key
cert := "cert.pem"
key := "key.pem"

// Configure the TLS
tlsConfig := &tls.Config{
    MinVersion: tls.VersionTLS12,
}

// Create a custom server
server := &http.Server{
    Addr: fmt.Sprintf(":%d", port),
    Handler: nil,
    TLSConfig: tlsConfig,
}
HTTPs certificates - SSL/TLS
The .pem extension stands for Privacy Enhanced Mail. It is a base64 encoded DER certificates. So PEM files are commonly used for storing and transmitting cryptographic keys, certificates and other data.
DER certificate means Distinguished Encoding Rules and it is a binary encoding for X509 certificates.
The PEM formate is base64 encoding making it easier to read and transport in text based protocols. So even if we are using http1.1 when we are using text-based protocols, it is easier to transport thse certificate files. pem files have specific headers and footers to identify the type of content they hold.
The server use the key.pem file to prove its identity and establish a secure connection. And then cert.pem file is provided to clients to verify server's identity and to encrypt the data sent to the server.
In summary, the PEM files are just text files containing cryptographic keys and certificates encoded in base64 with specific headers and footers and keep.pem contains the private key for decryption and signing, while cert.pem contains the public key and certificate for encryption and identity verification. These files are essential for setting up https, where the server must prove it's identity to clients and establish a secure communication channel.
Generate key and certificate separately
- To generate the key separately use this command :
openssl genpkey -algorithm RSA -out server.key -pkeyopt rsa_keygen_bits:2048
- To generate a certificate based on the above key:
openssl req -new -x509 -key server.key -out server.crt -days365
TLS + HTTP2 Requests
- While we test our server of file (server.go), we see a TLS handshake error while sending our first request. The error in our go https server indicates that there are issues with the SSL and TLS certificate being used.
The error states TLS Handshake error and then EOF. This error typically indicates that the connection was closed unexpectedly during the TLS handshake.
EOF - End Of File. In the context of network communication and the errors we are encountering, an EOF error typically indicates that one side of the connection has closed the connection unexpectedly or that the connection has been terminated. In general meaning of EOF in networking is connectino termination and protocol errors. So here instead of connection termination, the EOF probably means that there is a protocol error. In the context or TLS or https connection, an EOF error can also occur during the handshake process. If the connection is aborted of if there is a mismatch in expectations between the client and server then we get the EOF error.
Using Curl to make http2 request
Let's add some some more functionality to our server to log the type of http protocol, if it is actually the http version if it's 1.1 or if it's http2. And also we are going to log the TLS version if it's TLS 1.2 or TLS 1.3
func logRequestDetails(r *http.Request){
    httpVersion := r.Proto
	fmt.Println("Received request with HTTP Version:", httpVersion)
	if r.TLS != nil {
		tlsVersion := getTLSVersionName(r.TLS.Version)
		fmt.Println("Received request with TLS version:", tlsVersion)
	} else {
		fmt.Println("Received request without TLS")
	}
}

func getTLSVersionName(version uint16) string {
	switch version {
	case tls.VersionTLS10:
		return "TLS 1.0"
	case tls.VersionTLS11:
		return "TLS 1.1"
	case tls.VersionTLS12:
		return "TLS 1.2"
	case tls.VersionTLS13:
		return "TLS 1.3"
	default:
		return "Unknown TLS version"
	}
}
Curl Commands:
curl -v "https://localhost:3000/orders"
This will result in an error coz it's a self-signed certificate.
curl -v -k "https://localhost:3000/orders"
-k flag is used to ignore the self-signed certificate error. It will bypass the certificate validation.
Sample output
* Host localhost:3000 was resolved.
* IPv6: ::1
* IPv4: 127.0.0.1
*   Trying [::1]:3000...
* Connected to localhost (::1) port 3000
* ALPN: curl offers h2,http/1.1
* (304) (OUT), TLS handshake, Client hello (1):
* (304) (IN), TLS handshake, Server hello (2):
* (304) (IN), TLS handshake, Unknown (8):
* (304) (IN), TLS handshake, Certificate (11):
* (304) (IN), TLS handshake, CERT verify (15):
* (304) (IN), TLS handshake, Finished (20):
* (304) (OUT), TLS handshake, Finished (20):
* SSL connection using TLSv1.3 / AEAD-CHACHA20-POLY1305-SHA256 / [blank] / UNDEF
* ALPN: server accepted h2
* Server certificate:
*  subject: C=AU; ST=Non Existent; L=Randome; O=API inc; OU=API Inc; CN=API Inc; emailAddress=test@test.com
*  start date: Jun 24 05:57:36 2025 GMT
*  expire date: Jun 24 05:57:36 2026 GMT
*  issuer: C=AU; ST=Non Existent; L=Randome; O=API inc; OU=API Inc; CN=API Inc; emailAddress=test@test.com
*  SSL certificate verify result: self signed certificate (18), continuing anyway.
* using HTTP/2
* [HTTP/2] [1] OPENED stream for https://localhost:3000/orders
* [HTTP/2] [1] [:method: GET]
* [HTTP/2] [1] [:scheme: https]
* [HTTP/2] [1] [:authority: localhost:3000]
* [HTTP/2] [1] [:path: /orders]
* [HTTP/2] [1] [user-agent: curl/8.7.1]
* [HTTP/2] [1] [accept: */*]
> GET /orders HTTP/2
> Host: localhost:3000
> User-Agent: curl/8.7.1
> Accept: */*
>
* Request completely sent off
< HTTP/2 200
< content-type: text/plain; charset=utf-8
< content-length: 24
< date: Tue, 24 Jun 2025 13:12:52 GMT
<
* Connection #0 to host localhost left intact
Handling incoming orders⏎
- ALPN - Application Layer Protocol Negotiation. It's a protocol negotiation to negotiate the protocol that the client and the server will be using. And in the above output.. they have agreed to use http2 protocol.
HTTP2, HTTPS, HTTP Conections & TLS Handshake
HTTP 1.1
-
Connectino Behavior
- New Connection for each request
- Connection Reuse
- Connection Closure
-
Performance Consideration:
- Latency
- Resource Consumption
HTTPs (HTTP over TLS/SSL)
- Connection Behavior
- TLS Handshake
- Persistent Connections
- HTTP/1.1 Features
- Performance Considerations
- Latency
- Connection Resumption
HTTP2
- Connection Behavior
- Multiplexing
- Single Connection
- Prioritization
- Performance Considerations
- Reduced Latency
- Lower Resource Usage
References :
- http1.1 : https://www.rfc-editor.org/rfc/rfc9110.html
- http2 : https://httpwg.org/specs/rfc7540.html
- https : https://en.wikipedia.org/wiki/HTTPS
- tls : https://en.wikipedia.org/wiki/Transport_Layer_Security
mTLS
Use a common openssl.conf file to generate the key.pem and cert.pem files. Use this command:
openssl req -x509 -nodes -days 365 -newkey rsa:2048 -keyout key.pem -out cert.pem -config openssl.cnf
openssl.conf
[req]
default_bits        = 2048
distinguished_name  = req_distinguished_name
req_extensions      = req_ext
prompt              = no

[req_distinguished_name]
C = US
ST = State
L = City
O = Organization
OU = Organization Unit
CN = localhost

[req_ext]
subjectAltName = @alt_names

[alt_names]
DNS.1 = localhost
DNS.2 = 127.0.0.1
mTLS
mTLS stands for mutual TLS is an extension of TLS that requires both the client and the server to authenticate each other using certificates. This is more commonly used in environments where both parties need to establish a higher level of trust, such as in internal communications between microservices or in specific client server applications.
mTLS is typically not used for public facing websites like bank portals as it requires the client, in this case our web-browser or device to have a client certificate installed which is not practical for general consumer use. It's used in desktop or mobile applications for validating the certificate between the client and the server. So this is an enhanced level of security that we can implement.
Add this code snippet in the tlsConfig variable in server.go:
// Configure the TLS
tlsConfig := &tls.Config{
    MinVersion: tls.VersionTLS12,
    ClientAuth: tls.RequireAndVerifyClientCert,
    ClientCAs: loadClientCAs(),
}
Make another function loadClientCAs()
func loadClientCAs() *x509.CertPool{
	clientCAs := x509.NewCertPool()
	caCert, err := os.ReadFile("cert.pem")
	if err != nil {
		log.Fatalln("Could not load the client CA:", err)
	}
	clientCAs.AppendCertsFromPEM(caCert)
	return clientCAs
}
Benchmarking HTTP1.1 vs HTTP2 - H2Load BM Tool
Go's HTTP server automatically enables http2 by default when we use ListenAndServeTLS. So when we are creating a TLS server, a secure server then in that case Go by default makes your API into http2 API. However, external package like net/http2 package, allows for more advanced configuration and control over http2 features. We can customize and fine tune our http2 server using the http2 package in a much more refined way.
Serialization / Deserialization - Marshal/Unmarshal - Encode/Decode
Serialization is the process of converting a Go object into a json string. A json string is a byte slice and we are converting a Go object, an instance of a streuct into a JSON string which is a byte slice. Deserialization is a reverse process. It converts a JSON string into a Go object. Go provides two primary ways to handle json :
json.Marshalandjson.Unmarshal: these functions are straight forward and commonly used for in-memory json processing.json.NewEncoderandjson.NewDecoder: these methods are used for streaming JSON data. These are ideal for handling large datasets or working with network connections.
json.Marshal and json.Unmarshal are best suited for situations where you need to quickly serialize data in memory. They are simple to use and perfect for small to medium sized datasets.
json.NewDecoder creates a new decoder that reads from io.Reader. It's particularly used for streaming data such as reading json from a network connection or a file.
json.NewEncoder and json.NewDecoder, are ideal for situations involving large datasets or for streaming data. They are more efficient in terms of memory usage, especially when dealing with data that is being read from or written to an external source. And mostly when we are making APIs, we are reading or writing data from or to an external source and dealing with large datasets.
package main

import (
	"bytes"
	"encoding/json"
	"fmt"
	"log"
	"strings"
)

type User struct {
	Name string `json:"name"`
	Email string `json:"email"`
}

func main() {
	user := User{Name:"Alice", Email: "alice@example.com"}
	fmt.Println(user)
	jsonData, err := json.Marshal(user)
	if err != nil {
		log.Fatal(err)
	}
	fmt.Println(string(jsonData))

	var user1 User
	err = json.Unmarshal(jsonData, &user1)
	if err != nil {
		log.Fatal(err)
	}
	fmt.Println("User created from json data:", user1)


	// json.NewDecoder and json.NewEncoder
	jsonData1 := `{"name": "John", "email": "john@example.com"}`
	reader := strings.NewReader(jsonData1)
	decoder := json.NewDecoder(reader)

	var user2 User
	err = decoder.Decode(&user2)
	if err != nil {
		log.Fatal(err)
	}
	fmt.Println(user2)

	var buf bytes.Buffer
	encoder := json.NewEncoder(&buf)

	err = encoder.Encode(user)
	if err != nil {
		log.Fatal(err)
	}
	fmt.Println("Encoded json string:", buf.String())
}
Encoder:
- converts a struct to a json string
- first, create an encoder
- then encode the struct
Decoder:
- converts a json string to a struct
- first create a decoder
- then decode the json string
API Folder Structure
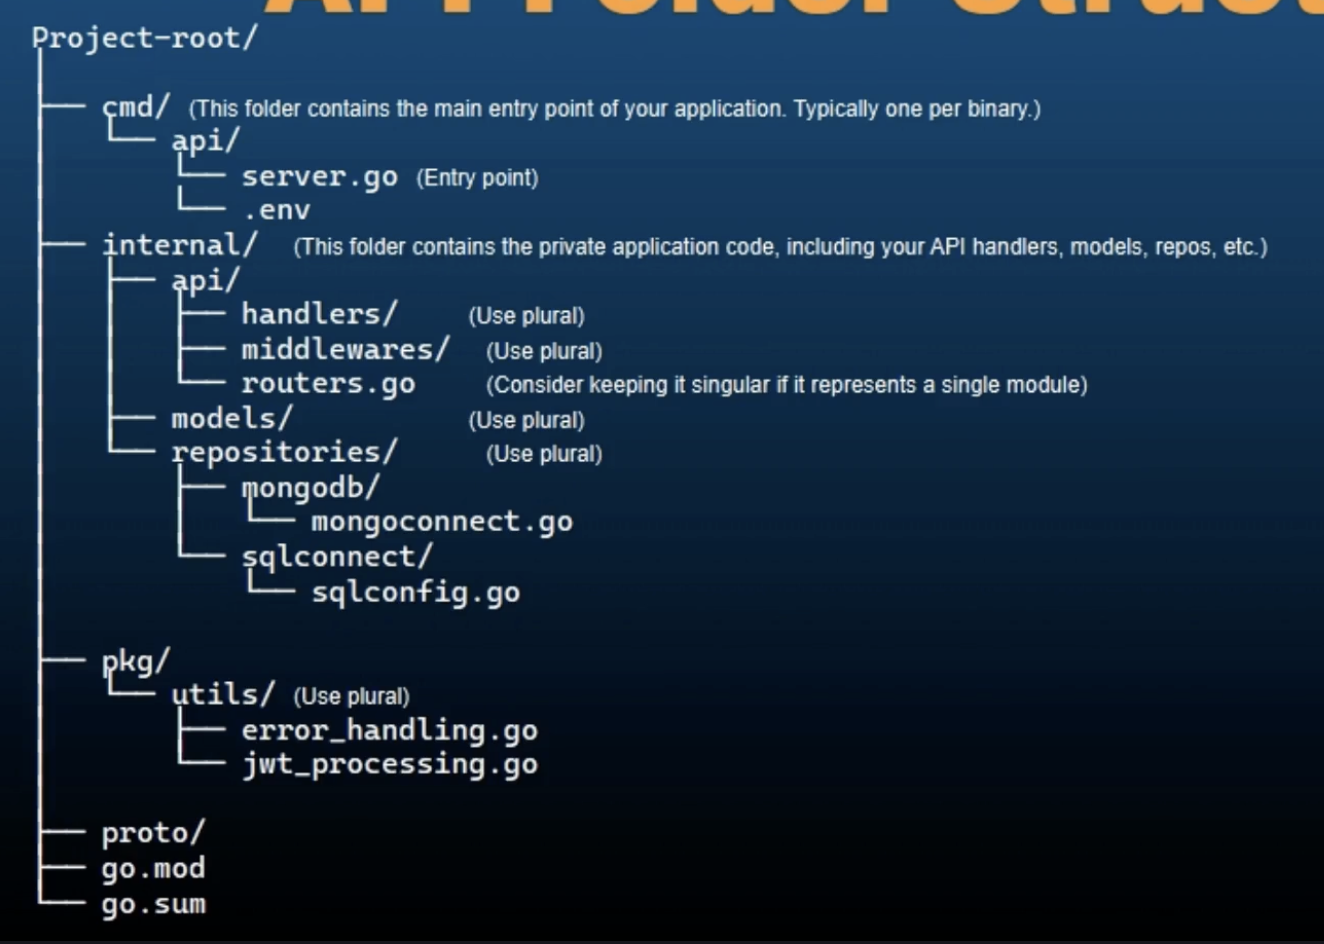
API Planning
In this project we are going to assume that we have been contracted to create a backend server/API for a school. The school is our client and we are going to plan the API as per our client requirements.
So the first stage is understanding the project requirements.
Project Goal:
Create an API for a school management system that administrative staff can use to manage students, teachers, and other staff members.
Key Requirements:
- Addition of student/teaches/staff/exec entry
- Modification of student/teacher/staff/exec entry
- Delete student/teacher/staff/exec entry
- Get list of all students/teachers/staff/execs
- Authentication: login, logout
- Bulk Modifications: students/teachers/staff/execs
- Class Management:
- Total count of a class with class teacher
- List of all students in a class with class teacher
Security and Rate Limiting:
- Rate Limit the application
- Password reset mechanisms (forgot password, update password)
- Deactivate user
Fields:
| Student | Teacher | Executives |
|---|---|---|
| First Name | First Name | First Name |
| Last Name | Last Name | Last Name |
| Class | Subject | Role |
| Class | ||
| Username | ||
| Password |
Endpoints
Executives
- GET
/execs: Get list of executives - POST
/execs: Add a new executive - PATCH
/execs: Modify multiple executives - GET
/execs/{id}: Get a specific executive - PATCH
/execs/{id}: Modify a specific executive - DELETE
/execs/{id}: Delete a specific executive - POST
/execs/login: Login - POST
/execs/logout: Logout - POST
/execs/forgotpassword: Forgot Password - POST
/execs/resetpassword/reset/{resetcode}: Reset Password
Students
- GET
/students: Get list of students - POST
/students: Add a new students - PATCH
/students: Modify multiple students - DELETE
/students: Delete multiple students - GET
/students/{id}: Get a specific student - PATCH
/students/{id}: Modify a specific student - PUT
/students/{id}: Update a specific student - DELETE
/students/{id}: Delete a specific student
Teachers
- GET
/teachers: Get list of teachers - POST
/teachers: Add a new teachers - PATCH
/teachers: Modify multiple teachers - DELETE
/teachers: Delete multiple teachers - GET
/teachers/{id}: Get a specific teacher - PATCH
/teachers/{id}: Modify a specific teacher - PUT
/teachers/{id}: Update a specific teacher - DELETE
/teachers/{id}: Delete a specific teacher - GET
/teachers/{id}/students: Get students of a specific teacher - GET
/teachers/{id}/studentcount: Get student count for a specific teacher
Best Practices and Common Pitfalls
-
Best Practices
- Modularity
- Documentation
- Error Handling
- Security
- Testing
-
Common Pitfalls
- Overcomplicating the API
- Ignoring Security
- Poor Documentation
- Inadequate Testing
By breaking down project requirements into tasks and subsequently into endpoints, you create a clear roadmap for development. Following best practices and avoiding common pitfalls will ensure your API is robust, secure and easy to use.
Basic Routing - CRUD - HTTP Methods
CRUD OPERATIONS
- Create
- Read
- Update
- Delete
HTTP Methods
- POST
- GET
- PUT
- DELETE
- PATCH
The http methods are fundamental to the design and operation of web applications and APIs. They provide a standardized way to perform different actions on resources, making web services predictable, interoperable and easy to understand. Moreover the RESTful API design REST, which is Representational State Transfer, is an architectural fo designing networked applications and RESTful APIs use HTTP methods to perform CRUD operations on resources. This approach simplifies the design and makes APIs more intuitive.
To make the APIs simple and intuitive, all the methods that are related to a particular are grouped together under one root.
package main

import (
	"fmt"
	"log"
	"net/http"
)

func main() {

	port := ":3000"
	http.HandleFunc("/", func(w http.ResponseWriter, r *http.Request) {
		w.Write([]byte("Hello Root Route"))
		fmt.Println("Hello Root Route")
	})

	http.HandleFunc("/teachers", func(w http.ResponseWriter, r *http.Request) {
		// Find out what kind of http method that is sent with the request
		fmt.Println(r.Method)

		switch r.Method {
		case http.MethodGet:
			w.Write([]byte("Hello GET method Teachers Route"))
			return
		case http.MethodPut:
			w.Write([]byte("Hello PUT method Teachers Route"))
			return
		case http.MethodPatch:
			w.Write([]byte("Hello PATCH method Teachers Route"))
			return
		case http.MethodPost:
			w.Write([]byte("Hello POST method Teachers Route"))
			return
		case http.MethodDelete:
			w.Write([]byte("Hello DELETE method Teachers Route"))
			return
		}

		w.Write([]byte("Hello Teachers Route"))
		fmt.Println("Hello Teachers Route")
	})

	http.HandleFunc("/students", func(w http.ResponseWriter, r *http.Request) {
		w.Write([]byte("Hello Students Route"))
		fmt.Println("Hello Students Route")
	})

	http.HandleFunc("/execs", func(w http.ResponseWriter, r *http.Request) {
		w.Write([]byte("Hello Execs Route"))
		fmt.Println("Hello Execs Route")
	})

	fmt.Println("Server is running on port:", port)
	err := http.ListenAndServe(port, nil)
	if err != nil {
		log.Fatalln("Error starting the server:", err)
	}
}
Processing Requests
Code for parsing the form data
Parse form data when the form is x-wwww-form-urlencoded
// Parse form data (necessary for x-www-form-urlencoded)
err := r.ParseForm()
if err != nil {
    http.Error(w, "Error parsing form:", http.StatusBadRequest)
    return
}
fmt.Println("Form:", r.Form)

// Parse Response Data
response := make(map[string]interface{})
for key, value := range r.Form {
    response[key] = value[0]
}
fmt.Println("Processed Response Map:", response)
Parse form data when the form is passed as RAW JSON
// RAW Body
body, err := io.ReadAll(r.Body)
if err != nil {
    http.Error(w, "Error parsing form:", http.StatusBadRequest)
    return
}
defer r.Body.Close()

fmt.Println("Raw Body:", string(body))


// If you expect JSON data, then Unmarshall it using struct
var userInstance1 User
err = json.Unmarshal(body, &userInstance1)
if err != nil {
    http.Error(w, "Error parsing form:", http.StatusBadRequest)
    return
}
fmt.Println(userInstance1)

// Using maps to Unmarshal the data
userInstance2 := make(map[string]interface{})
err = json.Unmarshal(body, &userInstance2)
if err != nil {
    http.Error(w, "Error parsing form:", http.StatusBadRequest)
    return
}
fmt.Println("Unmarshaled JSON into a map", userInstance2)
Different Options that we can use with the request
fmt.Println("Body:", r.Body)
fmt.Println("Form:", r.Form)
fmt.Println("Header:", r.Header)
fmt.Println("Context:", r.Context())
fmt.Println("Content Length:", r.ContentLength)
fmt.Println("Host:", r.Host)
fmt.Println("Method:", r.Method)
fmt.Println("Protocol:", r.Proto)
fmt.Println("Remote Addr:", r.RemoteAddr)
fmt.Println("Request URI:", r.RequestURI)
fmt.Println("TLS:", r.TLS)
fmt.Println("Trailer:", r.Trailer)
fmt.Println("Transfer Encoding:", r.TransferEncoding)
fmt.Println("URL:", r.URL)
fmt.Println("User Agent", r.UserAgent())
fmt.Println("Port:", r.URL.Port())
Path Params
Path Params are a way to capture values in the URL path to use them within our application. They are commonly used in web applications to pass data between the client and server in clean and readable way.
Path paramters are a fundamental part of building RESTful APIs and web applications in Go.You can handle path parameters using the standard library by manually parsing the URL, and this approach give you complete control over how you extract and use path parameters. However after Go version 1.22, it has become even more easier how we extract path parameters.
Query Params
Query paramters are a common way to pass data to a server via URL. They are different from path parameters because path parameter is a single value. Query parameters are typically used in GET requests to send data to the server such as filters or search criteria, or any other data that doesn't need to be in the request body in a URL.
We can provide default values for some of the query parameters which are not received by us.
Confidential information cannot be passes through URL parameters, query and path. These are both URL parameters. We cannot use confidential information in the URL. So that's why we will use username and password through JSON format.
The query parameters are used with GET requests most of the time. Query parameters are a powerful way to pass data to our server via URLs and the standard library in Go provides simple and effective tools to extract and work with query parameters. Used to implement features like filtering, sorting, pagination, etc.
Add this code to the GET method:
// teachers/?key=value&query=value2&sortby=email&sortorder=ASC

queryParams := r.URL.Query()
fmt.Println("Query Params:", queryParams)
sortby := queryParams.Get("sortby")
key := queryParams.Get("key")
sortorder := queryParams.Get("sortorder")
if sortorder == ""{
    sortorder = "DESC"
}
fmt.Printf("Sortby: %v | Sort Order: %v | Key: %v", sortby, sortorder, key)
Multiplexer
In Go mux which is short for multiplexer, refers to a request multiplexer which is a router that matches incoming HTTP requests to their respective handlers based on request URL and method. The http.ServeMux is the default http request multiplexer provided by the Go standard libary.
Mux allows you to define multiple routes, that is multiple end points for your API. Each route can have its own handler function, enabling you to organize your API better. Also MUX helps separating the logic for different routes, making the code cleaner and more maintainable.
func main() {

	port := ":3000"
	cert := "cert.pem"
	key := "key.pem"

	mux := http.NewServeMux()

	mux.HandleFunc("/", rootHandler)
	mux.HandleFunc("/teachers/", teachersHandler)
	mux.HandleFunc("/students/", studentsHandler)
	mux.HandleFunc("/execs/", execsHandler)

    tlsConfig := &tls.Config{
		MinVersion: tls.VersionTLS12,
	}

	// create custom server
	server := &http.Server{
		Addr: port,
		Handler: mux,
		TLSConfig: tlsConfig,
	}

	fmt.Println("Server is running on port:", port)
	err := server.ListenAndServeTLS(cert, key)
	if err != nil {
		log.Fatalln("Error starting the server:", err)
	}
}
Middlewares
Middleware is like a checkpoint or a gatekeeper that stands between a client request and the final processing of that request by the server. It can inspect modify or log the request before it reaches the final destination and it can do the same with the response before it is send back to the client.
A middleware performs a task on the request and then allows the request to move forward onto the next middleware and then from one middleware to the next and then to the next until it finally reaches the handler function.
Middleware in an API serves various purposes:
- Logging
- Authentication and Authorization
- Data Validation
- Error Handling
Mechanism of a middleware : In Go, middleware is a function that wraps around another function, the actual request handler and this wrapper function can fo something before and or after calling the actual handler.
Concept of next in middlewares :
http.Handlerinterface
type Handler interface{
    ServeHTTP(ResponseWriter, *Request)
}
- Middleware Pattern
- Chaining Handlers
Structure of a Middleware :
func MiddlwareName(next http.Handler) http.Handler {
	return http.HandlerFunc(func(w http.ResponseWriter, r *http.Request) {

		next.ServeHTTP(w,r)
	})
}
Security Headers Middleware
Applying Security Headers makes a significant difference in securing our API and improving browser behavior. They mitigate risks associated with common web vulnerabilities and ensure that your application adheres to best practices for web-security. Without these headers, our API will be more vulnerables to attacks and could lead to compromised security for your users. So applying these security headers in your REST API can significantly enhance the security of your application by mitigating various attack vectors. These are actual security headers which enhance the security of your API and they do by protecting your API against various attack vectors.
package middlewares

import "net/http"

func SecurityHeaders(next http.Handler) http.Handler {
	return http.HandlerFunc(func(w http.ResponseWriter, r *http.Request) {
		w.Header().Set("X-DNS-Prefetch-Control", "off")
		w.Header().Set("X-Frame-Options", "DENY")
		w.Header().Set("X-XSS-Protection", "1; mode-block")
		w.Header().Set("X-Content-Type-Options", "nosniff")
		w.Header().Set("Strict-Transport-Security", "max-age=63072000; includeSubDomains; preload")
		w.Header().Set("Referrer-Policy", "no-referrer")
		w.Header().Set("X-Powered-By","Django")

		w.Header().Set("Server", "")
		w.Header().Set("X-Permitterd-Cross-Domain-Policies", "none")
		w.Header().Set("Cache-Control", "no-store, no-chache, must-revalidate, max-age=0")
		w.Header().Set("Cross-Origin-Resource-Policy", "same-origin")
		w.Header().Set("Cross-Origin-Opener-Policy", "same-origin")
		w.Header().Set("Cross-Origin-Embedder-Policy","require-corp")
		w.Header().Set("Access-Control-Allow-Headers", "Content-Type, Authorization")
		w.Header().Set("Access-Control-Allow-Methods", "GET, POST, PUT, PATCH, DELETE")
		w.Header().Set("Access-Control-Allow-Credentials", "true")
		w.Header().Set("Permissions-Policy", "geolocation=(self), microphone=()")

		next.ServeHTTP(w,r)
	})
}
CORS Middleware
CORS, which stands for Cross Origin Resource Sharing, is a security feature implemented in web-browsers that restricts web pages from making requests to a domain different from the one that served the web page. This is crucial for preventing malicious attacks, but it can be a limitation during development or when building APIs that need to be accessed from different origins. The CORS middleware allows you to configure which origins are permitted to access your resources.
Cross Origin Resourse Sharing:
- Allow Specific Origins
- HTTP Methods
- Headers
- Credentials
- Preflight Requests
When a client makes a request to a resource on a different origin for example https://localhost:3000 to https://api.example.com, the browser checks whether the server's response includes the appropriate CORS headers.
All these middlewares are for production phase. In development phase we can inactivate them while we are testing our API continuously during development.
Using CORS middlware we can specify which origins are allowed to access the resources. For example we can allow requests from localhost:3000 or from myoriginurl.com, etc. We are actually checking the origin header. We are accessing the origin, which needs to be as per our requirement, if it does not match our accepted origins in the origin key of the header, then in that case, we will not allow such requests. This gives us an additional security layer over your API.
http.MethodOptions is just a pre-flight check. It returns immediately, allowing the request without calling the next handler.
Using CORS middleware is essential for developing APIs that need to be accessed from web-applications hosted on different origins. It helps maintaining security while allowing legitimate cross-origin requests.
package middlewares

import (
	"fmt"
	"net/http"
)

// api is hosted at www.myapi.com
// frontend server is at www.myfrontend.com

var allowedOrigins = []string{
	"https://localhost:3000",
	"https://www.myfrontend.com",
	"https://myoriginurl.com",
}

func Cors(next http.Handler) http.Handler {
	return http.HandlerFunc(func(w http.ResponseWriter, r *http.Request){
		origin := r.Header.Get("Origin")
		fmt.Println(origin)

		if isOriginAllowed(origin){
			w.Header().Set("Access-Control-Allow-Origin", origin)
		} else {
			http.Error(w, "Not allowed by CORS", http.StatusForbidden)
			return
		}
		// w.Header().Set()
		w.Header().Set("Access-Control-Allow-Headers", "Content-Type, Authorization")
		w.Header().Set("Access-Control-Expose-Headers", "Authorization")
		w.Header().Set("Access-Control-Allow-Methods", "GET, POST, PUT, PATCH, DELETE")
		w.Header().Set("Access-Control-Allow-Credentials", "true")
		w.Header().Set("Access-Control-Max-Age", "3600")

		if r.Method == http.MethodOptions{
			return
		}

		next.ServeHTTP(w, r)
	})
}

func isOriginAllowed(origin string) bool{
	for _, allowedOrigin := range allowedOrigins {
		if allowedOrigin == origin {
			return true
		}
	}
	return false
}
Response Time Middleware
A response time middleware will calculate the time it took to process a request from a client and send a response. So it's going to start tracking time as soon as we receive the request and it's going to calculate the time it took to send a response back to the client.
Compression Middleware
Using compression middleware in Go can be very beneficial for imptroving the performance of your web applications. Compression reduces the size of the response body sent over the network, which can significantly decrease loading times for your application. This is especially important for large assets like images, stylesheets and javascript files. By compressing responses you can minimize the amount of data transferred over the network, reducing bandwidth costs and improving overall efficiency.
Why use compression middleware ?
- Improved Performance
- Reduced Bandwidth usage
- Better User Experience
- Easy Integration
If our application primarily serves small payloads, for example a small API response, the overhead of compression may not be worth the gain as the compression ratio for small data may be minimal. Another factor to consider is that compression requires CPU resources. If your server is already under heavy load, adding compression may lead to performance degradation.
When you might not need Compression Middleware:
- Small Payloads
- Already Compressed Assets
- CPU Overhead
In conclusion, implementing compression middleware in your Go application can lead to significant performance improvements by reducing response sizes, lowering bandwidth usage, and enhancing the user experience. It can be easily integrated into your http server setup and is especially useful for applications serving large or static content.
package middlewares

import (
	"compress/gzip"
	"fmt"
	"net/http"
	"strings"
)

func Compression(next http.Handler) http.Handler {
	return http.HandlerFunc(func(w http.ResponseWriter, r *http.Request) {
		// Check if the client accepts gzip encoding
		if !strings.Contains(r.Header.Get("Accept-Encoding"), "gzip"){
			next.ServeHTTP(w,r)
		}

		// Set the response header
		w.Header().Set("Content-Encoding", "gzip")
		gz := gzip.NewWriter(w)
		defer gz.Close()

		// Wrap the ResponseWriter
		w = &gzipResponseWriter{
			ResponseWriter: w,
			Writer: gz,
		}

		next.ServeHTTP(w,r)
		fmt.Println("Sent from Compression Middleware")

	})
}

type gzipResponseWriter struct {
	http.ResponseWriter
	Writer *gzip.Writer
}

func (g *gzipResponseWriter) Write(b []byte) (int, error){
	return g.Writer.Write(b)
}
Rate Limiting Middleware
rate_limiter_middleware.go
package middlewares

import (
	"fmt"
	"net/http"
	"sync"
	"time"
)

type rateLimiter struct {
	mu sync.Mutex
	visitors map[string]int
	limit int
	resetTime time.Duration
}

func NewRateLimiter(limit int, resetTime time.Duration) *rateLimiter{
	rl := &rateLimiter{
		visitors: make(map[string]int),
		limit: limit,
		resetTime: resetTime,
	}
	// Start the reset routine
	go rl.resetVisitorCount()
	return rl
}

func (rl *rateLimiter) resetVisitorCount(){
	for {
		time.Sleep(rl.resetTime)
		rl.mu.Lock()
		rl.visitors = make(map[string]int)
		rl.mu.Unlock()
	}
}

func (rl *rateLimiter) Middleware(next http.Handler) http.Handler{
	return http.HandlerFunc(func(w http.ResponseWriter, r *http.Request) {
		rl.mu.Lock()
		defer rl.mu.Unlock()

		visitorIP := r.RemoteAddr    // You might want to extract the IP in a more sophisticated way
		rl.visitors[visitorIP]++

		fmt.Printf("Visitor COunt from %v is %v\n", visitorIP, rl.visitors[visitorIP])

		if rl.visitors[visitorIP] > rl.limit {
			http.Error(w, "Too many requests", http.StatusTooManyRequests)
			return
		}

		next.ServeHTTP(w,r)
	})
}
server.go
rl := middlewares.NewRateLimiter(5, time.Minute)

// create custom server
server := &http.Server{
    Addr:      port,
    // Handler: mux
    // Handler:   middlewares.SecurityHeaders(mux),
    Handler: rl.Middleware(middlewares.Compression(middlewares.ResponseTimeMiddleware(middlewares.Cors(mux)))),
    TLSConfig: tlsConfig,
}
HPP Middleware
HPP which stands for HTTP parameter pollution, is a type of an attack and our HPP middleware will help protect our application from HTTP parameter pollution attacks. Because the HTTP parameter pollution occurs when multiple parameters with the same name are sent in an HTTP request. This can lead to unexpected behavior, data corruption, or security vulnerabilities in the application.
HPP middlware normalizes the request parameters by merging or removing duplicate parameters. It ensures that only values is kept for each parameter name, reducing the risk of ambiguity and manipulation. By preventing paramter pollution, HPP helps maintain the integrity of your applications, data and logic, making it more robust against certain types of attacks. Moreover, this middleware will also us to configure how to handle duplicate parameters such as chooding to keep the first or last occurence or merging them into an array. Overall HPP middleware adds a layer of security by ensuring that the application processes parameters in a predictable and a safe manner.
package middlewares

import (
	"fmt"
	"net/http"
	"strings"
)

type HPPOptions struct {
	CheckQuery                  bool
	CheckBody                   bool
	CheckBodyOnlyForContentType string
	Whitelist                   []string
}

func Hpp(options HPPOptions) func(http.Handler) http.Handler{
	return func(next http.Handler) http.Handler {
		return http.HandlerFunc(func(w http.ResponseWriter, r *http.Request) {
			if options.CheckBody && r.Method == http.MethodPost && isCorrectContentType(r, options.CheckBodyOnlyForContentType){
				// Filter the body params
				filterBodyParams(r, options.Whitelist)
			}
			if options.CheckQuery && r.URL.Query() != nil {
				// Filter the query params
				filterQueryParams(r, options.Whitelist)
			}

			next.ServeHTTP(w,r)
		})
	}
}

func isCorrectContentType(r *http.Request, contentType string) bool {
	return strings.Contains(r.Header.Get("Content-Type"), contentType)
}

func filterBodyParams(r *http.Request, whitelist []string){
	err := r.ParseForm()
	if err != nil {
		fmt.Println(err)
		return
	}
	for k,v := range r.Form {
		if len(v) > 1 {
			r.Form.Set(k, v[0])    // first value
			// r.Form.Set(k, v[len(v)-1])   // last value
		}
		if !isWhiteListed(k, whitelist) {
			delete(r.Form, k)
		}
	}
}

func filterQueryParams(r *http.Request, whitelist []string){
	query := r.URL.Query()

	for k,v := range r.Form {
		if len(v) > 1 {
			query.Set(k, v[0])    // first value
			// query.Set(k, v[len(v)-1])   // last value
		}
		if !isWhiteListed(k, whitelist) {
			query.Del(k)
		}
		r.URL.RawQuery = query.Encode()
	}
}


func isWhiteListed(param string, whitelist []string) bool {
	for _, v := range whitelist {
		if param == v {
			return true
		}
	}
	return false
}
Creating our SQL database
CREATE DATABASE IF NOT EXISTS school;

USE school;

CREATE TABLE IF NOT EXISTS teachers(
	id INT AUTO_INCREMENT PRIMARY KEY,
	first_name VARCHAR(255) NOT NULL,
	last_name VARCHAR(255) NOT NULL,
	email VARCHAR(255) UNIQUE NOT NULL,
	class VARCHAR(255) NOT NULL,
	subject VARCHAR(255) NOT NULL,
	INDEX (email)
) AUTO_INCREMENT=100;
Part - 3
Why WHERE 1=1 in the SQL query
WHERE 1=1 is always true and acts as a placeholder to simplify appending additional conditions dynamically. It allows us to add conditions without worrying about whether it's the first conditions or not, avoiding the need to check if you should start with WHERE or add an AND.
WHERE 1=1 also simplify the code for adding filters. Without WHERE 1=1, you would need to check if the WHERE clause already exists before adding AND for each filter which adds extra complexity. And using this WHERE 1=1, we can actually handle multiple filters.
In conclusion, using WHERE 1=1 is a common practice for making dynamic query buliding more straightformward. It avoids the need for complex conditional logic when appending multiple filter conditions, making your code cleaner and easier to maintain.
Advanced Filtering Technique: GET - Getting entries based on multiple criteria
func addFilters(r *http.Request, query string, args []interface{}) (string, []interface{}) {
	params := map[string]string{
		"first_name": "first_name",
		"last_name":  "last_name",
		"email":      "email",
		"class":      "class",
		"subject":    "subject",
	}

	for param, dbField := range params {
		value := r.URL.Query().Get(param)
		if value != "" {
			query += " AND " + dbField + " = ?"
			args = append(args, value)
		}
	}
	return query, args
}
Advanced Sort Order Technique: GET - Sorting nad getting entries based on multiple criteria
.Get() returns a single value. This method returns the first value associated with the sortby key in the query parameters as a string. If there are multiple sortby parameters, only the first one is returned and if the key is not present it returns an empty string.
On the other hand, r.URL.Query()["sortby"] returns a slice of values. This method returns all values associated with the sortby key as a slice of strings. If there are multiple sortby parameters, all of them are returned. And all of them are returned in a slice form. If the key is not present, it returns a nil slice.
So in our case, where we want to handle multiple sorting criteria, r.URL.Query()["sortby"] is more appropriate because it gives us all the sorting parameters as a slice, allowing us to iterate through them and apply multiple sorting conditions.
func addSorting(r *http.Request, query string) string {
	sortParams := r.URL.Query()["sortby"]
	if len(sortParams) > 0 {
		query += " ORDER BY"
		for i, param := range sortParams {
			parts := strings.Split(param, ":")
			if len(parts) != 2 {
				continue
			}
			field, order := parts[0], parts[1]

			if !isValidField(field) || !isValidOrder(order) {
				continue
			}
			if i > 0 {
				query += ","
			}
			query += " " + field + " " + order
		}
	}
	return query
}

func isValidOrder(order string) bool {
	return order == "asc" || order == "desc"
}

func isValidField(field string) bool {
	validFields := map[string]bool{
		"first_name": true,
		"last_name":  true,
		"class":      true,
		"email":      true,
		"subject":    true,
	}
	return validFields[field]
}
Updating a complete entry - PUT
PUT and PATCH differ from one another in the way that PUT is meant to completely replace the entity. However PATCH is just modifying the entry slightly. If there is a minor modification then in that case we use patch. However, PUT is not used that much.
When we are posting data, we use Exec(). When we are retrieving data, we use Query(). In PUT request, we need to send all the values for all the fields. If we send a blank value, then the black value will be updated.
func updateTeacherHandler(w http.ResponseWriter, r *http.Request){
	idStr := strings.TrimPrefix(r.URL.Path, "/teachers/")
	id, err := strconv.Atoi(idStr)
	if err != nil {
		log.Println(err)
		http.Error(w, "Invalid Teacher ID", http.StatusBadRequest)
		return
	}

	var updatedTeacher models.Teacher
	err = json.NewDecoder(r.Body).Decode(&updatedTeacher)
	if err != nil {
		log.Println(err)
		http.Error(w, "Invalid Request Payload", http.StatusBadRequest)
		return
	}

	db, err := sqlconnect.ConnectDb()
	if err != nil {
		log.Println(err)
		http.Error(w, "Unable to connect to database", http.StatusInternalServerError)
		return
	}
	defer db.Close()

	var existingTeacher models.Teacher
	err = db.QueryRow("SELECT * FROM teachers WHERE id = ?", id).Scan(&existingTeacher.ID, &existingTeacher.Class, &existingTeacher.Email, &existingTeacher.FirstName, &existingTeacher.LastName, &existingTeacher.Subject)
	if err != nil {
		if err != sql.ErrNoRows {
			http.Error(w, "Teacher not found", http.StatusNotFound)
			return
		}
		http.Error(w, "Unable to Retrieve Data", http.StatusInternalServerError)
		return
	}

	updatedTeacher.ID = existingTeacher.ID
	_, err = db.Exec("UPDATE teachers SET first_name = ?, last_name = ?, email = ?, class = ?, subject = ? WHERE id = ?", updatedTeacher.FirstName, updatedTeacher.LastName, updatedTeacher.Email, updatedTeacher.Class, updatedTeacher.Subject, updatedTeacher.ID)
	if err != nil {
		http.Error(w,"Error Updating teacher", http.StatusInternalServerError)
		return
	}

	w.Header().Set("Content-Type", "application/json")
	json.NewEncoder(w).Encode(updatedTeacher)

}
Modifying an Entry - PATCH
// PATCH /teachers/{id}
func patchTeachersHandler(w http.ResponseWriter, r *http.Request) {
	idStr := strings.TrimPrefix(r.URL.Path, "/teachers/")
	id, err := strconv.Atoi(idStr)
	if err != nil {
		log.Println(err)
		http.Error(w, "Invalid Teacher ID", http.StatusBadRequest)
		return
	}

	var updates map[string]interface{}
	err = json.NewDecoder(r.Body).Decode(&updates)
	if err != nil {
		log.Println(err)
		http.Error(w, "Invalid Request Payload", http.StatusBadRequest)
		return
	}

	db, err := sqlconnect.ConnectDb()
	if err != nil {
		log.Println(err)
		http.Error(w, "Unable to connect to database", http.StatusInternalServerError)
		return
	}
	defer db.Close()

	var existingTeacher models.Teacher
	err = db.QueryRow("SELECT id, class, email, first_name, last_name, subject FROM teachers WHERE id = ?", id).Scan(&existingTeacher.ID, &existingTeacher.Class, &existingTeacher.Email, &existingTeacher.FirstName, &existingTeacher.LastName, &existingTeacher.Subject)
	if err != nil {
		if err != sql.ErrNoRows {
			http.Error(w, "Teacher not found", http.StatusNotFound)
			return
		}
		http.Error(w, "Unable to Retrieve Data", http.StatusInternalServerError)
		return
	}

	// Apply updates
	for k, v := range updates {
		switch k {
		case "first_name":
			existingTeacher.FirstName = v.(string)
		case "last_name":
			existingTeacher.LastName = v.(string)
		case "email":
			existingTeacher.Email = v.(string)
		case "class":
			existingTeacher.Class = v.(string)
		case "subject":
			existingTeacher.Subject = v.(string)
		}
	}

	_, err = db.Exec("UPDATE teachers SET first_name = ?, last_name = ?, email = ?, class = ?, subject = ? WHERE id = ?", existingTeacher.FirstName, existingTeacher.LastName, existingTeacher.Email, existingTeacher.Class, existingTeacher.Subject, existingTeacher.ID)
	if err != nil {
		http.Error(w, "Error Updating teacher", http.StatusInternalServerError)
		return
	}

	w.Header().Set("Content-Type", "application/json")
	json.NewEncoder(w).Encode(existingTeacher)

}
Improving our PATCH functionality - reflect package
Instead of using switch statements for every field, use the reflect package.
// // Apply updates
// for k, v := range updates {
// 	switch k {
// 	case "first_name":
// 		existingTeacher.FirstName = v.(string)
// 	case "last_name":
// 		existingTeacher.LastName = v.(string)
// 	case "email":
// 		existingTeacher.Email = v.(string)
// 	case "class":
// 		existingTeacher.Class = v.(string)
// 	case "subject":
// 		existingTeacher.Subject = v.(string)
// 	}
// }

// Apply updates using `reflect` package
teacherVal := reflect.ValueOf(&existingTeacher).Elem()
teacherType := teacherVal.Type()
for k, v := range updates {
    for i := 0; i < teacherVal.NumField(); i++ {

        field := teacherType.Field(i)

        if field.Tag.Get("json") == k + ",omitempty" {
            if teacherVal.Field(i).CanSet() {
             teacherVal.Field(i).Set(reflect.ValueOf(v).Convert(teacherVal.Field(i).Type()))
            }
        }
    }
}
Deleting an entry - DELETE
func deleteTeachersHandler(w http.ResponseWriter, r *http.Request) {
	idStr := strings.TrimPrefix(r.URL.Path, "/teachers/")
	id, err := strconv.Atoi(idStr)
	if err != nil {
		log.Println(err)
		http.Error(w, "Invalid Teacher ID", http.StatusBadRequest)
		return
	}

	db, err := sqlconnect.ConnectDb()
	if err != nil {
		log.Println(err)
		http.Error(w, "Unable to connect to database", http.StatusInternalServerError)
		return
	}
	defer db.Close()

	result, err := db.Exec("DELETE FROM teachers WHERE id = ?", id)
	if err != nil {
		http.Error(w, "Error deleting teacher", http.StatusInternalServerError)
		return
	}

	fmt.Println(result.RowsAffected())

	rowsAffected, err := result.RowsAffected()
	if err != nil {
		http.Error(w, "Error retrieving delete result", http.StatusInternalServerError)
		return
	}

	if rowsAffected == 0 {
		http.Error(w, "Teacher not found", http.StatusNotFound)
		return
	}

	// Response Body -> Optional
	w.Header().Set("Content-Type", "application/json")
	response := struct {
		Status string `json:"status"`
		ID     int    `json:"id"`
	}{
		Status: "Teacher deleted successfully",
		ID:     id,
	}
	json.NewEncoder(w).Encode(response)

	// Return status of NoContent -> Compulsory
	w.WriteHeader(http.StatusNoContent)

}
Modernizing Routes:
With Go version 1.22, we can extract path parameters just like we used to extract query parameters. We can just mention the method right before the route and pass it the handler function associates with that HTTP method.
Path with ... with the ellipsis, will include all the values after the intial route as the path parameter associated with the key that we have mentioned before the three dots ....
package main

import (
	"fmt"
	"net/http"
)

func main() {
	mux := http.NewServeMux()

	// Method based routing
	mux.HandleFunc("POST /items/create", func(w http.ResponseWriter, r *http.Request) {
		fmt.Fprintf(w, "Item created")
	})

	// Method based routing
	mux.HandleFunc("DELETE /items/create", func(w http.ResponseWriter, r *http.Request) {
		fmt.Fprintf(w, "Item deleted")
	})

	// Wildcard in pattern - path parameter
	mux.HandleFunc("GET /teachers/{id}", func(w http.ResponseWriter, r *http.Request) {
		fmt.Fprintf(w, "Teacher ID: %s", r.PathValue("id"))
	})

	// Wildcard with "...."
	mux.HandleFunc("/files/{path...}", func (w http.ResponseWriter, r *http.Request)  {
		fmt.Fprintf(w, "Path: %s", r.PathValue("path"))
	})

	// Confusion when there are two conflicting wildcards
	mux.HandleFunc("/path1/{param1}", func(w http.ResponseWriter, r *http.Request) {
		fmt.Fprintf(w, "Param1: %s", r.PathValue("param1"))
	})
	// mux.HandleFunc("/{param2}/path2", func(w http.ResponseWriter, r *http.Request) {
	// 	fmt.Fprintf(w, "Param2: %s", r.PathValue("param2"))
	// })
	/* Error:
		/{param2}/path2 and /files/{path...} both match some paths, like "/files/path2".
        But neither is more specific than the other.
        /{param2}/path2 matches "/param2/path2", but /files/{path...} doesn't.
        /files/{path...} matches "/files/", but /{param2}/path2 doesn't.
	*/

	mux.HandleFunc("/path2/param2", func(w http.ResponseWriter, r *http.Request) {
		fmt.Fprintf(w, "Nothing to see here")
	})

	http.ListenAndServe(":8080", mux)
}
Refactoring MUX
There should me only a single space between the http method and your route. If there is no space or more than one space, our application will not recognize the DELETE method associates with this route.
mux.HandleFunc("DELETE /teachers/", handlers.TeachersHandler)
For now we are focusing on only the /teachers/ route. So the router.go will now look like this:
package router

import (
	"net/http"
	"school_management_api/internal/api/handlers"
)

func Router() *http.ServeMux {
	mux := http.NewServeMux()
	mux.HandleFunc("/", handlers.RootHandler)

	mux.HandleFunc("GET /teachers/", handlers.TeachersHandler)
	mux.HandleFunc("GET /teachers/{id}", handlers.TeachersHandler)
	mux.HandleFunc("POST /teachers/", handlers.TeachersHandler)
	mux.HandleFunc("PUT /teachers/", handlers.TeachersHandler)
	mux.HandleFunc("PATCH /teachers/", handlers.TeachersHandler)
	mux.HandleFunc("PATCH /teachers/{id}", handlers.TeachersHandler)
	mux.HandleFunc("DELETE /teachers/", handlers.TeachersHandler)
	mux.HandleFunc("DELETE /teachers/{id}", handlers.TeachersHandler)


	mux.HandleFunc("/students/", handlers.StudentsHandler)
	mux.HandleFunc("/execs/", handlers.ExecsHandler)
	return mux
}
Using Path Params for Specific Entry
router/router.go
package router

import (
	"net/http"
	"school_management_api/internal/api/handlers"
)

func Router() *http.ServeMux {
	mux := http.NewServeMux()
	mux.HandleFunc("/", handlers.RootHandler)

	mux.HandleFunc("GET /teachers/", handlers.GetTeachersHandler)
	mux.HandleFunc("POST /teachers/", handlers.AddTeacherHandler)
	mux.HandleFunc("PATCH /teachers/", handlers.PatchTeachersHandler)
	mux.HandleFunc("DELETE /teachers/", handlers.DeleteTeachersHandler)

	mux.HandleFunc("GET /teachers/{id}", handlers.GetTeacherHandler)
	mux.HandleFunc("PUT /teachers/{id}", handlers.UpdateTeacherHandler)
	mux.HandleFunc("PATCH /teachers/{id}", handlers.PatchTeachersHandler)
	mux.HandleFunc("DELETE /teachers/{id}", handlers.DeleteTeachersHandler)


	mux.HandleFunc("/students/", handlers.StudentsHandler)
	mux.HandleFunc("/execs/", handlers.ExecsHandler)
	return mux
}
handlers/teachers.go
func GetTeachersHandler(w http.ResponseWriter, r *http.Request) {

	db, err := sqlconnect.ConnectDb()
	if err != nil {
		http.Error(w, "Error connecting to database", http.StatusInternalServerError)
		return
	}
	defer db.Close()

	query := "SELECT id, first_name, last_name, email, class, subject FROM teachers WHERE 1=1"
	var args []interface{}

	query, args = addFilters(r, query, args)

	query = addSorting(r, query)

	rows, err := db.Query(query, args...)
	if err != nil {
		fmt.Println("err")
		http.Error(w, "Database Query Error", http.StatusInternalServerError)
		return
	}
	defer rows.Close()

	teacherList := make([]models.Teacher, 0)
	for rows.Next() {
		teacher := models.Teacher{}
		err = rows.Scan(&teacher.ID, &teacher.FirstName, &teacher.LastName, &teacher.Email, &teacher.Class, &teacher.Subject)
		if err != nil {
			http.Error(w, "Error Scanning the database results", http.StatusInternalServerError)
			return
		}
		teacherList = append(teacherList, teacher)
	}

	response := struct {
		Status string           `json:"status"`
		Count  int              `json:"count"`
		Data   []models.Teacher `json:"data"`
	}{
		Status: "success",
		Count:  len(teacherList),
		Data:   teacherList,
	}
	w.Header().Set("Content-Type", "application/json")
	json.NewEncoder(w).Encode(response)

}

func GetTeacherHandler(w http.ResponseWriter, r *http.Request) {

	db, err := sqlconnect.ConnectDb()
	if err != nil {
		http.Error(w, "Error connecting to database", http.StatusInternalServerError)
		return
	}
	defer db.Close()

	idStr := r.PathValue("id")

	// Handle Path parameter
	id, err := strconv.Atoi(idStr)
	if err != nil {
		fmt.Println(err)
		return
	}

	var teacher models.Teacher
	err = db.QueryRow("SELECT id, first_name, last_name, email, class, subject FROM teachers WHERE id = ?", id).Scan(&teacher.ID, &teacher.Class, &teacher.FirstName, &teacher.LastName, &teacher.Subject, &teacher.Email)
	if err == sql.ErrNoRows {
		http.Error(w, "Teacher not found", http.StatusNotFound)
		return
	} else if err != nil {
		fmt.Println(err)
		http.Error(w, "Database Query Error", http.StatusInternalServerError)
		return
	}
	w.Header().Set("Content-Type", "application/json")
	json.NewEncoder(w).Encode(teacher)
}
Modifying Multiple Entries - PATCH
A transaction means that we are going to run multiple SQL statementd one after another.
db.Begin() starts a transaction and the default isolation is dependent on the driver. But to simplify it starts a transaction and that's why it returns a transaction sql.Tx and an error.
In Go, when you need to execute a series of SQL statements that should eiter all succeed or all fail. In that case we can use transactions. The database sql package provides a way to handle transactions using db.Begin and then from the resulting transaction we can use tx.Exec to execute statements, tx.Rollback to rollback the execution and tx.Commit to finally commit the transaction.
In the context of databases and SQl, a transaction is a sequence of one or more SQL operations that are executed as a single unit of work. The key characteristics of transaction is that, it ensures ACID properties. ACID stands for Atomicity, Consistency, Isolation and Durability for the operations within it.
-
Atomicity means that all operations within the transaction must succeed, or none should happen at all. If any operation within the transaction failsm the entire transaction is rolled back and the database is left in it's original state.
-
Consistency means that a transaction, brings the database from one valid state to another. If a transaction is successful, the database will be in a consistent state according to all defined rules such as constraints, triggers, etc.
-
Isolation means that the transactions are isolated from each other, meaning that the operation in one transaction are not visible to other transactions until the transaction is committed. This ensures that the transactions do not interfere with each other.
-
Duratbility means, once a transaction is committed, it's changes are permanennt, even in the event of a system failure, the data will persist and it will not be lost.
tx.Exec() executes an SQL statement within the context of a transaction. It is similar to db.Exec() as it also returns a result and an error but it ensures that the operation is part of the transaction. db.Exec() is for individual statement, tx.Exec is part of a transaction and we can use this for insert, update or delete statements within a transaction.
tx.Rollback just simply rolls back the transaction, undoing all the changes made during the transaction. This should be called if an error occurs, and that you want to discard any changes made in the transaction.
tx.Commit() commits the transaction applying all the changes made during the transaction and this should be called when all operations within the transaction succeeded and that you want to make the changes permanent.
Since we implemented transactions, transaction either finishes completely means either it is executed successfully completely or it fails completely. There's no partial success or partial failure when it comes to transactions.
// PATCH /teachers/
func PatchTeachersHandler(w http.ResponseWriter, r *http.Request) {
	db, err := sqlconnect.ConnectDb()
	if err != nil {
		log.Println(err)
		http.Error(w, "Unable to connect to databse", http.StatusInternalServerError)
		return
	}
	defer db.Close()

	var updates []map[string]interface{}
	err = json.NewDecoder(r.Body).Decode(&updates)
	if err != nil {
		http.Error(w, "Invalid request payload", http.StatusBadRequest)
		return
	}

	tx, err := db.Begin()
	if err != nil {
		log.Println(err)
		http.Error(w, "Error starting transaction", http.StatusInternalServerError)
		return
	}

	for _, update := range updates {
		id, ok := update["id"].(string)
		if !ok {
			tx.Rollback()
			http.Error(w, "Invalid teacher ID in update", http.StatusBadRequest)
			return
		}

		var teacherFromDb models.Teacher
		err := db.QueryRow("SELECT id, first_name, last_name, email, class, subject FROM teachers WHERE id = ?", id).Scan(&teacherFromDb.ID, &teacherFromDb.FirstName, &teacherFromDb.LastName, &teacherFromDb.Email, &teacherFromDb.Class, &teacherFromDb.Subject)

		if err != nil {
			tx.Rollback()
			if err == sql.ErrNoRows {
				http.Error(w, "Teacher not found", http.StatusNotFound)
				return
			}
			http.Error(w, "Error retrieving teacher", http.StatusInternalServerError)
			return
		}

		// Applu updates using reflection
		teacherVal := reflect.ValueOf(&teacherFromDb).Elem()
		teacherType := teacherVal.Type()

		for k, v := range update {
			if k == "id" {
				continue // skip updating the fields
			}
			for i := 0; i < teacherVal.NumField(); i++ {
				field := teacherType.Field(i)
				if field.Tag.Get("json") == k+",omitempty" {
					fieldVal := teacherVal.Field(i)
					if fieldVal.CanSet() {
						val := reflect.ValueOf(v)
						if val.Type().ConvertibleTo(fieldVal.Type()) {
							fieldVal.Set(val.Convert(fieldVal.Type()))
						} else {
							tx.Rollback()
							log.Printf("cannot convert %v to %v", val.Type(), fieldVal.Type())
							return
						}
					}
					break
				}
			}
		}
		_, err = tx.Exec("UPDATE teachers SET first_name = ?, last_name = ?, email = ?, class = ?, subject = ? WHERE id = ?", teacherFromDb.FirstName, teacherFromDb.LastName, teacherFromDb.Email, teacherFromDb.Class, teacherFromDb.Subject, teacherFromDb.ID)
		if err != nil {
			tx.Rollback()
			http.Error(w, "Error updating teacher", http.StatusInternalServerError)
			return
		}
	}

	// Commit the transaction
	err = tx.Commit()
	if err != nil {
		http.Error(w, "Error comitting transaction", http.StatusInternalServerError)
		return
	}
	w.WriteHeader(http.StatusNoContent)
}
Deleting Multiple Entries : Delete
func DeleteTeachersHandler(w http.ResponseWriter, r *http.Request){
	db, err := sqlconnect.ConnectDb()
	if err != nil {
		log.Println(err)
		http.Error(w, "Unable to connect to database", http.StatusInternalServerError)
		return
	}
	defer db.Close()

	var ids []int
	err = json.NewDecoder(r.Body).Decode(&ids)
	if err != nil {
		log.Println(err)
		http.Error(w, "Invalid request payload", http.StatusBadRequest)
		return
	}

	tx, err := db.Begin()
	if err != nil {
		log.Println(err)
		http.Error(w, "Error starting transaction", http.StatusInternalServerError)
		return
	}

	stmt, err := tx.Prepare("DELETE FROM teachers WHERE id = ?")
	if err != nil {
		log.Println(err)
		tx.Rollback()
		http.Error(w, "Error preparing delete statement", http.StatusInternalServerError)
		return
	}
	defer stmt.Close()

	deleteIds := []int{}

	for _, id := range ids {
		result, err := stmt.Exec(id)
		if err != nil {
			tx.Rollback()
			log.Println(err)
			http.Error(w, "Error deleting teacher", http.StatusInternalServerError)
			return
		}

		rowsAffected, err := result.RowsAffected()
		if err != nil {
			tx.Rollback()
			http.Error(w, "Error retrieving deleted result", http.StatusInternalServerError)
			return
		}

		// If teacher was deleted then add ID to the deletedIDs slice
		if rowsAffected > 0{
			deleteIds = append(deleteIds, id)
		}

		if rowsAffected < 1 {
			tx.Rollback()
			http.Error(w, fmt.Sprintf("ID %d does not exist",id), http.StatusInternalServerError)
			return
		}
	}

	// Commit
	err = tx.Commit()
	if err != nil {
		log.Println(err)
		http.Error(w, "Error Commiting transaction", http.StatusInternalServerError)
		return
	}

	if len(deleteIds) < 1 {
		http.Error(w, "IDs do not exist", http.StatusBadRequest)
		return
	}

	w.Header().Set("Content-Type", "application/json")
	response := struct {
		Status string `json:"status"`
		DeletedIDs []int `json:"deleted_ids"`
	}{
		Status: "Teachers successfully deleted",
		DeletedIDs: deleteIds,
	}
	json.NewEncoder(w).Encode(response)
}
Modelling Data
In API development, a model represents the structure of a data that your application handles. Models define the shape of the data, including the types of each field,relationships between different data types and any constraints or validations. Models provide a clear and structured way to represent the data in our application. This helps in maintaining consistency and understanding the data flow. By defining models, we can enfore validation rulesm ensuring that the data entering your system is in the expected format. Models act as an abstraction layer between the database and the application logic. This makes the application more modular and easier to maintain.
Proper use of models can prevent common security issues like SQL injection by ensuring that data is correctly sanitized and validated. When handling APi request, we can use models to ensure data is correctly parsed and validated.
Models are used for
- Data Representation
- Data Validation
- Abstraction
- Documentation
- Security
Industry Standards for Models:
- Naming Conventions
- Field Tags
- Validation
- Modularity
Importance
- Data integrity
- Maintainability
- Scalability
- Security
What happens if we don't use Models ?
- Inconsistent Data
- Code Duplication
- Difficult Maintenance
- Security Risks
Best Practices
- Keep Models Simple
- Use Field Tags
- Document Models
- Versioning
Common Pitfalls
- Tight Coupling
- Overcomplicating Models
- Ignoring Validation
- Lack of Documentation
The concept of Data Modelling is simple. Data Modelling takes unstructured data and then transforms it into a structured data. In Go, we are using struct to structure that unstructured data.
models/student.go
package models

type Student struct {
	ID int `json:"id,omitempty"`
	FirstName string `json:"first_name,omitempty"`
	LastName string `json:"last_name,omitempty"`
	Email string `json:"email,omitempty"`
	Class string `json:"class,omitempty"`
}
Refactoring Database Operations
So, until now, our teacher's handlers are too big and we have included the database operations inside the teachers handlers as well. So now, we are going to extract the database operations into a separate function. And that refactoring is pretty simple. So all you need to do first is bring the statements together which are related to database.
All the error responses are going to go from the handler functions, not from the database handlers.
internal/api/handlers/teachers.go
package handlers

import (
	"encoding/json"
	"fmt"
	"log"
	"net/http"
	"school_management_api/internal/models"
	"school_management_api/internal/repository/sqlconnect"
	"strconv"

)

func GetTeachersHandler(w http.ResponseWriter, r *http.Request) {

	var teachers []models.Teacher
	teachers, err := sqlconnect.GetTeachersDbHandler(teachers, r)
	if err != nil {
		return
	}

	response := struct {
		Status string           `json:"status"`
		Count  int              `json:"count"`
		Data   []models.Teacher `json:"data"`
	}{
		Status: "success",
		Count:  len(teachers),
		Data:   teachers,
	}
	w.Header().Set("Content-Type", "application/json")
	json.NewEncoder(w).Encode(response)

}

func GetOneTeacherHandler(w http.ResponseWriter, r *http.Request) {
	idStr := r.PathValue("id")
	id, err := strconv.Atoi(idStr)
	if err != nil {
		fmt.Println(err)
		return
	}
	teacher, err := sqlconnect.GetTeacherByID(id)
	if err != nil {
		fmt.Println(err)
		return
	}
	w.Header().Set("Content-Type", "application/json")
	json.NewEncoder(w).Encode(teacher)
}

func AddTeacherHandler(w http.ResponseWriter, r *http.Request) {

	var newTeachers []models.Teacher
	err := json.NewDecoder(r.Body).Decode(&newTeachers)
	if err != nil {
		http.Error(w, "Invalid Request Body", http.StatusBadRequest)
		return
	}

	addedTeachers, err := sqlconnect.AddTeachersDBHandler(newTeachers)
	if err != nil {
		fmt.Println(err)
		return
	}

	w.Header().Set("Content-Type", "application/json")
	w.WriteHeader(http.StatusCreated)

	response := struct {
		Status string           `json:"status"`
		Count  int              `json:"count"`
		Data   []models.Teacher `json:"data"`
	}{
		Status: "success",
		Count:  len(addedTeachers),
		Data:   addedTeachers,
	}

	json.NewEncoder(w).Encode(response)
}

func UpdateTeacherHandler(w http.ResponseWriter, r *http.Request) {
	idStr := r.PathValue("id")
	id, err := strconv.Atoi(idStr)
	if err != nil {
		log.Println(err)
		http.Error(w, "Invalid Teacher ID", http.StatusBadRequest)
		return
	}

	var updatedTeacher models.Teacher
	err = json.NewDecoder(r.Body).Decode(&updatedTeacher)
	if err != nil {
		log.Println(err)
		http.Error(w, "Invalid Request Payload", http.StatusBadRequest)
		return
	}

	updatedTeacherFromDb, err := sqlconnect.UpdateTeacher(id, updatedTeacher)
	if err != nil {
		log.Println(err)
		return
	}

	w.Header().Set("Content-Type", "application/json")
	json.NewEncoder(w).Encode(updatedTeacherFromDb)


func PatchTeachersHandler(w http.ResponseWriter, r *http.Request) {

	var updates []map[string]interface{}
	err := json.NewDecoder(r.Body).Decode(&updates)
	if err != nil {
		http.Error(w, "Invalid request payload", http.StatusBadRequest)
		return
	}

	err = sqlconnect.PatchTeachers(updates)
	if err != nil {
		log.Println(err)
		return
	}
	w.WriteHeader(http.StatusNoContent)

func PatchOneTeacherHandler(w http.ResponseWriter, r *http.Request) {
	idStr := r.PathValue("id")
	id, err := strconv.Atoi(idStr)
	if err != nil {
		log.Println(err)
		http.Error(w, "Invalid Teacher ID", http.StatusBadRequest)
		return
	}

	var updates map[string]interface{}
	err = json.NewDecoder(r.Body).Decode(&updates)
	if err != nil {
		log.Println(err)
		http.Error(w, "Invalid Request Payload", http.StatusBadRequest)
		return
	}

	updatedTeacher, err := sqlconnect.PatchOneTeacher(id, updates)
	if err != nil {
		log.Println(err)
		return
	}

	w.Header().Set("Content-Type", "application/json")
	json.NewEncoder(w).Encode(updatedTeacher)

}

func DeleteOneTeacherHandler(w http.ResponseWriter, r *http.Request) {
	idStr := r.PathValue("id")
	id, err := strconv.Atoi(idStr)
	if err != nil {
		log.Println(err)
		http.Error(w, "Invalid Teacher ID", http.StatusBadRequest)
		return
	}

	err = sqlconnect.DeleteOneTeacher(id)
	if err != nil {
		log.Println(err)
		return
	}
	w.Header().Set("Content-Type", "application/json")
	response := struct {
		Status string `json:"status"`
		ID     int    `json:"id"`
	}{
		Status: "Teacher deleted successfully",
		ID:     id,
	}
	json.NewEncoder(w).Encode(response)
	w.WriteHeader(http.StatusNoContent)


func DeleteTeachersHandler(w http.ResponseWriter, r *http.Request) {

	var ids []int
	err := json.NewDecoder(r.Body).Decode(&ids)
	if err != nil {
		log.Println(err)
		http.Error(w, "Invalid request payload", http.StatusBadRequest)
		return
	}

	deleteIds, err := sqlconnect.DeleteTeachers(ids)
	if err != nil {
		return
	}

	w.Header().Set("Content-Type", "application/json")
	response := struct {
		Status     string `json:"status"`
		DeletedIDs []int  `json:"deleted_ids"`
	}{
		Status:     "Teachers successfully deleted",
		DeletedIDs: deleteIds,
	}
	json.NewEncoder(w).Encode(response)
}
repository/sqlconnect/teachers_crud.go
package sqlconnect

import (
	"database/sql"
	"fmt"
	"log"
	"net/http"
	"reflect"
	"school_management_api/internal/models"
	"strings"
)

func isValidOrder(order string) bool {
	return order == "asc" || order == "desc"
}

func isValidField(field string) bool {
	validFields := map[string]bool{
		"first_name": true,
		"last_name":  true,
		"class":      true,
		"email":      true,
		"subject":    true,
	}
	return validFields[field]
}

func addSorting(r *http.Request, query string) string {
	sortParams := r.URL.Query()["sortby"]
	if len(sortParams) > 0 {
		query += " ORDER BY"
		for i, param := range sortParams {
			parts := strings.Split(param, ":")
			if len(parts) != 2 {
				continue
			}
			field, order := parts[0], parts[1]

			if !isValidField(field) || !isValidOrder(order) {
				continue
			}
			if i > 0 {
				query += ","
			}
			query += " " + field + " " + order
		}
	}
	return query
}

func addFilters(r *http.Request, query string, args []interface{}) (string, []interface{}) {
	params := map[string]string{
		"first_name": "first_name",
		"last_name":  "last_name",
		"email":      "email",
		"class":      "class",
		"subject":    "subject",
	}

	for param, dbField := range params {
		value := r.URL.Query().Get(param)
		if value != "" {
			query += " AND " + dbField + " = ?"
			args = append(args, value)
		}
	}
	return query, args
}

func GetTeachersDbHandler(teachers []models.Teacher, r *http.Request) ([]models.Teacher, error) {
	db, err := ConnectDb()
	if err != nil {
		return nil, err
	}
	defer db.Close()

	query := "SELECT id, first_name, last_name, email, class, subject FROM teachers WHERE 1=1"
	var args []interface{}

	query, args = addFilters(r, query, args)

	query = addSorting(r, query)

	rows, err := db.Query(query, args...)
	if err != nil {
		fmt.Println("err")
		return nil, err
	}
	defer rows.Close()
	for rows.Next() {
		teacher := models.Teacher{}
		err = rows.Scan(&teacher.ID, &teacher.FirstName, &teacher.LastName, &teacher.Email, &teacher.Class, &teacher.Subject)
		if err != nil {

			return nil, err
		}
		teachers = append(teachers, teacher)
	}
	return teachers, nil
}

func GetTeacherByID(id int) (models.Teacher, error) {
	db, err := ConnectDb()
	if err != nil {
		return models.Teacher{}, err
	}
	defer db.Close()

	var teacher models.Teacher
	err = db.QueryRow("SELECT id, first_name, last_name, email, class, subject FROM teachers WHERE id = ?", id).Scan(&teacher.ID, &teacher.Class, &teacher.FirstName, &teacher.LastName, &teacher.Subject, &teacher.Email)
	if err == sql.ErrNoRows {
		return models.Teacher{}, err
	} else if err != nil {
		fmt.Println(err)
		return models.Teacher{}, err
	}
	return teacher, nil
}

func AddTeachersDBHandler(newTeachers []models.Teacher) ([]models.Teacher, error) {
	db, err := ConnectDb()
	if err != nil {
		return nil, err
	}
	defer db.Close()
	stmt, err := db.Prepare("INSERT INTO teachers (first_name, last_name, email, class, subject) VALUES (?,?,?,?,?)")
	if err != nil {
		return nil, err
	}
	defer stmt.Close()

	addedTeachers := make([]models.Teacher, len(newTeachers))
	for i, newTeacher := range newTeachers {
		res, err := stmt.Exec(newTeacher.FirstName, newTeacher.LastName, newTeacher.Email, newTeacher.Class, newTeacher.Subject)
		if err != nil {

			return nil, err
		}
		lastID, err := res.LastInsertId()
		if err != nil {

			return nil, err
		}
		newTeacher.ID = int(lastID)
		addedTeachers[i] = newTeacher
	}
	return addedTeachers, nil
}

func UpdateTeacher(id int, updatedTeacher models.Teacher) (models.Teacher, error) {
	db, err := ConnectDb()
	if err != nil {
		log.Println(err)
		return models.Teacher{}, err
	}
	defer db.Close()

	var existingTeacher models.Teacher
	err = db.QueryRow("SELECT id, class, email, first_name, last_name, subject FROM teachers WHERE id = ?", id).Scan(&existingTeacher.ID, &existingTeacher.Class, &existingTeacher.Email, &existingTeacher.FirstName, &existingTeacher.LastName, &existingTeacher.Subject)
	if err != nil {
		if err != sql.ErrNoRows {

			return models.Teacher{}, err
		}
		return models.Teacher{}, err
	}

	updatedTeacher.ID = existingTeacher.ID
	_, err = db.Exec("UPDATE teachers SET first_name = ?, last_name = ?, email = ?, class = ?, subject = ? WHERE id = ?", updatedTeacher.FirstName, updatedTeacher.LastName, updatedTeacher.Email, updatedTeacher.Class, updatedTeacher.Subject, updatedTeacher.ID)
	if err != nil {
		return models.Teacher{}, err
	}
	return updatedTeacher, nil
}

func PatchTeachers(updates []map[string]interface{}) error {
	db, err := ConnectDb()
	if err != nil {
		log.Println(err)
		return err
	}
	defer db.Close()
	tx, err := db.Begin()
	if err != nil {
		log.Println(err)
		return err
	}

	for _, update := range updates {
		id, ok := update["id"].(string)
		if !ok {
			tx.Rollback()

			return err
		}

		var teacherFromDb models.Teacher
		err := db.QueryRow("SELECT id, first_name, last_name, email, class, subject FROM teachers WHERE id = ?", id).Scan(&teacherFromDb.ID, &teacherFromDb.FirstName, &teacherFromDb.LastName, &teacherFromDb.Email, &teacherFromDb.Class, &teacherFromDb.Subject)

		if err != nil {
			tx.Rollback()
			if err == sql.ErrNoRows {

				return err
			}

			return err
		}

		teacherVal := reflect.ValueOf(&teacherFromDb).Elem()
		teacherType := teacherVal.Type()

		for k, v := range update {
			if k == "id" {
				contin
			}
			for i := 0; i < teacherVal.NumField(); i++ {
				field := teacherType.Field(i)
				if field.Tag.Get("json") == k+",omitempty" {
					fieldVal := teacherVal.Field(i)
					if fieldVal.CanSet() {
						val := reflect.ValueOf(v)
						if val.Type().ConvertibleTo(fieldVal.Type()) {
							fieldVal.Set(val.Convert(fieldVal.Type()))
						} else {
							tx.Rollback()
							log.Printf("cannot convert %v to %v", val.Type(), fieldVal.Type())
							return err
						}
					}
					break
				}
			}
		}
		_, err = tx.Exec("UPDATE teachers SET first_name = ?, last_name = ?, email = ?, class = ?, subject = ? WHERE id = ?", teacherFromDb.FirstName, teacherFromDb.LastName, teacherFromDb.Email, teacherFromDb.Class, teacherFromDb.Subject, teacherFromDb.ID)
		if err != nil {
			tx.Rollback()

			return err
		}
	}
	err = tx.Commit()
	if err != nil {
		return err
	}
	return nil
}

func PatchOneTeacher(id int, updates map[string]interface{}) (models.Teacher, error) {

	db, err := ConnectDb()
	if err != nil {
		log.Println(err)
		return models.Teacher{}, err
	}
	defer db.Close()

	var existingTeacher models.Teacher
	err = db.QueryRow("SELECT id, class, email, first_name, last_name, subject FROM teachers WHERE id = ?", id).Scan(&existingTeacher.ID, &existingTeacher.Class, &existingTeacher.Email, &existingTeacher.FirstName, &existingTeacher.LastName, &existingTeacher.Subject)
	if err != nil {
		if err != sql.ErrNoRows {

			return models.Teacher{}, err
		}
		return models.

			Teacher{}, err
	}
	teacherVal := reflect.ValueOf(&existingTeacher).Elem()
	teacherType := teacherVal.Type(
	for k, v := range updates {

		for i := 0; i < teacherVal.NumField(); i++ {

			field := teacherType.Field(i)


			if field.Tag.Get("json") == k+",omitempty" {
				if teacherVal.Field(i).CanSet() {


					teacherVal.Field(i).Set(reflect.ValueOf(v).Convert(teacherVal.Field(i).Type()))
				}
			}
		}
	}

	_, err = db.Exec("UPDATE teachers SET first_name = ?, last_name = ?, email = ?, class = ?, subject = ? WHERE id = ?", existingTeacher.FirstName, existingTeacher.LastName, existingTeacher.Email, existingTeacher.Class, existingTeacher.Subject, existingTeacher.ID)
	if err != nil {
		return models.Teacher{}, err
	}
	return existingTeacher, nil
}


func DeleteOneTeacher(id int) error {
	db, err := ConnectDb()
	if err != nil {
		log.Println(err)
		return err
	}
	defer db.Close()

	result, err := db.Exec("DELETE FROM teachers WHERE id = ?", id)
	if err != nil {
		return err
	}

	fmt.Println(result.RowsAffected())

	rowsAffected, err := result.RowsAffected()
	if err != nil {
		return err
	}

	if rowsAffected == 0 {
		return err
	}
	return err
}


func DeleteTeachers(ids []int) ([]int, error) {
	db, err := ConnectDb()
	if err != nil {
		log.Println(err)
		return nil, err
	}
	defer db.Close()

	tx, err := db.Begin()
	if err != nil {
		log.Println(err)
		return nil, err
	}

	stmt, err := tx.Prepare("DELETE FROM teachers WHERE id = ?")
	if err != nil {
		log.Println(err)
		tx.Rollback()
		return nil, err
	}
	defer stmt.Close()

	deleteIds := []int{}

	for _, id := range ids {
		result, err := stmt.Exec(id)
		if err != nil {
			tx.Rollback()
			log.Println(err)

			return nil, err
		}

		rowsAffected, err := result.RowsAffected()
		if err != nil {
			tx.Rollback()

			return nil, err
		}

		if rowsAffected > 0 {
			deleteIds = append(deleteIds, id)
		}

		if rowsAffected < 1 {
			tx.Rollback()

			return nil, err
		}
	}
	err = tx.Commit()
	if err != nil {
		log.Println(err)
		return nil, err
	}

	if len(deleteIds) < 1 {
		return nil, err
	}
	return deleteIds, nil
}
Error Handling
pkg/utils/error_handler.go
package utils

import (
	"fmt"
	"log"
	"os"
)

func ErrorHandler(err error, message string) error {
	errorLogger := log.New(os.Stderr, "ERROR: ", log.Ldate|log.Ltime|log.Lshortfile)
	errorLogger.Println(message, err)
	return fmt.Errorf("%s", message)
}
The reason, we are not sending the error as a return value from this function is because we want to keep the error, the actual error as private. Private means that it will be available to us. We can read the error and we will get the error onto out logger, but the client should not get the actual error. The client should get the message string, the error string that we send to the client. We want to make a customized generic error string, an error message that we want to send to the client. We don't want actual technical errors sent to a user, because those errors are of no use to the user and sometimes we actually don't want the user to know the exact error. Sometimes less is more and that's why we want to communicate less information about the exact error. But we want to send a generic message to the end user.
/repository/sqlconnect/teachers_crud.go
package sqlconnect

import (
	"database/sql"
	"fmt"
	"log"
	"net/http"
	"reflect"
	"school_management_api/internal/models"
	"school_management_api/pkg/utils"
	"strconv"
	"strings"
)

func isValidOrder(order string) bool {
	return order == "asc" || order == "desc"
}

func isValidField(field string) bool {
	validFields := map[string]bool{
		"first_name": true,
		"last_name":  true,
		"class":      true,
		"email":      true,
		"subject":    true,
	}
	return validFields[field]
}

func addSorting(r *http.Request, query string) string {
	sortParams := r.URL.Query()["sortby"]
	if len(sortParams) > 0 {
		query += " ORDER BY"
		for i, param := range sortParams {
			parts := strings.Split(param, ":")
			if len(parts) != 2 {
				continue
			}
			field, order := parts[0], parts[1]

			if !isValidField(field) || !isValidOrder(order) {
				continue
			}
			if i > 0 {
				query += ","
			}
			query += " " + field + " " + order
		}
	}
	return query
}

func addFilters(r *http.Request, query string, args []interface{}) (string, []interface{}) {
	params := map[string]string{
		"first_name": "first_name",
		"last_name":  "last_name",
		"email":      "email",
		"class":      "class",
		"subject":    "subject",
	}

	for param, dbField := range params {
		value := r.URL.Query().Get(param)
		if value != "" {
			query += " AND " + dbField + " = ?"
			args = append(args, value)
		}
	}
	return query, args
}

func GetTeachersDbHandler(teachers []models.Teacher, r *http.Request) ([]models.Teacher, error) {
	db, err := ConnectDb()
	if err != nil {
		return nil, utils.ErrorHandler(err, "error retrieving data")
	}
	defer db.Close()

	query := "SELECT id, first_name, last_name, email, class, subject FROM teachers WHERE 1=1"
	var args []interface{}

	query, args = addFilters(r, query, args)

	query = addSorting(r, query)

	rows, err := db.Query(query, args...)
	if err != nil {
		fmt.Println("err")
		return nil, utils.ErrorHandler(err, "error retrieving data")
	}
	defer rows.Close()
	for rows.Next() {
		teacher := models.Teacher{}
		err = rows.Scan(&teacher.ID, &teacher.FirstName, &teacher.LastName, &teacher.Email, &teacher.Class, &teacher.Subject)
		if err != nil {

			return nil, utils.ErrorHandler(err, "error retrieving data")
		}
		teachers = append(teachers, teacher)
	}
	return teachers, nil
}

func GetTeacherByID(id int) (models.Teacher, error) {
	db, err := ConnectDb()
	if err != nil {
		return models.Teacher{}, utils.ErrorHandler(err, "error retrieving data ")
	}
	defer db.Close()

	var teacher models.Teacher
	err = db.QueryRow("SELECT id, first_name, last_name, email, class, subject FROM teachers WHERE id = ?", id).Scan(&teacher.ID, &teacher.Class, &teacher.FirstName, &teacher.LastName, &teacher.Subject, &teacher.Email)
	if err == sql.ErrNoRows {
		return models.Teacher{}, utils.ErrorHandler(err, "error retrieving data ")
	} else if err != nil {
		fmt.Println(err)
		return models.Teacher{}, utils.ErrorHandler(err, "error retrieving data ")
	}
	return teacher, nil
}

func AddTeachersDBHandler(newTeachers []models.Teacher) ([]models.Teacher, error) {
	db, err := ConnectDb()
	if err != nil {
		return nil, utils.ErrorHandler(err, "error adding data")
	}
	defer db.Close()
	stmt, err := db.Prepare("INSERT INTO teachers (first_name, last_name, email, class, subject) VALUES (?,?,?,?,?)")
	if err != nil {
		return nil, utils.ErrorHandler(err, "error adding data")
	}
	defer stmt.Close()

	addedTeachers := make([]models.Teacher, len(newTeachers))
	for i, newTeacher := range newTeachers {
		res, err := stmt.Exec(newTeacher.FirstName, newTeacher.LastName, newTeacher.Email, newTeacher.Class, newTeacher.Subject)
		if err != nil {

			return nil, utils.ErrorHandler(err, "error adding data")
		}
		lastID, err := res.LastInsertId()
		if err != nil {

			return nil, utils.ErrorHandler(err, "error adding data")
		}
		newTeacher.ID = int(lastID)
		addedTeachers[i] = newTeacher
	}
	return addedTeachers, nil
}

func UpdateTeacher(id int, updatedTeacher models.Teacher) (models.Teacher, error) {
	db, err := ConnectDb()
	if err != nil {
		return models.Teacher{}, utils.ErrorHandler(err, "error updating data")
	}
	defer db.Close()

	var existingTeacher models.Teacher
	err = db.QueryRow("SELECT id, class, email, first_name, last_name, subject FROM teachers WHERE id = ?", id).Scan(&existingTeacher.ID, &existingTeacher.Class, &existingTeacher.Email, &existingTeacher.FirstName, &existingTeacher.LastName, &existingTeacher.Subject)
	if err != nil {
		if err != sql.ErrNoRows {

			return models.Teacher{}, utils.ErrorHandler(err, "error updating data")
		}
		return models.Teacher{}, utils.ErrorHandler(err, "error updating data")
	}

	updatedTeacher.ID = existingTeacher.ID
	_, err = db.Exec("UPDATE teachers SET first_name = ?, last_name = ?, email = ?, class = ?, subject = ? WHERE id = ?", updatedTeacher.FirstName, updatedTeacher.LastName, updatedTeacher.Email, updatedTeacher.Class, updatedTeacher.Subject, updatedTeacher.ID)
	if err != nil {
		return models.Teacher{}, utils.ErrorHandler(err, "error updating data")
	}
	return updatedTeacher, nil
}

func PatchTeachers(updates []map[string]interface{}) error {
	db, err := ConnectDb()
	if err != nil {
		return utils.ErrorHandler(err, "error updating data")
	}
	defer db.Close()
	tx, err := db.Begin()
	if err != nil {
		return utils.ErrorHandler(err, "error updating data")
	}

	for _, update := range updates {
		idStr, ok := update["id"].(string)
		if !ok {
			tx.Rollback()

			return utils.ErrorHandler(err, "Invalid id")
		}

		id, err := strconv.Atoi(idStr)
		if err != nil {
			tx.Rollback()
			return utils.ErrorHandler(err, "invalid id")
		}

		var teacherFromDb models.Teacher
		err = db.QueryRow("SELECT id, first_name, last_name, email, class, subject FROM teachers WHERE id = ?", id).Scan(&teacherFromDb.ID, &teacherFromDb.FirstName, &teacherFromDb.LastName, &teacherFromDb.Email, &teacherFromDb.Class, &teacherFromDb.Subject)

		if err != nil {
			tx.Rollback()
			if err == sql.ErrNoRows {

				return utils.ErrorHandler(err, "Teacher Not Found")
			}

			return utils.ErrorHandler(err, "error updating data")
		}

		teacherVal := reflect.ValueOf(&teacherFromDb).Elem()
		teacherType := teacherVal.Type()

		for k, v := range update {
			if k == "id" {
				contin
			}
			for i := 0; i < teacherVal.NumField(); i++ {
				field := teacherType.Field(i)
				if field.Tag.Get("json") == k+",omitempty" {
					fieldVal := teacherVal.Field(i)
					if fieldVal.CanSet() {
						val := reflect.ValueOf(v)
						if val.Type().ConvertibleTo(fieldVal.Type()) {
							fieldVal.Set(val.Convert(fieldVal.Type()))
						} else {
							tx.Rollback()
							log.Printf("cannot convert %v to %v", val.Type(), fieldVal.Type())
							return utils.ErrorHandler(err, "error updating data")
						}
					}
					break
				}
			}
		}
		_, err = tx.Exec("UPDATE teachers SET first_name = ?, last_name = ?, email = ?, class = ?, subject = ? WHERE id = ?", teacherFromDb.FirstName, teacherFromDb.LastName, teacherFromDb.Email, teacherFromDb.Class, teacherFromDb.Subject, teacherFromDb.ID)
		if err != nil {
			tx.Rollback()
			return utils.ErrorHandler(err, "error updating data")
		}
	}
	err = tx.Commit()
	if err != nil {
		return utils.ErrorHandler(err, "error updating data")
	}
	return nil
}

func PatchOneTeacher(id int, updates map[string]interface{}) (models.Teacher, error) {

	db, err := ConnectDb()
	if err != nil {
		log.Println(err)
		return models.Teacher{}, utils.ErrorHandler(err, "error updating data")
	}
	defer db.Close()

	var existingTeacher models.Teacher
	err = db.QueryRow("SELECT id, class, email, first_name, last_name, subject FROM teachers WHERE id = ?", id).Scan(&existingTeacher.ID, &existingTeacher.Class, &existingTeacher.Email, &existingTeacher.FirstName, &existingTeacher.LastName, &existingTeacher.Subject)
	if err != nil {
		if err != sql.ErrNoRows {

			return models.Teacher{}, utils.ErrorHandler(err, "Teacher not Found")
		}
		return models.Teacher{}, utils.ErrorHandler(err, "error updating data")

	teacherVal := reflect.ValueOf(&existingTeacher).Elem()
	teacherType := teacherVal.Type(
	for k, v := range updates {

		for i := 0; i < teacherVal.NumField(); i++ {
			field := teacherType.Field(i)
			if field.Tag.Get("json") == k+",omitempty" {
				if teacherVal.Field(i).CanSet() {
					teacherVal.Field(i).Set(reflect.ValueOf(v).Convert(teacherVal.Field(i).Type()))
				}
			}
		}
	}

	_, err = db.Exec("UPDATE teachers SET first_name = ?, last_name = ?, email = ?, class = ?, subject = ? WHERE id = ?", existingTeacher.FirstName, existingTeacher.LastName, existingTeacher.Email, existingTeacher.Class, existingTeacher.Subject, existingTeacher.ID)
	if err != nil {
		return models.Teacher{}, utils.ErrorHandler(err, "error updating data")
	}
	return existingTeacher, nil
}

func DeleteOneTeacher(id int) error {
	db, err := ConnectDb()
	if err != nil {
		log.Println(err)
		return utils.ErrorHandler(err, "error deleting data")
	}
	defer db.Close()

	result, err := db.Exec("DELETE FROM teachers WHERE id = ?", id)
	if err != nil {
		return utils.ErrorHandler(err, "error deleting data")
	}

	fmt.Println(result.RowsAffected())

	rowsAffected, err := result.RowsAffected()
	if err != nil {
		return utils.ErrorHandler(err, "error deleting data")
	}

	if rowsAffected == 0 {
		return utils.ErrorHandler(err, "teacher not found")
	}
	return nil
}

func DeleteTeachers(ids []int) ([]int, error) {
	db, err := ConnectDb()
	if err != nil {
		return nil, utils.ErrorHandler(err, "error deleting data")
	}
	defer db.Close()

	tx, err := db.Begin()
	if err != nil {
		return nil, utils.ErrorHandler(err, "error deleting data")
	}

	stmt, err := tx.Prepare("DELETE FROM teachers WHERE id = ?")
	if err != nil {
		tx.Rollback()
		return nil, utils.ErrorHandler(err, "error deleting data")
	}
	defer stmt.Close()

	deleteIds := []int{}
	for _, id := range ids {
		result, err := stmt.Exec(id)
		if err != nil {
			tx.Rollback()
			return nil, utils.ErrorHandler(err, "error deleting data")
		}

		rowsAffected, err := result.RowsAffected()
		if err != nil {
			tx.Rollback()

			return nil, utils.ErrorHandler(err, "error deleting data")
		}

		if rowsAffected > 0 {
			deleteIds = append(deleteIds, id)
		}

		if rowsAffected < 1 {
			tx.Rollback()

			return nil, utils.ErrorHandler(err, fmt.Sprintf("ID %d does not exist", id))
		}
	}
	err = tx.Commit()
	if err != nil {
		log.Println(err)
		return nil, utils.ErrorHandler(err, "error deleting data")
	}

	if len(deleteIds) < 1 {
		return nil, utils.ErrorHandler(err, "IDs do not exist")
	}
	return deleteIds, nil
}
/internal/api/handler/teachers.go
package handlers

import (
	"encoding/json"
	"log"
	"net/http"
	"school_management_api/internal/models"
	"school_management_api/internal/repository/sqlconnect"
	"strconv"
	// "sync"
)

func GetTeachersHandler(w http.ResponseWriter, r *http.Request) {

	var teachers []models.Teacher
	teachers, err := sqlconnect.GetTeachersDbHandler(teachers, r)
	if err != nil {
		http.Error(w, err.Error(), http.StatusBadRequest)
		return
	}

	response := struct {
		Status string           `json:"status"`
		Count  int              `json:"count"`
		Data   []models.Teacher `json:"data"`
	}{
		Status: "success",
		Count:  len(teachers),
		Data:   teachers,
	}
	w.Header().Set("Content-Type", "application/json")
	json.NewEncoder(w).Encode(response)

}

func GetOneTeacherHandler(w http.ResponseWriter, r *http.Request) {
	idStr := r.PathValue("id")

	// Handle Path parameter
	id, err := strconv.Atoi(idStr)
	if err != nil {
		// fmt.Println(err)
		http.Error(w, "invalid ID", http.StatusBadRequest)
		return
	}
	teacher, err := sqlconnect.GetTeacherByID(id)
	if err != nil {
		// fmt.Println(err)
		http.Error(w, err.Error(), http.StatusInternalServerError)
		return
	}
	w.Header().Set("Content-Type", "application/json")
	json.NewEncoder(w).Encode(teacher)
}

func AddTeacherHandler(w http.ResponseWriter, r *http.Request) {

	var newTeachers []models.Teacher
	err := json.NewDecoder(r.Body).Decode(&newTeachers)
	if err != nil {
		http.Error(w, "Invalid Request Body", http.StatusBadRequest)
		return
	}

	addedTeachers, err := sqlconnect.AddTeachersDBHandler(newTeachers)
	if err != nil {
		// fmt.Println(err)
		http.Error(w, err.Error(), http.StatusInternalServerError)
		return
	}

	w.Header().Set("Content-Type", "application/json")
	w.WriteHeader(http.StatusCreated)

	response := struct {
		Status string           `json:"status"`
		Count  int              `json:"count"`
		Data   []models.Teacher `json:"data"`
	}{
		Status: "success",
		Count:  len(addedTeachers),
		Data:   addedTeachers,
	}

	json.NewEncoder(w).Encode(response)
}

func UpdateTeacherHandler(w http.ResponseWriter, r *http.Request) {
	idStr := r.PathValue("id")
	id, err := strconv.Atoi(idStr)
	if err != nil {
		log.Println(err)
		http.Error(w, "Invalid Teacher ID", http.StatusBadRequest)
		return
	}

	var updatedTeacher models.Teacher
	err = json.NewDecoder(r.Body).Decode(&updatedTeacher)
	if err != nil {
		log.Println(err)
		http.Error(w, "Invalid Request Payload", http.StatusBadRequest)
		return
	}

	updatedTeacherFromDb, err := sqlconnect.UpdateTeacher(id, updatedTeacher)
	if err != nil {
		// log.Println(err)
		http.Error(w, err.Error(), http.StatusInternalServerError)
		return
	}

	w.Header().Set("Content-Type", "application/json")
	json.NewEncoder(w).Encode(updatedTeacherFromDb)

}

// PATCH /teachers/
func PatchTeachersHandler(w http.ResponseWriter, r *http.Request) {

	var updates []map[string]interface{}
	err := json.NewDecoder(r.Body).Decode(&updates)
	if err != nil {
		log.Println(err)
		http.Error(w, "Invalid request payload", http.StatusBadRequest)
		return
	}

	err = sqlconnect.PatchTeachers(updates)
	if err != nil {
		// log.Println(err)
		http.Error(w, err.Error(), http.StatusBadRequest)
		return
	}
	w.WriteHeader(http.StatusNoContent)
}

// PATCH /teachers/{id}
func PatchOneTeacherHandler(w http.ResponseWriter, r *http.Request) {
	idStr := r.PathValue("id")
	id, err := strconv.Atoi(idStr)
	if err != nil {
		log.Println(err)
		http.Error(w, "Invalid Teacher ID", http.StatusBadRequest)
		return
	}

	var updates map[string]interface{}
	err = json.NewDecoder(r.Body).Decode(&updates)
	if err != nil {
		log.Println(err)
		http.Error(w, "Invalid Request Payload", http.StatusBadRequest)
		return
	}

	updatedTeacher, err := sqlconnect.PatchOneTeacher(id, updates)
	if err != nil {
		// log.Println(err)
		http.Error(w, err.Error(), http.StatusInternalServerError)
		return
	}

	w.Header().Set("Content-Type", "application/json")
	json.NewEncoder(w).Encode(updatedTeacher)

}

func DeleteOneTeacherHandler(w http.ResponseWriter, r *http.Request) {
	idStr := r.PathValue("id")
	id, err := strconv.Atoi(idStr)
	if err != nil {
		log.Println(err)
		http.Error(w, "Invalid Teacher ID", http.StatusBadRequest)
		return
	}

	err = sqlconnect.DeleteOneTeacher(id)
	if err != nil {
		// log.Println(err)
		http.Error(w, err.Error(), http.StatusBadRequest)
		return
	}

	// Response Body -> Optional
	w.Header().Set("Content-Type", "application/json")
	response := struct {
		Status string `json:"status"`
		ID     int    `json:"id"`
	}{
		Status: "Teacher deleted successfully",
		ID:     id,
	}
	json.NewEncoder(w).Encode(response)

	w.WriteHeader(http.StatusNoContent)

}

func DeleteTeachersHandler(w http.ResponseWriter, r *http.Request) {

	var ids []int
	err := json.NewDecoder(r.Body).Decode(&ids)
	if err != nil {
		log.Println(err)
		http.Error(w, "Invalid request payload", http.StatusBadRequest)
		return
	}

	deleteIds, err := sqlconnect.DeleteTeachers(ids)
	if err != nil {
		http.Error(w, err.Error(), http.StatusBadRequest)
		return
	}

	w.Header().Set("Content-Type", "application/json")
	response := struct {
		Status     string `json:"status"`
		DeletedIDs []int  `json:"deleted_ids"`
	}{
		Status:     "Teachers successfully deleted",
		DeletedIDs: deleteIds,
	}
	json.NewEncoder(w).Encode(response)
}
Struct Tags
In our functions, we are preparing SQL statements manually. So DB tags are not directly utilized for database operations but for better readability and maintainability. Using DB tags can still be beneficial if you decide to use an ORM (Object Relational Mapping library) using the sqlx or gorm libraries.
func generateInsertQuery(model interface{}) string {
	modelType := reflect.TypeOf(model)
	var columns, placeholders string

	for i := 0; i < modelType.NumField(); i++ {

		dbTag := modelType.Field(i).Tag.Get("db")
		dbTag = strings.TrimSuffix(dbTag, ",omitempty")
		fmt.Println("dbTag:", dbTag)

		if dbTag != "" && dbTag != "id" { // skip the ID field if it's auto increment
			if columns != "" {
				columns += ", "
				placeholders += ", "
			}
			columns += dbTag
			placeholders += "?"
		}
	}
	fmt.Printf("INSERT INTO teachers (%s) VALUES (%s)\n", columns, placeholders)
	return fmt.Sprintf("INSERT INTO teachers (%s) VALUE (%s)", columns, placeholders)
}

func getStructValues(model interface{}) []interface{} {

	modelValue := reflect.ValueOf(model)

	modelType := modelValue.Type()
	values := []interface{}{}

	for i := 0; i < modelType.NumField(); i++ {
		dbTag := modelType.Field(i).Tag.Get("db")
		if dbTag != "" && dbTag != "id,omitempty" {
			values = append(values, modelValue.Field(i).Interface())
		}
	}
	log.Println("Values:", values)
	return values
}
Data Validation
Data validation is the process of ensuring that incoming data is accurate, complete and meets specific requirements before it is processed or stored. In the context of APIs, data validation is crucial for maintaining the integrity of your application and ensuring a good user experience.
Importance :
- Security
- Data Integrity
- User Experience
Validating data helps protect against malicious inputs that could lead to vulnerabilities like SQL injection or cross-site scripting. Data validation also ensures that the data stored in your database is accurate and reliable. By providing meaningful error messages you guide users to submit the correct data enhancing their experience.
Types of Data Validation
- Format Validation
- Presence Validation
- Type Validation
- Value Validation
- Length Validation
Best Practices
- Validate Early
- Provide Clear Error Messages
- Use libraries and frameworks
- Implement server-side validation
- Be consistent
Common Pitfalls :
- Overly Restrictive Validation
- Neglecting Security
- Ignoring Data Types
- Inadequate Testing
When we are making servers, we are making a protection layer, a firewall, a line of defense for our database in a way. Moreover database operations are expensive as in time and resource consuming, so our server should prevent such cases from reaching the API. It needs to be the strongest line of defense against any illegal operation, against our database whether retrieval of data or posting of data. But other than our servers, there are other lines of defenses like middleware proxies, our front end and many more. Our main asset is the database and server is the strong titanium gate that needs to protect it.
In Conclusion, data validatino is a critical aspect of building robust APIs. It not only enhances security and data integrity, but also improves user experience by guiding users towards the correct input format. By following best practices and avoiding pitfalls, you can create a solid foundation for your API project.
internal/api/handler/teachers.go
func AddTeachersHandler(w http.ResponseWriter, r *http.Request) {

	var newTeachers []models.Teacher
	var rawTeachers []map[string]interface{}

	body, err := io.ReadAll(r.Body)
	if err != nil {
		http.Error(w, "Error reading request Body", http.StatusInternalServerError)
		return
	}
	defer r.Body.Close()

	err = json.Unmarshal(body, &newTeachers)
	if err != nil {
		http.Error(w, "Invalid Request Body", http.StatusBadRequest)
		return
	}
	fmt.Println(rawTeachers)

	fields := GetFieldNames(models.Teacher{})

	allowedFields := make(map[string]struct{})
	for _, field := range fields {
		allowedFields[field] = struct{}{}
	}

	for _, teacher := range rawTeachers {
		for key := range teacher {
			_, ok := allowedFields[key]
			if !ok {
				http.Error(w, "Unacceptable field found in request. Only use allowed fields.", http.StatusBadRequest)
			}
		}
	}

	err = json.Unmarshal(body, &rawTeachers)
	if err != nil {
		http.Error(w, "Invalid Request Body", http.StatusBadRequest)
		fmt.Println("New Teachers:", newTeachers)
		return
	}

	for _, teacher := range newTeachers {
		err = CheckBlankFields(teacher)
		if err != nil {
			http.Error(w, err.Error(), http.StatusBadRequest)
			return
		}
	}

	addedTeachers, err := sqlconnect.AddTeachersDBHandler(newTeachers)
	if err != nil {
		// fmt.Println(err)
		http.Error(w, err.Error(), http.StatusInternalServerError)
		return
	}

	w.Header().Set("Content-Type", "application/json")
	w.WriteHeader(http.StatusCreated)

	response := struct {
		Status string           `json:"status"`
		Count  int              `json:"count"`
		Data   []models.Teacher `json:"data"`
	}{
		Status: "success",
		Count:  len(addedTeachers),
		Data:   addedTeachers,
	}

	json.NewEncoder(w).Encode(response)
}
internal/api/handlers/helpers.go
package handlers

import (
	"errors"
	"reflect"
	"school_management_api/pkg/utils"
	"strings"
)

func CheckBlankFields(value interface{}) error {
	val := reflect.ValueOf(value)
	for i := 0; i < val.NumField(); i++ {
		field := val.Field(i)
		if field.Kind() == reflect.String && field.String() == "" {
			// http.Error(w, "All fields are required", http.StatusBadRequest)
			return utils.ErrorHandler(errors.New("all fields are required"), "All fields are required")
		}
	}
	return nil
}

func GetFieldNames(model interface{}) []string {
	val := reflect.TypeOf(model)
	fields := []string{}

	for i := 0; i < val.NumField(); i++ {
		field := val.Field(i)
		fieldToAdd := strings.TrimSuffix(field.Tag.Get("json"), ",omitempty")
		fields = append(fields, fieldToAdd)
	}
	return fields
}
Part - 4
Student Database Creation
USE school;
CREATE INDEX idx_class ON teachers(class);

CREATE TABLE IF NOT EXISTS students (
	id INT AUTO_INCREMENT PRIMARY KEY,
	first_name VARCHAR(255) NOT NULL,
	last_name VARCHAR(255) NOT NULL,
	email VARCHAR(255) UNIQUE NOT NULL,
	class VARCHAR(255) NOT NULL,
	INDEX(email),
	FOREIGN KEY (class) REFERENCES teachers(class)
) AUTO_INCREMENT=1000
CRUD for Students Route
internal/api/handlers/students.go
package handlers

import (
	"encoding/json"
	"fmt"
	"io"
	"log"
	"net/http"
	"school_management_api/internal/models"
	"school_management_api/internal/repository/sqlconnect"
	"strconv"
	// "sync"
)

func GetStudentsHandler(w http.ResponseWriter, r *http.Request) {

	var students []models.Student
	students, err := sqlconnect.GetStudentsDbHandler(students, r)
	if err != nil {
		http.Error(w, err.Error(), http.StatusBadRequest)
		return
	}

	response := struct {
		Status string           `json:"status"`
		Count  int              `json:"count"`
		Data   []models.Student `json:"data"`
	}{
		Status: "success",
		Count:  len(students),
		Data:   students,
	}
	w.Header().Set("Content-Type", "application/json")
	json.NewEncoder(w).Encode(response)

}

func GetOneStudentHandler(w http.ResponseWriter, r *http.Request) {
	idStr := r.PathValue("id")

	// Handle Path parameter
	id, err := strconv.Atoi(idStr)
	if err != nil {
		// fmt.Println(err)
		http.Error(w, "invalid ID", http.StatusBadRequest)
		return
	}
	student, err := sqlconnect.GetStudentByID(id)
	if err != nil {
		// fmt.Println(err)
		http.Error(w, err.Error(), http.StatusInternalServerError)
		return
	}
	w.Header().Set("Content-Type", "application/json")
	json.NewEncoder(w).Encode(student)
}

func AddStudentsHandler(w http.ResponseWriter, r *http.Request) {

	var newStudents []models.Student
	var rawStudents []map[string]interface{}

	body, err := io.ReadAll(r.Body)
	if err != nil {
		http.Error(w, "Error reading request Body", http.StatusInternalServerError)
		return
	}
	defer r.Body.Close()

	err = json.Unmarshal(body, &newStudents)
	if err != nil {
		http.Error(w, "Invalid Request Body", http.StatusBadRequest)
		return
	}
	fmt.Println(rawStudents)

	fields := GetFieldNames(models.Student{})

	allowedFields := make(map[string]struct{})
	for _, field := range fields {
		allowedFields[field] = struct{}{}
	}

	for _, student := range rawStudents {
		for key := range student {
			_, ok := allowedFields[key]
			if !ok {
				http.Error(w, "Unacceptable field found in request. Only use allowed fields.", http.StatusBadRequest)
			}
		}
	}

	err = json.Unmarshal(body, &rawStudents)
	if err != nil {
		http.Error(w, "Invalid Request Body", http.StatusBadRequest)
		fmt.Println("New Students:", newStudents)
		return
	}

	for _, student := range newStudents {
		err = CheckBlankFields(student)
		if err != nil {
			http.Error(w, err.Error(), http.StatusBadRequest)
			return
		}
	}

	addedStudents, err := sqlconnect.AddStudentsDBHandler(newStudents)
	if err != nil {
		// fmt.Println(err)
		http.Error(w, err.Error(), http.StatusInternalServerError)
		return
	}

	w.Header().Set("Content-Type", "application/json")
	w.WriteHeader(http.StatusCreated)

	response := struct {
		Status string           `json:"status"`
		Count  int              `json:"count"`
		Data   []models.Student `json:"data"`
	}{
		Status: "success",
		Count:  len(addedStudents),
		Data:   addedStudents,
	}

	json.NewEncoder(w).Encode(response)
}

func UpdateStudentHandler(w http.ResponseWriter, r *http.Request) {
	idStr := r.PathValue("id")
	id, err := strconv.Atoi(idStr)
	if err != nil {
		log.Println(err)
		http.Error(w, "Invalid Student ID", http.StatusBadRequest)
		return
	}

	var updatedStudent models.Student
	err = json.NewDecoder(r.Body).Decode(&updatedStudent)
	if err != nil {
		log.Println(err)
		http.Error(w, "Invalid Request Payload", http.StatusBadRequest)
		return
	}

	updatedStudentFromDb, err := sqlconnect.UpdateStudent(id, updatedStudent)
	if err != nil {
		// log.Println(err)
		http.Error(w, err.Error(), http.StatusInternalServerError)
		return
	}

	w.Header().Set("Content-Type", "application/json")
	json.NewEncoder(w).Encode(updatedStudentFromDb)

}

// PATCH /students/
func PatchStudentsHandler(w http.ResponseWriter, r *http.Request) {

	var updates []map[string]interface{}
	err := json.NewDecoder(r.Body).Decode(&updates)
	if err != nil {
		log.Println(err)
		http.Error(w, "Invalid request payload", http.StatusBadRequest)
		return
	}

	err = sqlconnect.PatchStudents(updates)
	if err != nil {
		// log.Println(err)
		http.Error(w, err.Error(), http.StatusBadRequest)
		return
	}
	w.WriteHeader(http.StatusNoContent)
}

// PATCH /students/{id}
func PatchOneStudentHandler(w http.ResponseWriter, r *http.Request) {
	idStr := r.PathValue("id")
	id, err := strconv.Atoi(idStr)
	if err != nil {
		log.Println(err)
		http.Error(w, "Invalid Student ID", http.StatusBadRequest)
		return
	}

	var updates map[string]interface{}
	err = json.NewDecoder(r.Body).Decode(&updates)
	if err != nil {
		log.Println(err)
		http.Error(w, "Invalid Request Payload", http.StatusBadRequest)
		return
	}

	updatedStudent, err := sqlconnect.PatchOneStudent(id, updates)
	if err != nil {
		// log.Println(err)
		http.Error(w, err.Error(), http.StatusInternalServerError)
		return
	}

	w.Header().Set("Content-Type", "application/json")
	json.NewEncoder(w).Encode(updatedStudent)

}

func DeleteOneStudentHandler(w http.ResponseWriter, r *http.Request) {
	idStr := r.PathValue("id")
	id, err := strconv.Atoi(idStr)
	if err != nil {
		log.Println(err)
		http.Error(w, "Invalid Student ID", http.StatusBadRequest)
		return
	}

	err = sqlconnect.DeleteOneStudent(id)
	if err != nil {
		// log.Println(err)
		http.Error(w, err.Error(), http.StatusBadRequest)
		return
	}

	// Response Body -> Optional
	w.Header().Set("Content-Type", "application/json")
	response := struct {
		Status string `json:"status"`
		ID     int    `json:"id"`
	}{
		Status: "Student deleted successfully",
		ID:     id,
	}
	json.NewEncoder(w).Encode(response)

	// Return status of NoContent -> Compulsory
	w.WriteHeader(http.StatusNoContent)

}

func DeleteStudentsHandler(w http.ResponseWriter, r *http.Request) {

	var ids []int
	err := json.NewDecoder(r.Body).Decode(&ids)
	if err != nil {
		log.Println(err)
		http.Error(w, "Invalid request payload", http.StatusBadRequest)
		return
	}

	deleteIds, err := sqlconnect.DeleteStudents(ids)
	if err != nil {
		http.Error(w, err.Error(), http.StatusBadRequest)
		return
	}

	w.Header().Set("Content-Type", "application/json")
	response := struct {
		Status     string `json:"status"`
		DeletedIDs []int  `json:"deleted_ids"`
	}{
		Status:     "Students successfully deleted",
		DeletedIDs: deleteIds,
	}
	json.NewEncoder(w).Encode(response)
}
repository/sqlconnect/students_crud.go
package sqlconnect

import (
	"database/sql"
	"fmt"
	"log"
	"net/http"
	"reflect"
	"school_management_api/internal/models"
	"school_management_api/pkg/utils"
	"strconv"
	"strings"
)

func GetStudentsDbHandler(students []models.Student, r *http.Request) ([]models.Student, error) {
	db, err := ConnectDb()
	if err != nil {
		return nil, utils.ErrorHandler(err, "error retrieving data")
	}
	defer db.Close()

	query := "SELECT id, first_name, last_name, email, class FROM students WHERE 1=1"
	var args []interface{}

	query, args = utils.AddFilters(r, query, args)

	query = utils.AddSorting(r, query)

	rows, err := db.Query(query, args...)
	if err != nil {
		fmt.Println("err")
		return nil, utils.ErrorHandler(err, "error retrieving data")
	}
	defer rows.Close()
	for rows.Next() {
		student := models.Student{}
		err = rows.Scan(&student.ID, &student.FirstName, &student.LastName, &student.Email, &student.Class)
		if err != nil {

			return nil, utils.ErrorHandler(err, "error retrieving data")
		}
		students = append(students, student)
	}
	return students, nil
}

func GetStudentByID(id int) (models.Student, error) {
	db, err := ConnectDb()
	if err != nil {
		return models.Student{}, utils.ErrorHandler(err, "error retrieving data ")
	}
	defer db.Close()

	var student models.Student
	err = db.QueryRow("SELECT id, first_name, last_name, email, class FROM students WHERE id = ?", id).Scan(&student.ID, &student.FirstName, &student.LastName, &student.Email, &student.Class)
	if err == sql.ErrNoRows {
		return models.Student{}, utils.ErrorHandler(err, "error retrieving data ")
	} else if err != nil {
		fmt.Println(err)
		return models.Student{}, utils.ErrorHandler(err, "error retrieving data ")
	}
	return student, nil
}

func AddStudentsDBHandler(newStudents []models.Student) ([]models.Student, error) {

	fmt.Println("------ AddStudentsDBHandler Called -------")

	db, err := ConnectDb()
	if err != nil {
		return nil, utils.ErrorHandler(err, "error adding data")
	}
	defer db.Close()
	stmt, err := db.Prepare(utils.GenerateInsertQuery("students", models.Student{}))
	if err != nil {
		return nil, utils.ErrorHandler(err, "error adding data")
	}
	defer stmt.Close()
	fmt.Printf("Studentss Add Handler")

	addedStudents := make([]models.Student, len(newStudents))

	for i, newStudent := range newStudents {
		values := utils.GetStructValues(newStudent)
		fmt.Println(newStudent)

		fmt.Println("VALUES:", values)
		res, err := stmt.Exec(values...)

		if err != nil {
			fmt.Println("----- Error():", err)
			if strings.Contains(err.Error(), "a foreign key constraint fails (`school`.`students`, CONSTRAINT `students_ibfk_1` FOREIGN KEY (`class`) REFERENCES `teachers` (`class`))"){
				return nil, utils.ErrorHandler(err, "class / class teacher does not exist.")
			}
			return nil, utils.ErrorHandler(err, "error adding data")
		}
		lastID, err := res.LastInsertId()
		if err != nil {

			return nil, utils.ErrorHandler(err, "error adding data")
		}
		newStudent.ID = int(lastID)
		addedStudents[i] = newStudent
	}
	return addedStudents, nil
}

func UpdateStudent(id int, updatedStudent models.Student) (models.Student, error) {
	db, err := ConnectDb()
	if err != nil {
		return models.Student{}, utils.ErrorHandler(err, "error updating data")
	}
	defer db.Close()

	var existingStudent models.Student
	err = db.QueryRow("SELECT id, class, email, first_name, last_name FROM students WHERE id = ?", id).Scan(&existingStudent.ID, &existingStudent.Class, &existingStudent.Email, &existingStudent.FirstName, &existingStudent.LastName)
	if err != nil {
		if err != sql.ErrNoRows {

			return models.Student{}, utils.ErrorHandler(err, "error updating data")
		}
		return models.Student{}, utils.ErrorHandler(err, "error updating data")
	}

	updatedStudent.ID = existingStudent.ID
	_, err = db.Exec("UPDATE students SET first_name = ?, last_name = ?, email = ?, class = ? WHERE id = ?", updatedStudent.FirstName, updatedStudent.LastName, updatedStudent.Email, updatedStudent.Class, updatedStudent.ID)
	if err != nil {
		return models.Student{}, utils.ErrorHandler(err, "error updating data")
	}
	return updatedStudent, nil
}

func PatchStudents(updates []map[string]interface{}) error {
	db, err := ConnectDb()
	if err != nil {
		return utils.ErrorHandler(err, "error updating data")
	}
	defer db.Close()
	tx, err := db.Begin()
	if err != nil {
		return utils.ErrorHandler(err, "error updating data")
	}

	for _, update := range updates {
		idStr, ok := update["id"].(string)
		if !ok {
			tx.Rollback()

			return utils.ErrorHandler(err, "Invalid id")
		}

		id, err := strconv.Atoi(idStr)
		if err != nil {
			tx.Rollback()
			return utils.ErrorHandler(err, "invalid id")
		}

		var studentFromDb models.Student
		err = db.QueryRow("SELECT id, first_name, last_name, email, class FROM students WHERE id = ?", id).Scan(&studentFromDb.ID, &studentFromDb.FirstName, &studentFromDb.LastName, &studentFromDb.Email, &studentFromDb.Class)

		if err != nil {
			tx.Rollback()
			if err == sql.ErrNoRows {

				return utils.ErrorHandler(err, "Student Not Found")
			}

			return utils.ErrorHandler(err, "error updating data")
		}

		studentVal := reflect.ValueOf(&studentFromDb).Elem()
		studentType := studentVal.Type()

		for k, v := range update {
			if k == "id" {
				continue
			}
			for i := 0; i < studentVal.NumField(); i++ {
				field := studentType.Field(i)
				if field.Tag.Get("json") == k+",omitempty" {
					fieldVal := studentVal.Field(i)
					if fieldVal.CanSet() {
						val := reflect.ValueOf(v)
						if val.Type().ConvertibleTo(fieldVal.Type()) {
							fieldVal.Set(val.Convert(fieldVal.Type()))
						} else {
							tx.Rollback()
							log.Printf("cannot convert %v to %v", val.Type(), fieldVal.Type())
							return utils.ErrorHandler(err, "error updating data")
						}
					}
					break
				}
			}
		}
		_, err = tx.Exec("UPDATE students SET first_name = ?, last_name = ?, email = ?, class = ? WHERE id = ?", studentFromDb.FirstName, studentFromDb.LastName, studentFromDb.Email, studentFromDb.Class, studentFromDb.ID)
		if err != nil {
			tx.Rollback()

			return utils.ErrorHandler(err, "error updating data")
		}
	}
	err = tx.Commit()
	if err != nil {
		return utils.ErrorHandler(err, "error updating data")
	}
	return nil
}

func PatchOneStudent(id int, updates map[string]interface{}) (models.Student, error) {

	db, err := ConnectDb()
	if err != nil {
		log.Println(err)
		return models.Student{}, utils.ErrorHandler(err, "error updating data")
	}
	defer db.Close()

	var existingStudent models.Student
	err = db.QueryRow("SELECT id, class, email, first_name, last_name FROM students WHERE id = ?", id).Scan(&existingStudent.ID, &existingStudent.Class, &existingStudent.Email, &existingStudent.FirstName, &existingStudent.LastName)
	if err != nil {
		if err != sql.ErrNoRows {

			return models.Student{}, utils.ErrorHandler(err, "Student not Found")
		}
		return models.Student{}, utils.ErrorHandler(err, "error updating data")
	}
	studentVal := reflect.ValueOf(&existingStudent).Elem()
	studentType := studentVal.Type()
	for k, v := range updates {

		for i := 0; i < studentVal.NumField(); i++ {

			field := studentType.Field(i)

			if field.Tag.Get("json") == k+",omitempty" {
				if studentVal.Field(i).CanSet() {
					studentVal.Field(i).Set(reflect.ValueOf(v).Convert(studentVal.Field(i).Type()))
				}
			}
		}
	}

	_, err = db.Exec("UPDATE students SET first_name = ?, last_name = ?, email = ?, class = ? WHERE id = ?", existingStudent.FirstName, existingStudent.LastName, existingStudent.Email, existingStudent.Class, existingStudent.ID)
	if err != nil {
		return models.Student{}, utils.ErrorHandler(err, "error updating data")
	}
	return existingStudent, nil
}

func DeleteOneStudent(id int) error {
	db, err := ConnectDb()
	if err != nil {
		log.Println(err)
		return utils.ErrorHandler(err, "error deleting data")
	}
	defer db.Close()

	result, err := db.Exec("DELETE FROM students WHERE id = ?", id)
	if err != nil {
		return utils.ErrorHandler(err, "error deleting data")
	}

	fmt.Println(result.RowsAffected())

	rowsAffected, err := result.RowsAffected()
	if err != nil {
		return utils.ErrorHandler(err, "error deleting data")
	}

	if rowsAffected == 0 {
		return utils.ErrorHandler(err, "student not found")
	}
	return nil
}

func DeleteStudents(ids []int) ([]int, error) {
	db, err := ConnectDb()
	if err != nil {
		return nil, utils.ErrorHandler(err, "error deleting data")
	}
	defer db.Close()

	tx, err := db.Begin()
	if err != nil {
		return nil, utils.ErrorHandler(err, "error deleting data")
	}

	stmt, err := tx.Prepare("DELETE FROM students WHERE id = ?")
	if err != nil {
		tx.Rollback()
		return nil, utils.ErrorHandler(err, "error deleting data")
	}
	defer stmt.Close()

	deleteIds := []int{}

	for _, id := range ids {
		result, err := stmt.Exec(id)
		if err != nil {
			tx.Rollback()

			return nil, utils.ErrorHandler(err, "error deleting data")
		}

		rowsAffected, err := result.RowsAffected()
		if err != nil {
			tx.Rollback()

			return nil, utils.ErrorHandler(err, "error deleting data")
		}

		if rowsAffected > 0 {
			deleteIds = append(deleteIds, id)
		}

		if rowsAffected < 1 {
			tx.Rollback()

			return nil, utils.ErrorHandler(err, fmt.Sprintf("ID %d does not exist", id))
		}
	}
	err = tx.Commit()
	if err != nil {
		log.Println(err)
		return nil, utils.ErrorHandler(err, "error deleting data")
	}

	if len(deleteIds) < 1 {
		return nil, utils.ErrorHandler(err, "IDs do not exist")
	}
	return deleteIds, nil
}
New Subroutes
Never use nil as a handler, otherwise you would always get an error and your server won't start. Subroutes are sub-urls. Any router after the main URL is the subroute.
router/router.go
mux.HandleFunc("GET /teachers/{id}/students", handlers.GetStudentsByTeacherId)
mux.HandleFunc("GET /teachers/{id}/studentcount", handlers.GetStudentCountByTeacherId)
Getting Student List for a specific teacher
teachers.go
func GetStudentsByTeacherId(w http.ResponseWriter, r *http.Request) {
	teacherId := r.PathValue("id")

	var students []models.Student

	students, err := sqlconnect.GetStudentsByTeacherIdFromDb(teacherId, students)
	if err != nil {
		http.Error(w, err.Error(), http.StatusInternalServerError)
		return
	}

	response := struct {
		Status string           `json:"status"`
		Count  int              `json:"count"`
		Data   []models.Student `json:"data"`
	}{
		Status: "success",
		Count:  len(students),
		Data:   students,
	}

	w.Header().Set("Content-Type", "application/json")
	json.NewEncoder(w).Encode(response)
}
teachers_crud.go
func GetStudentsByTeacherIdFromDb(teacherId string, students []models.Student) ([]models.Student, error) {
	db, err := ConnectDb()
	if err != nil {
		return nil, utils.ErrorHandler(err, "error retrieving data")
	}
	defer db.Close()

	query := `SELECT id, first_name, last_name, email, class FROM students WHERE class = (SELECT class FROM teachers WHERE id = ?)`
	rows, err := db.Query(query, teacherId)
	if err != nil {
		log.Println(err)
	}
	defer rows.Close()

	for rows.Next() {
		var student models.Student
		err := rows.Scan(&student.ID, &student.FirstName, &student.LastName, &student.Email, &student.Class)
		if err != nil {
			return nil, utils.ErrorHandler(err, "error retrieving data")
		}
		students = append(students, student)
	}

	err = rows.Err()
	if err != nil {
		return nil, utils.ErrorHandler(err, "error retrieving data")
	}
	return students, nil
}
Getting Student Count for a specific teacher
Well, the student list can be a lot longer than we think, and it may take time to be generated and sometimes it may be possible that the client only needs the count and not the list. That's why a separate handler for counting the students.
teachers.go
func GetStudentCountByTeacherId(w http.ResponseWriter, r *http.Request) {
	teacherId := r.PathValue("id")
	var studentCount int

	studentCount, err := sqlconnect.GetStudentCountByTeacherIdFromDb(teacherId)
	if err != nil {
		http.Error(w, err.Error(), http.StatusInternalServerError)
		return
	}

	response := struct {
		Status string `json:"status"`
		Count  int    `json:"count"`
	}{
		Status: "success",
		Count:  studentCount,
	}
	w.Header().Set("Content-Type", "application/json")
	json.NewEncoder(w).Encode(response)
}
teachers_crud.go
func GetStudentCountByTeacherIdFromDb(teacherId string) (int, error) {
	db, err := ConnectDb()
	if err != nil {
		return 0, utils.ErrorHandler(err, "error retrieving data")
	}
	defer db.Close()

	query := `SELECT COUNT(*) FROM students WHERE class = (SELECT class FROM teachers WHERE id = ?)`
	var studentCount int
	err = db.QueryRow(query, teacherId).Scan(&studentCount)
	if err != nil {
		return 0, utils.ErrorHandler(err, "error retrieving data")
	}
	return studentCount, nil
}
Router Refactoring
router/router.go
package router

import (
	"net/http"
)

func MainRouter() *http.ServeMux {

	tRouter := teachersRouter()
	sRouter := studentsRouter()

	tRouter.Handle("/", sRouter)
	return tRouter
}
router/students_router.go
package router

import (
	"net/http"
	"school_management_api/internal/api/handlers"
)

func studentsRouter() *http.ServeMux {

	mux := http.NewServeMux()

	mux.HandleFunc("GET /students", handlers.GetStudentsHandler)
	mux.HandleFunc("POST /students", handlers.AddStudentsHandler)
	mux.HandleFunc("PATCH /students", handlers.PatchStudentsHandler)
	mux.HandleFunc("DELETE /students", handlers.DeleteStudentsHandler)

	mux.HandleFunc("GET /students/{id}", handlers.GetOneStudentHandler)
	mux.HandleFunc("PUT /students/{id}", handlers.UpdateStudentHandler)
	mux.HandleFunc("PATCH /students/{id}", handlers.PatchOneStudentHandler)
	mux.HandleFunc("DELETE /students/{id}", handlers.DeleteOneStudentHandler)

	return mux
}
router/teachers_router.go
package router

import (
	"net/http"
	"school_management_api/internal/api/handlers"
)

func teachersRouter() *http.ServeMux {

	mux := http.NewServeMux()

	mux.HandleFunc("GET /", handlers.RootHandler)

	mux.HandleFunc("GET /teachers", handlers.GetTeachersHandler)
	mux.HandleFunc("POST /teachers", handlers.AddTeachersHandler)
	mux.HandleFunc("PATCH /teachers", handlers.PatchTeachersHandler)
	mux.HandleFunc("DELETE /teachers", handlers.DeleteTeachersHandler)

	mux.HandleFunc("GET /teachers/{id}", handlers.GetOneTeacherHandler)
	mux.HandleFunc("PUT /teachers/{id}", handlers.UpdateTeacherHandler)
	mux.HandleFunc("PATCH /teachers/{id}", handlers.PatchOneTeacherHandler)
	mux.HandleFunc("DELETE /teachers/{id}", handlers.DeleteOneTeacherHandler)

	mux.HandleFunc("GET /teachers/{id}/students", handlers.GetStudentsByTeacherId)
	mux.HandleFunc("GET /teachers/{id}/studentcount", handlers.GetStudentCountByTeacherId)

	return mux
}
Execs Router
router/execs_router.go
package router

import (
	"net/http"
	"school_management_api/internal/api/handlers"
)

func execsRouter() *http.ServeMux {
	mux := http.NewServeMux()

	mux.HandleFunc("GET /execs", handlers.ExecsHandler)
	mux.HandleFunc("POST /execs", handlers.ExecsHandler)
	mux.HandleFunc("PATCH /execs", handlers.ExecsHandler)

	mux.HandleFunc("GET /execs/{id}", handlers.ExecsHandler)
	mux.HandleFunc("PATCH /execs/{id}", handlers.ExecsHandler)
	mux.HandleFunc("DELETE /execs/{id}", handlers.ExecsHandler)
	mux.HandleFunc("POST /execs/{id}/updatepassword", handlers.ExecsHandler)

	mux.HandleFunc("POST /execs/login", handlers.ExecsHandler)
	mux.HandleFunc("POST /execs/logout", handlers.ExecsHandler)
	mux.HandleFunc("POST /execs/forgotpassword", handlers.ExecsHandler)
	mux.HandleFunc("POST /execs/resetpassword/reset/{resetcode}", handlers.ExecsHandler)
	return mux
}
router/router.go
package router

import (
	"net/http"
)

func MainRouter() *http.ServeMux {

	eRouter := execsRouter()
	tRouter := teachersRouter()
	sRouter := studentsRouter()
	sRouter.Handle("/", eRouter)
	tRouter.Handle("/", sRouter)
	return tRouter
}
Execs Models and Database Table
Create the execs database using this query:
CREATE TABLE IF NOT EXISTS execs (
	id INT AUTO_INCREMENT PRIMARY KEY,
	first_name VARCHAR(255) NOT NULL,
	last_name VARCHAR(255) NOT NULL,
	email VARCHAR(255) NOT NULL UNIQUE,
	username VARCHAR(255) NOT NULL UNIQUE,
	password VARCHAR(255) NOT NULL,
	password_changed_at VARCHAR(255),
	user_created_at TIMESTAMP DEFAULT CURRENT_TIMESTAMP,
	password_reset_token VARCHAR(255),
	inactive_status BOOLEAN NOT NULL,
	role VARCHAR(50) NOT NULL,
	INDEX idx_email (email),
	INDEX idx_username (username)
);
models/execs.go
package models

import "database/sql"

type Exec struct {
	ID                  int
	FirstName           string
	LastName            string
	Email               string
	Username            string
	Password            string
	PasswordChangedAt   sql.NullString
	UserCreatedAt       sql.NullString
	PasswordResetCode   sql.NullString
	PasswordCodeExpires sql.NullString
	InactiveStatus      bool
	Role                string
}
CRUD for Execs Route
internal/api/handlers/execs.go
package handlers

import (
	"encoding/json"
	"fmt"
	"io"
	"log"
	"net/http"
	"school_management_api/internal/models"
	"school_management_api/internal/repository/sqlconnect"
	"strconv"
)

func GetExecsHandler(w http.ResponseWriter, r *http.Request) {

	var execs []models.Exec
	execs, err := sqlconnect.GetExecsDbHandler(execs, r)
	if err != nil {
		http.Error(w, err.Error(), http.StatusBadRequest)
		return
	}

	response := struct {
		Status string        `json:"status"`
		Count  int           `json:"count"`
		Data   []models.Exec `json:"data"`
	}{
		Status: "success",
		Count:  len(execs),
		Data:   execs,
	}
	w.Header().Set("Content-Type", "application/json")
	json.NewEncoder(w).Encode(response)

}

func GetOneExecHandler(w http.ResponseWriter, r *http.Request) {
	idStr := r.PathValue("id")

	// Handle Path parameter
	id, err := strconv.Atoi(idStr)
	if err != nil {
		// fmt.Println(err)
		http.Error(w, "invalid ID", http.StatusBadRequest)
		return
	}
	exec, err := sqlconnect.GetExecByID(id)
	if err != nil {
		// fmt.Println(err)
		http.Error(w, err.Error(), http.StatusInternalServerError)
		return
	}
	w.Header().Set("Content-Type", "application/json")
	json.NewEncoder(w).Encode(exec)
}

func AddExecsHandler(w http.ResponseWriter, r *http.Request) {

	var newExecs []models.Exec
	var rawExecs []map[string]interface{}

	body, err := io.ReadAll(r.Body)
	if err != nil {
		http.Error(w, "Error reading request Body", http.StatusInternalServerError)
		return
	}
	defer r.Body.Close()

	err = json.Unmarshal(body, &newExecs)
	if err != nil {
		http.Error(w, "Invalid Request Body", http.StatusBadRequest)
		return
	}
	fmt.Println(rawExecs)

	fields := GetFieldNames(models.Exec{})

	allowedFields := make(map[string]struct{})
	for _, field := range fields {
		allowedFields[field] = struct{}{}
	}

	for _, exec := range rawExecs {
		for key := range exec {
			_, ok := allowedFields[key]
			if !ok {
				http.Error(w, "Unacceptable field found in request. Only use allowed fields.", http.StatusBadRequest)
			}
		}
	}

	err = json.Unmarshal(body, &rawExecs)
	if err != nil {
		http.Error(w, "Invalid Request Body", http.StatusBadRequest)
		fmt.Println("New Execs:", newExecs)
		return
	}

	for _, exec := range newExecs {
		err = CheckBlankFields(exec)
		if err != nil {
			http.Error(w, err.Error(), http.StatusBadRequest)
			return
		}
	}

	addedExecs, err := sqlconnect.AddExecsDBHandler(newExecs)
	if err != nil {
		// fmt.Println(err)
		http.Error(w, err.Error(), http.StatusInternalServerError)
		return
	}

	w.Header().Set("Content-Type", "application/json")
	w.WriteHeader(http.StatusCreated)

	response := struct {
		Status string        `json:"status"`
		Count  int           `json:"count"`
		Data   []models.Exec `json:"data"`
	}{
		Status: "success",
		Count:  len(addedExecs),
		Data:   addedExecs,
	}

	json.NewEncoder(w).Encode(response)
}

// PATCH /execs/
func PatchExecsHandler(w http.ResponseWriter, r *http.Request) {

	var updates []map[string]interface{}
	err := json.NewDecoder(r.Body).Decode(&updates)
	if err != nil {
		log.Println(err)
		http.Error(w, "Invalid request payload", http.StatusBadRequest)
		return
	}

	err = sqlconnect.PatchExecs(updates)
	if err != nil {
		// log.Println(err)
		http.Error(w, err.Error(), http.StatusBadRequest)
		return
	}
	w.WriteHeader(http.StatusNoContent)
}

// PATCH /execs/{id}
func PatchOneExecHandler(w http.ResponseWriter, r *http.Request) {
	idStr := r.PathValue("id")
	id, err := strconv.Atoi(idStr)
	if err != nil {
		log.Println(err)
		http.Error(w, "Invalid Exec ID", http.StatusBadRequest)
		return
	}

	var updates map[string]interface{}
	err = json.NewDecoder(r.Body).Decode(&updates)
	if err != nil {
		log.Println(err)
		http.Error(w, "Invalid Request Payload", http.StatusBadRequest)
		return
	}

	updatedExec, err := sqlconnect.PatchOneExec(id, updates)
	if err != nil {
		// log.Println(err)
		http.Error(w, err.Error(), http.StatusInternalServerError)
		return
	}

	w.Header().Set("Content-Type", "application/json")
	json.NewEncoder(w).Encode(updatedExec)

}

func DeleteOneExecHandler(w http.ResponseWriter, r *http.Request) {
	idStr := r.PathValue("id")
	id, err := strconv.Atoi(idStr)
	if err != nil {
		log.Println(err)
		http.Error(w, "Invalid Exec ID", http.StatusBadRequest)
		return
	}

	err = sqlconnect.DeleteOneExec(id)
	if err != nil {
		// log.Println(err)
		http.Error(w, err.Error(), http.StatusBadRequest)
		return
	}

	// Response Body -> Optional
	w.Header().Set("Content-Type", "application/json")
	response := struct {
		Status string `json:"status"`
		ID     int    `json:"id"`
	}{
		Status: "Exec deleted successfully",
		ID:     id,
	}
	json.NewEncoder(w).Encode(response)

	// Return status of NoContent -> Compulsory
	w.WriteHeader(http.StatusNoContent)

}
internal/repository/sqlconnect/execs_crud.go
package sqlconnect

import (
	"database/sql"
	"fmt"
	"log"
	"net/http"
	"reflect"
	"school_management_api/internal/models"
	"school_management_api/pkg/utils"
	"strconv"
)

func GetExecsDbHandler(execs []models.Exec, r *http.Request) ([]models.Exec, error) {
	db, err := ConnectDb()
	if err != nil {
		return nil, utils.ErrorHandler(err, "error retrieving data")
	}
	defer db.Close()

	query := "SELECT id, first_name, last_name, email, username, user_created_at, inactive_status, role FROM execs WHERE 1=1"
	var args []interface{}

	query, args = utils.AddFilters(r, query, args)

	query = utils.AddSorting(r, query)

	rows, err := db.Query(query, args...)
	if err != nil {
		fmt.Println("err")
		return nil, utils.ErrorHandler(err, "error retrieving data")
	}
	defer rows.Close()
	for rows.Next() {
		exec := models.Exec{}
		err = rows.Scan(&exec.ID, &exec.FirstName, &exec.LastName, &exec.Email, &exec.Username, &exec.UserCreatedAt, &exec.InactiveStatus, &exec.Role)
		if err != nil {

			return nil, utils.ErrorHandler(err, "error retrieving data")
		}
		execs = append(execs, exec)
	}
	return execs, nil
}

func GetExecByID(id int) (models.Exec, error) {
	db, err := ConnectDb()
	if err != nil {
		return models.Exec{}, utils.ErrorHandler(err, "error retrieving data ")
	}
	defer db.Close()

	var exec models.Exec
	err = db.QueryRow("SELECT id, first_name, last_name, email, username, inactive_status, role  FROM execs WHERE id = ?", id).Scan(&exec.ID, &exec.FirstName, &exec.LastName, &exec.Email, &exec.Username, &exec.InactiveStatus, &exec.Role)
	if err == sql.ErrNoRows {
		return models.Exec{}, utils.ErrorHandler(err, "error retrieving data ")
	} else if err != nil {
		fmt.Println(err)
		return models.Exec{}, utils.ErrorHandler(err, "error retrieving data ")
	}
	return exec, nil
}

func AddExecsDBHandler(newExecs []models.Exec) ([]models.Exec, error) {

	fmt.Println("------ AddExecsDBHandler Called -------")

	db, err := ConnectDb()
	if err != nil {
		return nil, utils.ErrorHandler(err, "error adding data")
	}
	defer db.Close()
	stmt, err := db.Prepare(utils.GenerateInsertQuery("execs", models.Exec{}))
	if err != nil {
		return nil, utils.ErrorHandler(err, "error adding data")
	}
	defer stmt.Close()
	fmt.Printf("Execs Add Handler")

	addedExecs := make([]models.Exec, len(newExecs))

	for i, newExec := range newExecs {
		values := utils.GetStructValues(newExec)
		fmt.Println(newExec)

		fmt.Println("VALUES:", values)
		res, err := stmt.Exec(values...)

		if err != nil {
			return nil, utils.ErrorHandler(err, "error adding data")
		}
		lastID, err := res.LastInsertId()
		if err != nil {

			return nil, utils.ErrorHandler(err, "error adding data")
		}
		newExec.ID = int(lastID)
		addedExecs[i] = newExec
	}
	return addedExecs, nil
}

func PatchExecs(updates []map[string]interface{}) error {
	db, err := ConnectDb()
	if err != nil {
		return utils.ErrorHandler(err, "error updating data")
	}
	defer db.Close()
	tx, err := db.Begin()
	if err != nil {
		return utils.ErrorHandler(err, "error updating data")
	}

	for _, update := range updates {
		idStr, ok := update["id"].(string)
		fmt.Println("ID:", idStr)
		if !ok {
			tx.Rollback()

			return utils.ErrorHandler(err, "Invalid id")
		}

		id, err := strconv.Atoi(idStr)
		fmt.Println("ID:", id)
		if err != nil {
			tx.Rollback()
			return utils.ErrorHandler(err, "invalid id")
		}

		var execFromDb models.Exec
		err = db.QueryRow("SELECT id, first_name, last_name, email, username FROM execs WHERE id = ?", id).Scan(&execFromDb.ID, &execFromDb.FirstName, &execFromDb.LastName, &execFromDb.Email, &execFromDb.Username)

		if err != nil {
			tx.Rollback()
			if err == sql.ErrNoRows {

				return utils.ErrorHandler(err, "Exec Not Found")
			}

			return utils.ErrorHandler(err, "error updating data")
		}

		execVal := reflect.ValueOf(&execFromDb).Elem()
		execType := execVal.Type()

		for k, v := range update {
			if k == "id" {
				continue
			}
			for i := 0; i < execVal.NumField(); i++ {
				field := execType.Field(i)
				if field.Tag.Get("json") == k+",omitempty" {
					fieldVal := execVal.Field(i)
					if fieldVal.CanSet() {
						val := reflect.ValueOf(v)
						if val.Type().ConvertibleTo(fieldVal.Type()) {
							fieldVal.Set(val.Convert(fieldVal.Type()))
						} else {
							tx.Rollback()
							log.Printf("cannot convert %v to %v", val.Type(), fieldVal.Type())
							return utils.ErrorHandler(err, "error updating data")
						}
					}
					break
				}
			}
		}
		_, err = tx.Exec("UPDATE execs SET first_name = ?, last_name = ?, email = ?, username = ? WHERE id = ?", execFromDb.FirstName, execFromDb.LastName, execFromDb.Email, execFromDb.Username, execFromDb.ID)
		if err != nil {
			tx.Rollback()

			return utils.ErrorHandler(err, "error updating data")
		}
	}
	err = tx.Commit()
	if err != nil {
		return utils.ErrorHandler(err, "error updating data")
	}
	return nil
}

func PatchOneExec(id int, updates map[string]interface{}) (models.Exec, error) {

	db, err := ConnectDb()
	if err != nil {
		log.Println(err)
		return models.Exec{}, utils.ErrorHandler(err, "error updating data")
	}
	defer db.Close()

	var existingExec models.Exec
	err = db.QueryRow("SELECT id, first_name, last_name, email, username  FROM execs WHERE id = ?", id).Scan(&existingExec.ID, &existingExec.FirstName, &existingExec.LastName, &existingExec.Email, &existingExec.Username)
	if err != nil {
		if err != sql.ErrNoRows {

			return models.Exec{}, utils.ErrorHandler(err, "Exec not Found")
		}
		return models.Exec{}, utils.ErrorHandler(err, "error updating data")
	}
	execVal := reflect.ValueOf(&existingExec).Elem()
	execType := execVal.Type()
	for k, v := range updates {

		for i := 0; i < execVal.NumField(); i++ {

			field := execType.Field(i)

			if field.Tag.Get("json") == k+",omitempty" {
				if execVal.Field(i).CanSet() {
					execVal.Field(i).Set(reflect.ValueOf(v).Convert(execVal.Field(i).Type()))
				}
			}
		}
	}

	_, err = db.Exec("UPDATE execs SET first_name = ?, last_name = ?, email = ?, username = ? WHERE id = ?", existingExec.FirstName, existingExec.LastName, existingExec.Email, existingExec.Username, existingExec.ID)
	if err != nil {
		return models.Exec{}, utils.ErrorHandler(err, "error updating data")
	}
	return existingExec, nil
}

func DeleteOneExec(id int) error {
	db, err := ConnectDb()
	if err != nil {
		log.Println(err)
		return utils.ErrorHandler(err, "error deleting data")
	}
	defer db.Close()

	result, err := db.Exec("DELETE FROM execs WHERE id = ?", id)
	if err != nil {
		return utils.ErrorHandler(err, "error deleting data")
	}

	fmt.Println(result.RowsAffected())

	rowsAffected, err := result.RowsAffected()
	if err != nil {
		return utils.ErrorHandler(err, "error deleting data")
	}

	if rowsAffected == 0 {
		return utils.ErrorHandler(err, "exec not found")
	}
	return nil
}
internal/models/exec.go
package models

import "database/sql"

type Exec struct {
	ID                  int            `json:"id,omitempty" db:"id,omitempty"`
	FirstName           string         `json:"first_name,omitempty" db:"first_name,omitempty"`
	LastName            string         `json:"last_name,omitempty" db:"last_name,omitempty"`
	Email               string         `json:"email,omitempty" db:"email,omitempty"`
	Username            string         `json:"username,omitempty" db:"username,omitempty"`
	Password            string         `json:"password,omitempty" db:"password,omitempty"`
	PasswordChangedAt   sql.NullString `json:"password_changed_at,omitempty" db:"password_changed_at,omitempty"`
	UserCreatedAt       sql.NullString `json:"user_created_at,omitempty" db:"user_created_at,omitempty"`
	PasswordResetToken   sql.NullString `json:"password_reset_token,omitempty" db:"password_reset_token,omitempty"`
	PasswordTokenExpires sql.NullString `json:"password_token_expires,omitempty" db:"password_token_expires,omitempty"`
	InactiveStatus      bool           `json:"inactive_status,omitempty" db:"inactive_status,omitempty"`
	Role                string         `json:"role,omitempty" db:"role,omitempty"`
}
Passwords - Hashing
We are not making an API for our software that is publicly available, like instagram or facebook or something like that where anyone can register and login. This is an enterprise software where the user administrators will create a new user. There's no signing up for a new user. The new users are created by the adminitrators. So once an employee joins the executive staff, then that employee will be added to the database and a user will be created for that executive.
When it comes to hashing passwords for secure storage, the choice of hashing algorithms is critical for ensuring both security and efficiency. The three commonly recommended algorithms are Bcrypt, Argon2 and Pbkdf2.
-
bcrypt
- Well established, secure
- It incorporates a salt to protect against rainbow table attacks and is adaptive, meaning the iteration count can be increased over time to make it slower as computing power increases.
- Popular
-
Argon2
- Winner of the Password Hashing Competition
- Three variants: Argon2d, Argon2i and Argon2id
- Highly efficient
- Argon2id is recommended for most use-cases as it provides a balance of resistance against both side channel and GPU attacks.
- In terms of efficiency, Argon2 is highly efficient and allows for fine-tuning of memory usafe, time, cost and parallelism, making it suitable for a wide range of environments.
-
PBKDF2 (Password Based Key Derivation Function 2)
- NIST-approved key derivation function
- can be slower compared to bcrypt and Argon2 specially when configured with high iteration count for better security.
- It applies a pseudo random function such as HMAC to the input password along with a salt value and repeats the process many times to produce a derived key. It is considered secure but less resistant to certain types of attacks like side channel attacks.
For our API, we will use Argon2. package: argon2 (golang.org/x/crypto/argon2)
go get golang.org/x/crypto/argon2
repository/sqlconnect/execs_crud.go
func AddExecsDBHandler(newExecs []models.Exec) ([]models.Exec, error) {
	fmt.Println("------ AddExecsDBHandler Called -------")
	db, err := ConnectDb()
	if err != nil {
		return nil, utils.ErrorHandler(err, "error adding data")
	}
	defer db.Close()
	stmt, err := db.Prepare(utils.GenerateInsertQuery("execs", models.Exec{}))
	if err != nil {
		return nil, utils.ErrorHandler(err, "error adding data")
	}
	defer stmt.Close()
	fmt.Printf("Execs Add Handler")

	addedExecs := make([]models.Exec, len(newExecs))
	// previous code
	for i, newExec := range newExecs {

		if newExec.Password == "" {
			return nil, utils.ErrorHandler(errors.New("password is blank"), "please enter a password")
		}

		salt := make([]byte, 16)
		_, err := rand.Read(salt)
		if err != nil {
			return nil, utils.ErrorHandler(errors.New("failed to generate salt"), "error adding data")
		}

		hash := argon2.IDKey([]byte(newExec.Password), salt, 1, 64*1024, 4, 32)
		saltBase64 := base64.StdEncoding.EncodeToString(salt)
		hashBase64 := base64.StdEncoding.EncodeToString(hash)
		encodedHash := fmt.Sprintf("%s.%s", saltBase64, hashBase64)
		newExec.Password = encodedHash

		// rest of the code in the ADDExecDBHandler

		values := utils.GetStructValues(newExec)
		fmt.Println(newExec)
		fmt.Println("VALUES:", values)
		res, err := stmt.Exec(values...)
		if err != nil {
			return nil, utils.ErrorHandler(err, "error adding data")
		}
		lastID, err := res.LastInsertId()
		if err != nil {
			return nil, utils.ErrorHandler(err, "error adding data")
		}
		newExec.ID = int(lastID)
		addedExecs[i] = newExec
	}
	return addedExecs, nil
}
Authorization and Authentication
Authentication is the process of verifying the identity of a user or system. When a user tries to access an API, they must prove their identity, typically by providing credentials such as username and password and optionally maybe a token or a biometric signature. Some practical examples of authetication include:
- Username and Passowrd
- Tokens: After the intial login the server provides a token, a JWT which is a JSON web token and the user or the client includes this token in the subsequent requests.
- Multifactor Authentication: It enhances security by requiring multiple forms of verification such as a password and a code sent to mobile.
This process does not involve any decision about what actions you can perform. It only establishes your identity.
Authorization is the process of determining what actions an authenticated user is allowed to perform. It defines permissions and access levels based on the user's role or attributes. Some practical examples are :
- Role-Based Access Control (RBAC) : It assigns permissions to roles rather than to individual users. Fo example an admin role may have access to all resources while a user role has limited access.
- Atttribute-Based Access Control (ABAC) : This uses attributes, example user attributes, resource attributes, environment conditions to determine access rights.
- Access Control Lists (ACLs) : defines permissions for specific users or groups for various resources.
When implementing authorization and authentication, it's essential to use strong and secure methods for verifying identity. Ensure that permissions are lightly controlled and regularly reviewed. Apply the principle of least privilege, granting only the necessary permission requried. And regularly audit and update both authentication and authorization mechanisms to maintain security.
Cookies, Sessions and JWT
Cookies Cookies are basically key-value pairs. Cookies are small pieces of data that are stored on the client side usually within the user's web browser and they are sent back to the server with each http request. They are used to remember information about the user between requests. Cookies are primarily used for session management, personalization and tracking user behavior.
When a server wants to set a cookie, it sends a set-cookie header in the http response. In client to server, the browser automatically includes the cookie int the cookie header of the subsequent http requests to the same domain. Let's say when you login to a website, the server might create a session and store the sessionID in a cookie. On each subsequent request, the browser sends the cookie back to the server, allowing the server to recognize the user and maintain the login state.
-
Carried between :
- From Server to Client
- From Client to Server
-
Typical Information they carry
- SessionID
- User Preferences
- Tracking Information
-
Usage in API/Server
- Session Management
- Authentication
- Personalization
Sessions A session is a server side storage of user data that persists accross multiple requests from the same user. The session data is linked to a unique session ID, which is usually stored in a cookie on the client side. Sessions are used to store user specific data between requests, such as login status, user preferences and other stateful information like the items stored in user's cart.
From client to server, the client sends the session ID stored in a cookie with each request. And from server to client, the server sends the session ID in a cookies when the session is first created. The most common example is shopping cart data for e-commerce applications. Sessions can also store authentication data to keep users logged in. And sessions can also store temporary data like form inputs or shopping cart items.
-
Carried between
- From Server to CLient
- From Client to Server
-
Typical Information they carry
- User Authentication Data
- User Preferences
- Shopping Cart Data
-
Usage in API/Server
- Authentication
- Stateful Applications
For storing sessionId, we have to use Reddis an in-memory database.
JWT The REST Principles advice us not to store session data, but our API RESTful, that means it should be stateless. We should not maintain the state in our API and preserve our resources.
JWT (JSON Web Tokens) are a compact, URL safe token format for securely transmitting information between parties. It consists of three parts: a header, a payload and a signature and is often used for authentication and information exchange. JWTs are used to authenticate users, especially in stateless distributed systems. They can also carry user information and claims.
From server to client, the server generates a JWT token and then sends it to the client, ususally in the response body or a cookie. Now from client to server, the client includes the JWT in the authorization header, commonly using the bearer schema of each request. The typical information that a JWT carries is userID to identify the user claims such as user roles, permissions and other metadata and expiration time to specify the token's validity period.
Let's suppose that we logged in to an application successfully. The server generates a JWT containing user information and signs it. The server has to sign the JWT. The client then stores the JWT, usually in local storage or a cookie and includes it in authorization header of subsequent requests. The server then verifies the JWT signature and extracts the user information to authenticate and authorize the request.
Login Route - Part 1 : Data Validation
handlers/execs.go
func LoginHandler(w http.ResponseWriter, r *http.Request) {
	var req models.Exec

	// Data Validation
	err := json.NewDecoder(r.Body).Decode(&req)
	if err != nil {
		http.Error(w, "Invalid request body", http.StatusBadRequest)
		return
	}
	defer r.Body.Close()

	if req.Username == "" || req.Password == "" {
		http.Error(w, "Username and password are required", http.StatusBadRequest)
		return
	}

	// Search for user if user actually exists
	db, err := sqlconnect.ConnectDb()
	if err != nil {
		utils.ErrorHandler(err, "error updating data")
		http.Error(w, "error connecting to database", http.StatusBadRequest)
		return
	}
	defer db.Close()

	user := &models.Exec{}
	err = db.QueryRow("SELECT id, first_name, last_name, email, username, password, inactive_status, role FROM execs WHERE username = ?", req.Username).Scan(&user.ID, &user.FirstName, &user.LastName, &user.Email, &user.Username, &user.Password, &user.InactiveStatus, &user.Role)
	if err != nil {
		if err == sql.ErrNoRows {
			utils.ErrorHandler(err, "user not found")
			http.Error(w, "user not found", http.StatusBadRequest)
			return
		}
		http.Error(w, "database query error", http.StatusBadRequest)
		return
	}
	// is user active

	// Verify password

	// Generate Token

	// Send token as a response or as a cookie
}
Login Route - Part 2 : Password Hashing
func LoginHandler(w http.ResponseWriter, r *http.Request) {
	var req models.Exec

	// Data Validation
	err := json.NewDecoder(r.Body).Decode(&req)
	if err != nil {
		http.Error(w, "Invalid request body", http.StatusBadRequest)
		return
	}
	defer r.Body.Close()

	if req.Username == "" || req.Password == "" {
		http.Error(w, "Username and password are required", http.StatusBadRequest)
		return
	}

	// Search for user if user actually exists
	db, err := sqlconnect.ConnectDb()
	if err != nil {
		utils.ErrorHandler(err, "error updating data")
		http.Error(w, "error connecting to database", http.StatusBadRequest)
		return
	}
	defer db.Close()

	user := &models.Exec{}
	err = db.QueryRow("SELECT id, first_name, last_name, email, username, password, inactive_status, role FROM execs WHERE username = ?", req.Username).Scan(&user.ID, &user.FirstName, &user.LastName, &user.Email, &user.Username, &user.Password, &user.InactiveStatus, &user.Role)
	if err != nil {
		if err == sql.ErrNoRows {
			utils.ErrorHandler(err, "user not found")
			http.Error(w, "user not found", http.StatusBadRequest)
			return
		}
		http.Error(w, "database query error", http.StatusBadRequest)
		return
	}

	// is user active
	if user.InactiveStatus {
		http.Error(w, "Account is inactive", http.StatusForbidden)
		return
	}

	// Verify password
	parts := strings.Split(user.Password, ".")
	if len(parts) != 2 {
		utils.ErrorHandler(errors.New("invalid encoded hash format"), "invalid encoded hash format")
		http.Error(w, "invalid encoded hash format", http.StatusForbidden)
		return
	}

	saltBase64 := parts[0]
	hashedPasswordBase64 := parts[1]

	salt, err := base64.StdEncoding.DecodeString(saltBase64)
	if err != nil {
		utils.ErrorHandler(err, "failed to decode the salt")
		http.Error(w, "failed to decode the salt", http.StatusForbidden)
		return
	}

	hashedPassword, err := base64.StdEncoding.DecodeString(hashedPasswordBase64)
	if err != nil {
		utils.ErrorHandler(err, "failed to decode the hashed password")
		http.Error(w, "failed to decode the hased password", http.StatusForbidden)
		return
	}

	hash := argon2.IDKey([]byte(req.Password), salt, 1, 64 * 1024, 4, 32)

	if len(hash) != len(hashedPassword) {
		utils.ErrorHandler(errors.New("incorrect password"), "incorrect password")
		http.Error(w, "incorrect password", http.StatusForbidden)
		return
	}

	if subtle.ConstantTimeCompare(hash, hashedPassword) == 1 {
		// do nothing
	} else {
		utils.ErrorHandler(errors.New("incorrect password"), "incorrect password")
		http.Error(w, "incorrect password", http.StatusForbidden)
		return
	}

	// Generate Token

	// Send token as a response or as a cookie
}
Login Route - Part 3: JWT, Cookie
First do testing with a random token string :
func LoginHandler(w http.ResponseWriter, r *http.Request) {
	var req models.Exec

	// Data Validation
	err := json.NewDecoder(r.Body).Decode(&req)
	if err != nil {
		http.Error(w, "Invalid request body", http.StatusBadRequest)
		return
	}
	defer r.Body.Close()

	if req.Username == "" || req.Password == "" {
		http.Error(w, "Username and password are required", http.StatusBadRequest)
		return
	}

	// Search for user if user actually exists
	db, err := sqlconnect.ConnectDb()
	if err != nil {
		utils.ErrorHandler(err, "error updating data")
		http.Error(w, "error connecting to database", http.StatusBadRequest)
		return
	}
	defer db.Close()

	user := &models.Exec{}
	err = db.QueryRow("SELECT id, first_name, last_name, email, username, password, inactive_status, role FROM execs WHERE username = ?", req.Username).Scan(&user.ID, &user.FirstName, &user.LastName, &user.Email, &user.Username, &user.Password, &user.InactiveStatus, &user.Role)
	if err != nil {
		if err == sql.ErrNoRows {
			utils.ErrorHandler(err, "user not found")
			http.Error(w, "user not found", http.StatusBadRequest)
			return
		}
		http.Error(w, "database query error", http.StatusBadRequest)
		return
	}

	// is user active
	if user.InactiveStatus {
		http.Error(w, "Account is inactive", http.StatusForbidden)
		return
	}

	// Verify password
	parts := strings.Split(user.Password, ".")
	if len(parts) != 2 {
		utils.ErrorHandler(errors.New("invalid encoded hash format"), "invalid encoded hash format")
		http.Error(w, "invalid encoded hash format", http.StatusForbidden)
		return
	}

	saltBase64 := parts[0]
	hashedPasswordBase64 := parts[1]

	salt, err := base64.StdEncoding.DecodeString(saltBase64)
	if err != nil {
		utils.ErrorHandler(err, "failed to decode the salt")
		http.Error(w, "failed to decode the salt", http.StatusForbidden)
		return
	}

	hashedPassword, err := base64.StdEncoding.DecodeString(hashedPasswordBase64)
	if err != nil {
		utils.ErrorHandler(err, "failed to decode the hashed password")
		http.Error(w, "failed to decode the hased password", http.StatusForbidden)
		return
	}

	hash := argon2.IDKey([]byte(req.Password), salt, 1, 64 * 1024, 4, 32)

	if len(hash) != len(hashedPassword) {
		utils.ErrorHandler(errors.New("incorrect password"), "incorrect password")
		http.Error(w, "incorrect password", http.StatusForbidden)
		return
	}

	if subtle.ConstantTimeCompare(hash, hashedPassword) == 1 {
		// do nothing
	} else {
		utils.ErrorHandler(errors.New("incorrect password"), "incorrect password")
		wl.Error(w, "incorrect password", http.StatusForbidden)
		return
	}

	// Generate Token
	tokenString := "abd"

	// Send token as a response or as a cookie
	http.SetCookie(w, &http.Cookie{
		Name: "Bearer",
		Value: tokenString,
		Path: "/",
		HttpOnly: true,
		Secure: true,
		Expires: time.Now().Add(24 * time.Hour),
	})

	http.SetCookie(w, &http.Cookie{
		Name: "tests",
		Value: "testString",
		Path: "/",
		HttpOnly: true,
		Secure: true,
		Expires: time.Now().Add(24 * time.Hour),
	})

	w.Header().Set("Content-Type", "application/json")
	response := struct {
		Token string `json:"token"`
	}{
		Token: tokenString,
	}
	json.NewEncoder(w).Encode(response)

	// Return status of NoContent -> Compulsory
	w.WriteHeader(http.StatusNoContent)
}
Now, add JWT_SECRET and JWT_EXPIRES_IN in .env file.
# ADD JWT TOKENS
JWT_SECRET="secretString132"
JWT_EXPIRES_IN=10s
utils/jwt.go
package utils

import (
	"os"
	"time"
	"github.com/golang-jwt/jwt/v5"
)

func SignToken(userId int, username, role string) (string, error) {
	jwtSecret := os.Getenv("JWT_SECRET")
	jwtExpiresIn := os.Getenv("JWT_EXPIRES_IN")

	claims := jwt.MapClaims{
		"uid":  userId,
		"user": username,
		"role": role,
	}
	if jwtExpiresIn != "" {
		duration, err := time.ParseDuration(jwtExpiresIn)
		if err != nil {
			return "", ErrorHandler(err, "Internal error")
		}
		claims["exp"] = jwt.NewNumericDate(time.Now().Add(duration))
	} else {
		claims["exp"] = jwt.NewNumericDate(time.Now().Add(15 * time.Minute))
	}

	token := jwt.NewWithClaims(jwt.SigningMethodHS256, claims)

	signedToken, err := token.SignedString([]byte(jwtSecret))
	if err != nil {
		return "", ErrorHandler(err, "Internal error")
	}
	return signedToken, nil
}
Final execs.go file
func LoginHandler(w http.ResponseWriter, r *http.Request) {
	var req models.Exec

	// Data Validation
	err := json.NewDecoder(r.Body).Decode(&req)
	if err != nil {
		http.Error(w, "Invalid request body", http.StatusBadRequest)
		return
	}
	defer r.Body.Close()

	if req.Username == "" || req.Password == "" {
		http.Error(w, "Username and password are required", http.StatusBadRequest)
		return
	}

	// Search for user if user actually exists
	db, err := sqlconnect.ConnectDb()
	if err != nil {
		utils.ErrorHandler(err, "error updating data")
		http.Error(w, "error connecting to database", http.StatusBadRequest)
		return
	}
	defer db.Close()

	user := &models.Exec{}
	err = db.QueryRow("SELECT id, first_name, last_name, email, username, password, inactive_status, role FROM execs WHERE username = ?", req.Username).Scan(&user.ID, &user.FirstName, &user.LastName, &user.Email, &user.Username, &user.Password, &user.InactiveStatus, &user.Role)
	if err != nil {
		if err == sql.ErrNoRows {
			utils.ErrorHandler(err, "user not found")
			http.Error(w, "user not found", http.StatusBadRequest)
			return
		}
		http.Error(w, "database query error", http.StatusBadRequest)
		return
	}

	// is user active
	if user.InactiveStatus {
		http.Error(w, "Account is inactive", http.StatusForbidden)
		return
	}

	// Verify password
	parts := strings.Split(user.Password, ".")
	if len(parts) != 2 {
		utils.ErrorHandler(errors.New("invalid encoded hash format"), "invalid encoded hash format")
		http.Error(w, "invalid encoded hash format", http.StatusForbidden)
		return
	}

	saltBase64 := parts[0]
	hashedPasswordBase64 := parts[1]

	salt, err := base64.StdEncoding.DecodeString(saltBase64)
	if err != nil {
		utils.ErrorHandler(err, "failed to decode the salt")
		http.Error(w, "failed to decode the salt", http.StatusForbidden)
		return
	}

	hashedPassword, err := base64.StdEncoding.DecodeString(hashedPasswordBase64)
	if err != nil {
		utils.ErrorHandler(err, "failed to decode the hashed password")
		http.Error(w, "failed to decode the hased password", http.StatusForbidden)
		return
	}

	hash := argon2.IDKey([]byte(req.Password), salt, 1, 64*1024, 4, 32)

	if len(hash) != len(hashedPassword) {
		utils.ErrorHandler(errors.New("incorrect password"), "incorrect password")
		http.Error(w, "incorrect password", http.StatusForbidden)
		return
	}

	if subtle.ConstantTimeCompare(hash, hashedPassword) == 1 {
		// do nothing
	} else {
		utils.ErrorHandler(errors.New("incorrect password"), "incorrect password")
		http.Error(w, "incorrect password", http.StatusForbidden)
		return
	}

	// Generate Token
	tokenString, err := utils.SignToken(user.ID, req.Username, user.Role)
	if err != nil {
		http.Error(w, "Could not create login token", http.StatusInternalServerError)
		return
	}

	// Send token as a response or as a cookie
	http.SetCookie(w, &http.Cookie{
		Name:     "Bearer",
		Value:    tokenString,
		Path:     "/",
		HttpOnly: true,
		Secure:   true,
		Expires:  time.Now().Add(24 * time.Hour),
	})

	http.SetCookie(w, &http.Cookie{
		Name:     "tests",
		Value:    "testString",
		Path:     "/",
		HttpOnly: true,
		Secure:   true,
		Expires:  time.Now().Add(24 * time.Hour),
	})

	w.Header().Set("Content-Type", "application/json")
	response := struct {
		Token string `json:"token"`
	}{
		Token: tokenString,
	}
	json.NewEncoder(w).Encode(response)

	// Return status of NoContent -> Compulsory
	w.WriteHeader(http.StatusNoContent)

}
Logout
Best practices:
- First, clear the JWT cookie which means remove it from the client end.
- Second, we can blacklist the JWT, which is optional. So if we are implementing a more secure system, we might want to keep a blacklist of invalidated JWTs, which can be done by storing the token in a databse or in-memory store like Redis and checking this blacklist in our middleware that handles authentication.
Here we will implement only the first one.
func LogoutHandler(w http.ResponseWriter, r *http.Request){
	http.SetCookie(w, &http.Cookie{
		Name:     "Bearer",
		Value:    "",
		Path:     "/",
		HttpOnly: true,
		Secure:   true,
		Expires:  time.Unix(0,0),
		SameSite: http.SameSiteStrictMode,
	})
	w.Header().Set("Content-Type", "application/json")
	w.Write([]byte(`{"message": "Logged out succesfully"}`))
}
Authentication Middleware - JWT
In order to protect all the routes from unauthorized access using JWT, we can create a middleware that will authenticate the JWT and then let the user access any route. If the JWT is not verified, then in that case, the user will not be authenticated and hence the user will not be able to access any route. We should use authentication middlewares on all endpoints, because only using login mechanism to protect our API is impractical because your endpoints may get compromised and then in that case, if you have not applied protection middleware on all endpoints, then your database can also get compromised. So to protect all our endpoints in the API, we will be creating a JWT middleware.
package middlewares

import (
	"context"
	"errors"
	"fmt"
	"log"
	"net/http"
	"os"
	"school_management_api/pkg/utils"

	"github.com/golang-jwt/jwt/v5"
)

type ContextKey string

func JWTMiddleware(next http.Handler) http.Handler {
	fmt.Println("---------- JWT Middleware ---------")
	return http.HandlerFunc(func(w http.ResponseWriter, r *http.Request) {
		fmt.Println("++++++++++ Inside JWT Middleware +++++++++")

		token, err := r.Cookie("Bearer")
		if err != nil {
			http.Error(w, "Authorization Header Missing", http.StatusUnauthorized)
			return
		}
		jwtSecret := os.Getenv("JWT_SECRET")
		parsedToken, err := jwt.Parse(token.Value, func(token *jwt.Token) (interface{}, error) {
			// Don't forget to validate the alg is what you expect
			if _, ok := token.Method.(*jwt.SigningMethodHMAC); !ok {
				return nil, fmt.Errorf("unexpected signing method: %v", token.Header["alg"])
			}
			// hmacSampleSecret is a []byte slice containing your secret, eg: []byte("my_secret_key")
			return []byte(jwtSecret), nil
		})
		if err != nil {
			if errors.Is(err, jwt.ErrTokenExpired) {
				http.Error(w, "Token Expired", http.StatusUnauthorized)
				return
			} else if errors.Is(err, jwt.ErrTokenMalformed){
				http.Error(w, "Token Malformed", http.StatusUnauthorized)
				return
			}
			utils.ErrorHandler(err, "")
			http.Error(w, err.Error(), http.StatusUnauthorized)
			return
		}

		if parsedToken.Valid {
			log.Println("Valid JWT")
		} else {
			http.Error(w, "Invalid Login Token", http.StatusUnauthorized)
			log.Println("Invalid JWT:", token.Value)
		}

		fmt.Println("Parsed Token:", parsedToken)

		claims, ok := parsedToken.Claims.(jwt.MapClaims)
		if ok {
			fmt.Println(claims["uid"], claims["exp"], claims["role"])
		} else {
			http.Error(w, "Invalid Login Token", http.StatusUnauthorized)
			return
		}

		// Now use context to carry the claim information accross different middlewares, accross different functions
		ctx := context.WithValue(r.Context(), ContextKey("role"), claims["role"])
		ctx = context.WithValue(ctx, ContextKey("expiresAt"), claims["exp"])
		ctx = context.WithValue(ctx, ContextKey("username"), claims["user"])
		ctx = context.WithValue(ctx, ContextKey("userId"), claims["uid"])

		fmt.Println(ctx)

		next.ServeHTTP(w, r.WithContext((ctx)))
		fmt.Println("Sent Response from JWT Middleware")
	})
}
Skipping Routes with Middleware - Prelogin
package middlewares

import (
	"net/http"
	"strings"
)

func MiddlewaresExcludePaths(middleware func(http.Handler) http.Handler, excludePaths ...string) func (http.Handler) http.Handler {
	return func(next http.Handler) http.Handler {
		return http.HandlerFunc(func(w http.ResponseWriter, r *http.Request){
			for _, path := range excludePaths {
				if strings.HasPrefix(r.URL.Path, path){
					next.ServeHTTP(w,r)
					return
				}
			}

			middleware(next).ServeHTTP(w,r)
		})
	}
}
Part 5
Download MailHog
Link: https://github.com/mailhog/MailHog
MailHog is a lightweight package that we can add to our API to include mail sending functionality in our server. MailHog is a simple and effective email testing tool that allows developers to simulate sending and receiving emails in a safe environment without actually sending them to real email addresses. It's particularly useful for testing email functionalities in applications during development.
Some of the key features of MailHog include an SMTP server, so MailHog runs an SMTP server that captures emails sent from your application. You can configure your application to send emails to MailHog instead of real email servers or real email addresses. This way you can review the content of the emails without sending them out. So those emails will be received to a fake SMTP server that is running on your computer and you can send as many emails as possible because no other server is receiving those emails and you don't have to login to any email account to check those emails.
Mailhog provides a web interface where we can view the emails that have been captured. You can see details like the sender, recipient, subject and body of each email, making it absolutely easy to verify that your application is sending the correct information.
Setting up mailHog is straight forward. it can be run as a standalone binary or as a Docker container. This ease of use allows developers to quickly integrate MailHog into their development workflow. With MailHog you can simulate various email scenarios without any side effects. MailHog can also be integrated into automated tests. You can check that emails are send correctly and contain the right information, making it a valuable tool for maintaining code quality.
In our API we use MailHog to send password reset emails. When a user submits their email address to the forgot password route, the application generates a password reset email containing a secure link, and this email is captured by MailHog, allowing us to verify its content through the web interface without actually sending it to the user's email address.
Handling the Forgot Password Route
The main code for the ForgotPasswordHandler looks like the one written below. It is further refactored for clean readability and good code quality.
execs.go
func ForgotPasswordHandler(w http.ResponseWriter, r *http.Request){
	var req struct{
		Email string `json:"email"`
	}

	err := json.NewDecoder(r.Body).Decode(&req)
	if err != nil {
		http.Error(w, "Invalid request body", http.StatusBadRequest)
		return
	}
	r.Body.Close()

	db, err := sqlconnect.ConnectDb()
	if err != nil {
		utils.ErrorHandler(err, "Internal Error")
		return
	}
	defer db.Close()

	// Since we want a single email address from the database, we need a single row that's we'll use a QueryRow to get the Row
	var exec models.Exec
	err = db.QueryRow("SELECT id FROM execs WHERE email=?", req.Email).Scan(&exec.ID)
	if err != nil {
		utils.ErrorHandler(err, "User not found")
		return
	}

	duration, err := strconv.Atoi(os.Getenv("RESET_TOKEN_EXP_DURATION"))
	if err!= nil {
		utils.ErrorHandler(err, "Failed to send password reset email")
		return
	}
	mins := time.Duration(duration)

	expiry := time.Now().Add(mins * time.Minute).Format(time.RFC3339)

	tokenBytes := make([]byte, 32)
	_, err = rand.Read(tokenBytes)
	if err!= nil {
		utils.ErrorHandler(err, "Failed to password reset email")
		return
	}

	log.Println("tokenBytes:", tokenBytes)
	token := hex.EncodeToString(tokenBytes)
	log.Println("token:", token)

	hashedToken := sha256.Sum256(tokenBytes)
	log.Println("hashedToken:", hashedToken)

	hashedTokenString := hex.EncodeToString(hashedToken[:])

	_, err = db.Exec("UPDATE execs SET password_reset_token=?, password_token_expires=? WHERE id=?", hashedTokenString, expiry, exec.ID)
	if err != nil {
		utils.ErrorHandler(err, "Failed to send password reset email")
		return
	}

	// Send to reset email
	resetURL := fmt.Sprintf("https://localhost:3000/execs/resetpassword/reset/%s", token)
	message := fmt.Sprintf("Forgot your password ? Reset your password using the following link: \n%s\nIf you didn't request a password reset, please ignore this email. This link is only valid for %d minutes", resetURL, int(mins))

	m := mail.NewMessage()    // Creates a new instance of mail message
	m.SetHeader("From", "schooladmin@school.com")
	m.SetHeader("To", req.Email)
	m.SetHeader("Subject", "Your Password reset link")
	m.SetBody("text/plain", message)

	d := mail.NewDialer("localhost", 1025, "", "")
	err = d.DialAndSend(m)
	if err != nil {
		utils.ErrorHandler(err, "Failed to send password reset email")
		return
	}

	// respond with success confirmation
	fmt.Fprintf(w, "Password reset link sent to %s", req.Email)

}
Reset Password using the Reset Link Generated
Put the reset link generated in the above route in the postman and add the body fields of new_password and confirm_password. The code for implementing the above functionality looks like below, before refactoring.
execs.go
func ResetPasswordHandler(w http.ResponseWriter, r *http.Request){
	token := r.PathValue("resetcode")

	type request struct {
		NewPassword string `json:"new_password"`
		ConfirmPassword string `json:"confirm_password"`
	}

	var req request
	err := json.NewDecoder(r.Body).Decode(&req)
	if err != nil {
		http.Error(w, "Invalid values in request", http.StatusBadRequest)
		return
	}

	// TODO: Data validation for blank values
	if req.NewPassword == "" && req.ConfirmPassword == "" {
		http.Error(w, "Password cannot have empty values", http.StatusBadRequest)
		return
	}

	if req.NewPassword != req.ConfirmPassword {
		http.Error(w, "Passwords should match", http.StatusBadRequest)
		return
	}

	bytes, err := hex.DecodeString(token)
	if err != nil {
		utils.ErrorHandler(err, "Internal Error")
		return
	}

	hashedToken := sha256.Sum256(bytes)
	hashedTokenString := hex.EncodeToString(hashedToken[:])


	db, err := sqlconnect.ConnectDb()
	if err != nil {
		utils.ErrorHandler(err, "Internal Error")
		return
	}
	defer db.Close()

	var user models.Exec

	query := "SELECT id, email FROM execs WHERE password_reset_token=? AND password_token_expires>?"
	err = db.QueryRow(query, hashedTokenString, time.Now().Format(time.RFC3339)).Scan(&user.ID, &user.Email)
	if err != nil {
		utils.ErrorHandler(err, "Invalid or expired resetcode")
		return
	}

	// Hash the new password
	hashedPassword, err := utils.HashPassword(req.NewPassword)
	if err!= nil {
		utils.ErrorHandler(err, "internal error")
		return
	}

	updateQuery := "UPDATE execs SET password=?, password_reset_token=NULL, password_token_expires=NULL, password_changed_at=? WHERE id=?"
	_, err = db.Exec(updateQuery, hashedPassword, time.Now().Format(time.RFC3339), user.ID)
	if err != nil {
		utils.ErrorHandler(err, "Internal Error")
		return
	}

	fmt.Fprintln(w, "Password reset successfully")
}
CSRF (Cross Site Request Forgery)
-
Cross Site Request Forgery
-
Stateless Nature
-
Token-based Authentication
-
Best Practices for CSRF Protection in APIs
- Use Same-Site Cookies
- Double Submit Cookies
- Custom Headers
- CSRF Tokens
-
Common Pitfalls in CSRF Protection
- Ignoring Stateless APIs
- Weak Token Generation
- Exposing Tokens
Cross-Site Request Forgery is a type of attack where a malicious actor tricks a user into performing actions on a web-application, where they are authenticated without their knowledge. This can lead to unauthorized actions such as data theft, account manipulation, and other harmful operations. CSRF attacks exploits the trust of web-application has in a user's web browser. Without proper protection, any authenticated action like changing a password or making a transaction, can be performed without the user's consent. This compromises the integrity and security of the application and the user's data.
While traditional web applications render HTML and manage user sessions, API often operate statelessly primarily using tokens for authentication. This makes CSRF slightly different in APIs. APIs do not maintain session states, reducing the direct risk of CSRF compared to stateful applications. APIs use tokens like JWT for authentication, which helps mitigate CSRF since token need to be included in each request explicitly.
CSRF protection is primarity needed for applications where the server and the client usually a web-browser, have a trust relationship and where the client needs to perform state changing operations like form submissions, which are authenticated by cookies or other mechanisms that the browser automatically includes with requests. If you are building a purely API based backed that does not directly interact with a web-browser, CSRF protection is generally not as necessary and there are some scenarios where CSRD is not typically needed.
Add Pagination to the Students Route
students.go
func GetStudentsHandler(w http.ResponseWriter, r *http.Request) {

	var students []models.Student

	// Implementing the pagination
	// url?limit=x&page=y
	// database will-leave/ will-not show calculated entries from the begining. (page-1) * limit ((1-1)*50 = 0*50 = 0)
	// page y => (y-1) * x, next x entries
	page, limit := getPaginationParams(r)

	students, totalStudents, err := sqlconnect.GetStudentsDbHandler(students, r, limit, page)
	if err != nil {
		http.Error(w, err.Error(), http.StatusBadRequest)
		return
	}

	response := struct {
		Status   string           `json:"status"`
		Count    int              `json:"count"`
		Page     int              `json:"page"`
		PageSize int              `json:"page_size"`
		Data     []models.Student `json:"data"`
	}{
		Status:   "success",
		Count:    totalStudents,
		Page:     page,
		PageSize: limit,
		Data:     students,
	}
	w.Header().Set("Content-Type", "application/json")
	json.NewEncoder(w).Encode(response)

}

func getPaginationParams(r *http.Request) (int, int) {
	page, err := strconv.Atoi(r.URL.Query().Get("page"))
	if err != nil {
		page = 1
	}

	limit, err := strconv.Atoi(r.URL.Query().Get("limit"))
	if err != nil {
		limit = 10
	}
	return page, limit
}
students_crud.go
func GetStudentsDbHandler(students []models.Student, r *http.Request, limit, page int) ([]models.Student, int, error) {
	db, err := ConnectDb()
	if err != nil {
		return nil, 0, utils.ErrorHandler(err, "error retrieving data")
	}
	defer db.Close()

	query := "SELECT id, first_name, last_name, email, class FROM students WHERE 1=1"
	var args []interface{}

	query, args = utils.AddFilters(r, query, args)

	// Add Pagination
	offset := (page - 1) * limit
	query += " LIMIT ? OFFSET ? "
	args = append(args, limit, offset)


	query = utils.AddSorting(r, query)

	rows, err := db.Query(query, args...)
	if err != nil {
		fmt.Println("err")
		return nil, 0, utils.ErrorHandler(err, "error retrieving data")
	}
	defer rows.Close()
	for rows.Next() {
		student := models.Student{}
		err = rows.Scan(&student.ID, &student.FirstName, &student.LastName, &student.Email, &student.Class)
		if err != nil {

			return nil, 0, utils.ErrorHandler(err, "error retrieving data")
		}
		students = append(students, student)
	}

	// Get the total count of students
	var totalStudents int
	err = db.QueryRow("SELECT COUNT(*) FROM students").Scan(&totalStudents)
	if err != nil {
		utils.ErrorHandler(err, "")
		totalStudents = 0
	}

	return students, totalStudents, nil
}
Data Sanitization - XSS Middleware
Sanitization is the process of cleaning and filtering user input to prevent the introduction of malicious data into a system. This practice is essential in safeguarding applications from various security threats such as SQL injection, cross-site scripting and other forms of injection attacks.
Data sanization plays a significant role in securing our API.
- It protects against injection attacks by removing or escaping harmful characters.
- It ensures that data confirms to expected formats and content maintaining system integrity.
- It prevents malicious data from degrading system performance.
Data Sanitization is crucial on the server side to ensure that all data Entering the system is clean and safe. And while it's important to sanitize data on the client side for user-feedback and immediate security, it should not be solely relied upon as client side sanitization can be bypassed.
Importance
- Security
- Integrity
- Performance
Areas Of Application
- API / Server-Side
- Frontend Development
Data Sanitization in APIs / Server-Side Development
- Input Sanitization
- Output Sanitization
- Database Interaction
How Data Sanitization is Implemented
- Escaping :
>to>,<to< - Validation : checking if an email address has a valid format before sending it to the database.
- Encoding : transform data into a safe format. Encoding data to be safely included in htmls or urls.
- Whitelist Filtering : allowing only known safe data to passthrough. eg: restricting input to only alphabetic characters for a name field.
Best Practices
- Sanitize all user inputs
- Use established libraries
- Sanitize at Multiple Layers
- Contextual Escaping
- Regularly Update
Common Pitfalls
- Relying Solely on client-side sanitization
- Incomplete Sanitization
- Improper Context Handling
- Neglecting Output Sanitization
- Over-Sanitization
Examples of Data Sanitization
- Preventing SQL Injection
- Preventing XSS
- Preventing URL Injection
io.ReadCloser vs io.Reader : An instance of io.ReadCloser needs to be read and it needs to be closed as well once it is read. So we have read method associated with io.ReadCloser as well as Close method assosciated with io.ReadCloser.
package middlewares

import (
	"bytes"
	"encoding/json"
	"fmt"
	"io"
	"log"
	"net/http"
	"net/url"
	"school_management_api/pkg/utils"
	"strings"
	"github.com/microcosm-cc/bluemonday"
)

func XSSMiddleware(next http.Handler) http.Handler {
	fmt.Println("++++++++++++ Initializing XSSMiddleware +++++++++++")
	return http.HandlerFunc(func(w http.ResponseWriter, r *http.Request) {
		fmt.Println("+++++++++++++++ XSS Middleware Ran ")

		// Sanitize the URL Path
		sanitizePath, err := clean(r.URL.Path)
		if err != nil {
			http.Error(w, err.Error(), http.StatusBadRequest)
			return
		}
		fmt.Println("Original Path:", r.URL.Path)
		fmt.Println("Sanitized Path:", sanitizePath)

		// Sanitize the query Params
		params := r.URL.Query()
		sanitizedQuery := make(map[string][]string)
		for key, values := range params {
			sanitizedKey, err := clean(key)
			if err != nil {
				http.Error(w, err.Error(), http.StatusBadRequest)
				return
			}

			var sanitizedValues []string
			for _, value := range values {
				cleanValue, err := clean(value)
				if err != nil {
					http.Error(w, err.Error(), http.StatusBadRequest)
					return
				}
				sanitizedValues = append(sanitizedValues, cleanValue.(string))
			}
			sanitizedQuery[sanitizedKey.(string)] = sanitizedValues
			fmt.Printf("Original Query %s: %s\n", key, strings.Join(values, ", "))
			fmt.Printf("Sanitized Query %s: %s\n", sanitizedKey, strings.Join(sanitizedValues, ", "))
		}

		r.URL.Path = sanitizePath.(string)
		r.URL.RawQuery = url.Values(sanitizedQuery).Encode()
		fmt.Println("Updated URL:", r.URL.String())

		// Sanitize request body
		if r.Header.Get("Content-Type") == "appplication/json" {
			if r.Body != nil {
				bodyBytes, err := io.ReadAll(r.Body)
				if err != nil {
					http.Error(w, utils.ErrorHandler(err, "Error reading request body").Error(), http.StatusBadRequest)
					return
				}
				bodyString := strings.TrimSpace(string(bodyBytes))
				fmt.Println("Original Body:", bodyString)

				// Reset the request Body
				r.Body = io.NopCloser(bytes.NewReader([]byte(bodyString)))

				if len(bodyString) > 0 {
					var inputData interface{}
					err := json.NewDecoder(bytes.NewReader([]byte(bodyString))).Decode(&inputData)
					if err != nil {
						http.Error(w, utils.ErrorHandler(err, "Invalid JSON body").Error(), http.StatusBadRequest)
						return
					}
					fmt.Println("Original JSON data:", inputData)

					// Sanitize the JSON body
					sanitizedData, err := clean(inputData)
					if err != nil {
						http.Error(w, err.Error(), http.StatusBadRequest)
						return
					}
					fmt.Println("Sanitized JSON data:", sanitizedData)

					// Marshall the sanitized data back to the body
					sanitizedBody, err := json.Marshal(sanitizedData)
					if err != nil {
						http.Error(w, utils.ErrorHandler(err, "Error sanitizing body").Error(), http.StatusBadRequest)
						return
					}

					r.Body = io.NopCloser(bytes.NewReader(sanitizedBody))
					fmt.Println("Sanitized body:", string(sanitizedBody))

				} else {
					log.Println("Request body is empty")
				}

			} else {
				log.Println("No body in the request")
			}
		} else if r.Header.Get("Content-Type") != "" {
			log.Printf("Received request with unsupported Content-Type: %s. Expected application/json.\n", r.Header.Get("Content-Type"))
			http.Error(w, "Unsupported Content-Type. please use application/json.", http.StatusUnsupportedMediaType)
			return
		}

		next.ServeHTTP(w, r)
		fmt.Println("Sending response from XSSMiddleware Ran")
	})
}

// Clean sanitizes input data to prevent XSS attacks
func clean(data interface{}) (interface{}, error) {
	switch v := data.(type) {
	case map[string]interface{}:
		for key, value := range v {
			v[key] = sanitizeValue(value)
		}
		return v, nil
	case []interface{}:
		for i, value := range v {
			v[i] = sanitizeValue(value)
		}
		return v, nil
	case string:
		return sanitizeString(v), nil
	default:
		// Error
		return nil, utils.ErrorHandler(fmt.Errorf("unsupported type: %T", data), fmt.Sprintf("unsupported type: %T", data))
	}
}

func sanitizeValue(data interface{}) interface{} {
	switch v := data.(type) {
	case string:
		return sanitizeString(v)
	case map[string]interface{}:
		for k, value := range v {
			v[k] = sanitizeValue(value)
		}
		return v
	case []interface{}:
		for i, value := range v {
			v[i] = sanitizeValue(value)
		}
		return v
	default:
		return v
	}
}

func sanitizeString(value string) string {
	return bluemonday.UGCPolicy().Sanitize(value)
}
Authorization
package utils

import "errors"

type ContextKey string

func AuthorizeUser(userRole string, allowedRoles ...string) (bool, error){
	for _, allowedRole := range allowedRoles {
		if userRole == allowedRole {
			return true, nil
		}
	}
	return false, errors.New(("user not authorized"))
}
Code Obfuscation
Code Obfuscation is the process of deliberately making source code or binary code difficult to understand. This is achieved through techniques that transform the code into a less readable form while preserving its functionality. The main goal is to protect intellectual property and prevent reverse engineering or unauthorized access to the code's logic.
Why is code obfuscation so important ?
-
Protection of Intellectual Property : Companies invest significant resources in developing their software. Obfuscation helps protect this investment by making it harder for competitors to copy or steal proprietary algorithms and logic.
-
Security Enhancement : Obfuscation adds an extra layer of security by making it more challenging for attackers to analyze the code and identify vulnerabilities. While not a substitute for robust security practices, it can deter casual attackers.
-
Compliance: Certain industries mau have regulations that require protecting sensitive data or intellectual property, making obfuscation a compliance necessity.
-
Sensitive Logic: Code Obfuscation is particularly relevant for APIs or server binary files because APIs contain business logic, authentication mechanisms and data processing algorithms that, if exposed could lead to security breaches.
-
Preventing Reverse Engineering: Binary files still can be reverse engineered to reveal sensitive information. Obfuscation makes this process mroe difficult.
-
Reducing Attack Surface: By obscuring the code, it helps reducae the attack surface, as attackers may find it harder to understand how to exploit vulnerabilities.
Cons of Code Obfuscation :
- Performance Overhead: It can introduce performance overhead, potentially slowing down execution.
- Debugging Difficulty: Obfuscated code can be challenging to debug and maintain, making it harder for developers to troubleshoot issues.
- Not Foolproof : Skilled attackers can still reverse engineer obfuscated code, making it a deterrent but not a complete solution.
Best Practices
- Use Established Tools
- Combine with other Security Practices.
- Keep backups: DO maintain original unobfuscated versions of the code for development and maintenance purposes.
- Evaluate Performance / Benchmarking
Common Pitfalls
- Over-Obfuscation
- Ignoring Security Best Practices
- Obfuscation does not guarantee protection against determined attackers. It's essential to remain vigilant and continuously assess security.
Adjustments before final binary
When we deploy our API, our certificate and key are going to be placed in a specific folder and our application binary is going to use the certificate and key from that location. So we need to det the path to our certificate and key be known to our API binary. And usually the path to your certificate and key will be stored in the environment variable. Certificate file path is going to start from the root folder.
We will be deploying it on our computer for testing purposes. So in that case, we can embed this .env file along with the binary.
How Internet Works
Contents
- URI/URL
- Request Response Cycle
- What is Frontend Dev/ Client Side
- What is Backend Dev/ API/ Server Side
- HTTP-1/2/3, HTTPS
- Quiz-12: Internet Quiz
URI / URL
How Internet Works
Internet is a global network of interconnected computers that communicate using standardized protocols.
Key Components
- Clients and Servers
- Protocols
- IP Addresses
- Domain Name Systems(DNS)
A Web Request's Journey
- Step-1: Entering a URL
- Step-2: DNS Lookup, DNS Server Interaction
- Step-3: Establicshing a TCP connection
- browser sends a TCP SYN (synchronize) packet to the server.
- server responds with a SYN-SCK (synchronize-acknowledgement) packet.
- browser sends an ACK (acknowledgement) packet, completing the three-way handshake.
- Step-4: Sending an HTTP Request
- Step-5: Server Processing and Response
- Step-6: Rendering the Webpage
URI & URL
URI (Uniform Resource Locator)
Components:
- URL (Uniform Resource Locator)
- URN (Uniform Resource Name)
Components of a URL
- Scheme
- Host
- Port
- Path
- Query
- Fragment
Request Response Cycle
Introduction
The request response cycle is the fundamental process through which a client, typically a web browser communicates with a server to request and receive resources. The key component of request response cycle include client, server and protocol.
Key Components
- Client
- Server
- Protocol
Steps in the Request-Response Cycle:
- Cient Sends a Request
- DNS Resolution
- Establishing a Connection
- Server Receives the Request
- Server Sends a Response
- Client Receives the response
Note Points:
-
HTTP Request Components
-
HTTP Response Components
-
HTTP Methods: GET, POST, PUT, PATCH, DELETE
-
Status Codes (reference: https://developer.mozilla.org/en-US/docs/Web/HTTP/Reference/Status)
-
Headers
- Request Headers
- Response Headers
-
Practical Use Cases and Examples
- Accessing a Webpage
- Submitting a Form
- API Calls
-
Best Practices
- Optimize Requests
- Handle Errors Gradually
- Secure Comunmications
Frontend / Client-Side
The fronted, also known as client-side refers to the part of a web-application that the users interact with directly. It includes everything users experience on their web browsers or mobile devices. The fontend is responsible for the presentation and behavior of a website or web application. It onvolves designing and implementing user interfaces, handling user interactions and presenting data retrieved from the backend.
Frontend (Client-Side)
- User Interface (UI)
- User Experience (UX)
- Technologies Used: html, css and javascript
- Frameworks and Libraries: react, vue.js, angular
How Frontend interacts with backend
- Client-Server Communication
- HTTP Request and Responses
- APIs
- Asynchronous Operations
- AJAX (Asynchronous Javascript and XML)
- Fetch API
Practical examples of frontend applications
- Static Websites
- Dynamic Web Applications
- Single-Page Applications (SPAs)
Frontend Development Best Practices
- Responsive Design
- Definition
- Techniques
- Performance Optimization
- Definition
- Techniques
- Accessibility
- Definition
- Techniques
Backend / Server Side
The backend also known as server side, refers to the part od a web application that runs on the server and is responsible for processing requests, managing data and performing application logic. So the complete application logic resides in the server on your server-side application. The backend handles the server side operations that support the functionality of a web application. It processes requests from the frontend, interacts with databases, performs computations and sends responses back to the client.
Key Components of Backend Development
- Server
- Application Logic
- Database
- APIs
How Backendd interacts with Frontend
- Client-Server Communication
- HTTP Requests and Responses
- APIs
- Data Handling
- Request Processing
- Response Generation
HTTP 1,2,3 | HTTPs
HTTP/1.0
- 1996
- Features
- Request-Response Model
- Stateless
- Connection
HTTP/1.1
-
1999
-
Features
- Persistent Connections
- Pipelining
- Additional Headers
-
Limitations
- Head Of Line Blocking
- Limited Multiplexing
HTTP/2
-
2015
-
Features
- Binary Protocol
- Multiplexing
- Header Compression
- Stream Prioritization
- Server Push
-
Advantages
- Reduced Latency
- Efficient Use of Connections
HTTP/3
- 2020
- Features
- Based on QUIC
- UDP Based
- Built-In Encryption
- Stream Multiplexing
- Advantages
- Faster Connection Establishment
- Improved Resilience
Quiz-12: Internet Quiz
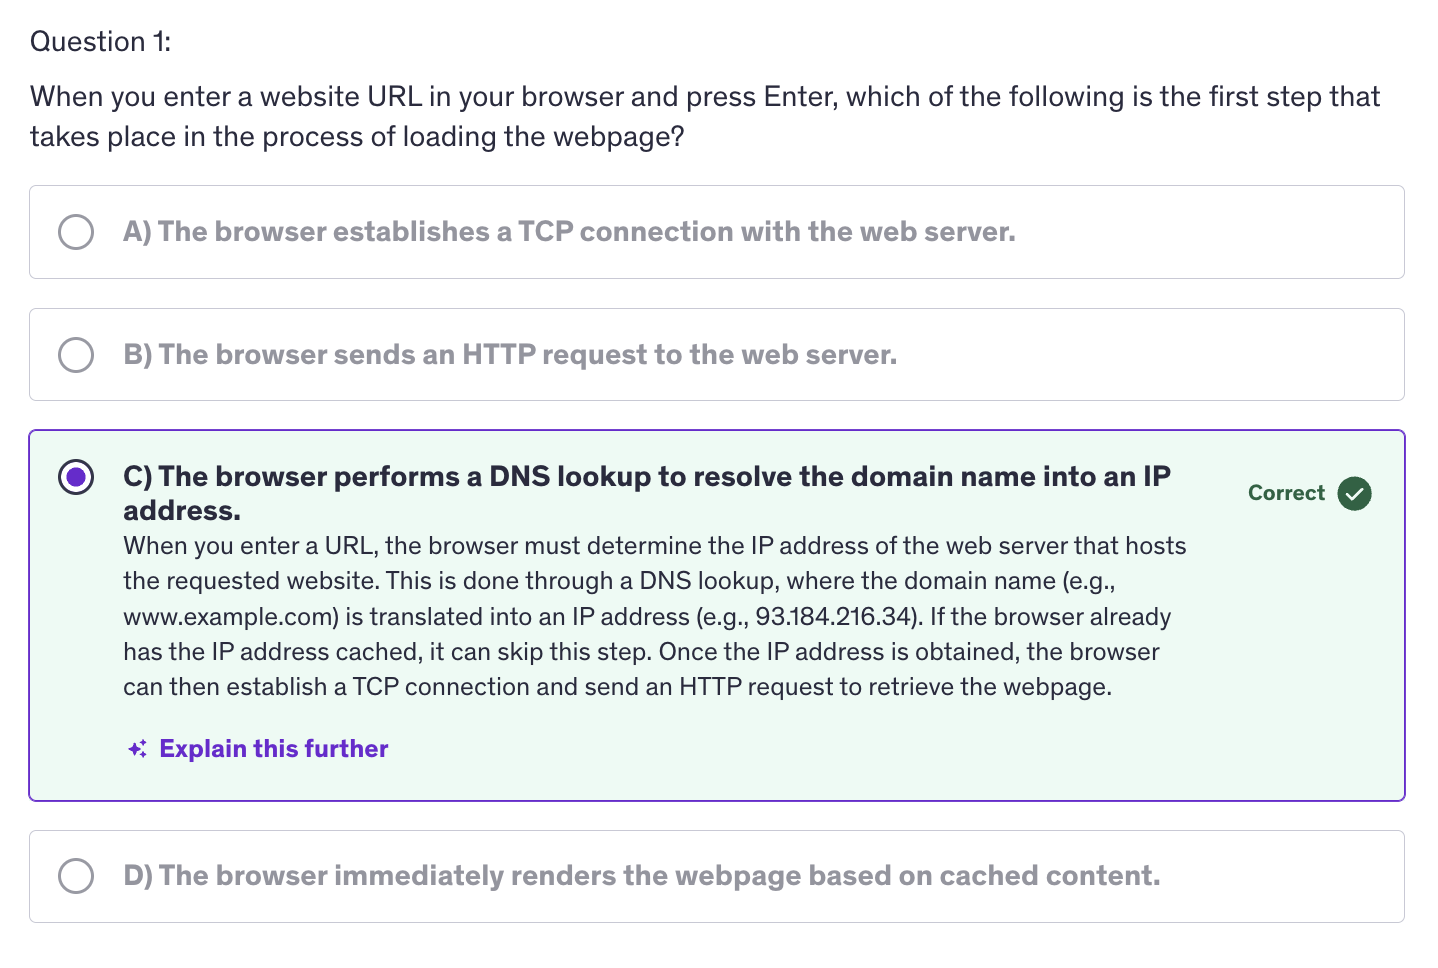
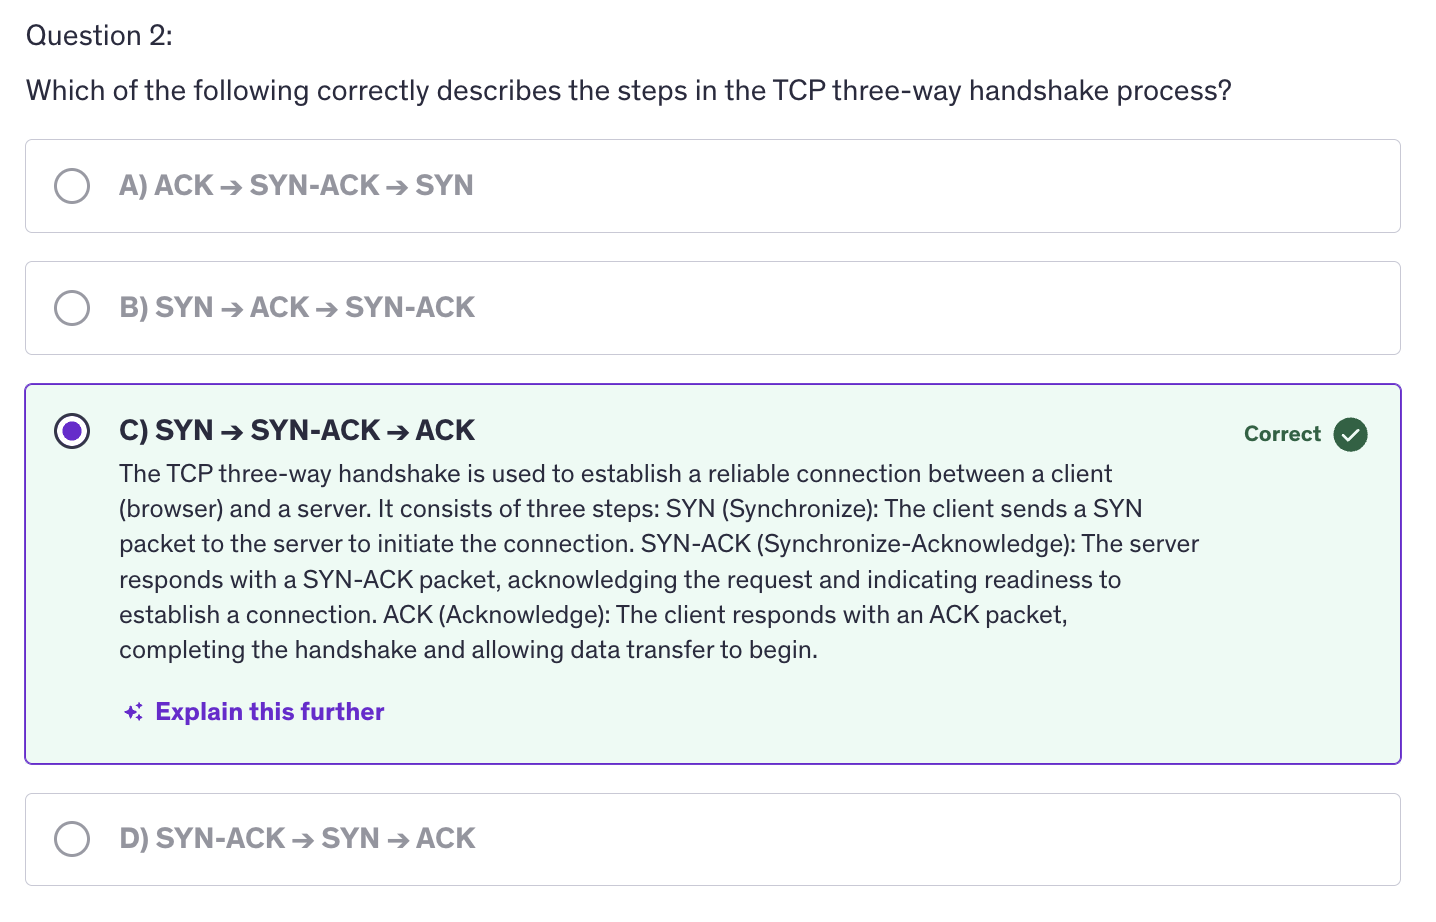
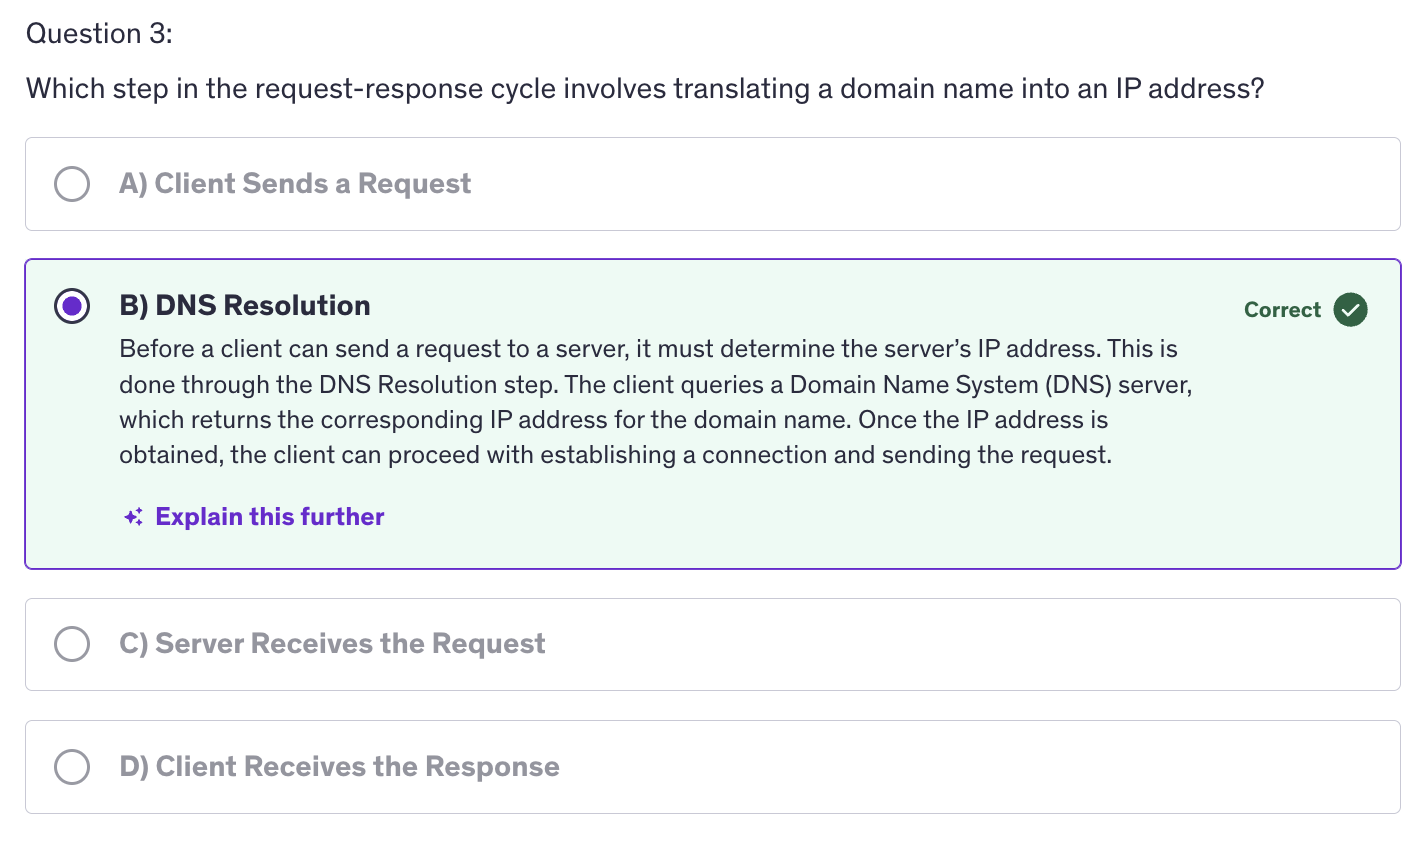
Protol Buffers
Language agnostic binary serialization format developed by Google. One of the key features of Protocol Buffers is that they can be used accross various programming languages.
Key Features:
- Efficiency
- Speed
- Cross-Platform Compatibility
Use Cases:
- Microservices Communication
- APIs
- Data Storage
- Game Development
Advantages of Using Protocol Buffers
- Backward and Forward Compatibility
- Strongly Typed
- Support for Multiple Languages
After creating the dot proto file, we use the Protoc compiler to generate source code in various programming. This generated source code includes classes or structures that can be used to serialize and deserialize our data. Once you have the generated code, you can use it to easily convert your data objects to and from the Protocol Buffers binary format, allowing for efficient data transmission or storage.
Syntax and Structure of .proto files
A .proto file is a text file that defines the structures of your data in a clear and concise way. It uses a specific syntax to describe the messages and the fields that compose them. The .proto file serves as a blueprint for generating the corresponding code in your preferred programming language.
Basic structure of a .proto file:
syntax = "proto3";  // Syntax Version
package example;

// Message definition
message Person{
    string name = 1;
    int32 id = 2;
    string email = 3;
}
Defining Fields
<fiedl_type> <field_name> = <field_number>;
Basic Field Types
- int32, int64: Signed integers of varying sizes.
- uint32, uint64: Unsigned integers
- float, double: Floating point numbers
- bool: Boolean values
- string: A sequence of characters
- bytes: A sequence of raw bytes
Enumerations
enum Gender{
    MALE=0;
    FEMALE=1;
    OTHER=2;
}
Nested Messages
message Address{
    string street = 1;
    string city = 2;
}
message Person{
    string name=1;
    Address address = 2;    // Nested message
}
Field Options : Repeated Fields, Required and Optional
message Person {
    repeated string phone_numbers = 1;  // List of phone numbers
}
Comments
In summary, .proto files serve as the foundation structure for defining your data in Protocol Buffers. Understanding the syntax and structure is essential for effectively creating messages and ensuring proper data serialization.
Packages in Protocol Buffers
-
Packages
-
Package Naming Conventions
- Lowercase
- Dot Notation
- Consistency
-
Importing Packages
File: person.proto
syntax = "proto3"
package example;
// Message definition
message Person{
    string name = 1;
    int32 id = 2;
}
File: main.proto
syntax = "proto3"
package main;
// Importing another .proto file
import "example/person.proto";
message Company{
    repeated example.Person employees = 1; // using the person message from the example package
}
When you generate code from your .proto files, the package declaration influences the namespace of the generated code. The code gets generated using the protoc compiler. For instance, if you define a package as example, the generated classes will be organized under that namespace in the target programming language.
- Avoiding Naming Conflicts
File: user.proto
syntax= "proto3"
package user;
message User {
    string username = 1;
}
File: admin.proto
syntax = "proto3";
package admin;
message User {
    string adminId = 1;
}
Using packages is essential to prevent naming conflicts in large code bases. For instance if you have multiple messages with the same name in different .proto files, using ensures that they can coexist without issues. In this case, both user messages can exist because they are in different packages.
In summary, packages in Protocol buffers are crucila for organizing your data structures, preventing naming conflicts and maintaining a clean code base. By following best practices in package naming and usagem you can create well structured and maintainable Protocol Buffers projects.
Messages in Protocol Buffers
Messages are the code data structures used in Protocol buffers to represent and serialize structured data. Understanding how to define and use messages is fundamental to effectively utilizing protocol buffers in our applications.
A Message in Protocol Buffer is a logical container for structured data. It allows you to define a set of fields, each with a specific type and purpose. Messages can represent complex data structures and are used to facilitate communication between systems. To define a message in a .proto file, use the message keyword followed by the message name and a block containing its fields.
Messages
syntax = "proto3"
package example;

// Defining a message
message Person{
    string name = 1;    // Field 1
    int32 id = 2;       // Field 2
    string email = 3;   // Field 3
}
A message can have the following components :
- Field Declarations
- Nested Messages
- Enumerations
Message Options
message OldPerson{
    option deprecated = true;   // This message is deprecated
    string name = 1;
}
Best Practices for Messages
- use meaningful names
- keep messages focused
- plan for evolution
Fields in Protocol buffers
Fields are the fundamental building blocks of messages in protocol buffers, and understanding how to define and use them is crucial for effective data serialization in Protocol buffers. A Field is a key value pair withing a message that represents a piece of data. Each field has a unique number, a data type and a name. Fields are used to define the structure of the data you want to serialize.
Field type includes the data type of the field such as int32, string or bool. Field name is the identifier for the field following standard naming conventions usually snakecase. Field number is a unique positive integers assigned to the field, which is used for serialization.
Fields
<field_type> <field_name> = <field_number>;
Field Options
- In
proto2, fields could be marked asrequiredoroptional. Inproto3all fields are optional by default. - Use
repeatedto define a field that can contain multiple values of the same type. - You can specify additional options such as
deafult,packedand more.
Field Numbers
- Use numbers between 1 and 15 for frequently used fields, as these require only one byte in the binary encoding.
- Use numbers between 16 and 2047 for less frequently used fields.
- Avoid changing field numbers once they are assigned, as this can lead to incompatability with serialized data.
Best Practices
- Use meaningful names
- avoid reserved field names
Interview Questions and Answers
1. What is the Go compiler and how does it work?
Answer: The Go compiler translates Go source code into machine code or an intermediate representation. When you run the go build command, the Go toolchain compiles the code, linking it with the necessary libraries. The Go compiler performs various checks, including syntax analysis and type checking, before generating the final binary.
2. Explain the Go runtime and its responsibilities.
Answer: The Go runtime is responsible for managing memory, goroutine scheduling, garbage collection, and low-level system interactions. It provides the necessary support for features like goroutines and channels, enabling concurrent programming. The runtime also manages stack growth and shrinks, as well as handles panics and recoveries in Go applications.
3. What are some common packages in the Go standard library?
Answer: The Go standard library includes several important packages, such as:
fmt: For formatted I/O operations.
net/http: For building HTTP servers and clients.
os: For interacting with the operating system (file handling, environment variables).
encoding/json: For JSON encoding and decoding.
sync: For synchronization primitives like Mutex and WaitGroup.
4. What is the purpose of the import statement in Go?
Answer: The import statement in Go is used to include external packages in a Go program. It allows you to use functions, types, and variables defined in other packages. Importing can be done using the package name directly or using an alias to avoid naming conflicts.
5. Can you explain the difference between a slice and an array in Go?
Answer: An array is a fixed-size collection of elements of the same type, defined at compile time. For example, var arr [5]int creates an array of 5 integers. In contrast, a slice is a dynamically-sized, flexible view into the elements of an array. Slices can grow or shrink in size, and they are created using the make function or by slicing an array. For example, slice := make([]int, 0, 5) creates a slice with an initial capacity of 5.
- What is a struct in Go, and how do you define one? Answer: A struct in Go is a composite data type that groups together variables (fields) under a single name. Structs are used to model complex data. You define a struct using the type keyword. For example:
type Person struct {
Name string
Age int
}
-
How does garbage collection work in Go? Answer: Go uses a concurrent garbage collector that automatically manages memory allocation and deallocation. It identifies and frees up memory occupied by objects that are no longer reachable or referenced by the program. The garbage collector runs in the background, allowing developers to focus on writing code without manual memory management.
-
What are the zero values of different data types in Go? Answer: In Go, each data type has a default zero value when declared without initialization:
int: 0
float64: 0.0
string: ""
bool: false
pointer: nil
slice, map, channel: nil Structs have zero values for all their fields.
-
What is the purpose of the defer statement in Go? Answer: The defer statement is used to schedule a function call to be executed after the surrounding function completes, regardless of whether it exits normally or through a panic. This is useful for resource cleanup tasks, such as closing files or releasing locks. Deferred calls are executed in last-in-first-out order.
-
Explain how to create and use a map in Go. Answer: A map in Go is a built-in data type that associates keys with values. You can create a map using the make function or a map literal. For example:
myMap := make(map[string]int)
myMap["apple"] = 5
myMap["banana"] = 3
You can access and modify the values using their keys, and you can check for the existence of a key using the second return value from the lookup operation:
value, exists := myMap["apple"]
- How do you declare a variable in Go? Answer: In Go, you can declare a variable using the var keyword, short variable declaration using :=, or by using the const keyword for constants. For example:
var x int // Declares a variable x of type int
y := 10 // Short variable declaration
const pi = 3.14 // Declares a constant
- What are the different types of variables in Go? Answer: Go supports several types of variables, including:
Basic types: int, float64, bool, string
Composite types: array, struct, slice, map, channel
Reference types: pointer
Function types
- What is the syntax for performing arithmetic operations in Go? Answer: Arithmetic operations in Go are performed using standard operators. The common arithmetic operators are:
Addition: +
Subtraction: -
Multiplication: *
Division: /
Modulus: %
For example:
a := 10
b := 3
sum := a + b // 13
difference := a - b // 7
product := a * b // 30
quotient := a / b // 3
remainder := a % b // 1
- How does a for loop work in Go? Answer: In Go, the for loop is the only looping construct. It can be used in several ways:
Basic loop:
for i := 0; i < 5; i++ {
fmt.Println(i)
} Looping through a slice:
fruits := []string{"apple", "banana", "cherry"}
for index, fruit := range fruits {
fmt.Println(index, fruit)
} Infinite loop:
for {
// code to execute indefinitely
} 15. What are the different types of operators in Go? Answer: Go supports several types of operators, including:
Arithmetic Operators: +, -, *, /, %
Comparison Operators: ==, !=, >, <, >=, <=
Logical Operators: && (AND), || (OR), ! (NOT)
Bitwise Operators: &, |, ^, <<, >>
Assignment Operators: =, +=, -=, *=, /=, %=
- What is the syntax for an if-else condition in Go? Answer: The if statement in Go allows conditional execution of code. The syntax is as follows:
if condition {
// code to execute if condition is true
} else if anotherCondition {
// code to execute if another condition is true
} else {
// code to execute if no conditions are true
}
For example:
x := 10 if x > 0 { fmt.Println("Positive") } else if x < 0 { fmt.Println("Negative") } else { fmt.Println("Zero") }
- Can you explain the difference between if and switch statements in Go? Answer: Both if and switch statements are used for conditional execution, but they have different use cases:
The if statement is used for simple conditions and can handle complex boolean expressions.
The switch statement is more readable for multiple discrete cases based on the value of a single expression. For example:
switch day := "Monday"; day { case "Monday": fmt.Println("Start of the week") case "Friday": fmt.Println("End of the week") default: fmt.Println("Midweek") } 18. How do you use logical operators in Go? Answer: Logical operators are used to combine multiple boolean expressions. The common logical operators in Go are:
&& (AND): Returns true if both operands are true.
|| (OR): Returns true if at least one operand is true.
! (NOT): Reverses the boolean value of the operand. For example:
a := true b := false if a && !b { fmt.Println("Condition is true") } 19. What happens if you omit the condition in an if statement? Answer: Omitting the condition in an if statement will result in a compile-time error in Go. Unlike some other languages, Go requires a boolean expression in the condition. For example:
if { // This will cause a compile-time error
fmt.Println("Hello")
}
- How do you use the short variable declaration syntax in Go? Answer: The short variable declaration syntax := allows you to declare and initialize a variable in a single statement. It can only be used inside functions. For example:
x := 5 // Declare and initialize x with 5
name := "Go" // Declare and initialize name with "Go"
If the variable is already declared in the same scope, you can use = to assign a new value without redeclaring it.
-
What is a switch statement in Go, and when would you use it? Answer: A switch statement in Go is a control structure that allows you to execute different blocks of code based on the value of a variable or expression. It can be seen as a more readable alternative to a series of if-else statements, especially when dealing with multiple conditions that depend on a single value. You would use a switch statement when you have a variable that can take multiple discrete values, allowing for cleaner and more organized code.
-
How do arrays work in Go, and what are their characteristics? Answer: Arrays in Go are fixed-size collections of elements of the same type. Once an array is declared, its size cannot change. Each element in the array can be accessed using an index, with indexing starting from zero. Arrays are value types, meaning that when you assign an array to another array, a copy of the entire array is made. This can lead to inefficiencies if arrays are large. Because of their fixed size, arrays are often less flexible compared to slices.
-
What are slices in Go, and how do they differ from arrays? Answer: Slices in Go are dynamic, flexible views into the elements of an array. Unlike arrays, slices can grow and shrink in size, allowing for more flexibility in handling collections of data. A slice consists of a pointer to the underlying array, its length, and its capacity. Changes made to a slice will affect the underlying array, but slices themselves are reference types, so when passed to functions, they do not create copies of the data. This makes slices more efficient for managing collections compared to arrays.
-
Explain the concept of maps in Go and their use cases. Answer: Maps in Go are built-in data structures that associate keys with values, allowing for efficient data retrieval. They are similar to hash tables or dictionaries in other programming languages. Maps are unordered collections, and each key must be unique within the map. You can use maps to store data where quick lookups are required, such as counting occurrences of elements, grouping data, or caching results. Maps in Go are reference types, so they should be initialized before use.
-
What is the purpose of the range keyword in Go, and how is it typically used? Answer: The range keyword in Go is used to iterate over various data structures, such as arrays, slices, maps, and strings. When using range, it returns two values: the index (or key) and the corresponding value. This makes it easy to loop through elements without manually managing the index. It is commonly used in for loops to process collections of data in a clean and concise manner.
-
Can you describe how a switch statement can simplify code readability? Answer: A switch statement can significantly improve code readability by providing a clear structure for conditional logic. Instead of having multiple if-else statements, a switch allows you to group related conditions under a single construct, making it easier to understand the flow of logic. It also reduces indentation levels and clutter, allowing developers to quickly grasp the decision-making process based on the variable’s value.
-
What are the limitations of using arrays in Go? Answer: The primary limitations of arrays in Go are their fixed size and value type behavior. Once an array is declared, its length cannot change, making them inflexible for scenarios where the size of the data is unknown or variable. Additionally, because arrays are value types, passing them to functions results in copying the entire array, which can lead to inefficiencies with larger data sets. This is why slices are generally preferred for most applications.
-
How do maps handle key uniqueness in Go? Answer: In Go, each key in a map must be unique. If you attempt to assign a value to a key that already exists in the map, the existing value will be overwritten with the new value. This ensures that each key always maps to a single, up-to-date value. This property is essential for ensuring data integrity within a map, making it a powerful tool for lookups and associations.
-
What are the advantages of using slices over arrays? Answer: Slices offer several advantages over arrays, including:
Dynamic Size: Slices can grow and shrink in size, allowing for more flexibility in data management.
Reference Type: Slices are reference types, meaning they provide a more efficient way to pass collections of data to functions without copying the entire data structure.
Built-in Functions: Go provides a rich set of built-in functions to manipulate slices, such as append, which allows you to easily add elements to a slice. These characteristics make slices more suitable for most use cases compared to fixed-size arrays.
-
How does the range keyword work with maps, and what does it return? Answer: When using the range keyword with maps, it iterates over each key-value pair in the map. For each iteration, range returns two values: the key and the corresponding value. This allows developers to easily access and work with both elements in a straightforward manner. The order of iteration is not guaranteed, as maps are unordered collections. Using range makes processing maps more efficient and less error-prone than manually managing keys and values.
-
What are functions in Go, and what is their significance? Answer: Functions in Go are reusable blocks of code that perform specific tasks. They allow developers to encapsulate logic, making code more organized and modular. Functions can take parameters and return values, enabling the creation of flexible and maintainable code. They are significant because they promote code reuse, enhance readability, and facilitate easier debugging and testing.
-
Can you explain the concept of multiple return values in Go? Answer: In Go, functions can return multiple values, which is a unique feature of the language. This allows a function to provide more information about its execution, such as returning a result along with an error value. This is particularly useful for error handling, as it enables developers to check for errors directly while obtaining the desired output. The ability to return multiple values simplifies code and improves clarity by reducing the need for complex structures.
-
What are variadic functions in Go, and when would you use them? Answer: Variadic functions in Go are functions that can accept a variable number of arguments. The parameters are specified using an ellipsis (...) before the type, allowing you to pass any number of arguments of that type. Variadic functions are useful when you want to allow flexibility in the number of inputs, such as when concatenating strings or processing lists of items. They simplify function calls by avoiding the need to create arrays or slices explicitly.
-
How does the defer statement work in Go, and what are its common use cases? Answer: The defer statement in Go is used to postpone the execution of a function until the surrounding function completes. Defer statements are often used for cleanup tasks, such as closing files, releasing resources, or unlocking mutexes. The deferred function calls are executed in last-in-first-out order, which helps manage resources efficiently and ensures that cleanup code runs even if an error occurs, thus preventing resource leaks.
-
What is the purpose of the init function in Go? Answer: The init function in Go is a special function that is automatically called when a package is initialized. It is used to set up necessary conditions before the main execution of the program starts. The init function does not take any parameters and does not return any values. It is commonly used for initializing global variables, configuring settings, or preparing resources required by the package, ensuring that the package is ready for use.
-
How do functions contribute to code organization and modularity in Go? Answer: Functions promote code organization and modularity by allowing developers to break down complex tasks into smaller, manageable pieces. Each function can encapsulate a specific responsibility, making it easier to understand, maintain, and test. This modular approach reduces code duplication and enhances readability, as developers can focus on one function at a time without being overwhelmed by the entire codebase.
-
In what scenarios might you prefer using multiple return values over structs in Go? Answer: You might prefer using multiple return values when a function needs to return a primary result along with an error status or additional context about the result. This approach is simpler and more direct, particularly for functions where the error condition is significant. Using multiple return values can eliminate the overhead of defining a struct solely for this purpose, streamlining the code while keeping it clear and straightforward.
-
What are the advantages of using variadic functions in Go? Answer: Variadic functions offer several advantages, including:
Flexibility: They allow the passing of any number of arguments, making functions more versatile and easier to use in various contexts.
Simplified Function Calls: Users can call the function with different numbers of arguments without needing to create and manage an array or slice explicitly.
Cleaner Code: Variadic functions help maintain clean and concise code, especially when dealing with collections of items, as they avoid cumbersome constructs.
-
How does the defer statement help in error handling in Go? Answer: The defer statement aids in error handling by ensuring that cleanup code runs regardless of whether a function exits normally or due to an error. For example, if a function encounters a panic or an error, deferred calls will still execute, allowing developers to safely release resources or perform necessary cleanup. This guarantees that the program maintains stability and prevents resource leaks, making error handling more robust.
-
Can you explain how the init function interacts with package initialization in Go? Answer: The init function is automatically called by the Go runtime before the main function and is invoked once for each package when it is imported. It allows developers to perform necessary initialization steps, such as setting up configuration values or preparing global variables. This automatic invocation ensures that packages are correctly initialized without needing explicit calls, leading to better encapsulation and organization of code across the application.
-
What is a panic in Go, and when does it occur? Answer: A panic in Go is a runtime error that indicates an unexpected situation in the program, leading to the abnormal termination of the program's execution. Panics can occur due to various reasons, such as dereferencing a nil pointer, attempting to access an out-of-bounds index in an array or slice, or using a type assertion that fails. When a panic occurs, the program stops executing the current function and starts unwinding the stack, triggering deferred functions until it reaches the main function.
-
How does the recover function work in Go, and what is its purpose? Answer: The recover function in Go is used to regain control after a panic occurs. It can only be called within a deferred function, and it stops the panic process by returning the value passed to the panic call. This allows developers to handle the error gracefully and continue the program's execution. The main purpose of recover is to provide a mechanism for recovering from panics, enabling error handling without crashing the program entirely.
-
What is the relationship between panic and recover in Go? Answer: The relationship between panic and recover is that they work together to manage errors in Go. When a panic occurs, the normal flow of execution is interrupted, and the program starts unwinding the stack. If a deferred function calls recover, it can intercept the panic, preventing the program from terminating. This allows the developer to implement error handling logic and resume normal execution, effectively using recover to manage the consequences of a panic.
-
When should you use panic and recover in your Go programs? Answer: Panic and recover should be used sparingly and primarily for exceptional situations that are not expected to occur during normal operation. For instance, you might use panic when there is a programming error, such as accessing a nil pointer or an invalid type assertion. In contrast, recover should be used to handle these panics gracefully, particularly in situations where you want to maintain application stability and prevent abrupt termination, such as in web servers or applications with critical background tasks.
-
What is the role of the exit function in Go, and how is it different from panic? Answer: The exit function in Go, specifically os.Exit, is used to terminate the program immediately with a specified exit status code. Unlike panic, which unwinds the stack and executes deferred functions, os.Exit does not allow any deferred functions to run and stops the program execution instantly. It is typically used when you need to exit the program due to a critical error or when the program completes its intended operation. The exit status can be used to indicate success (0) or failure (non-zero) to the operating system.
-
What happens to deferred functions when a panic occurs in Go? Answer: When a panic occurs in Go, the program starts unwinding the stack, and all deferred functions in the current function's scope are executed in the reverse order of their declaration. This behavior allows developers to clean up resources or perform necessary actions before the program terminates. If a deferred function contains a call to recover, it can intercept the panic, allowing the program to continue executing rather than crashing.
-
Can you recover from a panic in any part of the program? Answer: No, you can only recover from a panic if the recover function is called within a deferred function. If the panic occurs in a nested function, the recovery must happen in a deferred function of the function that initiated the panic. This limitation emphasizes the need to structure error handling carefully and ensure that recovery logic is in the appropriate scope.
-
What are some best practices for using panic and recover in Go? Answer: Best practices for using panic and recover include:
Use panic only for unrecoverable errors or programming mistakes that should not occur during normal execution.
Avoid using panic for regular error handling; instead, return errors for expected failure conditions.
Always handle recover in a controlled manner, such as in top-level functions or within goroutines, to ensure graceful handling of unexpected situations.
Log the error details when recovering to aid in debugging and maintaining application stability.
-
How does panic affect the flow of a Go program? Answer: Panic disrupts the normal flow of a Go program by terminating the current function's execution and triggering the stack unwinding process. As the stack unwinds, all deferred functions are executed in reverse order until the program reaches the top-level function (main). If not recovered, the program will ultimately terminate, which can lead to a poor user experience or loss of unsaved data. This behavior makes understanding panic's impact crucial for effective error handling.
-
What should developers keep in mind when using os.Exit in their Go applications? Answer: When using os.Exit, developers should remember that it terminates the program immediately and does not execute any deferred functions. This means that any resource cleanup, logging, or important final operations defined in deferred statements will not run. Developers should use os.Exit judiciously and ensure that any necessary cleanup is performed before calling it. Additionally, they should provide meaningful exit codes to help indicate the program's success or failure to the operating system.
-
What is a closure in Go, and how does it work? Answer: A closure in Go is a function that captures the lexical scope in which it is defined, allowing it to access variables from that scope even after the outer function has finished executing. Closures enable the creation of functions with persistent state, as they can remember the values of the captured variables. This feature is useful for scenarios like callbacks, event handlers, or when maintaining state in a concurrent environment.
-
Can you explain recursion and its use cases in Go? Answer: Recursion is a programming technique where a function calls itself to solve a problem. In Go, a recursive function typically has a base case to stop the recursion and a recursive case that breaks the problem into smaller subproblems. Recursion is useful for solving problems that can be defined in terms of smaller instances of the same problem, such as calculating factorials, traversing tree structures, or implementing algorithms like quicksort and mergesort.
-
What are pointers in Go, and why are they important? Answer: Pointers in Go are variables that hold the memory address of another variable. They are important because they allow developers to directly manipulate the memory of variables, which can lead to more efficient memory usage and performance. Pointers enable passing large structs or arrays to functions without copying the entire data structure, facilitating changes to the original variable. They also help in implementing data structures like linked lists and trees.
-
How do strings work in Go, and what are their characteristics? Answer: Strings in Go are immutable sequences of bytes, typically representing UTF-8 encoded text. Once a string is created, its content cannot be modified; any operations that seem to modify a string actually create a new string. Strings can be concatenated, compared, and sliced, but since they are immutable, these operations do not change the original string. This immutability contributes to thread safety and performance in concurrent applications.
-
What are runes in Go, and how do they differ from strings? Answer: Runes in Go are a data type that represents a single Unicode code point. A rune is an alias for the int32 type, allowing it to hold any valid Unicode character. Runes differ from strings in that strings are collections of bytes, while runes represent individual characters. This distinction is important when dealing with multi-byte characters in Unicode, as a single character may occupy more than one byte in a string. Runes enable proper handling of text and ensure accurate processing of characters from various languages.
-
What are some common use cases for closures in Go? Answer: Common use cases for closures in Go include:
Callback Functions: Using closures to create functions that can be passed as arguments to other functions.
Maintaining State: Capturing variables to maintain state across multiple invocations of a function, such as in event handling or middleware.
Data Hiding: Encapsulating functionality and protecting internal variables from external access, providing a clean interface for interacting with the captured data.
- What are the potential drawbacks of using recursion in Go? Answer: The potential drawbacks of using recursion in Go include:
Stack Overflow: Recursive calls consume stack space, and deep recursion can lead to a stack overflow if the base case is not reached promptly.
Performance Overhead: Each function call incurs overhead, which can affect performance, especially if the recursion depth is significant.
Readability Concerns: While recursion can simplify some problems, it may also make the code harder to understand for those unfamiliar with the concept, especially in complex cases.
-
Why are pointers considered a powerful feature in Go? Answer: Pointers are considered powerful in Go because they provide control over memory management and data manipulation. They enable developers to pass large data structures to functions without the overhead of copying, allowing modifications to the original data. Pointers also facilitate the creation of complex data structures, such as linked lists and trees, by allowing nodes to reference each other dynamically. This flexibility and efficiency make pointers an essential tool for performance optimization in Go applications.
-
How do you compare strings in Go, and what factors should you consider? Answer: Strings in Go can be compared using the comparison operators (==, !=, <, >, <=, >=). When comparing strings, factors to consider include:
Case Sensitivity: String comparisons in Go are case-sensitive, meaning "hello" and "Hello" are considered different.
Encoding: Ensure that the strings being compared are encoded in the same character set (typically UTF-8) to avoid unexpected results.
Performance: Comparing long strings may incur performance costs, so it's essential to consider efficiency when performing numerous comparisons.
-
What is the significance of the len function in relation to strings and runes in Go? Answer: The len function in Go returns the number of bytes in a string, not the number of characters. This distinction is crucial when working with Unicode, as some characters may consist of multiple bytes. For runes, the len function can be misleading if used directly on a string; to accurately determine the number of characters (runes) in a string, you should convert the string to a slice of runes and then use len. Understanding this difference is vital for correctly handling text in various languages and ensuring accurate string manipulation.
-
What are formatting verbs in Go, and how are they used? Answer: Formatting verbs in Go are placeholders used in string formatting functions to specify how to format different types of data. They are used with the fmt package's functions, such as Printf, Sprintf, and Println. For example, verbs like %s format strings, %d formats integers, and %v formats values in a default format. Formatting verbs help create readable output by controlling the representation of various data types when printing or logging.
-
Can you explain the purpose of the fmt package in Go? Answer: The fmt package in Go provides I/O formatting functions for input and output operations. It includes functions for formatted printing to standard output or to strings, reading input, and formatting data for display. Commonly used functions include Print, Printf, Println, Sprintf, and Scanf. The fmt package simplifies the process of displaying data, making it easier to generate formatted output for debugging, logging, or user interaction.
-
What is a struct in Go, and how is it different from a class in other programming languages? Answer: A struct in Go is a composite data type that groups together variables (fields) under a single name. Structs are used to create complex data structures that represent real-world entities. Unlike classes in object-oriented programming languages, structs in Go do not have methods or inheritance. Instead, methods can be defined separately and associated with structs, enabling behavior without encapsulating it within the struct itself. This approach promotes a composition-based design rather than a strict inheritance model.
-
How do methods work in Go, and how are they associated with structs? Answer: Methods in Go are functions that have a receiver, allowing them to be associated with a specific type, such as a struct. The receiver is specified in the function signature and can be either a value receiver or a pointer receiver. Value receivers operate on a copy of the struct, while pointer receivers allow methods to modify the original struct. Methods enable you to define behavior for structs, making it easier to encapsulate related functionality and manage data.
-
What is an interface in Go, and how does it differ from traditional object-oriented interfaces? Answer: An interface in Go is a type that defines a set of method signatures without implementing them. Any type that provides implementations for all the methods in an interface is said to implement that interface, allowing for polymorphism. Unlike traditional object-oriented interfaces, Go does not require explicit declarations of intent to implement an interface; types automatically satisfy an interface by implementing its methods. This approach promotes flexibility and decoupling in code design.
-
What are some common use cases for using structs in Go? Answer: Common use cases for structs in Go include:
Data Modeling: Representing real-world entities, such as users, products, or transactions, with associated fields.
Configuration Management: Grouping configuration settings into a single structure for easier management and organization.
API Responses: Structuring JSON or XML responses for APIs, allowing easy serialization and deserialization of data.
Complex Data Structures: Creating linked lists, trees, or graphs by combining multiple structs.
-
How can interfaces enhance code flexibility and maintainability in Go? Answer: Interfaces enhance code flexibility and maintainability by promoting decoupling between components. By relying on interfaces rather than concrete types, developers can easily swap implementations without modifying the code that uses the interface. This allows for more modular design, easier testing (using mock implementations), and the ability to extend functionality without altering existing code. Interfaces also enable polymorphism, allowing different types to be treated uniformly based on shared behavior.
-
What are the advantages of using pointer receivers for methods in Go? Answer: Using pointer receivers for methods in Go has several advantages:
Mutability: Pointer receivers allow methods to modify the original struct, making it possible to change the state of the receiver.
Efficiency: Passing a pointer to a large struct avoids copying the entire struct, which can improve performance and reduce memory usage.
Consistency: Using pointer receivers ensures that all methods can operate on the same instance of the struct, maintaining consistency across method calls.
-
What is the purpose of the %+v formatting verb in the fmt package? Answer: The %+v formatting verb in the fmt package is used to print the detailed representation of a struct, including its field names and values. This verb is particularly useful for debugging, as it provides a clear view of the internal state of the struct. By using %+v, developers can quickly inspect the contents of structs without manually formatting each field, making it easier to identify issues or understand data structures during development.
-
How do you define an interface with multiple methods, and what are the implications for implementing types? Answer: To define an interface with multiple methods in Go, you simply specify the method signatures within the interface definition. Any type that implements all the methods declared in the interface satisfies that interface. The implication is that implementing types must provide concrete implementations for each method, enabling polymorphism. This encourages designing components based on shared behaviors rather than specific implementations, fostering a more flexible and extensible codebase.
-
What is struct embedding in Go, and how does it work? Answer: Struct embedding in Go is a way to include one struct type within another, allowing the outer struct to inherit the fields and methods of the embedded struct. This provides a form of composition, where the outer struct can access the embedded struct's fields and methods directly. Struct embedding promotes code reuse and helps organize related data and behavior without requiring inheritance, which is not supported in Go.
-
Can you explain generics in Go and their significance? Answer: Generics in Go allow developers to write functions and data structures that can operate on any data type while maintaining type safety. Introduced in Go 1.18, generics enable the creation of reusable code components, such as generic functions, maps, and slices, that work with different types without sacrificing performance. This feature reduces code duplication and enhances flexibility, making it easier to handle a variety of data types in a type-safe manner.
-
What are errors in Go, and how are they handled? Answer: Errors in Go are represented by the built-in error type, which is an interface that provides a method to retrieve error messages. Error handling in Go follows a conventional approach where functions return an error value alongside other results. Developers check for errors after calling functions and handle them appropriately, often using conditional statements. This explicit error handling model encourages developers to write robust code and ensures that errors are acknowledged and managed rather than ignored.
-
What are some common string functions in Go, and how are they used? Answer: Common string functions in Go, provided by the strings package, include:
strings.Contains: Checks if a substring exists within a string.
strings.Split: Divides a string into a slice based on a specified delimiter.
strings.ToUpper and strings.ToLower: Convert strings to uppercase or lowercase.
strings.TrimSpace: Removes leading and trailing whitespace from a string. These functions facilitate string manipulation and analysis, making it easier to work with text data in Go applications.
-
How does string formatting work in Go, and what are its key functions? Answer: String formatting in Go is primarily handled by the fmt package, which provides functions for creating formatted strings. Key functions include Sprintf for returning a formatted string, Printf for printing formatted output to the console, and Sprint for concatenating strings with formatting. Formatting verbs, such as %s, %d, and %v, specify how to format different data types. This functionality allows developers to produce readable and structured output for various contexts, such as logging and user interfaces.
-
What are the benefits of using struct embedding over inheritance in Go? Answer: The benefits of struct embedding over inheritance in Go include:
Composition over Inheritance: Struct embedding promotes the use of composition, leading to more flexible designs that can be easily modified or extended without impacting existing code.
Simplicity: Embedding is straightforward, allowing developers to combine functionalities without the complexity associated with inheritance hierarchies.
Reduced Coupling: Embedding reduces tight coupling between components, making it easier to maintain and test code independently.
-
What is the significance of type parameters in Go's generics? Answer: Type parameters in Go's generics enable developers to define functions and data types that can operate on different types while maintaining type safety. By specifying type parameters, developers can create reusable code that adapts to various data types without sacrificing performance or clarity. This allows for more expressive code, as developers can create collections, algorithms, and utility functions that work seamlessly with any type, reducing code duplication and enhancing flexibility.
-
How do you propagate errors in Go, and what best practices should you follow? Answer: In Go, errors are propagated by returning an error value from functions. Best practices for error propagation include:
Return Early: Check for errors immediately after function calls and return them to the caller to avoid complex nested error handling.
Wrap Errors: Use error wrapping to add context to errors when returning them, making it easier to diagnose issues later.
Log Errors: Consider logging errors at appropriate levels to maintain visibility and aid debugging while allowing the program to handle them gracefully.
- How can you compare strings in Go, and what factors should you consider? Answer: Strings in Go can be compared using comparison operators like ==, !=, <, >, <=, and >=. Factors to consider when comparing strings include:
Case Sensitivity: Comparisons are case-sensitive, meaning "Hello" and "hello" are considered different.
Encoding: Ensure that strings are encoded in the same format (usually UTF-8) to avoid unexpected results during comparisons.
Performance: Be mindful of performance when comparing large strings or performing multiple comparisons, as it may impact efficiency.
-
What role does the error interface play in Go's error handling model? Answer: The error interface in Go plays a central role in the error handling model by providing a standardized way to represent errors. It defines a single method, Error(), which returns a string describing the error. This uniformity allows functions to return any type that implements the error interface, enabling developers to handle different error types consistently. The error interface encourages explicit error handling and promotes the development of robust applications by ensuring that errors are acknowledged and addressed.
-
What are text templates in Go, and how are they used? Answer: Text templates in Go, provided by the text/template package, are a way to generate formatted text output based on a template and data. They allow developers to create dynamic content by defining placeholders within a template that are replaced with actual values at runtime. Text templates are commonly used for generating HTML, emails, or configuration files. The templating system supports conditional logic, loops, and custom functions, enabling the creation of complex and dynamic output.
-
Can you explain the purpose of regular expressions in Go? Answer: Regular expressions in Go are a powerful tool for pattern matching and text manipulation. The regexp package provides support for defining and using regular expressions to search, match, and replace strings based on specific patterns. Regular expressions are useful for tasks such as validating input formats (like email addresses), extracting substrings, and performing complex string replacements. They allow developers to perform these operations concisely and efficiently.
-
How does time management work in Go, and what are the key types and functions? Answer: Time management in Go is handled through the time package, which provides types and functions for working with dates and times. The key type is Time, which represents a specific point in time, and the package includes functions for getting the current time, formatting and parsing time values, and performing arithmetic operations on time (e.g., adding or subtracting durations). The time package also supports time zones and provides methods to manipulate and compare time values, making it comprehensive for various time-related operations.
-
What is the epoch time, and how is it represented in Go? Answer: Epoch time, also known as Unix time, is a system for tracking time that counts the number of seconds that have elapsed since January 1, 1970, at 00:00:00 UTC. In Go, epoch time can be represented using the Time type in the time package. The Unix() method returns the epoch time as an integer value, while the UnixNano() method provides a more precise representation in nanoseconds. Epoch time is commonly used in computing for timestamps and time calculations.
-
How can you format and parse time in Go? Answer: In Go, time formatting and parsing are done using the Format and Parse methods of the Time type. The Format method allows developers to convert a Time value into a string representation based on a specified layout, which is defined using a reference time (the specific date and time "Mon Jan 2 15:04:05 MST 2006"). The Parse method converts a formatted string back into a Time value based on the provided layout. This approach enables flexible handling of date and time representations for various applications.
-
What are the differences between UTC and local time in Go? Answer: UTC (Coordinated Universal Time) is a time standard that is not subject to time zones or daylight saving changes, making it a consistent reference point for time. Local time, on the other hand, is specific to a geographical region and can vary based on time zones and daylight saving time adjustments. In Go, the time package provides support for both UTC and local time. Developers can convert between the two using methods like In() for changing the time zone and can retrieve the current time in either format using time.Now() with appropriate location settings.
-
How do you handle time zones in Go? Answer: Handling time zones in Go is facilitated by the time package, which provides the Location type to represent different time zones. Developers can obtain time zone information using the LoadLocation function, which loads time zone data from the IANA Time Zone Database. Once a location is loaded, the In() method of the Time type can be used to convert a Time value to the specified time zone. This allows for accurate date and time representation across different regions and ensures proper calculations and comparisons involving local times.
-
What is the purpose of the Duration type in Go's time package? Answer: The Duration type in Go's time package represents the elapsed time between two Time values and is measured in nanoseconds. It is used to perform arithmetic operations on time, such as adding or subtracting durations from Time values. The Duration type provides methods for expressing time intervals in various units (seconds, minutes, hours, etc.) and enables developers to easily work with time intervals in applications, such as timeouts, delays, and scheduling tasks.
-
What are some common use cases for text templates in Go? Answer: Common use cases for text templates in Go include:
Generating HTML: Dynamically creating HTML pages or components based on data from databases or user input.
Email Templating: Creating personalized email content with variables and conditional logic.
Configuration Files: Generating configuration files from templates, allowing for customization based on environment or user settings.
Reports: Producing structured reports in plain text or other formats using template data.
-
How can you validate input using regular expressions in Go? Answer: Input validation using regular expressions in Go involves defining a pattern that represents the expected format of valid input and using the MatchString or FindString methods from the regexp package to test whether the input matches the pattern. Regular expressions allow developers to check for various conditions, such as valid email formats, phone numbers, or specific string patterns, making it an effective approach for ensuring that user input meets required criteria before further processing.
-
How can random numbers be generated in Go, and what package is used for this purpose? Answer: Random numbers in Go can be generated using the math/rand package. This package provides functions to generate pseudo-random numbers in various formats, including integers, floats, and normally distributed values. To ensure that random numbers are different across executions, developers typically use a seeded random number generator, which can be seeded with the current time or another source of entropy. The rand.Seed function is used to set the seed value, and subsequent calls to random number generation functions will produce different sequences of numbers.
-
What is number parsing in Go, and which functions are commonly used for this task? Answer: Number parsing in Go refers to the conversion of string representations of numbers into numeric types, such as integers or floats. The strconv package provides functions like strconv.Atoi for converting strings to integers and strconv.ParseFloat for converting strings to floating-point numbers. These functions return the parsed value along with an error to indicate whether the conversion was successful. Number parsing is essential for handling user input, reading from files, or processing data in various applications.
-
How does URL parsing work in Go, and which package is used for this purpose? Answer: URL parsing in Go is accomplished using the net/url package, which provides functions to parse and manipulate URLs. The url.Parse function takes a string representation of a URL and returns a URL struct that contains various components, such as the scheme, host, path, query parameters, and fragment. This allows developers to easily access and modify specific parts of the URL. The package also provides functionality for encoding and decoding URL query parameters, making it useful for web applications and APIs.
-
What is the purpose of the bufio package in Go? Answer: The bufio package in Go provides buffered I/O operations, which enhance the efficiency of reading from and writing to input and output streams. By buffering input, the bufio package reduces the number of I/O operations, which can be expensive in terms of performance. It provides types like Scanner for reading input line by line and Writer for buffered writing. This package is particularly useful for handling large files or streams, where minimizing the number of direct read/write operations can significantly improve performance.
-
What is Base64 encoding, and why is it used in Go? Answer: Base64 encoding is a method of converting binary data into a text representation using a specific set of 64 characters (A-Z, a-z, 0-9, +, /) to ensure that the data remains intact when transmitted over channels that may not support binary data. In Go, the encoding/base64 package provides functions to encode and decode data in Base64 format. This encoding is commonly used for transmitting binary data in web applications, such as embedding images in HTML or sending binary files in JSON, ensuring compatibility with text-based protocols.
-
How can you generate random numbers within a specific range in Go? Answer: To generate random numbers within a specific range in Go, you can use the math/rand package along with arithmetic operations. After seeding the random number generator, you can generate a random number and then scale and shift it to fit within your desired range. For example, you can generate a random integer between a minimum and maximum value by using the formula: rand.Intn(max-min) + min, which produces a number that falls within that range.
-
What considerations should you keep in mind when parsing numbers from strings in Go? Answer: When parsing numbers from strings in Go, consider the following:
Error Handling: Always check for errors returned by parsing functions to handle invalid input gracefully.
Locale Differences: Be aware of different number formats (e.g., decimal separators) in various locales, which may affect parsing.
Whitespace and Formatting: Ensure that input strings are trimmed of leading or trailing whitespace to avoid parsing issues.
Data Type Limitations: Be mindful of the data type limits (e.g., integers) to avoid overflow or underflow when converting large numbers.
- What are some common use cases for URL parsing in Go? Answer: Common use cases for URL parsing in Go include:
Web Development: Extracting and manipulating URL components in web applications to route requests and build links.
API Interaction: Handling query parameters in API requests and responses for data filtering and pagination.
Redirects: Modifying URLs for redirection purposes based on certain conditions or user inputs.
Data Validation: Validating and sanitizing URLs before processing them to ensure they conform to expected formats.
- How does the Scanner type in the bufio package work, and what are its benefits? Answer: The Scanner type in the bufio package provides a convenient way to read input from various sources, such as files or standard input, line by line. It automatically handles buffering and allows developers to iterate over input without manually managing buffers. Benefits of using Scanner include:
Simplicity: It provides an easy-to-use interface for reading input, reducing boilerplate code.
Memory Efficiency: It uses buffering to minimize the number of I/O operations, improving performance when processing large inputs.
Custom Splitters: Developers can define custom splitting behavior to read tokens or lines based on specific criteria.
-
What is the significance of Base64 encoding in data transmission? Answer: Base64 encoding is significant in data transmission because it ensures that binary data can be safely transmitted over protocols that primarily handle text, such as HTTP or email. By encoding binary data into a text format, Base64 helps prevent data corruption during transmission. This encoding is widely used for embedding images in web pages, sending attachments via email, and transmitting binary files in JSON or XML formats. It ensures that the data remains intact and is easily reconstructible by the receiving system.
-
What is hashing, and how is it used in Go? Answer: Hashing is the process of converting input data of any size into a fixed-size string of bytes, typically a hash code, using a hash function. In Go, hashing is used for various purposes, including data integrity verification, digital signatures, and efficient data retrieval in data structures like hash tables. Hash functions take an input (or 'message') and produce a hash value, which is a unique representation of that data. If the input data changes, even slightly, the resulting hash will be significantly different, making it useful for detecting changes or duplicates.
-
How does the crypto package work in Go, and what are its main features? Answer: The crypto package in Go provides cryptographic functions and algorithms for secure data handling, including encryption, decryption, hashing, and digital signatures. It offers various sub-packages, such as crypto/aes for symmetric encryption, crypto/rsa for asymmetric encryption, and crypto/sha256 for hashing. The package follows best practices for cryptography and is designed to be easy to use while ensuring that developers can implement secure systems. It helps in safeguarding sensitive information, ensuring data integrity, and authenticating communications.
-
What are the different methods to write files in Go, and when would you use each? Answer: In Go, files can be written using the os and io/ioutil packages. Common methods include:
os.OpenFile: Used for opening files with specific flags (like append or write), giving more control over file operations. Suitable for scenarios where you need to update existing files or create new ones with specific permissions.
ioutil.WriteFile: A convenience function for writing data to a file in one go. It is suitable for simple use cases where you need to create or overwrite a file without needing advanced options.
bufio.Writer: For buffered writing, improving performance when writing large amounts of data. Ideal for situations where you need to write data incrementally or frequently, minimizing I/O operations.
- How do you read files in Go, and what are the common techniques used? Answer: Reading files in Go can be accomplished using the os and bufio packages, among others. Common techniques include:
os.ReadFile: A simple method to read the entire contents of a file into memory, useful for small files or when the entire content is needed at once.
bufio.Scanner: Allows reading a file line by line, which is memory-efficient and ideal for processing large files where you don't want to load the entire content into memory.
io.Reader: For custom implementations, using an io.Reader interface allows developers to define how data is read from various sources, enabling more flexibility in reading file content.
-
What are line filters in Go, and how can they be implemented? Answer: Line filters in Go are mechanisms used to process or transform lines of text as they are read from a file or input stream. They can be implemented using the bufio.Scanner or bufio.Reader types to read input line by line. Developers can apply filters, such as searching for specific keywords, modifying lines, or removing unwanted characters, as they process each line. This approach allows for efficient handling of text data without loading the entire content into memory and provides a way to perform real-time data transformation.
-
How can hashing be used to ensure data integrity? Answer: Hashing can be used to ensure data integrity by generating a unique hash value for a set of data (e.g., a file or message). When the data is later retrieved or transmitted, the hash value can be recalculated and compared with the original hash. If the two hash values match, it indicates that the data has not been altered. This technique is widely used in data storage, transmission protocols, and digital signatures to verify that information remains unchanged and reliable throughout its lifecycle.
-
What considerations should be taken into account when writing files in Go? Answer: When writing files in Go, consider the following:
File Permissions: Specify appropriate permissions when creating or opening files to ensure security.
Error Handling: Always check for errors during file operations to handle issues such as file not found, permission denied, or disk space exhaustion gracefully.
Buffering: Use buffered I/O when writing large amounts of data to improve performance and reduce the number of I/O operations.
Closing Files: Ensure that files are closed properly after writing to release system resources and prevent data corruption.
- What are some common use cases for reading files line by line in Go? Answer: Common use cases for reading files line by line in Go include:
Log File Analysis: Processing log files to extract specific entries or generate statistics without loading the entire file into memory.
Configuration File Parsing: Reading configuration files where each line represents a setting, allowing for incremental processing.
Streaming Data Processing: Handling large data streams or input files, such as CSV files, where you want to process each line sequentially for efficiency.
-
How does Base64 encoding relate to the crypto package in Go? Answer: Base64 encoding is often used in conjunction with cryptography for encoding binary data into a text format, which can be safely transmitted over text-based protocols. While the crypto package provides functions for secure data handling, Base64 encoding (found in the encoding/base64 package) is used to encode the output of cryptographic functions (like encrypted data or hash values) to ensure they are compatible with text formats. This combination allows developers to securely handle and transmit sensitive data.
-
What are the benefits of using the bufio package for file reading and writing? Answer: The benefits of using the bufio package for file reading and writing include:
Improved Performance: Buffered I/O reduces the number of read and write operations by accumulating data in memory before performing actual I/O, which is especially beneficial for large files.
Convenience: It provides convenient types like Scanner for line-by-line reading and Writer for buffered writing, simplifying the process of handling text data.
Flexibility: bufio allows for custom splitting logic and provides options for reading tokens, lines, or entire files, giving developers control over how they process input and output.
-
What are file paths in Go, and how are they represented? Answer: File paths in Go are strings that specify the location of files or directories in the filesystem. They can be absolute or relative. An absolute path specifies the complete location from the root directory, while a relative path specifies the location relative to the current working directory. In Go, file paths can be represented using the path and path/filepath packages, which provide functions to manipulate paths in a platform-independent manner, ensuring compatibility across different operating systems.
-
How are directories handled in Go? Answer: Directories in Go are handled using the os and path/filepath packages. The os package provides functions for creating, removing, and reading directories. For example, os.Mkdir is used to create a new directory, and os.Remove can delete a directory. The path/filepath package offers utilities for working with directory paths, such as joining paths and walking through directories recursively. This enables developers to manage and traverse directory structures effectively.
-
What are temporary files and directories in Go, and how are they created? Answer: Temporary files and directories in Go are used for storing data that is only needed for a short duration, such as during a program's execution. They can be created using the os package's TempDir and CreateTemp functions, which ensure that temporary files and directories are created in a secure manner. Temporary files often have unique names to avoid conflicts and can be automatically cleaned up when no longer needed. These are particularly useful for caching, intermediate data storage, or testing purposes.
-
What is the purpose of the embed directive in Go? Answer: The embed directive in Go allows developers to include files and directories directly into the Go binary at compile time. By using the //go:embed comment, developers can embed resources such as HTML files, images, or configuration files, making them accessible at runtime without requiring separate file handling. This feature simplifies deployment, as the embedded resources are included in the executable, reducing the need for additional file management and ensuring that all necessary resources are packaged with the application.
-
How does Go handle file path normalization, and why is it important? Answer: Go handles file path normalization using the path and path/filepath packages, which provide functions to clean and resolve file paths. Normalization involves resolving relative paths, removing redundant elements (like . and ..), and ensuring consistent separators across different operating systems. This is important because it prevents errors related to incorrect file paths, ensures that paths are interpreted correctly by the operating system, and enhances portability of code across different environments.
-
What are the differences between absolute and relative file paths in Go? Answer: Absolute file paths specify the complete location of a file or directory from the root of the filesystem, providing a direct reference regardless of the current working directory. In contrast, relative file paths are specified in relation to the current working directory, allowing for more flexible navigation within the filesystem. While absolute paths are reliable and unambiguous, relative paths can make code more portable and easier to manage, especially in projects with nested directories.
-
What considerations should be taken into account when working with directories in Go? Answer: When working with directories in Go, consider the following:
Permissions: Ensure that the program has the necessary permissions to create, read, or write to directories, especially in restricted environments.
Error Handling: Always check for errors when performing directory operations to handle issues such as non-existent directories or permission errors.
Directory Existence: Before attempting to create a directory, check if it already exists to avoid conflicts or unnecessary errors.
Cross-Platform Compatibility: Use the path/filepath package for path manipulation to ensure compatibility with different operating systems.
-
How can temporary files and directories enhance application performance? Answer: Temporary files and directories enhance application performance by providing a means to store intermediate data during processing without cluttering the main storage. They allow for quick read and write operations that can reduce the overall execution time of applications, particularly when handling large datasets or files. Using temporary storage can also minimize the risk of data corruption in the main application data by isolating transient data from persistent data storage.
-
What is the significance of using the os package for file and directory operations in Go? Answer: The os package in Go is significant for file and directory operations as it provides a comprehensive set of functions for creating, deleting, reading, and writing files and directories. It abstracts away the underlying system calls, allowing developers to perform filesystem operations in a cross-platform manner. The package also includes functionalities for handling file permissions, accessing environment variables, and managing the working directory, making it an essential tool for file management in Go applications.
-
What are some best practices for using the embed directive in Go? Answer: Best practices for using the embed directive in Go include:
Minimize Embedded Files: Only embed necessary resources to keep the binary size manageable.
Organize Embedded Files: Use structured directories for embedded files to maintain clarity and avoid clutter.
Version Control: Consider versioning your embedded files, especially for static resources, to avoid compatibility issues during updates.
Access Control: Be mindful of exposing sensitive files and ensure that only non-sensitive resources are embedded, as they become part of the executable.
-
What are command line arguments in Go, and how are they typically accessed? Answer: Command line arguments in Go are the inputs provided to a program when it is executed from the command line. They are accessed using the os.Args slice, where os.Args[0] is the name of the program, and subsequent elements represent the arguments passed to the program. Command line arguments are commonly used to provide configuration options, specify input files, or control program behavior without requiring hard-coded values.
-
How do command line flags differ from command line arguments in Go? Answer: Command line flags are a specific type of command line argument that provides options to modify the behavior of a program. Unlike general command line arguments, which are typically positional, flags are usually specified with a hyphen (e.g., -flagName=value). In Go, the flag package is used to define and parse these flags, allowing developers to set default values, specify flag types (e.g., boolean, integer, string), and handle user input more flexibly. This makes command line flags a powerful way to enhance user interaction with the program.
-
What are command line subcommands in Go, and when are they used? Answer: Command line subcommands in Go are a way to structure command line interfaces by allowing a program to support multiple commands, each with its own set of options and arguments. This is similar to how Git uses subcommands like git commit and git push. Subcommands are often implemented using a command parsing library, and they help organize complex command line interfaces by grouping related functionality together, making it easier for users to navigate and utilize the program effectively.
-
How do environment variables work in Go, and what are common use cases? Answer: Environment variables in Go are key-value pairs stored in the operating system's environment. They can be accessed using the os.Getenv function, which retrieves the value of a specified variable. Common use cases for environment variables include:
Configuration: Storing application settings, such as database credentials or API keys, without hard-coding them in the source code.
Environment-Specific Behavior: Modifying application behavior based on the environment (development, testing, production) by setting different environment variables for each context.
Feature Flags: Enabling or disabling features at runtime without redeploying the application.
- What are the advantages of using the flag package for command line flag parsing in Go? Answer: The flag package in Go offers several advantages for command line flag parsing:
Simplicity: It provides an easy-to-use interface for defining and parsing flags, reducing boilerplate code.
Type Safety: The package supports different flag types (e.g., boolean, integer, string), ensuring that user input is validated and converted automatically.
Default Values: Developers can specify default values for flags, making it easy to provide sensible defaults for users.
Help Messages: The package automatically generates help messages, improving user experience by guiding users on how to use the command line interface.
-
What is logging in Go, and why is it important? Answer: Logging in Go refers to the practice of recording runtime events and information to aid in debugging and monitoring applications. The log package provides simple logging capabilities, allowing developers to write log messages to standard output or files. Logging is important because it helps identify issues, track application behavior, and maintain an audit trail of important events. Effective logging strategies enable developers to diagnose problems quickly and understand application performance in production environments.
-
How can command line arguments and environment variables complement each other in Go applications? Answer: Command line arguments and environment variables can complement each other by providing flexibility in configuration. For example, command line arguments can be used for temporary or one-off settings during program execution, while environment variables can store persistent configuration values that apply across different runs of the application. This allows developers to create applications that are easily configurable in different environments, making it possible to override environment variable settings with command line arguments for specific use cases.
-
What are some best practices for handling command line flags in Go? Answer: Best practices for handling command line flags in Go include:
Clear Documentation: Provide clear descriptions for each flag to guide users on their usage.
Consistent Naming: Use consistent and meaningful flag names to improve usability.
Default Values: Set sensible default values for flags to minimize the need for users to provide input every time.
Error Handling: Ensure proper error handling for invalid flag inputs and provide helpful messages to guide users in correcting their input.
-
How does logging levels help in managing log output in Go applications? Answer: Logging levels help manage log output in Go applications by categorizing log messages based on their severity or importance. Common levels include DEBUG, INFO, WARN, ERROR, and FATAL. By using different logging levels, developers can filter log output, allowing for more granular control over what is recorded during development and production. For example, DEBUG messages may be useful during development but can be suppressed in production to reduce noise and focus on critical issues. This enhances both readability and maintainability of logs.
-
What role do command line subcommands play in creating user-friendly command line interfaces? Answer: Command line subcommands play a crucial role in creating user-friendly command line interfaces by allowing developers to logically group related commands and options under a single command. This structure simplifies the user experience, as it organizes functionality in a clear and hierarchical manner. For instance, users can navigate commands easily (e.g., app subcommand1 vs. app subcommand2), leading to improved usability. Additionally, subcommands can have their own flags and arguments, providing a clear separation of concerns and reducing complexity for users interacting with the command line interface.
-
What is JSON, and how is it used in Go? Answer: JSON (JavaScript Object Notation) is a lightweight data interchange format that is easy for humans to read and write, and easy for machines to parse and generate. In Go, JSON is commonly used for data serialization and deserialization, allowing developers to convert Go data structures (like structs) into JSON format for transmission over networks or storage, and vice versa. The encoding/json package provides functions for encoding and decoding JSON data, making it straightforward to work with structured data in Go applications.
-
How do struct tags work in Go, and what are they used for? Answer: Struct tags in Go are metadata attached to struct fields, allowing developers to specify additional information about the fields, such as how they should be encoded or decoded in formats like JSON or XML. Struct tags are represented as string literals in backticks (`) following the field declaration. For example, a field can have a JSON tag to define its name when serialized or deserialized. This feature is useful for configuring libraries that handle data transformation without modifying the struct definition itself, promoting flexibility and clarity.
-
What is XML, and how does it differ from JSON in Go? Answer: XML (eXtensible Markup Language) is a markup language used for encoding documents in a format that is both human-readable and machine-readable. In Go, XML can be processed using the encoding/xml package, which provides functions for encoding and decoding XML data similar to the JSON package. The main differences between XML and JSON include:
Syntax: JSON uses a lightweight, less verbose syntax with key-value pairs, while XML uses a tag-based structure that can be more verbose.
Data Types: JSON supports basic data types (strings, numbers, arrays, booleans), while XML is more flexible with complex data structures and attributes.
Use Cases: JSON is often preferred for web APIs due to its simplicity and smaller payloads, while XML may be used in applications requiring document structure or metadata.
-
How does type conversion work in Go, and why is it important? Answer: Type conversion in Go is the process of converting a value from one data type to another. Go is statically typed, meaning that variables must be explicitly declared with a specific type, and conversions are necessary when working with different types (e.g., converting an int to a float64). Type conversion is important because it allows for operations between different data types, ensuring compatibility in calculations, data processing, and API interactions. Go requires explicit conversions to prevent errors and promote type safety, reducing the risk of unexpected behavior.
-
What is the io package in Go, and what are its primary functions? Answer: The io package in Go provides essential interfaces and functions for input and output operations. It defines standard interfaces like Reader, Writer, Closer, and provides utility functions for common tasks, such as reading and writing data to various sources (files, network connections, etc.). The package facilitates efficient and consistent handling of streams of data, supporting buffering and efficient reading/writing methods. It is a foundational package for building applications that require data manipulation, file handling, or network communication.
-
How can the math package be utilized in Go, and what types of functions does it provide? Answer: The math package in Go provides a collection of mathematical functions and constants for performing various mathematical operations. It includes functions for basic arithmetic, trigonometry, logarithms, exponentiation, and more advanced mathematical calculations. Additionally, it provides constants such as Pi and E. This package is useful in applications that require mathematical computations, such as scientific calculations, simulations, and data analysis, enabling developers to leverage built-in functions for common mathematical tasks without implementing them from scratch.
-
What is the significance of struct tags for XML processing in Go? Answer: Struct tags are significant for XML processing in Go as they define how struct fields should be serialized and deserialized when converting between Go structs and XML data. Using the encoding/xml package, developers can specify XML element names, attributes, and other properties directly in the struct definition. This enhances flexibility, allowing the XML representation to differ from the Go struct while maintaining a clear and organized codebase. Properly defined struct tags are crucial for ensuring that data is correctly mapped between Go and XML formats.
-
What are some common use cases for JSON in Go applications? Answer: Common use cases for JSON in Go applications include:
Web APIs: JSON is often used to transmit data between a server and client, enabling RESTful API communication.
Configuration Files: JSON can be used to define application configuration settings, allowing for easy parsing and modification.
Data Serialization: JSON is utilized for serializing complex data structures for storage in databases or files.
Data Exchange: JSON is used for exchanging data between different systems or applications due to its lightweight and easy-to-parse format.
-
How does Go handle error handling when working with the io package? Answer: Go handles error handling in the io package through the convention of returning an error value alongside the result of an I/O operation. Most functions in the io package return two values: the result (e.g., number of bytes read or written) and an error value. If an error occurs during the operation, the error value is non-nil, and developers are encouraged to check this value before proceeding. This explicit error handling approach promotes robustness and ensures that developers address potential issues in I/O operations, leading to more reliable code.
-
What are some best practices for using the math package in Go? Answer: Best practices for using the math package in Go include:
Understanding Precision: Be aware of the precision limits of floating-point operations and consider using appropriate types (e.g., float32 vs. float64) based on the required precision.
Using Constants: Leverage predefined constants such as Pi and E to enhance readability and maintainability of mathematical expressions.
Handling Edge Cases: Consider edge cases, such as handling NaN (Not a Number) and infinity, to ensure correct behavior in mathematical calculations.
Performance Considerations: For performance-critical applications, consider the efficiency of using built-in mathematical functions compared to custom implementations.
-
What is a package in Go, and why is it important? Answer: A package in Go is a collection of related Go source files that are organized together under a common name. Packages are the fundamental way to structure and organize code in Go, promoting reusability and modularity. Each Go program is made up of packages, and every Go file belongs to a package. Packages allow developers to encapsulate functionality, reducing code duplication and making large codebases more manageable by grouping related functions, types, and constants together.
-
How are packages different from modules in Go? Answer: Packages and modules in Go serve different purposes:
Packages: A package is a code organization unit, representing a collection of Go source files that provide specific functionality. Packages can be imported and used by other packages within the same module or different modules.
Modules: A module is a higher-level construct introduced in Go 1.11, representing a collection of related packages that are versioned and distributed together. A module is defined by a go.mod file at its root, which specifies the module’s name, version, dependencies, and other metadata. Modules enable dependency management and versioning, ensuring that projects can manage and control the specific versions of packages they rely on.
- What are the benefits of using packages in Go? Answer: The benefits of using packages in Go include:
Code Reusability: Packages allow developers to create reusable code components that can be imported and used across multiple projects.
Encapsulation: Packages help encapsulate related functionality, keeping implementation details hidden and exposing only the necessary interfaces.
Modularity: Packages promote modular design, making code easier to maintain and extend.
Namespace Management: Packages prevent naming conflicts by providing separate namespaces for functions, variables, and types, making it easier to organize large codebases.
-
Can you explain the purpose of the main package in Go? Answer: The main package in Go is a special package that serves as the entry point for executable Go programs. When you build and run a Go program, the Go compiler looks for the main package, which must contain a main function. This main function is the starting point of the program's execution. While other packages provide reusable functionality, the main package is specifically used to build applications that can be run directly. Without a main package and function, a Go program cannot be executed as a standalone application.
-
What are goroutines, and how do they differ from traditional threads? Answer: Goroutines are lightweight concurrent execution units in Go, managed by the Go runtime. They are used to run functions concurrently, allowing multiple tasks to be performed simultaneously. Goroutines differ from traditional threads in several ways:
Lightweight: Goroutines are more lightweight than threads, requiring less memory and startup time, allowing thousands or even millions of goroutines to run concurrently.
Managed by the Go Runtime: The Go runtime manages goroutines, handling their scheduling and execution, while threads are typically managed by the operating system.
Communication: Goroutines communicate with each other using channels, providing a safe way to exchange data and synchronize tasks without the complexities of traditional thread synchronization mechanisms like mutexes.
- What are the advantages of using goroutines in Go? Answer: The advantages of using goroutines in Go include:
Concurrency: Goroutines enable concurrent execution, allowing tasks to be performed in parallel, which can lead to more efficient use of system resources and improved performance.
Simplicity: Goroutines are easy to use, requiring only a simple syntax to launch a function concurrently. This simplicity makes concurrent programming more accessible to developers.
Scalability: Because goroutines are lightweight, they can be scaled to handle a large number of concurrent tasks without overwhelming system resources, making them ideal for building high-performance applications.
Automatic Management: The Go runtime automatically manages goroutines, including their scheduling, synchronization, and memory management, reducing the complexity of writing concurrent code.
-
How do modules in Go help with dependency management? Answer: Modules in Go help with dependency management by providing a way to specify, version, and manage external dependencies in a project. The go.mod file at the root of a module lists the module’s dependencies and their specific versions. This ensures that the same versions of dependencies are used across different environments, reducing the risk of compatibility issues. Modules also support version control, allowing developers to update or roll back dependencies as needed. Additionally, the go.sum file tracks the exact versions of all dependencies, ensuring reproducible builds.
-
What happens when you import a package in Go? Answer: When you import a package in Go, the compiler includes the package's code in the program, allowing you to use the package's exported functions, types, and variables. The imported package must be compiled first, and the compiler checks for any errors in the package before including it. Importing a package also triggers the execution of any init functions defined in the package, which are used for initialization tasks. Imports in Go help organize code and promote code reuse by allowing developers to leverage functionality from other packages.
-
Why is the init function useful in Go packages? Answer: The init function in Go is useful for performing package-level initialization tasks before the main program or any other package functions are executed. Each package can have one or more init functions, which are automatically called by the Go runtime when the package is imported. init functions are commonly used for:
Setting up global variables or configurations: Preparing necessary state or configurations for the package to function correctly.
Registering items: For example, registering handlers, encoders, or other components with a framework or library.
Performing one-time setup tasks: Ensuring that certain setup tasks are completed before any other code in the package is run.
- What are some best practices for organizing packages in a Go project? Answer: Best practices for organizing packages in a Go project include:
Grouping Related Code: Organize code into packages based on functionality, grouping related code together to improve modularity and readability.
Avoiding Cyclical Imports: Ensure that packages do not import each other in a circular manner, as this can lead to compilation errors and complex dependencies.
Keeping Packages Focused: Each package should have a single responsibility or focus, preventing packages from becoming too large or unwieldy.
Using Clear and Descriptive Names: Package names should be clear and descriptive, reflecting the functionality they provide. This helps other developers understand the purpose of the package at a glance.
Minimizing Exported Items: Only export functions, types, or variables that need to be accessed outside the package. Keeping other items unexported (private) helps encapsulate implementation details and prevents unintended use.
-
What is a channel in Go, and why is it used? Answer: A channel in Go is a communication mechanism that allows goroutines to exchange data and synchronize their execution. Channels provide a safe way to send and receive data between goroutines, preventing race conditions and enabling concurrent programming. Channels are strongly typed, meaning they can only transfer values of a specific data type. They are used to coordinate tasks, synchronize processes, and share data between concurrently running goroutines, making them essential for building efficient and scalable concurrent programs.
-
What is the difference between an unbuffered channel and a buffered channel in Go? Answer: The difference between unbuffered and buffered channels in Go lies in how they handle data transmission:
Unbuffered Channel: An unbuffered channel requires both the sender and receiver to be ready before data can be transferred. The send and receive operations on an unbuffered channel are synchronous, meaning the sender will block until the receiver is ready to receive the data, and vice versa.
Buffered Channel: A buffered channel has a fixed capacity, allowing the sender to send multiple values into the channel without waiting for an immediate receiver. The sender only blocks if the channel is full, and the receiver blocks if the channel is empty. Buffered channels enable asynchronous communication between goroutines, as the sender and receiver do not need to be synchronized at the moment of data exchange.
-
How do channels help in synchronizing goroutines? Answer: Channels help in synchronizing goroutines by coordinating the timing of operations between them. When using an unbuffered channel, the sender and receiver must wait for each other, ensuring that data is passed only when both are ready. This naturally synchronizes the execution of the goroutines, as one goroutine cannot proceed until the other has completed its corresponding operation (sending or receiving). Channels can also be used as signals, where a goroutine waits to receive a value before continuing, ensuring that tasks are completed in the desired order.
-
What are the advantages of using unbuffered channels in Go? Answer: The advantages of using unbuffered channels in Go include:
Natural Synchronization: Unbuffered channels provide automatic synchronization between goroutines, as they require both the sender and receiver to be ready before data can be transferred.
Simpler Design: Since unbuffered channels enforce synchronization, they can simplify the design of concurrent programs by eliminating the need for explicit locks or other synchronization primitives.
Prevents Data Races: By synchronizing data transfer between goroutines, unbuffered channels help prevent data races, ensuring that data is shared safely and consistently.
- When would you prefer to use a buffered channel over an unbuffered channel? Answer: A buffered channel is preferred over an unbuffered channel in scenarios where:
Asynchronous Communication: You want to allow the sender to continue its execution without waiting for an immediate receiver, which can improve performance in some cases.
Reduced Blocking: Buffered channels reduce blocking, as the sender can continue to send data until the buffer is full, and the receiver can process the data when ready.
Handling Bursts of Data: Buffered channels are useful when you expect bursts of data that need to be processed at different rates, allowing the buffer to absorb the burst and smooth out the processing.
- What does it mean for a channel to have a direction in Go? Answer: In Go, a channel can have a direction, meaning it can be restricted to either sending or receiving data, but not both. This is done by specifying the channel direction in the function signature or variable declaration:
Send-only Channel: A send-only channel is a channel that is restricted to sending data. It can be passed to functions that only need to send data to the channel.
Receive-only Channel: A receive-only channel is a channel that is restricted to receiving data. It can be passed to functions that only need to receive data from the channel. Channel directions are used to enforce constraints and improve the clarity and safety of the code by ensuring that channels are used only in the intended way.
-
How do buffered channels affect the synchronization of goroutines? Answer: Buffered channels affect the synchronization of goroutines by allowing asynchronous communication. In a buffered channel, the sender can send multiple values without waiting for an immediate receiver, as long as the buffer is not full. This reduces the degree of synchronization between goroutines, as the sender and receiver do not need to be ready at the same time. However, when the buffer is full, the sender will block until space becomes available, which reintroduces synchronization. Buffered channels thus provide a balance between concurrency and synchronization, depending on the buffer size.
-
What is channel synchronization, and how can it be implemented using channels in Go? Answer: Channel synchronization refers to using channels to coordinate the timing and order of operations between goroutines. It can be implemented using unbuffered channels, where the send and receive operations block until both the sender and receiver are ready, ensuring that the two goroutines are synchronized. Channel synchronization can also be achieved with buffered channels by controlling when data is sent and received, or by using channels as signaling mechanisms (e.g., sending a signal to indicate that a task is complete). This ensures that certain operations do not proceed until specific conditions are met.
-
What happens when you try to send or receive on a nil channel in Go? Answer: In Go, attempting to send or receive on a nil channel results in a permanent block. Since a nil channel is not initialized, it cannot transfer any data, and any goroutine attempting to send or receive on it will be indefinitely blocked, leading to deadlock if not handled properly. This behavior emphasizes the importance of ensuring that channels are properly initialized before use and highlights the need for careful management of channel states to avoid unexpected blocking in concurrent programs.
-
How do you close a channel in Go, and what are the implications of closing a channel? Answer: Closing a channel in Go is done using the close function. Closing a channel indicates that no more values will be sent on it. Once a channel is closed, any attempts to send data on it will cause a panic, while receiving from a closed channel will continue to retrieve remaining buffered values, followed by zero values of the channel's type after the buffer is drained. Closing a channel is typically used to signal to receiving goroutines that no more data will be sent, allowing them to finish processing and exit gracefully. It’s important to note that only the sender should close the channel, as closing a channel from multiple goroutines can lead to a panic.
-
What is multiplexing in Go, and how does the select statement facilitate it? Answer: Multiplexing in Go refers to the ability to wait on multiple channel operations simultaneously and handle whichever operation becomes ready first. The select statement in Go is used to achieve this. It allows a goroutine to monitor multiple channels and execute a case block when one of the channels is ready for communication (either sending or receiving). If multiple channels are ready, one is chosen at random. This mechanism is useful in scenarios where a program needs to handle inputs from multiple sources concurrently without being blocked on any single channel.
-
Can you explain how non-blocking channel operations work in Go? Answer: Non-blocking channel operations in Go allow a goroutine to attempt a send or receive operation on a channel without blocking if the channel is not ready. This can be achieved using a select statement with a default case. When the select has a default case, it will execute that case if no other case is ready, thereby avoiding blocking. Non-blocking operations are useful in situations where a goroutine needs to perform other tasks if the channel is not immediately available, thus enhancing responsiveness and efficiency.
-
What is the purpose of using range over a channel in Go? Answer: The range keyword in Go can be used to iterate over values received from a channel until the channel is closed. When ranging over a channel, the loop will repeatedly receive values from the channel and terminate when the channel is closed and all buffered values have been received. This is commonly used in scenarios where a goroutine continuously sends values to a channel, and another goroutine processes those values until the sender indicates that no more values will be sent by closing the channel.
-
What is the context package in Go, and why is it important? Answer: The context package in Go provides a way to carry deadlines, cancelation signals, and request-scoped values across API boundaries and between goroutines. It is important for managing the lifecycle of processes and ensuring that resources are properly cleaned up when a process is canceled or times out. For example, in server applications, a context is often used to cancel in-progress requests when a client disconnects, to enforce timeouts, or to pass request-scoped information like authentication tokens. The context package is crucial for writing robust and responsive concurrent programs.
-
How do timers work in Go, and what are their typical use cases? Answer: A timer in Go is used to schedule an event to occur after a specified duration. Timers are created using the time.NewTimer function, and they send the current time on their channel when they expire. Typical use cases for timers include setting a timeout for an operation, delaying the execution of a task, or periodically checking a condition. Timers are important for managing time-sensitive operations and ensuring that a program remains responsive to delays or timeouts.
-
What are tickers in Go, and how are they different from timers? Answer: A ticker in Go is similar to a timer but is used to repeatedly trigger events at regular intervals. Tickers are created using the time.NewTicker function, and they send the current time on their channel at each tick interval. Unlike timers, which expire once, tickers continue to send values at the specified interval until they are stopped. Tickers are commonly used for tasks that need to be performed repeatedly, such as polling for updates, refreshing data, or monitoring system metrics.
-
How does the select statement support non-blocking channel operations in Go? Answer: The select statement supports non-blocking channel operations by allowing a goroutine to attempt a send or receive on a channel without blocking if the channel is not ready. This is done by including a default case within the select statement. If none of the channels are ready, the default case is executed, allowing the goroutine to perform other actions or simply continue its execution without being blocked. This is particularly useful for maintaining responsiveness in concurrent programs where a goroutine cannot afford to wait indefinitely for a channel operation.
-
What happens when you use a select statement with multiple channel operations, and more than one channel is ready? Answer: When a select statement has multiple cases and more than one channel operation is ready, Go randomly chooses one of the ready cases to execute. This ensures that the program remains fair and does not bias towards any particular channel when multiple channels are ready at the same time. This randomness helps to evenly distribute processing across all channels, making the program's behavior more predictable and balanced in scenarios with multiple concurrent inputs.
-
Can you explain the concept of channel directions in the context of select statements? Answer: Channel directions in Go define whether a channel can be used for sending, receiving, or both. In the context of select statements, channel directions ensure that each case operates in the correct manner. For example, a select case might send data to a send-only channel or receive data from a receive-only channel. The compiler enforces channel direction constraints, preventing accidental misuse of channels. This helps in writing clear and correct concurrent code by ensuring that channels are only used for their intended purposes.
-
How can context be used in combination with channels to manage timeouts and cancellations in Go? Answer: The context package in Go is often used in combination with channels to manage timeouts and cancellations. A context.Context object can be used to create a channel that is closed when the context is canceled or times out. This channel can then be monitored in a select statement, allowing a goroutine to respond to cancellation signals or deadlines. For example, if an operation exceeds its allotted time, the context’s channel will close, signaling the goroutine to stop its work and clean up resources. This mechanism is essential for building robust and responsive applications that can gracefully handle interruptions and time-sensitive operations.
-
What is a worker pool in Go, and why is it used? Answer: A worker pool in Go is a concurrency pattern where a fixed number of goroutines (workers) are created to process tasks from a common task queue or channel. Each worker pulls tasks from the queue and processes them independently. Worker pools are used to limit the number of concurrent tasks, allowing for better resource management and preventing the system from being overwhelmed by too many goroutines. They are particularly useful in scenarios where tasks are relatively independent and can be processed in parallel, such as handling HTTP requests, processing data streams, or performing batch jobs.
-
How do wait groups work in Go, and what problem do they solve? Answer: Wait groups in Go, provided by the sync.WaitGroup type, are used to wait for a collection of goroutines to finish executing. A wait group maintains a counter, which is incremented for each goroutine that is launched and decremented when each goroutine completes its task. The main goroutine can call Wait() on the wait group, which will block until the counter reaches zero, indicating that all goroutines have finished. Wait groups solve the problem of coordinating the completion of multiple goroutines, ensuring that the main program doesn’t exit before all concurrent tasks have completed.
-
What is a mutex in Go, and when would you use it? Answer: A mutex, short for "mutual exclusion," is a synchronization primitive in Go used to prevent multiple goroutines from accessing a shared resource simultaneously, which could lead to data races. Provided by the sync.Mutex type, a mutex allows only one goroutine to access the critical section of code at a time, ensuring data consistency. You would use a mutex in scenarios where shared resources, such as shared variables, maps, or slices, need to be modified by multiple goroutines, and you want to prevent concurrent writes that could corrupt the data.
-
Can you explain the difference between a mutex and an atomic counter in Go? Answer: Both mutexes and atomic counters are used for synchronizing access to shared data, but they serve different purposes and operate differently:
Mutex: A mutex locks a critical section, ensuring that only one goroutine can execute the section at a time. It is a general-purpose synchronization tool that can protect complex operations involving multiple steps or multiple variables.
Atomic Counter: An atomic counter, provided by functions in the sync/atomic package, allows for lock-free atomic operations on a single integer value (such as incrementing or decrementing). Atomic counters are more efficient than mutexes for simple operations on single variables because they avoid the overhead of locking and unlocking. In summary, use atomic counters for simple, fast, and lock-free updates to single variables, and use mutexes for more complex operations that require exclusive access to shared resources.
- What are the potential downsides of using mutexes in Go? Answer: The potential downsides of using mutexes in Go include:
Performance Overhead: Mutexes introduce performance overhead due to the need to acquire and release locks, which can be significant in highly concurrent programs.
Deadlocks: Improper use of mutexes can lead to deadlocks, where two or more goroutines are waiting on each other to release locks, resulting in a standstill.
Reduced Concurrency: Mutexes serialize access to the critical section, which can reduce concurrency and lead to performance bottlenecks, especially if the locked section is long or frequently accessed.
Complexity: Managing mutexes can increase the complexity of the code, making it harder to understand, maintain, and debug, especially in large or distributed systems.
-
How does the sync.WaitGroup help in managing the lifecycle of goroutines? Answer: The sync.WaitGroup helps manage the lifecycle of goroutines by tracking how many goroutines are still running and ensuring that the main program waits for all of them to complete before proceeding. When a goroutine is launched, the wait group’s counter is incremented, and when the goroutine finishes its task, the counter is decremented. The main goroutine can then call Wait() on the wait group, which will block until the counter reaches zero, signaling that all goroutines have finished. This ensures proper synchronization between the main program and its concurrent goroutines, preventing premature program termination and potential resource leaks.
-
In what situations would you prefer using atomic operations over mutexes? Answer: You would prefer using atomic operations over mutexes in situations where you need to perform simple, single-variable updates, such as incrementing or decrementing counters, that can be done atomically. Atomic operations are lock-free and therefore more efficient than using mutexes because they avoid the overhead of acquiring and releasing locks. Examples include implementing counters, flags, or simple state variables in a highly concurrent environment where performance is critical, and the operation on the variable is small and self-contained.
-
Can you explain the concept of a deadlock in the context of mutexes and how it can occur? Answer: A deadlock occurs when two or more goroutines are blocked forever, each waiting for the other to release a lock or resource. In the context of mutexes, a deadlock can happen if goroutine A locks mutex 1 and waits for mutex 2 while goroutine B locks mutex 2 and waits for mutex 1. Neither goroutine can proceed because each is waiting for the other to release a lock, resulting in a standstill. Deadlocks can be avoided by careful design, such as acquiring locks in a consistent order, using timeout mechanisms, or minimizing the use of mutexes in the code.
-
What is the sync/atomic package in Go, and how does it differ from sync.Mutex? Answer: The sync/atomic package in Go provides low-level atomic memory primitives that allow for lock-free synchronization of shared variables. It includes functions for performing atomic operations on integer and pointer types, such as atomic increment, decrement, load, store, and compare-and-swap. Unlike sync.Mutex, which locks a critical section to ensure exclusive access, atomic operations operate directly on memory in a single, indivisible step, making them faster and more efficient for simple operations. However, atomic operations are limited to basic operations on single variables, whereas sync.Mutex can protect more complex, multi-step operations.
-
How can you use a wait group to coordinate a worker pool in Go? Answer: In a worker pool, you can use a wait group to coordinate the completion of all worker goroutines. When creating the worker pool, you increment the wait group counter for each worker goroutine. As each worker completes its task, it decrements the wait group counter. The main goroutine then calls Wait() on the wait group to block until all worker goroutines have finished processing. This ensures that the main program does not exit prematurely and that all tasks assigned to the workers are fully processed before the program continues or terminates.
-
What is rate limiting, and why is it important in Go applications? Answer: Rate limiting is a technique used to control the amount of traffic sent or received over a network within a certain period. In Go applications, rate limiting is important for preventing abuse, managing resource consumption, and ensuring fair use of services. For example, in a web server, rate limiting can prevent a single client from overwhelming the server with too many requests. It also helps in avoiding issues like denial of service (DoS) attacks, reducing the load on downstream services, and ensuring that all clients receive a fair share of the server's resources.
-
How can Go's goroutines be used to implement rate limiting? Answer: Go's goroutines can be used to implement rate limiting by creating a dedicated goroutine that controls the flow of requests. This goroutine can use a ticker or a time-based mechanism to allow requests to proceed at a controlled rate. For example, a goroutine could produce tokens at a fixed rate and distribute them to incoming requests. Each request must wait for a token before proceeding, ensuring that the rate of requests is limited. This pattern helps to enforce rate limiting without blocking the main program flow.
-
What are stateful goroutines, and how do they differ from stateless goroutines? Answer: Stateful goroutines are goroutines that maintain internal state across multiple invocations or operations. This means that the goroutine has access to data that persists beyond the scope of a single function call, allowing it to remember past interactions or accumulate results. In contrast, stateless goroutines do not maintain any internal state between invocations and rely solely on the input provided to each call. Stateful goroutines are useful for managing state in concurrent processes, such as maintaining counters, handling sessions, or implementing finite state machines, while stateless goroutines are often used for isolated, independent tasks.
-
Can you explain how stateful goroutines can be used to manage shared state in a concurrent Go application? Answer: Stateful goroutines can be used to manage shared state in a concurrent Go application by encapsulating the state within the goroutine and controlling access to it through channels. Instead of multiple goroutines accessing shared data directly, they send messages to a stateful goroutine, which serializes access to the shared state. This pattern, known as the "actor model," avoids race conditions and ensures that state modifications are performed safely and sequentially. It’s particularly useful in scenarios where multiple goroutines need to read or modify a common resource without the risk of data corruption.
-
What are some common sorting algorithms provided by Go's standard library? Answer: Go’s standard library provides built-in sorting algorithms through the sort package. The most commonly used sorting algorithms include:
Quick Sort: This is the default sorting algorithm used by the sort.Sort function. It is an efficient, in-place, and comparison-based algorithm.
Heap Sort: While not directly exposed, Go’s sort package internally uses heap structures for some operations, such as sorting large datasets in specific contexts.
Insertion Sort: Used by the sort package for small slices to reduce overhead. These algorithms are optimized for performance and are tailored to work efficiently with Go's data structures, such as slices.
-
How does Go's sort package handle sorting for different data types? Answer: Go's sort package handles sorting for different data types by providing functions that work with interfaces rather than specific data types. The package defines the sort.Interface which requires three methods: Len(), Less(), and Swap(). By implementing these methods for a custom type, you can sort any collection of data, such as slices of structs, integers, or strings. This flexibility allows Go developers to sort custom types or composite data structures according to specific criteria by defining how elements should be compared and swapped.
-
What is the purpose of sorting by functions in Go, and how does it work? Answer: Sorting by functions in Go allows you to define custom sorting logic by providing a function that determines the ordering of elements. This is particularly useful when the natural ordering of the elements is not sufficient, or when you need to sort by multiple fields or complex criteria. The sort.Slice function in Go allows you to pass a comparison function directly, which is then used to sort the slice based on your custom logic. This approach is powerful because it decouples the sorting logic from the data structure, making the code more flexible and easier to maintain.
-
In what scenarios would you use custom sorting logic in Go, and how does it improve flexibility? Answer: Custom sorting logic in Go is used in scenarios where the default ordering is not sufficient or when sorting needs to be based on multiple criteria. For example, if you have a slice of structs and want to sort first by one field (e.g., name) and then by another field (e.g., age), custom sorting allows you to implement this logic. It improves flexibility by allowing you to tailor the sorting behavior to the specific needs of your application, such as sorting by complex, non-numeric fields, or implementing domain-specific ordering rules.
-
What are the advantages of using stateful goroutines for managing concurrency over using traditional synchronization mechanisms like mutexes? Answer: The advantages of using stateful goroutines for managing concurrency over traditional synchronization mechanisms like mutexes include:
Simpler Concurrency Management: Stateful goroutines encapsulate state and handle all interactions through channels, which can reduce the complexity associated with managing mutexes and locks.
Avoiding Race Conditions: By serializing access to shared state through a single goroutine, stateful goroutines inherently avoid race conditions without the need for explicit locking mechanisms.
Improved Maintainability: The actor model, which stateful goroutines follow, often leads to more maintainable code as it clearly separates concerns and localizes state management within a single goroutine.
Reduced Lock Contention: Since there are no locks, there’s no contention, which can lead to better performance in some scenarios compared to using mutexes where multiple goroutines might frequently compete for the same lock.
-
How can rate limiting be used in conjunction with stateful goroutines in a Go application? Answer: Rate limiting can be used in conjunction with stateful goroutines by having the stateful goroutine control the rate at which tasks are processed. For example, a stateful goroutine can maintain a count of processed requests and use a time-based mechanism (such as a ticker) to ensure that only a certain number of tasks are processed within a given time frame. By coordinating rate limiting within a stateful goroutine, you can centralize control over request processing, enforce rate limits across multiple sources, and simplify the logic needed to manage rate limits in a concurrent application.
-
What is the purpose of testing in Go, and how is it typically performed? Answer: Testing in Go is essential for ensuring the correctness and reliability of code. It is typically performed using the testing package, which provides a framework for writing and running tests. Go tests are written as functions that follow a specific naming convention (TestXxx) and are placed in files with the _test.go suffix. These test functions are designed to verify that code behaves as expected by making assertions about its output. Testing helps catch bugs early, ensures that new changes do not break existing functionality, and facilitates code refactoring with confidence.
-
What is benchmarking in Go, and how does it differ from testing? Answer: Benchmarking in Go is a process used to measure the performance of code, specifically how fast or efficiently a function executes. It differs from testing in that testing focuses on correctness, while benchmarking focuses on performance. Benchmark functions in Go are written using the testing package and follow the naming convention BenchmarkXxx. These functions are designed to run code repeatedly to measure execution time and performance metrics. Benchmarking helps developers identify bottlenecks, optimize code, and compare different implementations for efficiency.
-
Can you explain how Go handles executing external OS processes? Answer: Go handles executing external OS processes using the os/exec package. This package provides functions to run external commands and interact with the underlying operating system. By using exec.Command, developers can create a new command, specify its arguments, and execute it. The command can be run in various ways, such as synchronously (waiting for it to finish) or asynchronously (running in the background). Additionally, developers can capture the output, pass input, and manage the environment variables of the command. Executing OS processes is useful for tasks like automation, integrating with other tools, or performing system-level operations.
-
What are signals in the context of Go applications, and how are they typically handled? Answer: Signals in Go applications refer to notifications sent by the operating system to a process, typically in response to specific events, such as a user interrupt (e.g., pressing Ctrl+C) or the termination of a process. Signals are used to communicate with running processes and can be handled in Go using the os/signal package. This package allows a Go application to listen for specific signals and execute corresponding handlers when those signals are received. Handling signals is crucial for gracefully shutting down services, cleaning up resources, or performing specific actions based on system events.
-
How does the reflect package in Go enable runtime introspection? Answer: The reflect package in Go enables runtime introspection, which is the ability to examine and manipulate objects and types at runtime. Using reflect, developers can inspect the type, value, and structure of variables dynamically, without knowing their types at compile time. This is useful for scenarios like writing generic functions, serialization, and deserialization, or working with dynamic data structures. reflect provides functions to retrieve information about a variable's type and value, modify the values, and even create new types and values at runtime. However, it requires careful use because it bypasses Go's static type system, potentially leading to runtime errors.
-
Why is reflection considered a powerful but risky feature in Go? Answer: Reflection is considered powerful because it allows developers to write highly flexible and dynamic code, enabling operations that are not possible with static typing alone. For example, reflection allows for dynamic type checks, manipulation of data structures, and the implementation of generic utilities that work with any type. However, it is risky because it circumvents the compile-time type safety that Go normally enforces. This can lead to runtime errors, increased code complexity, and potential performance overhead. Moreover, reflection can make the code harder to understand and maintain, as the relationships between types and values become less explicit.
-
What are the key differences between testing and benchmarking in Go? Answer: The key differences between testing and benchmarking in Go lie in their objectives and implementation:
Objective: Testing focuses on verifying the correctness of code, ensuring that it produces the expected results under various conditions. Benchmarking, on the other hand, measures the performance of code, assessing how fast or resource-efficient a function or piece of code is.
Implementation: Testing functions are written using the testing.T type and typically include assertions to check that the code behaves as expected. Benchmarking functions use the testing.B type and are designed to run the code repeatedly to measure execution time.
Outcome: The outcome of testing is usually a pass/fail result based on whether the code meets the expected behavior. Benchmarking produces performance metrics, such as execution time and memory usage, which can be used to optimize the code.
-
How can Go's testing package be used to write unit tests for complex logic? Answer: Go's testing package can be used to write unit tests for complex logic by breaking down the logic into smaller, testable units and writing test functions for each unit. Each test function should focus on a specific aspect of the logic, making assertions about the expected output for given inputs. Test cases can be organized using table-driven tests, where a table of inputs and expected outputs is iterated over to verify the logic under different scenarios. Additionally, the testing package allows for setup and teardown functions, mocking dependencies, and handling edge cases, making it possible to thoroughly test even the most complex logic.
-
In what scenarios would you use the exec package in Go, and what are some common use cases? Answer: The exec package in Go is used in scenarios where a Go application needs to interact with external OS processes. Common use cases include:
Running External Commands: Automating tasks by running shell commands or scripts from within a Go application.
Interfacing with Other Programs: Integrating Go applications with existing tools or systems by executing their command-line interfaces.
Process Management: Starting, stopping, and controlling external processes, such as daemons or background tasks.
Automation and Scripting: Writing automation scripts in Go that need to execute multiple commands or handle complex workflows involving external programs. Using the exec package allows Go applications to leverage the full power of the underlying operating system, extending their capabilities beyond the Go runtime.
- What are the potential challenges when using the reflect package in Go, and how can they be mitigated? Answer: The potential challenges when using the reflect package in Go include:
Runtime Errors: Since reflection operates at runtime, errors that would normally be caught at compile time, such as type mismatches, may only manifest during execution, leading to panics.
Performance Overhead: Reflection incurs a performance cost because it involves dynamic type inspection and manipulation, which is slower than direct access using static types.
Code Complexity: Code that relies heavily on reflection can become difficult to read, understand, and maintain, as it obscures the relationships between types and values. These challenges can be mitigated by using reflection sparingly, only when necessary, and ensuring thorough testing to catch potential runtime errors. Additionally, developers can document the use of reflection clearly and consider alternative approaches, such as code generation or interface-based designs, to achieve similar functionality with less risk.
- What is concurrency in Go, and how does it differ from parallelism? Answer: Concurrency in Go refers to the ability of the language to structure a program so that it can perform multiple tasks seemingly at the same time. It is about dealing with multiple tasks in overlapping time periods, not necessarily simultaneously. Go achieves concurrency using goroutines, which are lightweight threads managed by the Go runtime.
Parallelism, on the other hand, is about executing multiple tasks truly simultaneously, typically on multiple CPU cores. While concurrency is more about the structure of the program, parallelism is about the actual execution. Concurrency can lead to parallelism when multiple cores are available, but they are not the same thing. Concurrency is a broader concept, while parallelism is a specific type of concurrency.
- How does Go handle race conditions, and what are they? Answer: A race condition in Go occurs when two or more goroutines access the same shared resource simultaneously, and at least one of the accesses is a write. Because the goroutines are running concurrently, the order of operations is non-deterministic, leading to unpredictable behavior and potential bugs.
Go provides a tool called race detector to identify race conditions during testing. It can be enabled by running tests with the -race flag. To handle race conditions, Go developers typically use synchronization mechanisms like mutexes, channels, or other forms of concurrency control to ensure that shared resources are accessed in a safe and controlled manner.
- What is a deadlock, and how can it occur in Go programs? Answer: A deadlock occurs in Go programs when two or more goroutines are blocked forever, each waiting for the other to release a resource or send/receive on a channel. This situation happens when there is a circular dependency between the goroutines or resources, causing them to be stuck indefinitely.
Deadlocks can occur when goroutines are waiting on locks (mutexes) that are never released or when channels are used inappropriately, such as when a goroutine is waiting to receive on a channel that will never have data sent to it. Deadlocks can be avoided by carefully designing the program's concurrency model, ensuring that dependencies between goroutines and resources do not create cycles.
- Can you explain what a livelock is and how it differs from a deadlock in Go? Answer: A livelock is a situation where two or more goroutines are not blocked but are unable to make progress because they keep changing their state in response to each other without making any actual progress. Unlike a deadlock, where goroutines are stuck waiting, a livelock involves goroutines that are active but stuck in a loop of continuous change, leading to the same non-productive state.
In Go, livelocks can occur if goroutines are designed to retry or back off from a resource when contention is detected, but the contention resolution mechanism is not well-designed, causing the goroutines to continuously retry without succeeding. Livelocks can be more challenging to detect because the goroutines appear to be doing work, but they are not making any forward progress.
- What is starvation in the context of Go concurrency, and how can it occur? Answer: Starvation in Go concurrency occurs when a goroutine is perpetually delayed or unable to access a resource it needs because other goroutines are continuously occupying that resource. This can happen when certain goroutines hold on to resources for too long, preventing other goroutines from executing their tasks.
Starvation can occur if the concurrency control mechanisms (such as locks or channels) are not fairly implemented or if the program's design prioritizes some goroutines over others without proper consideration. It can lead to performance degradation and unresponsive programs, especially in long-running systems.
- How does Go's runtime scheduler handle concurrency and parallelism? Answer: Go's runtime scheduler is responsible for managing the execution of goroutines. It handles concurrency by efficiently switching between goroutines, allowing them to run on one or more operating system threads. The scheduler ensures that goroutines are executed in a way that maximizes CPU utilization while minimizing the overhead of context switching.
For parallelism, the scheduler maps goroutines to multiple operating system threads that can run on multiple CPU cores simultaneously. The Go scheduler uses a work-stealing algorithm, where idle threads can "steal" work from other threads, balancing the workload across available cores. This approach allows Go programs to achieve parallel execution when hardware resources are available, while still handling concurrency effectively.
- What strategies can be used in Go to avoid race conditions? Answer: To avoid race conditions in Go, developers can use several strategies:
Mutexes (Mutual Exclusion): Use sync.Mutex or sync.RWMutex to protect shared resources, ensuring that only one goroutine can access the resource at a time.
Channels: Use channels to synchronize access to shared data. By sending data through channels, you can ensure that only one goroutine accesses the data at a time.
Atomic Operations: Use atomic operations provided by the sync/atomic package for simple read-modify-write operations, which ensures that these operations are performed atomically.
Avoiding Shared State: Design the program to minimize or eliminate shared state between goroutines, reducing the need for synchronization and the possibility of race conditions.
By carefully applying these strategies, race conditions can be mitigated, leading to more reliable and predictable concurrent programs.
- How can deadlocks be detected and avoided in Go programs? Answer: Deadlocks can be detected using Go's runtime analysis tools, such as the runtime package's debug functions, or by careful code review and testing. However, the best approach is to avoid deadlocks altogether by following good concurrency practices:
Avoid Circular Dependencies: Ensure that goroutines do not form circular dependencies on resources or locks, which can lead to deadlocks.
Use Channels Carefully: Design channel usage patterns to avoid situations where goroutines are waiting on each other indefinitely.
Timeouts and Contexts: Use timeouts or context-based cancellation to prevent goroutines from waiting indefinitely on a resource or operation.
Order of Acquisition: Always acquire locks in a consistent order across the program to avoid deadlock scenarios.
By following these practices, developers can design their programs to be deadlock-free.
- What are the differences between race conditions, deadlocks, and livelocks in Go concurrency? Answer:
Race Conditions: Occur when multiple goroutines access shared resources concurrently, with at least one goroutine modifying the resource. The result is unpredictable behavior due to the non-deterministic order of execution.
Deadlocks: Happen when two or more goroutines are blocked indefinitely, each waiting for the other to release a resource, leading to a situation where none of the goroutines can proceed.
Livelocks: Involve goroutines that are not blocked but are continuously changing their states in response to each other, without making any progress. Livelocks differ from deadlocks in that the goroutines are active, but they are stuck in a non-productive cycle.
These issues are common challenges in concurrent programming, and understanding their differences is crucial for designing robust concurrent systems in Go.
- Why is understanding concurrency important in Go, and what challenges does it present? Answer: Understanding concurrency is important in Go because the language is designed with concurrency as a core feature, making it easier to build efficient, scalable programs. Concurrency allows programs to handle multiple tasks simultaneously, improving performance and responsiveness.
However, concurrency presents challenges such as race conditions, deadlocks, livelocks, and starvation, which can lead to bugs, performance issues, and unpredictable behavior. These challenges require developers to carefully design their programs, using synchronization mechanisms like mutexes, channels, and atomic operations to ensure safe and efficient concurrent execution. Mastery of concurrency concepts is essential for writing reliable Go programs, especially in systems where performance and scalability are critical.
-
What is the purpose of the sync package in Go? Answer: The sync package in Go provides basic synchronization primitives for managing concurrent access to shared resources. It is essential for ensuring that multiple goroutines can safely interact with shared data without causing race conditions, deadlocks, or other concurrency-related issues. The package includes tools like Mutex, RWMutex, WaitGroup, Once, Cond, and Pool, each designed to address specific synchronization needs.
-
What is an RWMutex in Go, and how does it differ from a regular Mutex? Answer: An RWMutex (Read-Write Mutex) is a synchronization primitive in Go that allows multiple readers or a single writer to access a shared resource. The key difference between RWMutex and a regular Mutex is that RWMutex differentiates between read and write operations:
Read Lock (RLock): Allows multiple goroutines to read the shared resource concurrently.
Write Lock (Lock): Allows only one goroutine to write to the shared resource, blocking any readers or other writers.
RWMutex is particularly useful when read operations are frequent, and write operations are infrequent, as it can improve performance by allowing concurrent reads.
- Can you explain how sync.NewCond works in Go? Answer: sync.NewCond in Go creates a new condition variable, which is used for signaling between goroutines. A Cond is typically associated with a Mutex or RWMutex and allows goroutines to wait for a specific condition to become true.
The primary methods of sync.Cond are:
Wait(): A goroutine calls Wait to block until it is signaled. It temporarily releases the associated mutex while waiting and reacquires it when unblocked.
Signal(): Wakes up one goroutine that is waiting on the condition.
Broadcast(): Wakes up all goroutines waiting on the condition.
sync.NewCond is useful in scenarios where goroutines need to wait for some condition to be met before proceeding.
- What is sync.Once and when should it be used? Answer: sync.Once is a synchronization primitive in Go that ensures a piece of code is executed only once, regardless of how many times it is called or how many goroutines call it. This is particularly useful for tasks like initializing a resource or running setup code that must only occur once during the lifetime of a program.
The primary method of sync.Once is:
Do(func()): Executes the given function only once. Subsequent calls to Do with the same sync.Once instance will not execute the function again.
sync.Once is ideal for ensuring that critical initialization code is executed safely in a concurrent environment.
- How does sync.Pool work in Go, and what are its benefits? Answer: sync.Pool is a concurrency-safe pool of reusable objects in Go. It is used to manage a set of temporary objects that can be reused, reducing the need for repetitive allocations and garbage collection.
Key features of sync.Pool include:
Get(): Retrieves an object from the pool. If the pool is empty, it creates a new one.
Put(interface{}): Returns an object to the pool, making it available for reuse.
The primary benefit of sync.Pool is that it reduces the overhead of memory allocation and garbage collection in scenarios where objects are frequently created and discarded, such as in server applications handling numerous requests.
- What is the use case for sync.NewCond compared to other synchronization mechanisms like WaitGroup? Answer: sync.NewCond is used for signaling between goroutines, allowing one or more goroutines to wait for a specific condition to be met before proceeding. This is different from WaitGroup, which is used to wait for a collection of goroutines to complete.
A typical use case for sync.NewCond is when you have a shared resource that needs to be accessed in a specific order or when a certain condition must be true before goroutines can proceed. For example, you might use sync.NewCond to manage a queue where goroutines need to wait until an item is available before they can dequeue.
sync.NewCond provides more flexibility than WaitGroup as it allows signaling and waiting based on custom conditions rather than just counting completed tasks.
- Why would you choose RWMutex over a regular Mutex in Go? Answer: You would choose RWMutex over a regular Mutex when you have a scenario with a high number of read operations and fewer write operations. RWMutex allows multiple readers to access the shared resource simultaneously, improving performance by avoiding unnecessary blocking when reads are more frequent than writes.
In contrast, a regular Mutex only allows one goroutine to access the resource at a time, whether it's for reading or writing. By using RWMutex, you can optimize the performance of read-heavy operations by allowing concurrent read access while still protecting the resource during writes.
- How does sync.Once improve code safety in concurrent programs? Answer: sync.Once improves code safety in concurrent programs by ensuring that a particular piece of code is executed only once, even if multiple goroutines attempt to execute it concurrently. This prevents issues such as double initialization, race conditions, or inconsistent states that can arise when the same code is executed multiple times concurrently.
sync.Once is particularly useful for safely initializing resources like database connections, configuration setups, or singleton instances in a concurrent environment.
- What are the advantages of using sync.Pool for managing object reuse in Go? Answer: The advantages of using sync.Pool for managing object reuse in Go include:
Reduced Allocation Overhead: By reusing objects, sync.Pool minimizes the need for frequent memory allocations, reducing the load on the garbage collector and improving performance.
Concurrency-Safe Object Management: sync.Pool is designed to be used safely across multiple goroutines, allowing for efficient object reuse in concurrent applications.
Dynamic Sizing: The pool dynamically grows and shrinks based on demand, which means it adapts to the workload without requiring manual intervention.
sync.Pool is particularly beneficial in high-performance applications where objects are frequently created and discarded, such as in request handling loops in web servers.
- In what scenarios would you prefer using sync.NewCond over sync.WaitGroup? Answer: You would prefer using sync.NewCond over sync.WaitGroup in scenarios where you need to manage complex synchronization patterns that depend on specific conditions rather than just counting goroutine completions.
For example, if you need goroutines to wait for a certain condition (such as a resource being available or a specific state being reached) before proceeding, sync.NewCond is more appropriate. It allows for fine-grained control over when goroutines are awakened, providing more flexibility than sync.WaitGroup, which is more suited for simple use cases where you need to wait for a set of goroutines to finish.
sync.NewCond is useful in cases like implementing producer-consumer patterns, handling event-driven synchronization, or managing complex state transitions.
-
What is the request-response cycle in the context of web development? Answer: The request-response cycle is the fundamental process in web development that describes the interaction between a client (typically a web browser or mobile app) and a server. When a user interacts with a web application, the client sends an HTTP request to the server, which processes the request, performs the necessary actions (like fetching data from a database), and then sends back an HTTP response. The response usually contains the requested data, a status code, and possibly HTML, JSON, or another content type. This cycle is crucial for delivering web content to users.
-
What role do status codes play in the HTTP request-response cycle? Answer: Status codes are a key component of the HTTP request-response cycle, providing a standardized way for servers to communicate the outcome of a request back to the client. They are three-digit codes included in the HTTP response that indicate whether the request was successful, whether there was a client-side error, a server-side error, or if additional action is required. For example, a status code of 200 OK indicates success, while 404 Not Found indicates that the requested resource could not be found.
-
Can you explain the significance of HTTP response codes in API development? Answer: HTTP response codes are critical in API development because they inform clients about the success or failure of their requests. These codes help clients understand how to proceed after making a request. For example:
200 OK signals a successful request.
201 Created is used when a new resource is created.
400 Bad Request indicates a client-side error, often due to invalid input.
500 Internal Server Error suggests a server-side issue. Using correct HTTP response codes improves API usability and helps developers diagnose and handle errors effectively.
-
How does the frontend interact with the backend in a typical web application? Answer: In a typical web application, the frontend (client-side) and backend (server-side) interact through HTTP requests and responses. The frontend, which is responsible for the user interface and experience, sends requests to the backend for data or to perform actions (e.g., submitting a form). The backend, often implemented as an API or server, processes these requests, interacts with databases or other services, and returns the appropriate response to the frontend. This interaction enables dynamic content to be displayed and updated on the frontend based on the data processed by the backend.
-
What is the difference between the frontend and backend in web development? Answer: The frontend and backend refer to different parts of a web application:
Frontend: This is the client-facing part of the application, including the user interface (UI) that users interact with. It is typically built using HTML, CSS, and JavaScript, and it runs in the user's web browser.
Backend: This is the server-side part of the application, responsible for processing requests, managing databases, and executing business logic. It handles data processing, authentication, and other core functionalities. The backend is typically built using server-side programming languages like Go, Python, or Java.
The frontend and backend work together to create a complete web application, with the frontend handling user interaction and the backend managing data and application logic.
- Why are HTTP status codes important for RESTful APIs? Answer: HTTP status codes are important for RESTful APIs because they provide a standardized way to communicate the result of a client's request. They help clients understand whether their request was successful, encountered an error, or requires further action. For example:
200 OK indicates a successful operation.
201 Created is used after creating a resource.
404 Not Found informs the client that the requested resource does not exist.
401 Unauthorized indicates that authentication is required.
Using appropriate status codes improves the clarity of API responses and enables clients to handle different scenarios appropriately.
-
What happens when a client receives a 404 Not Found status code? Answer: When a client receives a 404 Not Found status code, it means that the server could not find the requested resource. This often occurs when the client attempts to access a URL that does not exist on the server. The 404 response indicates that the resource is either missing, has been moved, or the client made an incorrect request. It helps guide the client to check the URL or request parameters and try again or handle the error appropriately in the application.
-
How does an API differ from a traditional backend server? Answer: An API (Application Programming Interface) is a set of rules that allows different software components to communicate with each other, often over HTTP in web contexts. A traditional backend server handles the entire server-side operation of a web application, including serving HTML, managing databases, handling authentication, and more.
APIs specifically provide endpoints for data access and manipulation, enabling frontend applications, mobile apps, or other services to interact with the backend without directly handling HTML rendering or other full-stack responsibilities. APIs are often used to expose specific functionalities of a backend system for external use.
-
What is the role of the backend in managing HTTP status codes? Answer: The backend is responsible for generating and returning appropriate HTTP status codes in response to client requests. These status codes are crucial for indicating the outcome of the request, such as whether it was successful, encountered an error, or required further action. The backend logic determines which status code to return based on factors like the validity of the request, server errors, or authentication issues. Proper use of status codes in the backend ensures clear communication with the client and helps in debugging and error handling.
-
Why is the distinction between frontend and backend important in web development? Answer: The distinction between frontend and backend is important in web development because it defines the separation of concerns between different parts of an application:
Frontend: Focuses on the user experience, UI design, and client-side logic. It interacts directly with users and handles tasks like rendering pages, capturing user input, and displaying data.
Backend: Manages the server-side logic, including database operations, business logic, and API endpoints. It handles tasks like processing requests, authenticating users, and maintaining data integrity.
This separation allows developers to specialize in different areas, promotes modular development, and enables independent scaling and optimization of each part.
- What are the key differences between HTTP/1.1, HTTP/2, and HTTP/3? Answer:
HTTP/1.1: The most widely used version of HTTP, HTTP/1.1 supports persistent connections, chunked transfers, and request pipelining. However, it has limitations, such as head-of-line blocking, where a single slow request can block others.
HTTP/2: Introduced multiplexing, allowing multiple requests and responses to be sent over a single connection simultaneously, which reduces latency. It also supports header compression (HPACK) and prioritization of requests.
HTTP/3: The latest version of HTTP, HTTP/3 runs over QUIC, a transport protocol built on UDP rather than TCP. It offers faster connection establishment, improved security, and better handling of packet loss, further reducing latency and improving performance.
-
What is HTTPS, and how does it differ from HTTP? Answer: HTTPS (HyperText Transfer Protocol Secure) is an extension of HTTP that adds a layer of security by using SSL/TLS (Secure Sockets Layer/Transport Layer Security) to encrypt the data transmitted between a client and a server. This encryption ensures that sensitive data, such as login credentials and payment information, cannot be easily intercepted by malicious actors. HTTPS also provides data integrity, ensuring that the data sent has not been tampered with, and authentication, verifying that the server is who it claims to be.
-
Can you explain what REST is and how it is related to HTTP? Answer: REST (Representational State Transfer) is an architectural style for designing networked applications, often used in developing APIs. RESTful services leverage standard HTTP methods (GET, POST, PUT, DELETE, etc.) to perform operations on resources, typically represented by URLs or URIs (Uniform Resource Identifiers). REST emphasizes stateless interactions, where each request from a client to a server must contain all the information needed to understand and process the request, without relying on any stored context on the server.
-
What is an API Endpoint, and how is it used in RESTful services? Answer: An API endpoint is a specific URL at which a server listens for requests from clients. In RESTful services, endpoints represent resources (e.g., users, orders, products) and define the actions that can be performed on these resources using HTTP methods. For example, GET /users/123 might be an endpoint to retrieve the details of a specific user, while POST /users could be used to create a new user. Endpoints are critical in RESTful APIs as they define how clients interact with the application's data and functionality.
-
How does an HTTP Client work in Go, and what is its purpose? Answer: An HTTP Client in Go is a part of the net/http package and is used to send HTTP requests and receive responses from a server. The HTTP client allows you to make requests like GET, POST, PUT, DELETE, and handle responses, including reading the response body, handling status codes, and managing headers. It can be configured with timeouts, custom headers, cookies, and other settings to control how requests are made and responses are processed. The HTTP client is essential for interacting with web services, APIs, or any HTTP server.
-
What is the role of an HTTP Server in Go? Answer: An HTTP Server in Go is responsible for handling incoming HTTP requests from clients, processing them, and sending back the appropriate HTTP responses. The server listens on a specified port for requests and uses handlers (functions) to manage different routes or endpoints. These handlers define how the server should respond to various requests (e.g., serving HTML pages, processing form data, providing JSON responses). The HTTP Server is a core component for building web applications, APIs, or any service that requires communication over HTTP.
-
What advantages does HTTP/2 offer over HTTP/1.1 for web applications? Answer: HTTP/2 offers several advantages over HTTP/1.1:
Multiplexing: Multiple requests and responses can be sent over a single connection simultaneously, reducing latency.
Header Compression: HTTP/2 compresses headers, reducing the amount of data transmitted and speeding up communication.
Request Prioritization: It allows for the prioritization of requests, ensuring that critical resources are loaded first.
Binary Protocol: HTTP/2 uses a binary format instead of text, which is more efficient to parse and less prone to errors.
These features collectively improve the performance and efficiency of web applications.
- What are the security benefits of using HTTPS for API communication? Answer: HTTPS provides several security benefits for API communication:
Data Encryption: Encrypts the data transmitted between the client and server, protecting it from eavesdroppers and man-in-the-middle attacks.
Data Integrity: Ensures that the data has not been altered during transit.
Authentication: Verifies the identity of the server, ensuring that the client is communicating with the intended server and not an imposter.
Privacy: Protects sensitive data, such as login credentials and personal information, from being exposed.
Using HTTPS is crucial for securing API communications, especially when handling sensitive or private data.
-
How do you distinguish between RESTful and non-RESTful APIs? Answer: RESTful APIs adhere to the principles of REST architecture, including stateless communication, the use of standard HTTP methods (GET, POST, PUT, DELETE), and resource-based URLs. They emphasize simplicity, scalability, and the use of standard protocols. Non-RESTful APIs might use custom methods, rely on stateful interactions, or not follow the resource-based URL pattern. They may also use other protocols like SOAP, which is more complex and rigid compared to REST.
-
Why is it important to properly manage HTTP Clients in Go, especially in high-concurrency environments? Answer: Properly managing HTTP Clients in Go is important because creating a new HTTP client for every request can lead to resource exhaustion and inefficient use of system resources, such as open file descriptors and TCP connections. Reusing a single http.Client instance allows for connection reuse, better performance, and resource management. In high-concurrency environments, failing to manage clients properly can lead to issues like connection leaks, excessive garbage collection, and reduced application performance.
-
What are ports, and why are they important in networking? Answer: Ports are numerical identifiers in networking that help distinguish between different services or applications running on the same host. Each port corresponds to a specific service, allowing multiple services to run simultaneously without interference. For instance, HTTP traffic typically uses port 80, while HTTPS traffic uses port 443. Understanding ports is essential for configuring servers, establishing connections, and troubleshooting network issues.
-
What are Go modules, and why were they introduced? Answer: Go modules are a dependency management system introduced in Go 1.11 to simplify package management and versioning in Go projects. Modules allow developers to define dependencies explicitly, track versions, and ensure consistent builds across different environments. They help eliminate issues related to GOPATH and provide a more organized way to manage project dependencies, making it easier to share and reuse code.
-
What does the go mod init command do? Answer: The go mod init command initializes a new Go module in the current directory by creating a go.mod file. This file contains metadata about the module, including its name (usually the module's import path) and dependencies. By running this command, developers can start using Go modules for dependency management, allowing them to manage and version their packages effectively.
-
How does the go get command work, and what is its purpose? Answer: The go get command is used to download and install packages from a remote repository (like GitHub) into the local Go workspace. It automatically updates the go.mod file with the new dependencies, ensuring that the project has access to the required packages. go get can also be used to upgrade existing dependencies to a newer version. It simplifies the process of managing dependencies and keeping projects up to date.
-
What is TLS/SSL, and how does it secure communications? Answer: TLS (Transport Layer Security) and its predecessor SSL (Secure Sockets Layer) are cryptographic protocols designed to secure communications over a computer network. They provide data encryption, ensuring that the data transmitted between a client and server cannot be easily intercepted or read by third parties. TLS also provides authentication, verifying the identity of the communicating parties, and integrity, ensuring that the data has not been tampered with during transmission. Using TLS/SSL is essential for protecting sensitive information, especially in web applications and APIs.
-
Why is it important to use modules in Go projects? Answer: Using modules in Go projects is important because they provide a structured way to manage dependencies and versions. Modules help avoid conflicts between different projects that may require different versions of the same package. They also enable reproducible builds by locking dependencies to specific versions in the go.mod and go.sum files. This organization simplifies collaboration, code sharing, and the overall management of complex projects.
-
Can you explain how a port number is used in a URL? Answer: In a URL, a port number specifies the network port that the server listens to for incoming connections. It is usually appended to the hostname or IP address after a colon. For example, in the URL http://example.com:8080, 8080 is the port number. If no port number is specified, the default port for the protocol is used (port 80 for HTTP and port 443 for HTTPS). Understanding port numbers is crucial for accessing web services that may not use standard ports.
-
What happens if you try to go get a package that does not exist? Answer: If you try to go get a package that does not exist, the command will return an error message indicating that the package could not be found. This might happen if the package name is incorrect, the repository has been deleted or made private, or if the package does not follow the expected directory structure. The error helps developers identify issues with the package source or name, allowing them to correct it.
-
How does Go ensure that modules are compatible with each other? Answer: Go ensures that modules are compatible with each other by using versioning and semantic versioning (semver) practices. Each module can specify compatible versions of its dependencies in the go.mod file. When using go get, Go checks for compatibility by resolving dependencies and their required versions, ensuring that no incompatible versions are used. This process helps maintain stability and avoids conflicts between different modules within a project.
-
Why is TLS/SSL particularly important for web applications? Answer: TLS/SSL is particularly important for web applications because it protects sensitive user data, such as login credentials, payment information, and personal details, from being intercepted by malicious actors during transmission. It helps build trust with users by providing a secure environment for their transactions. Additionally, many modern browsers flag non-HTTPS sites as insecure, which can deter users from engaging with those sites. Implementing TLS/SSL is essential for ensuring data security and maintaining user confidence in web applications.
-
What is serialization, and why is it used? Answer: Serialization is the process of converting an object or data structure into a format that can be easily stored or transmitted, such as JSON, XML, or binary formats. It allows complex data structures to be represented in a compact and standardized format, making it easier to save to files, send over networks, or share between different systems. Serialization is essential for data persistence and communication in distributed applications.
-
What is deserialization, and how does it relate to serialization? Answer: Deserialization is the reverse process of serialization, where the serialized data is converted back into its original object or data structure. It allows applications to reconstruct the original data from a serialized format. Deserialization is crucial for reading stored data, processing received data from network requests, or converting data formats for application use. It works hand-in-hand with serialization to facilitate data interchange.
-
What is the difference between marshaling and encoding in Golang? Answer: Marshaling refers specifically to the process of converting a Go data structure (like a struct) into a format that can be stored or transmitted (e.g., JSON or XML). In Go, this is commonly done using the json.Marshal function. Encoding, on the other hand, is a broader term that encompasses the entire process of converting data from one format to another, which may include marshaling. For example, encoding can refer to converting data to a specific character encoding, like UTF-8.
-
What is unmarshaling, and how is it used in Go? Answer: Unmarshaling is the process of converting serialized data back into a Go data structure. In Go, this is typically done using the json.Unmarshal function, which takes a byte slice containing JSON data and populates a specified struct or data type. Unmarshaling is crucial for processing incoming data, such as JSON from API requests, allowing applications to work with structured data directly.
-
Can you explain the difference between encode and decode? Answer: In the context of data processing, "encode" typically refers to the process of transforming data into a specific format for storage or transmission, such as converting a string to bytes or a data structure to JSON. "Decode," on the other hand, refers to the process of converting data from a specific format back into its original form. For example, decoding JSON data involves reading the JSON format and converting it into a Go struct. In Go, json.Encoder is used for encoding, while json.Decoder is used for decoding.
-
Why is JSON often used for serialization in web applications? Answer: JSON (JavaScript Object Notation) is widely used for serialization in web applications due to its lightweight and human-readable format. JSON is easy to read and write for both humans and machines, making it a popular choice for data interchange between clients and servers. Additionally, JSON is language-agnostic, meaning it can be easily parsed and generated by many programming languages, including Go. This interoperability is essential for web APIs and services.
-
What are some common use cases for serialization in Golang? Answer: Common use cases for serialization in Golang include:
Data storage: Saving application state or configuration to a file in a serialized format.
Network communication: Sending data over the network between clients and servers, often using JSON or Protobuf.
APIs: Serializing responses for RESTful APIs, allowing clients to consume structured data.
Inter-process communication: Sharing data between different processes or services using serialized formats.
- What are some potential challenges with deserialization? Answer: Challenges with deserialization can include:
Data integrity: If the serialized data has been tampered with, it can lead to errors or security vulnerabilities during deserialization.
Versioning: Changes to the data structure can cause deserialization to fail if the serialized data does not match the expected format.
Performance: Deserialization can be computationally expensive, especially for large datasets, potentially impacting application performance.
Type safety: Deserializing data into the wrong type can lead to runtime errors if not properly handled.
- How do you ensure that marshaling and unmarshaling handle errors gracefully? Answer: To ensure that marshaling and unmarshaling handle errors gracefully, developers should:
Check return values: Always check for errors returned by marshaling or unmarshaling functions and handle them appropriately, such as logging the error or returning an error response.
Use struct tags: Utilize struct tags in Go to control how fields are marshaled and unmarshaled, ensuring the correct mapping between data and structure.
Validate data: Implement validation logic before and after marshaling or unmarshaling to ensure data integrity and compliance with expected formats.
-
What is a common serialization format used in Go besides JSON, and why would you use it? Answer: Besides JSON, a common serialization format used in Go is Protocol Buffers (Protobuf). Protobuf is a binary serialization format developed by Google that is highly efficient and suitable for high-performance applications. It allows for smaller message sizes compared to JSON, which can significantly reduce bandwidth usage and improve serialization/deserialization speeds. Protobuf also supports schema evolution, making it easier to manage changes in data structures over time while maintaining backward compatibility.
-
What is CRUD, and why is it important in web development? Answer: CRUD stands for Create, Read, Update, and Delete, representing the four basic operations that can be performed on data. In web development, CRUD operations are fundamental for interacting with databases and managing application state. These operations allow users to create new records, read or retrieve existing data, update records, and delete data as needed. Implementing CRUD functionality is essential for building dynamic web applications and services.
-
What are routes in a web application, and how do they function? Answer: Routes in a web application define the paths through which requests are mapped to specific handlers or functions. Each route corresponds to a specific URL pattern and HTTP method (GET, POST, PUT, DELETE, etc.). When a user makes a request to a particular URL, the routing mechanism checks the defined routes and directs the request to the appropriate handler. This system allows developers to organize application logic and manage how users interact with various endpoints.
-
Can you explain what path parameters are and how they are used? Answer: Path parameters are variables embedded in the URL path that allow dynamic values to be captured and used in a web application. They are typically denoted with a colon (:) in the route definition. For example, in the route /users/:id, :id is a path parameter that captures the user ID from the URL. Path parameters are commonly used to identify specific resources, such as retrieving user information based on their unique identifier.
-
How do query parameters differ from path parameters? Answer: Query parameters are key-value pairs appended to the end of a URL, typically following a question mark (?). They provide additional information to the server about the request. For example, in the URL /users?age=30&sort=name, age and sort are query parameters. Unlike path parameters, which are part of the URL structure, query parameters are optional and often used for filtering, sorting, or searching results.
-
What is the significance of HTTP methods in CRUD operations? Answer: HTTP methods are crucial for defining the type of operation being performed in a web application. Each CRUD operation typically corresponds to a specific HTTP method:
Create: POST (to create a new resource)
Read: GET (to retrieve existing resources)
Update: PUT or PATCH (to modify existing resources)
Delete: DELETE (to remove a resource) Using the appropriate HTTP methods helps communicate the intended action clearly and aligns with RESTful design principles.
-
Can you explain how to handle optional query parameters in a Go web application? Answer: Handling optional query parameters in a Go web application involves checking if the parameters exist in the request. When a request is received, the server can parse the query string and look for specific keys. If a key is present, its value can be used; if it’s absent, the application can apply default behavior or handle the request accordingly. This flexibility allows developers to create more versatile APIs that cater to various user needs.
-
What is REST, and how does it relate to CRUD operations and routing? Answer: REST (Representational State Transfer) is an architectural style for designing networked applications that relies on stateless communication and standard HTTP methods. RESTful APIs utilize CRUD operations to manipulate resources, which are typically represented by URLs. Routing plays a vital role in RESTful applications by defining how requests to various endpoints are processed and how resources are managed through CRUD operations, ensuring a consistent and predictable interface.
-
What are some common practices for naming routes in a web application? Answer: Common practices for naming routes include:
Use nouns: Routes should represent resources (e.g., /users, /products) rather than actions.
Use plural forms: Use plural nouns to indicate collections (e.g., /users for multiple users).
Follow REST conventions: Map routes to HTTP methods according to CRUD operations (e.g., use GET for retrieving and POST for creating).
Be descriptive: Ensure that routes clearly indicate their purpose and functionality to improve readability and maintainability.
-
How can query parameters be used for filtering and pagination? Answer: Query parameters are often used for filtering and pagination by allowing clients to specify criteria in their requests. For filtering, parameters can include key-value pairs that determine which resources to return (e.g., /products?category=electronics). For pagination, parameters like page and limit can control the number of results returned and which subset of results to fetch (e.g., /users?page=2&limit=10). This functionality enhances user experience by allowing tailored data retrieval.
-
What are some potential security concerns related to path and query parameters? Answer: Security concerns related to path and query parameters include:
Injection attacks: Malicious users may attempt to inject harmful code or SQL queries through parameters, which can lead to vulnerabilities like SQL injection.
Data exposure: Sensitive information should not be passed in URLs, as they may be logged or cached by browsers and servers, exposing private data.
Parameter tampering: Attackers may manipulate parameters to gain unauthorized access to resources or perform actions outside their permission scope. Implementing validation, sanitization, and proper authentication mechanisms is essential to mitigate these risks.
-
What is a multiplexer (mux) in the context of web applications? Answer: A multiplexer (mux) is a routing mechanism that directs incoming HTTP requests to the appropriate handler functions based on the request URL and HTTP method. In web applications, a mux examines the request path and method to determine which function should process the request. This allows developers to define multiple routes within a single application, enabling organized and efficient request handling.
-
How does a multiplexer differ from a simple router? Answer: While both a multiplexer and a router are used to direct HTTP requests, a multiplexer typically handles more complex routing logic, allowing for features like route grouping, variable path parameters, and method-specific routing. In contrast, a simple router may only match URLs to handler functions without additional capabilities. A mux often provides more advanced functionality for managing routes, including middleware integration and custom matching rules.
-
Can you explain what middleware is in a web application? Answer: Middleware is a function or layer in a web application that sits between the incoming request and the final handler. It is used to process requests, modify responses, or perform actions before or after a request is handled. Common uses of middleware include logging, authentication, request validation, error handling, and setting response headers. Middleware helps separate concerns and keeps the codebase clean by promoting reusability and modularity.
-
How can middleware be used to implement authentication in a web application? Answer: Middleware can be implemented to check if a user is authenticated before allowing access to certain routes. When a request is received, the authentication middleware verifies the presence of valid credentials (e.g., tokens, session cookies). If the credentials are valid, the request proceeds to the intended handler; otherwise, the middleware can return an unauthorized response. This approach centralizes authentication logic and simplifies the handling of protected routes.
-
What are the common HTTP methods used in web applications, and what do they represent? Answer: Common HTTP methods include:
GET: Used to retrieve data from the server. It should not have side effects and is considered safe and idempotent.
POST: Used to send data to the server to create a new resource. It often changes the server state.
PUT: Used to update an existing resource or create a new resource if it does not exist. It is idempotent, meaning multiple identical requests have the same effect as a single request.
DELETE: Used to remove a resource from the server. It is also idempotent.
PATCH: Used to apply partial modifications to a resource.
-
How does the choice of HTTP method affect RESTful API design? Answer: The choice of HTTP method is crucial in RESTful API design as it conveys the intended action on a resource. Each method corresponds to a specific CRUD operation, aligning with REST principles. For example, using GET for data retrieval ensures the operation is safe, while POST is appropriate for creating new resources. Properly using HTTP methods helps ensure that APIs are predictable, making it easier for clients to understand and interact with them.
-
What is the significance of status codes in conjunction with HTTP methods? Answer: Status codes indicate the outcome of an HTTP request and provide clients with feedback on their operations. When an HTTP method is used, the server responds with an appropriate status code that reflects the result:
200 OK: Successful GET or PUT request.
201 Created: Successful POST request indicating resource creation.
204 No Content: Successful DELETE request.
400 Bad Request: Client error, indicating an invalid request.
401 Unauthorized: Authentication required. Using correct status codes enhances the API's usability and allows clients to handle responses effectively.
- What are some common middleware patterns in Golang web applications? Answer: Common middleware patterns in Golang web applications include:
Logging middleware: Logs request details (e.g., method, URL, time taken) for monitoring and debugging.
Authentication middleware: Verifies user credentials before allowing access to protected routes.
Recovery middleware: Catches panics during request processing and prevents the application from crashing, returning a server error instead.
CORS middleware: Manages Cross-Origin Resource Sharing settings to control which domains can access resources.
- How can middleware affect performance in a web application? Answer: Middleware can impact performance in several ways:
Processing time: Each middleware adds processing time to the request lifecycle. Excessive or inefficient middleware can slow down response times.
Resource usage: Middleware that performs heavy computations or I/O operations can consume more server resources, potentially leading to bottlenecks.
Cascading effects: If multiple middleware functions are chained, the cumulative processing time can significantly increase latency. Optimizing middleware usage and ensuring they are lightweight can help mitigate performance issues.
-
How does a multiplexer handle conflicts between different routes? Answer: A multiplexer handles conflicts between different routes by following a specific order of precedence when matching incoming requests. Typically, the mux checks the most specific routes first (e.g., routes with path parameters or fixed paths) before falling back to more general routes. If two routes match the same request, the mux prioritizes the one defined first in the code. Developers can also use techniques like grouping routes or defining common prefixes to manage conflicts effectively.
-
What is the purpose of the GET method in an API? Answer: The GET method is used to retrieve data from a server. When a client sends a GET request, it requests information from a specified resource. The GET method should not modify any data on the server and is considered safe and idempotent, meaning multiple identical requests will yield the same result without causing side effects. GET requests can include query parameters to filter or sort the data being retrieved.
-
How does the POST method differ from the GET method? Answer: The POST method is used to send data to the server to create a new resource. Unlike GET, which only retrieves data, POST requests can modify server state and may result in the creation of new resources, such as adding a new user or product. POST requests typically include a request body containing the data to be sent to the server, making it suitable for submitting forms or uploading files.
-
What is the function of the PUT method in RESTful APIs? Answer: The PUT method is used to update an existing resource or create a new resource if it does not already exist. When a client sends a PUT request, it includes the complete representation of the resource in the request body. PUT requests are idempotent, meaning that sending the same request multiple times will produce the same result. This ensures that resources can be updated reliably without unintended changes.
-
When would you use the DELETE method in an API? Answer: The DELETE method is used to remove a specified resource from the server. When a client sends a DELETE request, it instructs the server to delete the resource identified by the request URL. This operation is also idempotent; sending the same DELETE request multiple times will not have any additional effects after the resource has been deleted. DELETE requests are commonly used to manage resource lifecycle, such as removing user accounts or products.
-
What is the purpose of the PATCH method in a RESTful API? Answer: The PATCH method is used to apply partial modifications to an existing resource. Unlike PUT, which requires the complete representation of the resource, PATCH only requires the fields that need to be updated. This makes PATCH more efficient for updates, especially when dealing with large resources, as it reduces the amount of data sent over the network. PATCH requests are also idempotent, ensuring consistent behavior on repeated calls.
-
How is the OPTIONS method used in an API? Answer: The OPTIONS method is used to describe the communication options for a specific resource or the server as a whole. It allows clients to determine the allowed HTTP methods and other capabilities of an API endpoint before making actual requests. This method is particularly useful in Cross-Origin Resource Sharing (CORS) scenarios, where browsers check for permitted methods and headers before sending requests to a different origin. OPTIONS responses typically include the allowed methods in the Allow header.
-
What is an API handler, and what role does it play in web applications? Answer: An API handler is a function or method that processes incoming HTTP requests and generates corresponding HTTP responses. Handlers are responsible for implementing the business logic of an API endpoint, such as interacting with databases, performing computations, or formatting data. Each API endpoint typically has its own handler that defines how to respond to specific HTTP methods (GET, POST, etc.) and routes. Handlers play a crucial role in the overall architecture of web applications by managing request and response flows.
-
How do HTTP methods and API handlers work together? Answer: HTTP methods and API handlers work together to define how requests are processed in a web application. Each handler is associated with specific HTTP methods, allowing it to determine the appropriate action based on the method used in the request. For example, a GET request to a particular endpoint may invoke a different handler than a POST request to the same endpoint. This relationship ensures that the application can handle different types of interactions with the same resource effectively.
-
Can you explain the significance of status codes in API responses? Answer: Status codes in API responses provide clients with information about the outcome of their requests. They indicate whether the request was successful, resulted in an error, or requires further action. Common status codes include:
200 OK: Successful request.
201 Created: Resource successfully created (used with POST).
204 No Content: Successful request with no content to return (used with DELETE).
400 Bad Request: Invalid request format or parameters.
404 Not Found: Requested resource does not exist. Using appropriate status codes helps clients understand the result of their operations and facilitates better error handling.
- What are some best practices for designing APIs using these HTTP methods? Answer: Best practices for designing APIs with HTTP methods include:
Use the correct HTTP method: Align the chosen method with the intended operation (e.g., use GET for retrieval, POST for creation).
Ensure idempotency: Design PUT and DELETE methods to be idempotent to avoid unintended side effects.
Consistent naming conventions: Use clear and descriptive resource names in URLs for better readability.
Implement proper status codes: Return meaningful status codes in responses to communicate the result of the operation.
Document the API: Provide clear documentation on the available endpoints, methods, and expected request/response formats to facilitate ease of use for clients.
-
What is a database, and why is it important in applications? Answer: A database is an organized collection of structured information or data that is stored and accessed electronically. Databases are crucial in applications because they provide a systematic way to manage, store, retrieve, and manipulate data efficiently. They allow for data persistence, ensuring that information remains available even after the application stops running. Databases support various operations, such as querying, updating, and deleting data, making them essential for dynamic applications.
-
What is an ORM (Object-Relational Mapping), and what advantages does it offer? Answer: Object-Relational Mapping (ORM) is a programming technique that allows developers to interact with a relational database using object-oriented programming concepts. ORMs map database tables to programming language classes and rows to instances of those classes. The advantages of using an ORM include:
Abstraction: Developers can work with database records as objects without needing to write complex SQL queries.
Productivity: ORMs often come with built-in methods for common database operations, speeding up development.
Portability: ORM libraries often support multiple database systems, making it easier to switch between them.
Maintainability: Code becomes more readable and easier to maintain due to the use of familiar object-oriented concepts.
-
What is SQL, and what role does it play in database management? Answer: SQL (Structured Query Language) is a standardized programming language used for managing and manipulating relational databases. SQL plays a critical role in database management by allowing users to perform various operations, such as querying data, inserting new records, updating existing records, and deleting records. SQL provides a declarative syntax, enabling users to specify what data they want to retrieve or manipulate without detailing how to perform those operations.
-
Can you explain what MariaDB is and how it relates to MySQL? Answer: MariaDB is an open-source relational database management system that is a fork of MySQL. It was created as a response to concerns over the acquisition of MySQL by Oracle Corporation. MariaDB aims to maintain compatibility with MySQL while introducing new features, performance enhancements, and improved security. It supports the same SQL syntax and can often be used as a drop-in replacement for MySQL, allowing users to transition seamlessly between the two systems.
-
What is a primary key in a database, and why is it important? Answer: A primary key is a unique identifier for each record in a database table. It ensures that no two rows can have the same value for the primary key column(s). The primary key is important because it:
Ensures data integrity: By guaranteeing that each record is uniquely identifiable, it prevents duplicate entries.
Facilitates data retrieval: Queries can be optimized using primary keys for faster lookups and indexing.
Establishes relationships: Primary keys are often referenced by foreign keys in other tables, enabling the establishment of relationships between tables in a relational database.
-
What is a foreign key, and how does it relate to primary keys? Answer: A foreign key is a field or a set of fields in one table that uniquely identifies a row of another table. It establishes a link between the two tables by referencing the primary key of the related table. Foreign keys are important for maintaining referential integrity, ensuring that relationships between tables remain consistent. For example, if a table of Orders contains a foreign key referencing a Customers table, it ensures that each order is associated with a valid customer.
-
How do primary keys and foreign keys contribute to database normalization? Answer: Primary keys and foreign keys are fundamental components of database normalization, a process that organizes data to minimize redundancy and dependency.
Primary keys ensure that each record in a table is unique, which prevents duplicate data entries.
Foreign keys establish relationships between tables, allowing data to be linked rather than duplicated. This encourages the separation of data into different tables based on related attributes, reducing redundancy and promoting data integrity.
- What are some common data types used in SQL databases? Answer: Common data types used in SQL databases include:
INT: Used for integer values.
VARCHAR: Used for variable-length strings.
TEXT: Used for large amounts of text data.
DATE: Used for date values.
FLOAT: Used for floating-point numbers. Choosing appropriate data types is essential for optimizing storage and ensuring data integrity.
- What are the ACID properties in the context of database transactions? Answer: ACID properties ensure reliable processing of database transactions:
Atomicity: Ensures that a transaction is treated as a single unit of work, either fully completing or fully failing.
Consistency: Guarantees that a transaction brings the database from one valid state to another, maintaining all defined rules and constraints.
Isolation: Ensures that concurrent transactions do not interfere with each other, preserving data integrity during simultaneous operations.
Durability: Guarantees that once a transaction is committed, it remains permanent, even in the event of a system failure.
-
What is the significance of indexing in a database? Answer: Indexing is a technique used to optimize the performance of database queries. An index is a data structure that improves the speed of data retrieval operations on a database table. Indexes work by allowing the database to find and access the data more efficiently, significantly reducing the time it takes to execute queries. However, while indexes can speed up read operations, they may slow down write operations (inserts, updates, deletes) due to the overhead of maintaining the index. Therefore, careful consideration is needed when designing indexes for optimal performance.
-
What is normalization in the context of databases, and why is it important? Answer: Normalization is the process of organizing data in a database to reduce redundancy and improve data integrity. It involves dividing a database into smaller tables and defining relationships between them. The main goals of normalization are to eliminate duplicate data, ensure data dependencies are properly enforced, and simplify data management. By normalizing a database, developers can avoid anomalies during data insertion, updating, and deletion, leading to a more efficient and reliable database structure.
-
What is an RDBMS, and how does it differ from other types of databases? Answer: A Relational Database Management System (RDBMS) is a type of database management system that stores data in a structured format, using rows and columns within tables. RDBMSs are built on the principles of relational algebra and allow for relationships between tables through foreign keys. The key differences between RDBMS and other types of databases include:
Structure: RDBMSs use predefined schemas and tables, while NoSQL databases can have dynamic schemas.
ACID compliance: RDBMSs typically support ACID properties for transaction management, while some NoSQL databases prioritize scalability and performance over strict ACID compliance.
Query language: RDBMSs use SQL for querying, whereas NoSQL databases may use various query languages or APIs tailored to their data models.
- Can you explain what NoSQL databases are and their primary characteristics? Answer: NoSQL databases are a category of database systems that provide a way to store and retrieve data using means other than the traditional relational model. They are designed to handle large volumes of unstructured or semi-structured data and can offer greater scalability and flexibility than RDBMSs. Primary characteristics of NoSQL databases include:
Schema flexibility: NoSQL databases often allow for dynamic or schema-less designs, making it easier to adapt to changing data requirements.
Horizontal scalability: Many NoSQL databases are designed to scale out by distributing data across multiple servers, enabling efficient handling of large datasets.
Variety of data models: NoSQL databases can utilize various data models, such as document-based (e.g., MongoDB), key-value stores (e.g., Redis), column-family stores (e.g., Cassandra), and graph databases (e.g., Neo4j).
-
What is a schema in the context of a database? Answer: A schema in a database defines the structure of the database, including the organization of tables, the relationships between them, and the types of data stored within each table. It serves as a blueprint for how data is stored, accessed, and manipulated. A well-defined schema helps maintain data integrity and provides a clear understanding of how different data entities relate to each other. In RDBMSs, the schema is typically defined using SQL commands that create tables, specify columns, and establish constraints.
-
What is a table in a relational database, and what are its components? Answer: A table in a relational database is a collection of related data entries that consists of rows and columns. Each table represents a specific entity, such as customers, orders, or products. The main components of a table include:
Columns: Each column in a table represents a specific attribute of the entity, such as CustomerID, Name, or Email. Columns have defined data types, such as integer, string, or date.
Rows: Each row in a table corresponds to a single record or instance of the entity, containing values for each attribute defined by the columns.
Primary key: A primary key uniquely identifies each row in the table, ensuring that no two records can have the same key value. It is often a single column but can be a combination of multiple columns.
- What are the different normal forms in database normalization? Answer: Database normalization involves several normal forms, each with specific criteria to minimize redundancy and improve data integrity. The most common normal forms are:
First Normal Form (1NF): Ensures that all columns contain atomic values and that each column contains values of a single type. It eliminates repeating groups and ensures that each entry in a column is unique.
Second Normal Form (2NF): Builds on 1NF by ensuring that all non-key attributes are fully functionally dependent on the primary key, eliminating partial dependencies.
Third Normal Form (3NF): Extends 2NF by ensuring that all non-key attributes are not only dependent on the primary key but also independent of each other, eliminating transitive dependencies.
- What are some advantages and disadvantages of using NoSQL databases? Answer: Advantages of NoSQL databases:
Scalability: NoSQL databases can easily scale horizontally to handle large volumes of data by distributing it across multiple servers.
Flexibility: The schema-less nature allows for more flexibility in data modeling, accommodating various data formats and structures.
Performance: NoSQL databases can optimize performance for specific use cases, such as high write or read speeds.
Disadvantages of NoSQL databases:
Lack of ACID compliance: Some NoSQL databases sacrifice strict ACID properties for performance and scalability, which can lead to potential data integrity issues.
Complex queries: While NoSQL databases often support simple queries, complex joins and aggregations may require more effort to implement compared to SQL.
Less maturity: Many NoSQL technologies are relatively new, which can lead to less community support and documentation compared to established RDBMS solutions.
- How does denormalization work, and when is it appropriate to use? Answer: Denormalization is the process of intentionally introducing redundancy into a database schema to improve query performance. While normalization reduces data redundancy, it can sometimes lead to complex joins that slow down read operations. Denormalization may be appropriate in the following scenarios:
Performance optimization: When read-heavy workloads require faster access times, denormalizing can reduce the number of joins needed.
Simplified queries: Denormalization can make queries simpler by consolidating data into fewer tables.
Data warehousing: In analytical environments, denormalized data structures can improve query performance for reporting and analysis.
- What are the common use cases for RDBMS and NoSQL databases? Answer: Common use cases for RDBMS:
Transactional applications, such as banking systems or e-commerce platforms, where data integrity and ACID compliance are critical.
Applications requiring complex queries and reporting, such as customer relationship management (CRM) systems.
Common use cases for NoSQL databases:
Big data applications, where large volumes of unstructured data need to be processed quickly.
Content management systems or social networks, where data models may evolve rapidly and require flexibility.
Applications requiring high scalability and low-latency access, such as real-time analytics or IoT applications.
-
What is the role of indexing in both RDBMS and NoSQL databases? Answer: Indexing is a technique used in both RDBMS and NoSQL databases to improve data retrieval performance. An index is a data structure that allows the database to find and access data more quickly. In RDBMS, indexes are commonly created on primary and foreign keys, as well as on columns frequently used in queries. In NoSQL databases, indexing may vary based on the data model (e.g., document, key-value), but it generally serves the same purpose of enhancing query performance. However, indexing can also introduce overhead, as it requires additional storage space and may slow down write operations, so careful consideration is needed in designing indexes.
-
What is API refactoring, and why is it important? Answer: API refactoring is the process of modifying the structure or design of an API without changing its external behavior or functionality. The purpose of refactoring is to improve the internal quality of the API, making it easier to understand, maintain, and extend. It's important because as applications grow, the initial design may become cumbersome or inefficient. Refactoring can help streamline the API, enhance performance, reduce technical debt, and ensure that it aligns with current best practices and user needs.
-
What are struct tags in Go, and what purpose do they serve? Answer: Struct tags in Go are string literals associated with struct fields that provide metadata about the fields. They are defined by placing a backtick-enclosed string after the field declaration. Struct tags are commonly used for purposes such as:
Serialization and deserialization: Tags can specify how a field should be processed when converting to and from formats like JSON or XML.
Data validation: Tags can define validation rules that are used to check the integrity of data before processing.
ORM mapping: Tags can indicate how struct fields map to database columns in an ORM framework.
- Why is data validation important in API development? Answer: Data validation is crucial in API development as it ensures that incoming data meets specific criteria before being processed or stored. This helps to:
Prevent errors: By validating data early, APIs can avoid runtime errors caused by unexpected input.
Enhance security: Proper validation helps mitigate security vulnerabilities, such as SQL injection or cross-site scripting (XSS), by ensuring that only valid data is accepted.
Maintain data integrity: Validating data helps ensure that the data stored in databases or used in applications is accurate and reliable.
- What is the difference between authentication and authorization? Answer: Authentication and authorization are two distinct concepts in security:
Authentication is the process of verifying the identity of a user or system. It typically involves checking credentials, such as usernames and passwords, tokens, or biometric data, to confirm that the user is who they claim to be.
Authorization, on the other hand, is the process of determining what an authenticated user is allowed to do. It involves defining and enforcing permissions and access controls to resources based on the user's role or identity. In summary, authentication answers the question "Who are you?" while authorization answers "What can you do?"
- What are some common methods of authentication used in APIs? Answer: Common methods of authentication used in APIs include:
Basic Authentication: Involves sending a username and password encoded in the request headers. It's simple but less secure unless used over HTTPS.
Token-based Authentication: Involves issuing a token (e.g., JWT) upon successful login. The client includes this token in subsequent requests to access protected resources.
OAuth: An authorization framework that allows third-party applications to access user data without sharing credentials. It typically involves obtaining access tokens.
API Keys: A unique identifier sent with each request to authenticate the client. It's often used for identifying and tracking API usage.
-
How can struct tags be used for data validation in Go? Answer: In Go, struct tags can be utilized with validation libraries to enforce rules on struct fields. By defining tags that specify validation constraints (e.g., required, maxLength, email), developers can annotate struct fields with the desired validation criteria. When validating data, the validation library reads these tags and applies the rules accordingly. This approach centralizes validation logic, making it easier to maintain and ensuring that validation rules are clearly documented alongside the struct definitions.
-
What role does middleware play in handling authentication and authorization in APIs? Answer: Middleware is a function that intercepts requests and responses in the API request lifecycle. It plays a crucial role in handling authentication and authorization by:
Authenticating requests: Middleware can check for valid authentication tokens or credentials before allowing access to protected routes.
Enforcing authorization: After a user is authenticated, middleware can verify whether the user has the necessary permissions to perform specific actions or access certain resources.
Centralizing logic: Using middleware for authentication and authorization allows developers to separate these concerns from the core business logic of the application, promoting cleaner and more maintainable code.
- What are some best practices for implementing authentication in APIs? Answer: Best practices for implementing authentication in APIs include:
Use HTTPS: Always encrypt data in transit to protect sensitive information, such as passwords and tokens.
Employ secure token storage: Store authentication tokens securely on the client side, using mechanisms like HttpOnly and Secure flags for cookies.
Implement token expiration: Use short-lived tokens to minimize risk. Refresh tokens can be issued to obtain new access tokens without requiring users to log in again.
Rate limiting: Apply rate limiting to authentication endpoints to mitigate brute-force attacks.
Log authentication attempts: Keep logs of authentication attempts to monitor for suspicious activity.
- How can authorization be implemented in a Go API? Answer: Authorization in a Go API can be implemented using role-based access control (RBAC) or attribute-based access control (ABAC) mechanisms. This can involve:
Defining user roles: Assign roles to users (e.g., admin, user, guest) and specify permissions associated with each role.
Middleware checks: Use middleware to check a user's role or permissions against the requested action or resource. If the user is not authorized, the middleware can return an appropriate HTTP status code (e.g., 403 Forbidden).
Configurable policies: Use configuration files or databases to define and manage authorization rules, making it easier to update permissions without changing code.
- What are some common challenges in API authentication and authorization? Answer: Common challenges in API authentication and authorization include:
Token management: Properly handling token expiration, revocation, and renewal can be complex and may require additional infrastructure.
Secure storage of credentials: Protecting user credentials and tokens from unauthorized access is critical to maintaining security.
Scalability: As applications grow, managing user identities and permissions becomes more complex, requiring efficient systems to handle increased load.
User experience: Striking a balance between security measures (e.g., multi-factor authentication) and user convenience can be challenging, as overly complex processes may frustrate users.
-
What are cookies in web development, and how are they used in Go applications? Answer: Cookies are small pieces of data stored on the client's browser that are sent to the server with each HTTP request. They are commonly used for maintaining state and storing user preferences, authentication tokens, and session identifiers. In Go applications, cookies can be created, read, and managed using the http package. They allow developers to persist information between user sessions, enabling functionalities like "remember me" options and tracking user behavior across different visits.
-
What is a session, and how does it differ from cookies? Answer: A session is a server-side storage mechanism that allows an application to maintain state across multiple requests from the same user. Unlike cookies, which store data on the client side, sessions store data on the server, with the client typically receiving a session ID in a cookie or URL parameter to identify the session. This approach provides greater security since sensitive data is not exposed to the client. Sessions are often used for user authentication, where user-specific information is stored on the server while the client holds only the session identifier.
-
What is JSON Web Token (JWT), and how is it used for authentication in APIs? Answer: JWT is a compact, URL-safe means of representing claims to be transferred between two parties. It is commonly used for authentication in APIs. When a user logs in, the server generates a JWT that encodes user information and claims, signing it with a secret key. The client stores this token and includes it in the Authorization header of subsequent requests. The server verifies the token's authenticity and extracts user information to authorize access to resources. JWTs provide a stateless authentication mechanism, meaning no session information is stored on the server.
-
How does pagination work in APIs, and why is it important? Answer: Pagination is the process of dividing a large set of results into smaller, manageable chunks or pages. In APIs, pagination is essential for improving performance and user experience, especially when dealing with large datasets. It helps reduce the load on both the server and the client by only fetching a subset of data at a time. Common pagination strategies include offset-based (using page and limit parameters) and cursor-based pagination (using a unique identifier to fetch the next set of results). Implementing pagination ensures that clients can retrieve data efficiently without overwhelming them with excessive information at once.
-
What is data sanitization, and why is it important in web applications? Answer: Data sanitization is the process of cleaning and validating input data to prevent harmful data from being processed by an application. It is essential for preventing security vulnerabilities, such as SQL injection, cross-site scripting (XSS), and command injection attacks. By sanitizing data, developers ensure that only safe, expected data is accepted and processed. This involves removing or encoding special characters, validating data formats, and implementing strict input controls. Data sanitization is a critical aspect of building secure web applications, protecting both the application and its users.
-
What are the common types of cookies, and how do they differ? Answer: There are several types of cookies, each serving different purposes:
Session Cookies: Temporary cookies that are deleted when the browser is closed. They are often used to store session information during a user's visit.
Persistent Cookies: Remain on the user's device for a specified period or until manually deleted. They are used to remember user preferences or authentication details across sessions.
Secure Cookies: Transmitted only over secure HTTPS connections, ensuring that the cookie data is not exposed during transmission.
HttpOnly Cookies: Not accessible via JavaScript, which helps mitigate risks like XSS attacks by preventing client-side scripts from accessing the cookie data.
- How can sessions be managed securely in a Go application? Answer: To manage sessions securely in a Go application, developers should:
Use secure session IDs: Generate long, random, and unpredictable session identifiers to prevent session hijacking.
Implement HTTPS: Always use secure connections to protect session data during transmission.
Set cookie attributes: Use Secure and HttpOnly flags for session cookies to enhance security against interception and client-side attacks.
Implement session expiration: Define a timeout period for sessions to automatically log users out after inactivity, reducing the risk of unauthorized access.
Invalidate sessions on logout: Ensure that sessions are properly terminated when users log out, preventing reuse of old session identifiers.
- What are the benefits of using JWT over traditional session management? Answer: Using JWT for authentication offers several advantages over traditional session management:
Statelessness: JWTs are self-contained and carry all necessary information, allowing servers to remain stateless. This improves scalability, as no session data needs to be stored on the server.
Cross-domain support: JWTs can be easily used in cross-domain applications, making them ideal for microservices and single-page applications (SPAs).
Decentralized authentication: Since JWTs can be verified without querying a central session store, they facilitate distributed systems where services can authenticate users independently.
Flexibility: JWTs can carry custom claims, allowing for versatile payloads that can include user roles, permissions, and expiration information.
- How can pagination be implemented in a RESTful API? Answer: In a RESTful API, pagination can be implemented by providing query parameters in the API request. Common approaches include:
Offset-based pagination: Clients send page and limit parameters, specifying which set of results to return. For example, GET /items?page=2&limit=10 retrieves the second page of results with ten items per page.
Cursor-based pagination: Clients receive a cursor with the last item of the current page, allowing them to fetch the next set of results. This approach can provide more reliable performance, especially for large datasets.
Link headers: APIs can include Link headers in the response, providing URLs for the next, previous, first, and last pages of results, helping clients navigate through pages easily.
- What are some best practices for data sanitization in Go applications? Answer: Best practices for data sanitization in Go applications include:
Validate input data: Implement strict validation rules for incoming data to ensure it meets expected formats and constraints.
Use libraries: Leverage existing libraries and frameworks that provide built-in sanitization and validation functions to avoid common pitfalls.
Encode output data: Ensure that any data output to web pages or databases is properly encoded to prevent XSS and injection attacks.
Whitelist accepted values: Where possible, use whitelisting to define acceptable input values, rejecting anything outside the defined criteria.
Regular security audits: Conduct regular security assessments to identify and address potential vulnerabilities related to data sanitization.
-
What is code obfuscation, and why is it used in Go applications? Answer: Code obfuscation is the practice of transforming code into a version that is difficult to understand while maintaining its functionality. It is used in Go applications to protect intellectual property and deter reverse engineering, making it harder for malicious actors to analyze or modify the code. By obfuscating code, developers can safeguard their business logic, algorithms, and proprietary methods from unauthorized access or exploitation.
-
What is a binary file, and how does it differ from a text file? Answer: A binary file is a file that contains data in a format that is not intended for human reading. It is composed of a sequence of bytes that may represent various types of data, such as images, audio, or compiled programs. In contrast, a text file contains human-readable characters and is typically encoded using standard character encodings like ASCII or UTF-8. The key difference is that binary files require specific programs to interpret their content, while text files can be opened and understood using basic text editors.
-
What are protocol buffers, and what advantages do they offer for data serialization? Answer: Protocol buffers (protobufs) are a language-agnostic serialization format developed by Google for structured data. They allow developers to define data structures (messages) in a simple interface definition language (IDL) and then generate code for various programming languages. The advantages of using protocol buffers include:
Efficiency: Protobufs are compact and efficient in both size and speed, making them ideal for performance-sensitive applications.
Cross-language support: Protobufs can generate code for multiple programming languages, facilitating communication between systems written in different languages.
Backward compatibility: Protobufs allow for easy evolution of data structures, enabling new fields to be added without breaking existing data formats.
-
What are packages in protocol buffers, and how are they used? Answer: Packages in protocol buffers are a way to organize and group related messages, enumerations, and service definitions within a .proto file. By specifying a package name, developers can avoid naming conflicts and enhance code organization. When code is generated from a .proto file, the package name becomes part of the namespace for the generated classes, allowing for better structure and maintainability of the codebase. This organization is especially useful in larger projects with multiple proto files.
-
What is a message in protocol buffers, and how does it function? Answer: A message in protocol buffers is a structured data type defined in a .proto file that represents a specific entity or data structure. Messages can contain fields of various types, including primitive types (e.g., integers, strings) and other messages. Each field is defined with a unique tag number, which is used to serialize and deserialize data efficiently. When a message is serialized, it is converted into a compact binary format, and during deserialization, the binary data is transformed back into the original message structure. This mechanism allows for efficient data exchange between systems.
-
How do protocol buffers compare to JSON for data serialization? Answer: Protocol buffers and JSON are both used for data serialization, but they have key differences:
Efficiency: Protocol buffers produce smaller binary representations compared to JSON, which results in reduced bandwidth usage and faster parsing.
Schema: Protobufs require a defined schema (the .proto file) that enforces structure, while JSON is more flexible and does not require a predefined schema, making it easier for ad-hoc data structures.
Performance: Protobufs typically offer better performance in terms of serialization and deserialization speed compared to JSON, which can be slower due to its text-based nature.
Human-readability: JSON is human-readable, making it easier for debugging and manual inspection, while protocol buffers are not human-readable due to their binary format.
- What are the different field types supported by protocol buffers? Answer: Protocol buffers support a variety of field types that can be used in messages, including:
Scalar types: These include basic data types like int32, int64, float, double, bool, and string.
Enumerations: Custom enumerated types can be defined for more structured data representation.
Nested messages: Messages can contain other messages as fields, allowing for complex data structures.
Repeated fields: Fields can be defined as repeated, allowing for lists or arrays of values.
Map types: Key-value pairs can be represented using the map type, providing a flexible way to store associative data.
-
What is the role of field numbers in protocol buffers? Answer: Field numbers in protocol buffers are unique identifiers assigned to each field in a message definition. They play a critical role in serialization and deserialization processes, as they determine how data is encoded and decoded. Field numbers are used to reference fields in the binary representation, allowing the decoder to recognize which data corresponds to which field. It is important that field numbers remain consistent, especially when modifying message definitions, to ensure backward compatibility and correct data interpretation.
-
How do you handle backward compatibility with protocol buffers? Answer: Backward compatibility in protocol buffers can be managed by following certain best practices:
Do not reuse field numbers: Once a field number is assigned, it should not be reused for a different field, even if the original field is removed.
Use optional fields: When adding new fields, mark them as optional to avoid breaking existing clients that do not expect them.
Avoid changing the data type: Changing the type of an existing field can lead to compatibility issues. Instead, consider adding a new field with a new number.
Deprecate fields: If a field is no longer needed, mark it as deprecated rather than removing it. This allows older clients to continue functioning without errors.
- What are some common use cases for protocol buffers in Go applications? Answer: Protocol buffers are commonly used in Go applications for various purposes, including:
Microservices communication: Protobufs facilitate efficient communication between microservices by providing a compact and well-defined data exchange format.
Data storage: Protobufs can be used for serializing data before storing it in databases or files, enabling efficient retrieval and processing.
Remote procedure calls (RPC): Protobufs are often used in conjunction with gRPC, a high-performance RPC framework that allows for seamless communication between distributed systems.
Configuration management: Protobufs can be employed to define and manage configuration settings in a structured manner.
-
What are fields in protocol buffers, and how do they function? Answer: Fields in protocol buffers are individual data elements defined within a message. Each field has a unique name, a data type, and a field number. Fields are the building blocks of messages and define the structure of the data being serialized. When a message is serialized, the values of its fields are converted into a compact binary format based on their definitions. During deserialization, the field numbers are used to reconstruct the message, allowing for efficient data transmission between systems.
-
What are the different field types supported in protocol buffers? Answer: Protocol buffers support various field types that can be used to define message structures. The primary field types include:
Scalar types: These include basic data types like integers (int32, int64), floating-point numbers (float, double), booleans (bool), and strings (string).
Enumerations: Custom enumerated types can be defined to represent a set of predefined values.
Nested messages: Messages can contain other messages as fields, allowing for complex data structures.
Repeated fields: Fields can be defined as repeated, enabling them to hold lists or arrays of values.
Map types: Fields can be defined as maps, which are key-value pairs that allow for associative data storage.
-
How do field numbers work in protocol buffers, and why are they important? Answer: Field numbers in protocol buffers are unique identifiers assigned to each field within a message definition. They are crucial for serialization and deserialization processes, as they determine how data is encoded and decoded in the binary format. When a message is serialized, each field is represented by its field number, allowing the decoder to recognize which data corresponds to which field during deserialization. It is essential to maintain the same field numbers throughout a message's lifecycle to ensure backward compatibility and correct data interpretation.
-
What is RPC (Remote Procedure Call), and how does it relate to protocol buffers? Answer: RPC, or Remote Procedure Call, is a protocol that allows a program to execute a procedure or function on a remote server as if it were a local call. In the context of protocol buffers, gRPC is a modern RPC framework that uses protocol buffers for its message serialization. gRPC enables seamless communication between distributed systems by defining service methods and their input/output message types in a .proto file. When a client calls a remote method, the request is serialized into a protocol buffer format, sent to the server, and deserialized for processing.
-
What role does the protoc compiler play in working with protocol buffers? Answer: The protoc compiler is the official protocol buffers compiler that processes .proto files to generate code in various programming languages. When a developer defines messages and services in a .proto file, the protoc compiler takes this file and generates language-specific source code (e.g., Go, Java, Python) that includes the necessary classes, methods, and serialization logic. This generated code allows developers to easily create, manipulate, and serialize/deserialize protocol buffer messages without having to implement the underlying logic manually.
-
How do you ensure backward compatibility when modifying protocol buffer messages? Answer: To ensure backward compatibility when modifying protocol buffer messages, developers should follow best practices such as:
Avoid reusing field numbers: Once assigned, a field number should never be reused for a different field, as this can lead to data corruption.
Add optional fields: When introducing new fields, they should be marked as optional to avoid breaking existing clients that may not expect them.
Deprecate fields: Instead of removing fields that are no longer needed, mark them as deprecated. This allows older clients to continue functioning without issues.
Maintain data type consistency: Changing the type of an existing field can lead to compatibility problems, so it's best to add a new field with a new number if a change is necessary.
-
What is the significance of using repeated fields in protocol buffers? Answer: The repeated keyword in protocol buffers is used to define fields that can hold multiple values of the same type, similar to an array or a list in other programming languages. This allows for the representation of collections of data within a single message. For example, a repeated field can be used to store a list of user IDs or a collection of addresses. When serialized, the repeated field will include each value in the binary format, allowing for efficient data transfer and processing of variable-length lists.
-
How do enumerations in protocol buffers enhance data handling? Answer: Enumerations in protocol buffers provide a way to define a set of named constants, which can be used as field types in messages. This enhances data handling by enforcing a limited set of valid values for a field, improving code readability and reducing errors. For example, instead of using an integer to represent the status of a request, an enumeration can define meaningful names like PENDING, COMPLETED, or FAILED. This not only makes the code more understandable but also allows for better validation of data when messages are serialized or deserialized.
-
What are the advantages of using protocol buffers over XML or JSON for data serialization? Answer: Protocol buffers offer several advantages over XML or JSON for data serialization:
Efficiency: Protobufs produce a smaller binary representation compared to XML and JSON, resulting in reduced bandwidth usage and faster transmission.
Performance: Protobufs are typically faster to serialize and deserialize than XML and JSON due to their binary format, which is less verbose and more compact.
Schema enforcement: Protocol buffers require a defined schema, ensuring that the data adheres to a specific structure, while XML and JSON are more flexible and can lead to inconsistencies.
Strong typing: Protobufs provide strong typing for fields, reducing the likelihood of runtime errors related to type mismatches.
- What are the common use cases for protocol buffers in Go applications? Answer: Protocol buffers are commonly used in Go applications for various purposes, including:
Microservices communication: Protobufs facilitate efficient communication between microservices by providing a compact and well-defined data exchange format.
gRPC services: Protobufs are used with gRPC for defining service methods and their message types, enabling high-performance remote procedure calls.
Data storage: Protobufs can serialize data before storing it in databases or files, making it easy to retrieve and process later.
Configuration management: Protobufs can define structured configuration settings, allowing for better organization and retrieval in applications.
- What is gRPC, and what are its main features? Answer: gRPC is an open-source remote procedure call (RPC) framework developed by Google that enables communication between distributed systems. It is built on top of HTTP/2 and utilizes Protocol Buffers as its interface description language. The main features of gRPC include:
Efficient serialization: Uses Protocol Buffers for compact and efficient data serialization.
Bi-directional streaming: Supports streaming of data in both directions, allowing clients and servers to send multiple messages as part of a single connection.
Language-agnostic: Provides support for multiple programming languages, making it versatile for various development environments.
Authentication and security: Integrates with existing authentication mechanisms and supports TLS for secure communication.
-
What is a service in gRPC, and how is it defined? Answer: A service in gRPC is a collection of methods that can be invoked remotely by clients. It is defined in a .proto file, where developers specify the service name and its methods, along with their input and output message types. The service acts as a contract between the client and server, outlining the available operations and the data structures used for communication. Once defined, the gRPC framework generates the necessary code for both the client and server to implement the service.
-
What is a client-side stream in gRPC, and how does it work? Answer: A client-side stream in gRPC allows the client to send a stream of messages to the server in a single RPC call. This means the client can make multiple requests in a continuous flow without waiting for a response after each message. The server processes the stream and can send a single response after receiving all the messages. This is useful for scenarios where the client needs to send large amounts of data, such as uploading files or sending multiple records in one go.
-
What is a server-side stream in gRPC, and what are its use cases? Answer: A server-side stream in gRPC allows the server to send a stream of messages back to the client in response to a single request. The client makes a single call to the server, and the server can then send multiple responses over the same connection. This is beneficial in scenarios where the server needs to continuously provide updates or data to the client, such as live data feeds, real-time notifications, or long-running computations that return intermediate results.
-
What is bidirectional streaming in gRPC, and how does it differ from the other streaming types? Answer: Bidirectional streaming in gRPC allows both the client and server to send a stream of messages to each other simultaneously. Unlike client-side or server-side streaming, where one side sends messages while the other side waits for a response, bidirectional streaming enables continuous communication in both directions. This is particularly useful for interactive applications, such as chat systems or real-time collaboration tools, where both parties need to exchange messages back and forth without blocking each other.
-
What are some advantages of using gRPC for building microservices? Answer: Using gRPC for building microservices offers several advantages:
Performance: gRPC's use of HTTP/2 and Protocol Buffers results in faster serialization and deserialization, reducing latency in service communication.
Strongly typed contracts: The use of Protocol Buffers allows for strong typing of service methods and message structures, improving code reliability and reducing errors.
Streaming capabilities: gRPC's support for various streaming types facilitates real-time data exchange between services, enhancing responsiveness.
Automatic code generation: gRPC generates client and server code from .proto files, simplifying the development process and ensuring consistency.
-
How does gRPC handle error handling in RPC calls? Answer: gRPC provides a structured way to handle errors through the use of status codes. When an error occurs during an RPC call, the server returns an error response with a specific gRPC status code, such as NOT_FOUND, INVALID_ARGUMENT, or UNAUTHENTICATED. Clients can then inspect the status code to determine the nature of the error and take appropriate action, such as retrying the request or displaying an error message to the user. This standardized approach allows for better error handling and debugging in distributed systems.
-
What is the role of Protocol Buffers in gRPC? Answer: Protocol Buffers (protobufs) serve as the interface description language for gRPC. They define the structure of the messages exchanged between clients and servers, specifying the fields and data types used in each message. By using protobufs, gRPC ensures efficient serialization and deserialization of messages, enabling compact binary representation. The use of a defined schema promotes strong typing, reducing the likelihood of errors due to mismatched data formats and facilitating compatibility across different programming languages.
-
Can you explain the concept of load balancing in gRPC? Answer: Load balancing in gRPC refers to the distribution of client requests across multiple server instances to optimize resource utilization and improve performance. gRPC supports various load balancing strategies, including round-robin, pick-first, and least-connections. These strategies help ensure that no single server becomes a bottleneck and that requests are handled efficiently. gRPC can work with external load balancers or implement client-side load balancing using service discovery mechanisms to dynamically determine available server instances.
-
What are some common use cases for gRPC? Answer: gRPC is commonly used in various scenarios, including:
Microservices architecture: Facilitating communication between microservices in a distributed system.
Real-time applications: Enabling real-time data exchange for chat applications, online gaming, or live streaming services using bidirectional streaming.
Mobile applications: Providing efficient communication between mobile clients and backend services due to its performance advantages.
Inter-service communication: Allowing services written in different programming languages to communicate seamlessly through defined protobuf contracts.
Data-intensive applications: Handling large data transfers, such as batch processing or file uploads, using client-side streaming.
-
What is metadata in gRPC, and how is it used? Answer: Metadata in gRPC refers to key-value pairs that provide additional context about a gRPC call. It can be sent from the client to the server or vice versa and is typically used for purposes such as authentication, tracking, and routing. Metadata can include information like API keys, user tokens, or request IDs. It is similar to HTTP headers but is specifically tailored for gRPC communication. Metadata can be included in both requests and responses, allowing for richer communication between clients and servers.
-
How do headers differ from trailers in gRPC? Answer: In gRPC, headers and trailers are both forms of metadata but are used at different stages of the RPC lifecycle. Headers are sent at the beginning of a request or response and can include information necessary for processing the call, such as authorization tokens or content-type. Trailers, on the other hand, are sent at the end of a response and can be used to convey additional information after the main response has been sent, such as status codes, error messages, or resource usage statistics. Trailers allow for more flexible communication, as they can be used to update the client with information that becomes available only after the main response.
-
What is protoc-gen-validate, and how does it enhance gRPC services? Answer: protoc-gen-validate is a plugin for the Protocol Buffers compiler (protoc) that provides validation rules for messages defined in .proto files. It allows developers to specify constraints and validation rules for fields in gRPC messages, such as minimum or maximum values, required fields, and regular expressions for strings. By integrating validation directly into the protobuf definition, it enhances the robustness of gRPC services by ensuring that incoming and outgoing data adheres to the specified constraints before processing, reducing the likelihood of errors and improving data integrity.
-
What is grpc-gateway, and what purpose does it serve? Answer: grpc-gateway is a plugin for the Protocol Buffers compiler that allows developers to expose gRPC services as RESTful APIs. It automatically translates HTTP RESTful calls into gRPC requests, enabling clients that do not support gRPC to interact with gRPC services using standard HTTP methods. This is particularly useful for building APIs that need to be accessible by a wider range of clients, such as web applications or third-party services. By using grpc-gateway, developers can leverage the performance and benefits of gRPC while providing a RESTful interface for compatibility.
-
How does MongoDB integrate with Go applications, particularly in the context of gRPC? Answer: MongoDB can be integrated into Go applications using the official MongoDB Go driver, which allows developers to interact with MongoDB databases using Go idioms. In the context of gRPC, MongoDB can be used to store and retrieve data for services defined in gRPC. When a gRPC service receives a request, it can use the MongoDB driver to query the database, process the data, and return the results to the client as part of the gRPC response. This integration enables efficient data storage and retrieval for applications built with gRPC.
-
What are interceptors in gRPC, and how do they function? Answer: Interceptors in gRPC are middleware components that allow developers to intercept and modify the behavior of gRPC calls. They can be applied to both the client and server sides and are used for various purposes, such as logging, monitoring, authentication, and error handling. Interceptors can be thought of as wrappers around the actual method calls, allowing additional functionality to be executed before and after the gRPC call. For example, a server-side interceptor could log the details of incoming requests, while a client-side interceptor might add authentication metadata to requests.
-
What role does gRPC metadata play in authentication and authorization? Answer: gRPC metadata plays a crucial role in authentication and authorization by allowing clients to send credentials or tokens with their requests. For example, a client can include an authorization token in the metadata to authenticate itself to the server. The server can then inspect the metadata before processing the request, verifying that the client is authorized to perform the requested operation. This mechanism provides a flexible and extensible way to manage access control in gRPC services without tightly coupling authentication logic to the core business logic.
-
How do you handle versioning of gRPC APIs? Answer: Handling versioning in gRPC APIs can be achieved through several strategies:
Separate service definitions: Create new service definitions for each version in separate .proto files, allowing clients to choose which version to use.
Field numbering: Use field numbers in message definitions carefully, adding new fields while maintaining existing ones to support backward compatibility.
Using metadata: Clients can specify the desired API version in the metadata when making requests, and servers can handle the requests accordingly based on the specified version. By planning for versioning early in the design process, developers can ensure smoother transitions between API changes.
- What are some best practices for using MongoDB in a gRPC application? Answer: Best practices for using MongoDB in a gRPC application include:
Connection pooling: Use connection pools to manage database connections efficiently and avoid overhead from creating and closing connections frequently.
Data validation: Implement validation at both the gRPC layer and the MongoDB layer to ensure data integrity and consistency.
Error handling: Handle database errors gracefully and provide meaningful error messages in the gRPC responses to aid in debugging.
Indexing: Utilize indexes in MongoDB to optimize query performance, particularly for frequently accessed data.
Asynchronous operations: Consider using asynchronous database operations to improve performance and responsiveness in high-load scenarios.
- What is the significance of using trailers in gRPC responses? Answer: Trailers in gRPC responses are significant because they allow the server to send additional metadata after the main response has been delivered. This can include information that may not be available until after the primary response has been processed, such as statistics on processing time, resource usage, or error codes. Using trailers enhances communication by providing the client with important information without requiring an additional round-trip call. It allows for a more efficient use of network resources and can improve the overall responsiveness of the application.